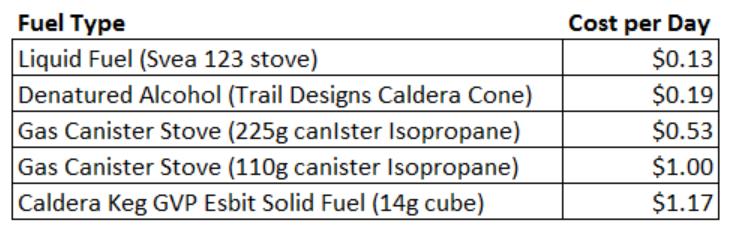
After 5 years, I am changing my Go To stove system. For the past five years, my primary stove system has been a Caldera Keg GVP Stove system. The total weight of the stove, pot, lid, and wind screen weighs 87 grams (3 ounces).
THIS ISN’T A GEAR REVIEW
I have owned many backpacking stoves in my life – around a dozen or so. This sounds like a lot, but you have to take into consideration that this covers a 45 year span. I still have all of these stoves, except two I gave away. Three of the stoves require obsolete gas canisters, so I can no longer buy fuel for them.
I recently acquired a Trail Designs Fissure Stove System, which will become my primary stove system. You may be surprised with what will become my second choice.
Unlike most gear reviews on the Internet and in magazines, a proper gear review should include extensive use in varying conditions. A year’s duration to cover all the seasons, plus at least 30 days of using the gear in the field should be a minimum. Actually, I could do a real gear review, because I have been using the stove (a Trail Designs 12-10 alcohol unit) for several years. The only difference is the Fissure uses a different windscreen than my other Trail Designs stoves, but the performance is about the same.
About 4 years ago I bought a Trail Designs ULC stove because it fit into a pot I already owned. But using the system was so fiddly and inconvenient; I stopped using it after a few trips. It still looks new.
But this still won’t be a gear review. Instead, you may be interested in my thought processes of selecting gear, which this is about. When it comes to stoves (and pots/windscreens) there are several things I consider:
- Cost of the stove system and the recurring cost of fuel
- Weight of the stove, windscreen (when used), and pot
- Efficiency – I am not talking about how fast the stove boils water or how much fuel it uses, but how easy it is for me to use the system
- Compactness – how well does the system fit in my pack
Now that I am retired, I have been reviewing all household expenditures. This includes monies spent on recreation. We’re not going to reduce our camping activities, nor am I going to backpack less, on the contrary, more will be better. My backpacking gear is pretty much set for the rest of my life, the only thing to be purchased is consumables (food and stove fuel) and the occasional replacement item that wears out or breaks. I have no control over the cost of food. But I do have control over fuel. Given my inventory of backpacking stoves, I have 4 options; excluding wood which I never use – too messy and it is usually illegal to gather wood in the desert and many forests have bans on wood fires. The options are
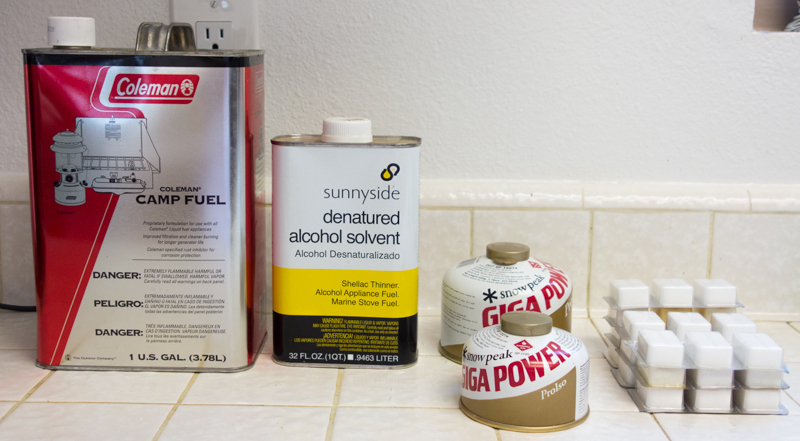
- Liquid gas (Coleman fuel and other brands)
- Canister stove fuel (e.g. isopropane)
- Denatured alcohol
- Esbit solid fuel
Liquid gas stoves are the heaviest, followed by canister, alcohol and Esbit in that order. Canister stoves have the highest BTU’s closely followed by liquid gas. Alcohol and Esbit have about ½ the BTU’s of the first two. Aside from weight, one might want to know how much does the fuel cost each day. Now that I am on a fixed income, it is more important that when I was working. On most of my trips I only boil water for instant and freeze dried foods, and to drink coffee or tea. I use a lot of fuel every year and there is a great variance in cost for the different fuels.
Avoiding Confusion
To avoid confusing between volume and mass (e.g. fluid ounces and weight), I will use fluid ounces for volume and grams for weight in this article.
FUEL AND COSTS
I don’t spend a lot of time analyzing fuel consumption. Over the years I have figured out about how much fuel I use each day. It is important to know how much fuel you need so you don’t bring too much (unnecessary weight) and too little (run out of fuel before the trip is over).
As you can see in the table below, Denatured alcohol and liquid fuel (i.e. Coleman Fuel and similar brands) are by far the cheapest fuels. Fuel in gas canisters is measured by its mass (e.g. weight). The small 4 ounce cans contain around 110 – 115 grams of fuel. I use about 20 grams per day.
Liquid Gas
My Svea 123 Stove uses around 1 ounce of liquid gas per day. I also have two Mountain Safety Research (MSR) liquid fuel stoves, but they are for winter (think snow) use and I have never calculated fuel consumption. But they are not as fuel efficient as the Svea. I can buy a gallon of white gas (Coleman fuel) for around $16. Coleman fuel is pretty easy to find. Most department stores like Wal-Mart or Target carry it in 1 quart bottles and sometimes in gallon cans. Almost every sporting goods store sells it too. Sometimes in small towns near trails it is difficult to locate.
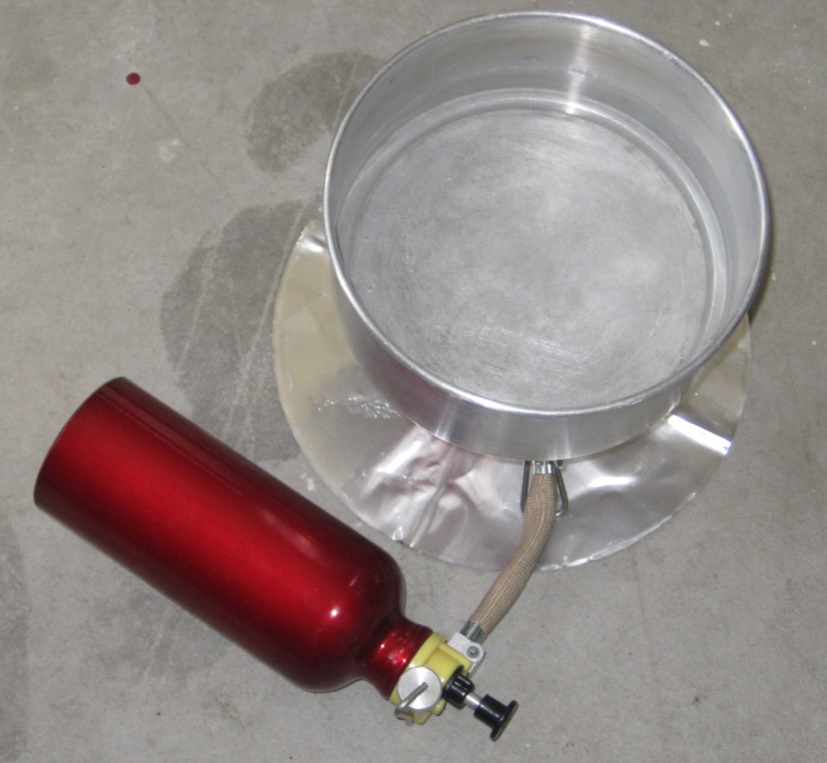
Most liquid fuel stoves require a separate fuel bottle that is pressurized with a pump for delivery to the stove. Because they most hold pressure, they are heavy. The Svea 123 has its tank built into the stove and can hold about 4 ounces of fuel. Because a pressurize bottle is not needed, additional fuel can be carried in a much lighter bottle.
Alcohol
I have only used one alcohol stove, the Trail Designs 12-10 stove, which is made from a recycled soda bottle. It is called a 12-10 because it has 12 air holes in the outside and 10 holes in the fuel compartment.

Alcohol stoves are easy Do It Yourself projects and there are many commercial alcohol stoves available usually made from brass, aluminum or even titanium. When combined with a Trail Designs windscreen, the Caldera Cone, the system is the most efficient alcohol stove setup available. One thing about alcohol, it has about ½ the BTU’s of liquid or canister gas, so it usually takes twice as long if not more to boil water. Another downside is there is no ON/OFF knob on these stoves. In daylight the flame is not visible from an alcohol stove, and it can be dangerous if you tip it over while is it lit. Many areas in California will not allow the use of alcohol stoves when the fire danger is high. Denatured alcohol is the easiest fuel to buy. My local big box hardware store sells it for $15.95 a gallon and quarts can be had for $7.95. Some gasoline anti-freeze additives are mostly denatured alcohol which increases the availability in little trail towns where the HEET brand is often sold (note: buy the stuff in the Yellow bottle, not the Red Heet bottles). Denatured alcohol is mostly ethanol with some methanol added so people won’t drink it. Yellow bottle HEET is primarily methanol, which burn the same.
Canister Gas
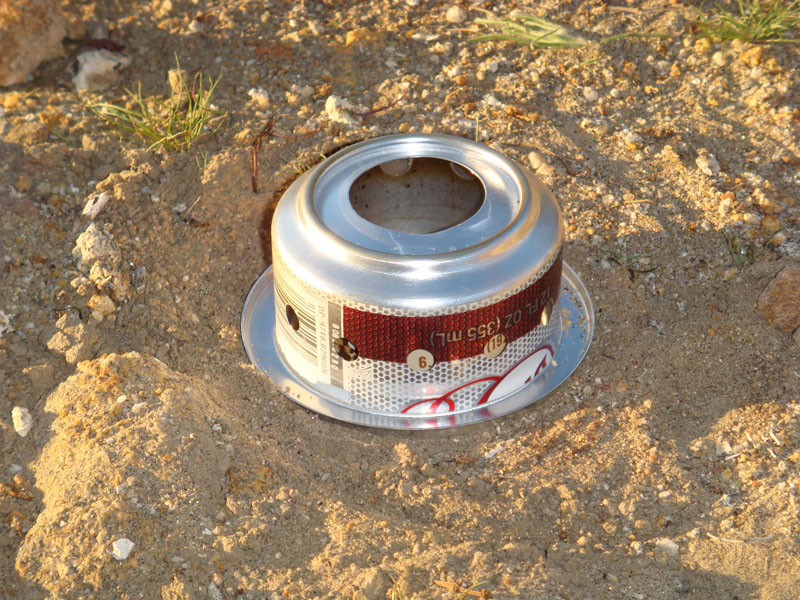
Today most canister gas is a blend of around 80% isobutene and 20% propane. It varies among manufactures. The most common canister gas stove screw to the top of the canister. These fuels have the most BTU’s of backpacking stoves, slightly edging liquid gas. They are easy to use although wind can play havoc with most of these stoves and for most of these stoves it is dangerous to use a windscreen, which can cause the canister to explode. Another problem is that they do poorly in cold weather when temperatures approach freezing. In recent years, several canister stove companies have brought stoves to market that can be used with the canister inverted. These stoves have a fuel hose so the stove is connected remotely from the canister. This allows a windscreen to be used with the stove. Additionally, when the canister is inverted (unlike a top mounted stove) liquid fuel is feed to the stove, which makes these canister stoves good for winter use.
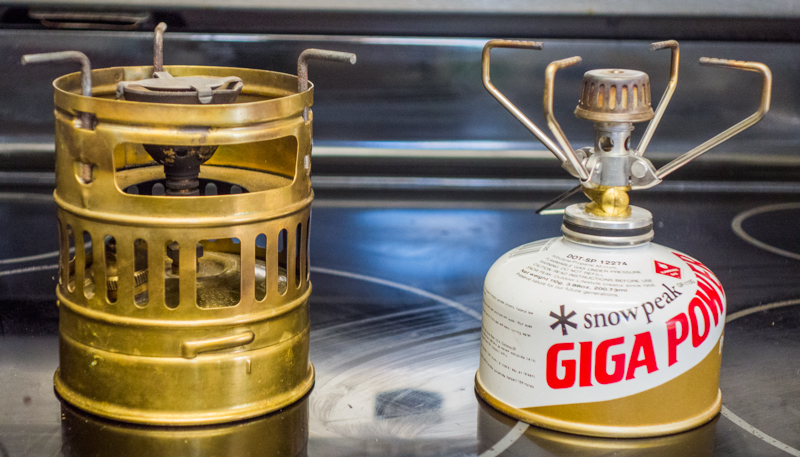
My top mounted canister stove is a Snow Peak Giga Power and weighs 92 grams (3.25 ounces). When I bought it, it was the gold standard of canister stoves. Today, stoves as light as 25 grams (0.9 ounces) are available – but they are much more fragile and have small burners. I have stayed with my Snow Peak, as I am not one to buy new gear every year. I also have a Mountain Safety Research WindPro II remote canister stove for winter use.
Canister fuel is fairly expensive, so I buy it by the case. Cost runs $59.95 for twelve 4-ounce canisters or $69.95 for twelve 8-ounce canisters. Because the gas is under pressure, the canisters themselves are fairly heavy: an empty 4 ounce canister weighs 119 grams (4.2 ounces) and the 8-ounce canister weighs 136 grams (4.8 ounces). So we don’t get our measurements of weight and volume in ounces confused, the 4 ounce canister contains 110-115 grams of fuel by weight and the 8 ounce canister contains around 227-250 grams of fuel by weight. The amount of fuel in a canister varies by manufacturer, as does the mix of Iso-propane and butane. Typically I use about 20 grams of fuel per day. Canisters are pretty easy to find.
Esbit
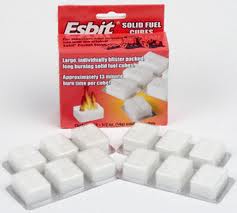
The absolute lightest fuel is the Esbit brand solid fuel. It also has the fewest BTU,s taking about 12 minutes to boil two cups of water with a 14 gram (0.5 ounces) fuel tablet. It is also the most expensive. 12 fuel tabs cost about $7 – $8. Because it has been my main fuel for the past several years, I buy it by the case when I can find it on sale. It is the most difficult fuel to find, and you may not be able to get it in small trail towns.
STOVE SYSTEM WEIGHTS
When looking at stove weights it is important to include the weights of the stove, fuel bottle or canister, pot and lid, and windscreen. Below is a table of the stoves I use most often along with the accessories I use with each of them. Because the cheapest fuels per day are denatured alcohol and white gas, I have highlighted my lightest alcohol and white gas systems. Neither of these stoves uses a separate windscreen, as required by the Snow Peak GigaPower or the two MSR stoves. The pot stand for the Fissure and the Svea 123 are also the windscreens.

Fuel Bottles
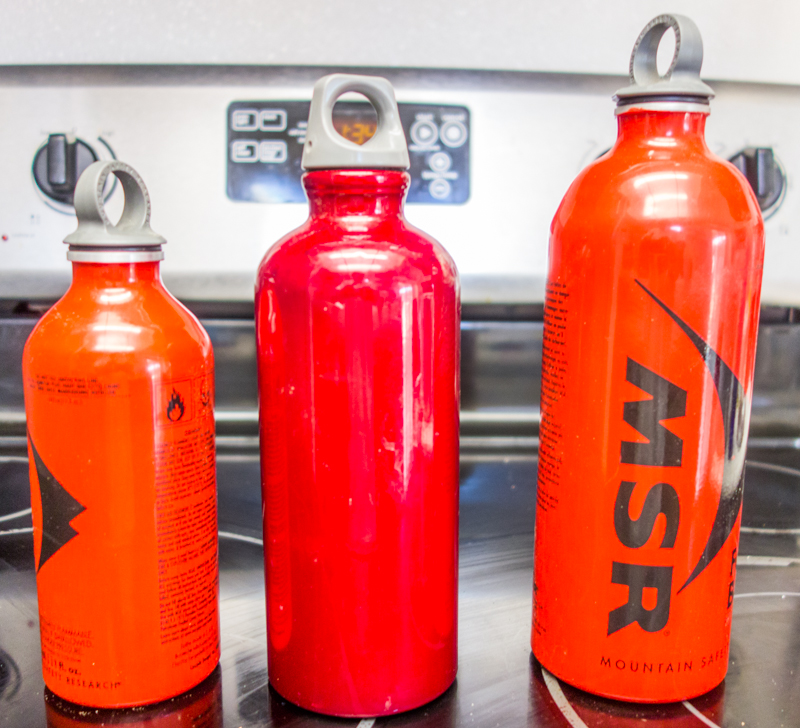
Most liquid gas stoves require a pressurize bottle that is used as the remote gas tank. They are heavy weighing between 79 – 207 grams (2.8 and 7.3 ounces). However, they are robust. My bottles last about 20 years before they get so dinged up they need to be replaced. I used to carry my extra fuel for the Svea 123 in one of these bottles. However, I recently found a better and lighter solution.
Disclaimer: Any fuel should be carried in a bottle that meets the specifications of the fuel manufacturer and complies with any State and Federal Regulations.
Okay, that is the legal and safety stuff. I don’t always follow them, because often these standards are created by lawyers to protect the companies from litigation – not us consumers, and they assume that you and I are stupid. Another example is tents. Tent manufacturers state you should never cook in a tent, and stove manufactures state the same. I cook in my tents if the weather is bad. You see, I have this special quality – common sense.
Better Solution: Non-pressure plastic bottles for alcohol and liquid gas
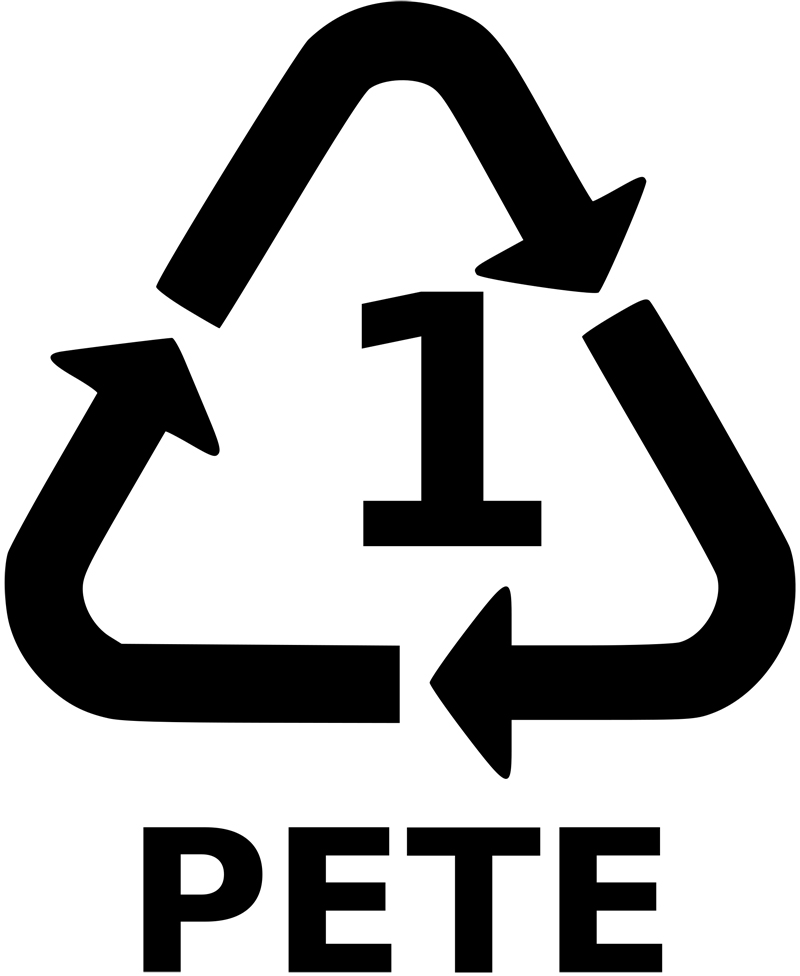
I have found that recyclable bottles made of polyethylene terephthalate (called PET or PETE) are not affected by denatured alcohol or liquid gas. Your typical packaged water bottle is probably made from PETE. Just look at the bottom of the bottle and you will see the symbol above. There are a few problems with these bottles for when used for fuel:
- Alcohol and liquid gas are clear and storing them in a water bottle could lead to accidental drinking of the fuel – this would be a bad thing
- The bottles are not very robust and I worry about leaks
- The bottle caps are small, anemic, and easily lost.
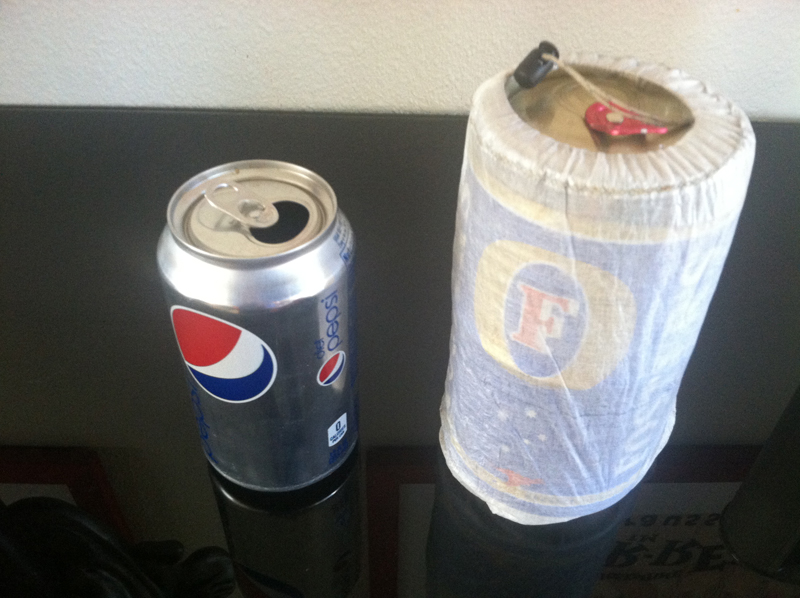
A while back, after some dental work, I had to use some prescription mouth wash, which came in heavy duty dark brown 16 fluid ounce bottles.
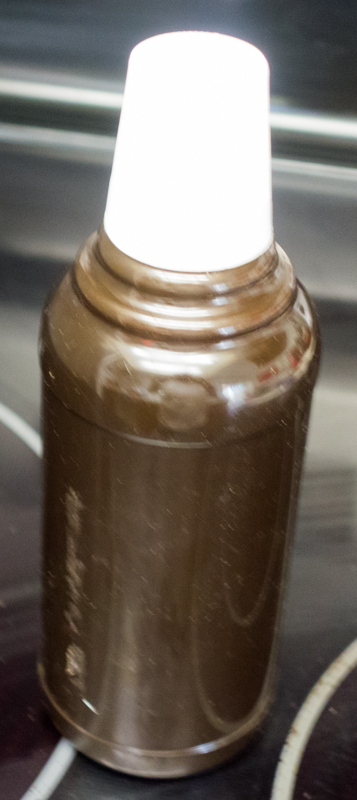
The tamper proof cap also has a marking for 15ml of fluid and it does not leak. Downside is it weighs 49 grams (1.75 ounces) versus 7 grams (.25 ounces) for the typical 500 ml (16.9 fluid ounce) water bottle.

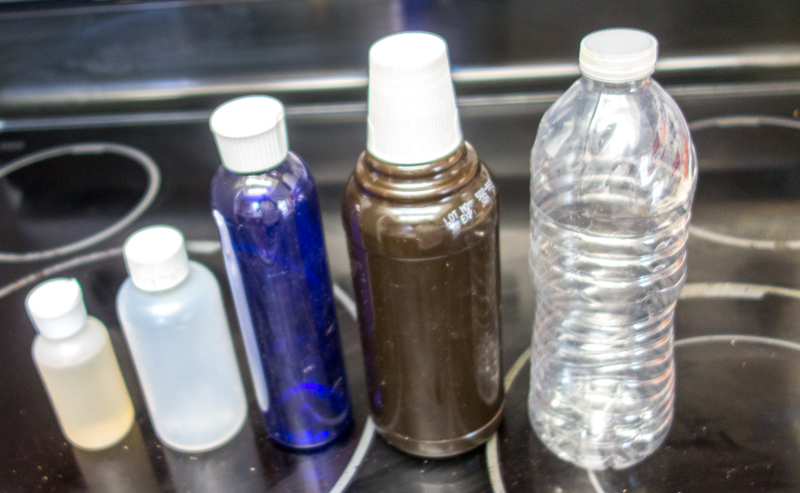
Depending upon how much fuel I need for a specific trip, I take a bottle that contains only the needed amount of fuel for the trip. I will no longer be using the fragile water bottle on the right in the picture above.
STOVE USE AND COMPACTNESS
Because liquid gas and alcohol are by far the cheapest fuel, going forward, I am going to mostly use these types of stoves. The Trail Designs Fissure stove will be my main stove. When discussing stoves, we need to talk about pots and windscreens.
Pots
A pot needs to be matched to the stove, keeping in mind that the size of the stove burner, distance from the pot supports and flame pattern should dictate what pot to use. In general, short wide pots are the most efficient. But these pots are often bulky and their dimensions often make it difficult to fit the stove, windscreen, and accessories in the pot.
Additionally, the bulky set-up makes it harder to easily pack it in the backpack. Tall, narrow pots may not be as efficient, but often you can put everything in the pot, and it is easier to pack. Many of these narrow set-ups will fit in the side pocket of a backpack. Your day-to-day cooking and organization will vastly improve if you can store your complete stove system in the pot, and you will be less likely to misplace or lose something.
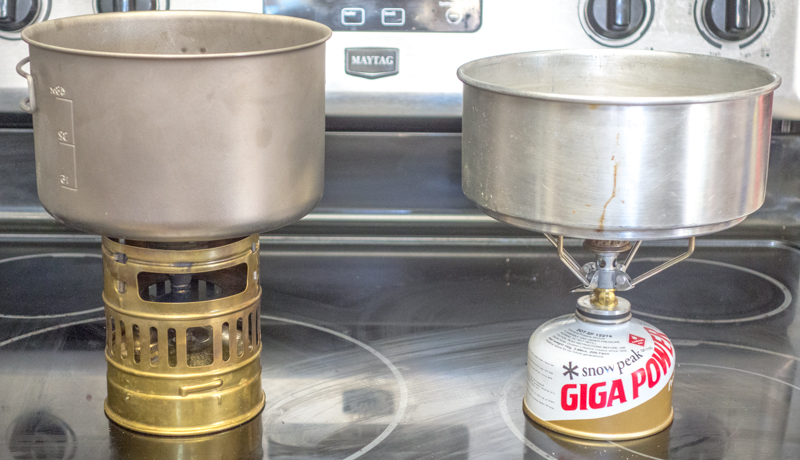
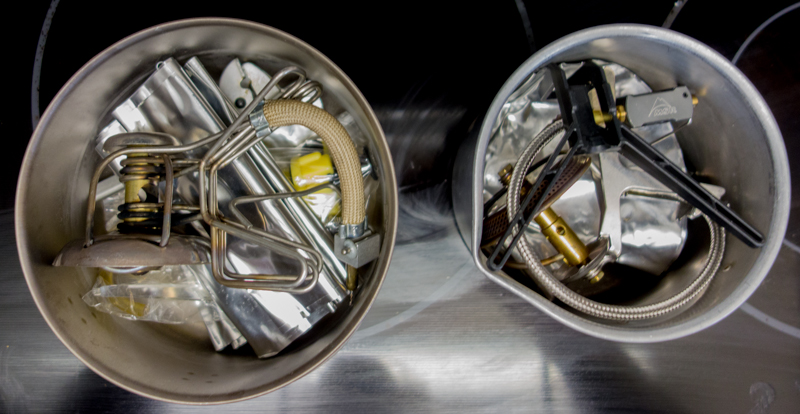
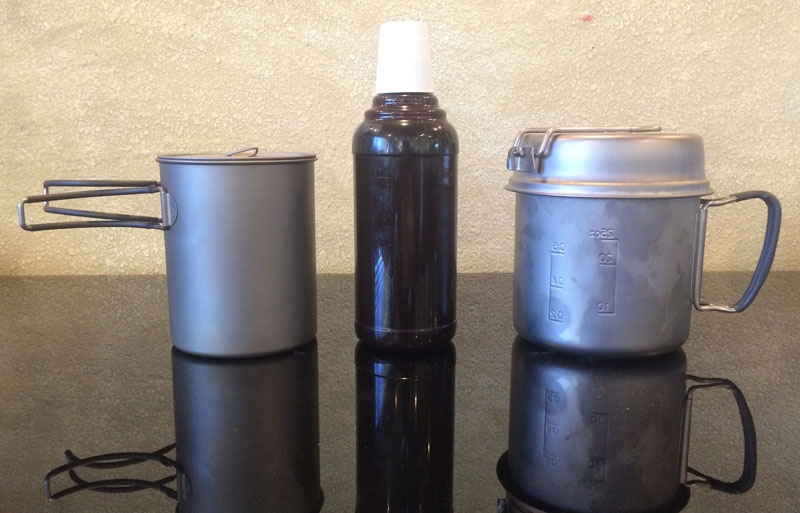
The Svea and the GigaPower stoves and all accessories will easily fit into these large pots above. But I don’t need pots that large. Typically, for each meal, I boil about two cups of water, give or take a little. A perfect pot for me has a capacity around 0.8 to 0.9 Liters. A wonderful pot is the MSR Titan Kettle at 0.8 Liters.
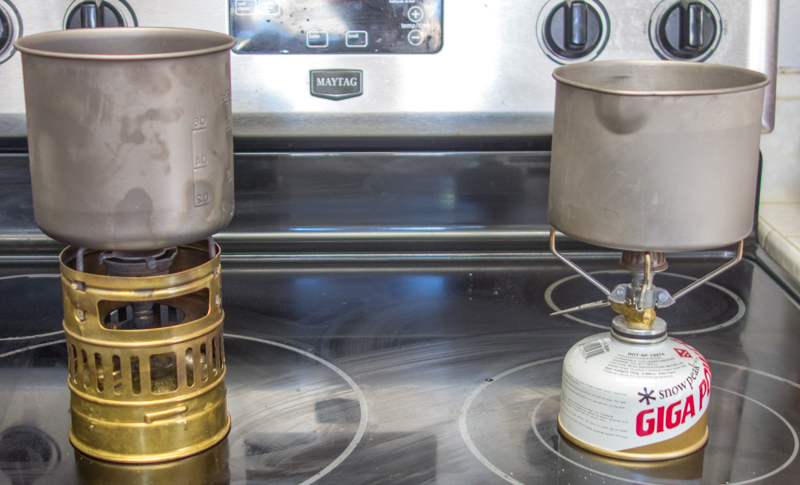
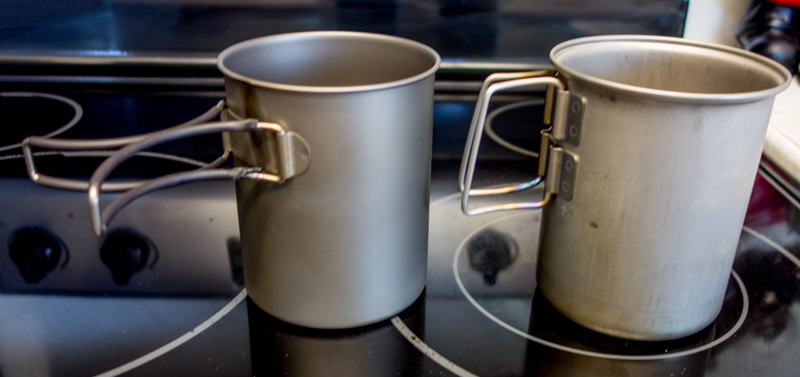
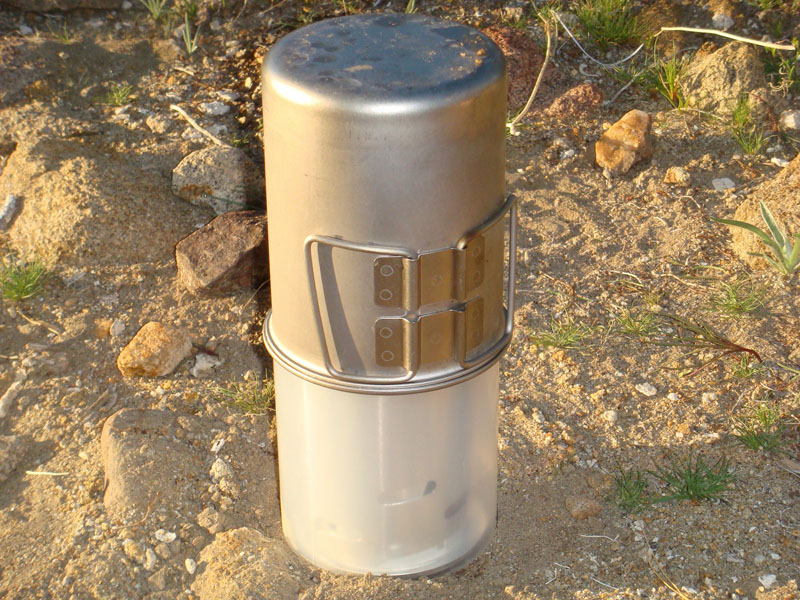
The pot on the right (above) is a MSR Titan Kettle and has a capacity of 0.85 Liters. It is a great pot for the GigaPower and I can store the fuel canister and stove in it. However, I cannot store the Svea 123 in it, so it would not be a good pot.
The pot on the left (above) is a Snow Peak Trek 900 (.9 Liters) and is perfect for the Svea, because with the lid (which doubles as a 10 ounce drinking cup or small fry pan) it holds the Svea 123.
Snow Peak Trek 900 Pot and Svea 123
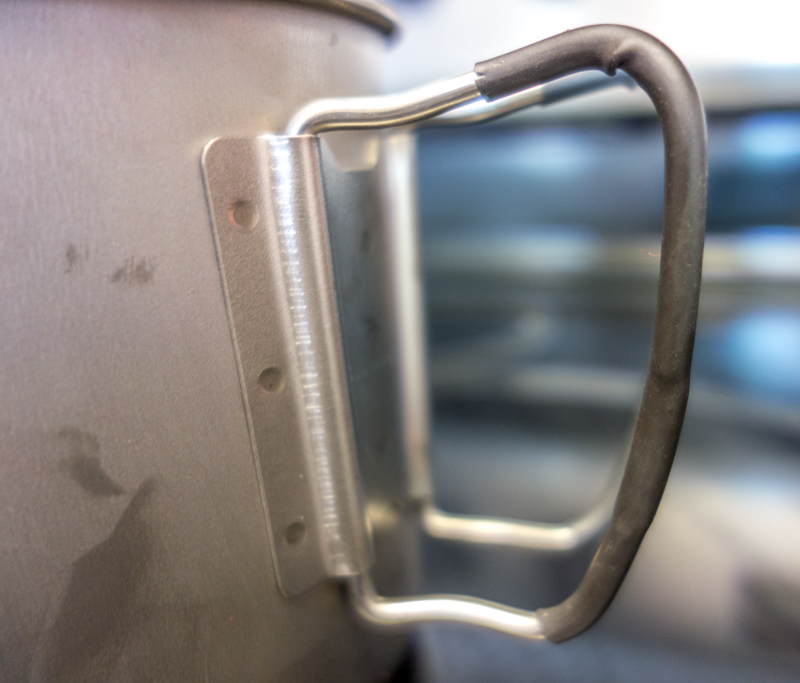
Pot Handles and a Tip
Most of the titanium pots I use come with folding handles which are convenient for lifting the pot or using the pot as a drinking mug. The downside is they usually get too hot to pick up, requiring the use of a bandana or glove. The picture below shows a Toaks 850ml pot (right) that comes with insulation on the handles and a Snow Peak 830ml pot (right) that does not.
It is usually easy to remove the handles and install electrical heat shrink as insulation. Heat shrink is plastic tubing that is placed over electrical wire connections as insulation. When it is heated it contracts.

The heat shrink is much larger than thickness of the handle. Once the handles are removed, which usually is just a matter of sliding each end out of the slot, work the heat shrink over each handle, and then replace the handles on the pot. Now here is the best way to shrink the tubing. Don’t do what most people do and heat it with a match or lighter.
Pre-heat your oven to 350 degrees, while making sure you wife isn’t home – they get weird when you use the oven for anything other than baking or broiling. Place the pot in the oven for 15 or 20 minutes.
Oven baked heat shrink. Umm, Umm, good!
Final Thoughts on Large Pots
Earlier I showed a picture with a 2.0 and 1.5 liter pot, and then went on to say I only needed a 0.8 to 0.9 Liter pot. So why would I own such a large pot? No, the’re not for cooking for groups of people, I only cook for myself.
In winter it is often necessary to melt snow for water, which requires a larger pot. These two pots are used only for that and they are large enough to hold my MSR WhisperLite or MSR WindPro II stove, both of which are better for melting snow than any of my other stoves.
Windscreens
Most top mounted canister stoves do not come with windscreens and the manufacturers warn against using them. Many people create Rube Goldberg screens that are fiddly and fragile. Care must be taken when making your own windscreen for these canister stoves, because if the canister gets too hot it WILL EXPLODE and is very dangerous!!
My Mountain Safety Research stoves come with aluminum windscreens that wear out and flop around in the wind.
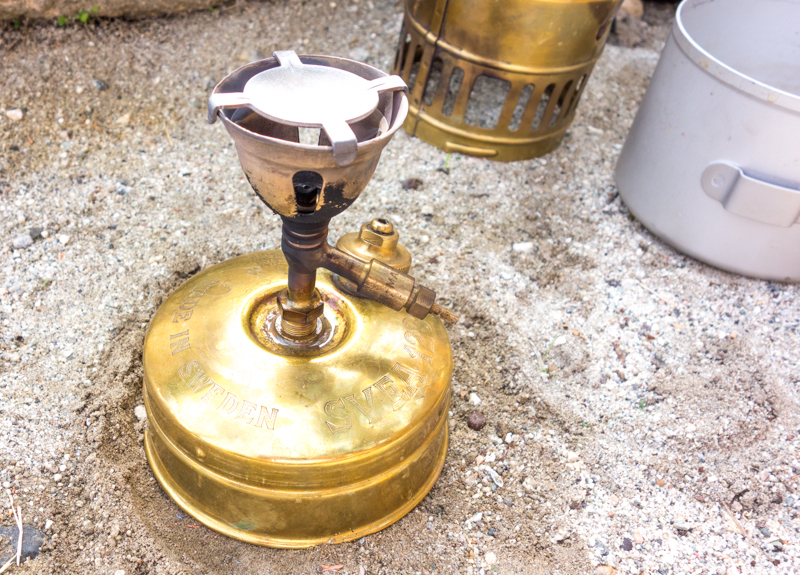
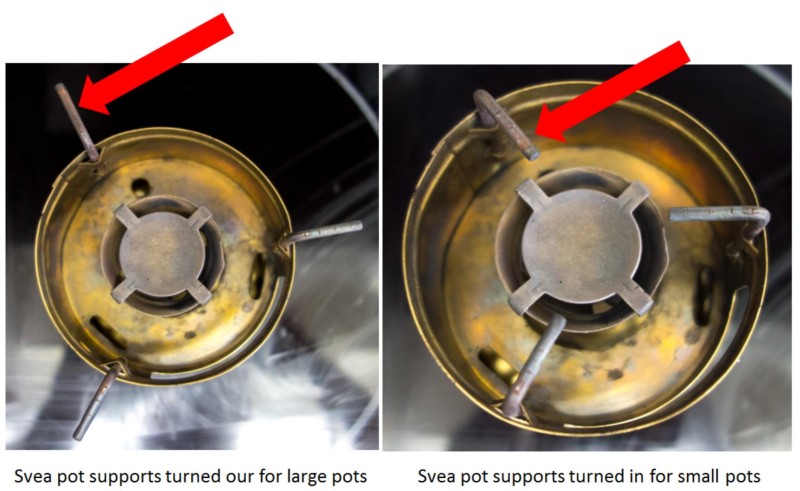
The Svea 123 comes with a windscreen that is also the pot holder.
Given the factors of fuel costs, pot configuration, windscreen hassles, and overall ease of use I will stick to two stoves going forward: The Trail Designs Fissure and the Svea 123 liquid fuel stove.
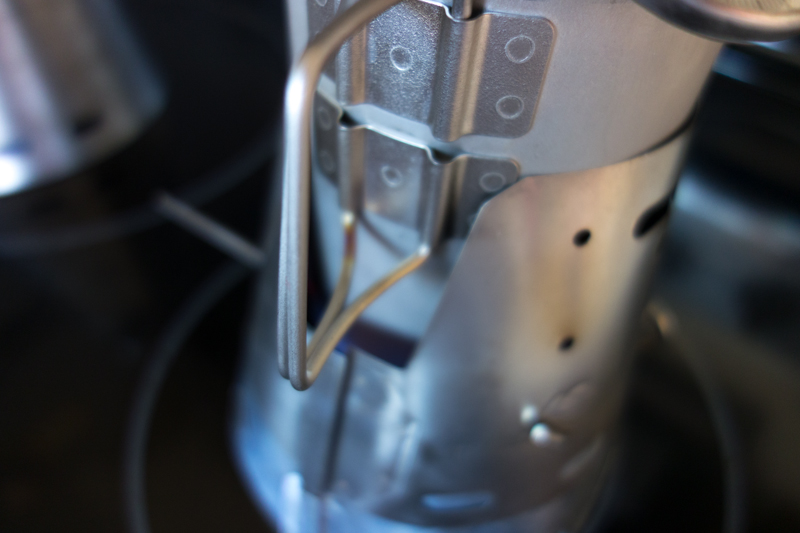
Trail Designs Fissure Ti-Tri Stove
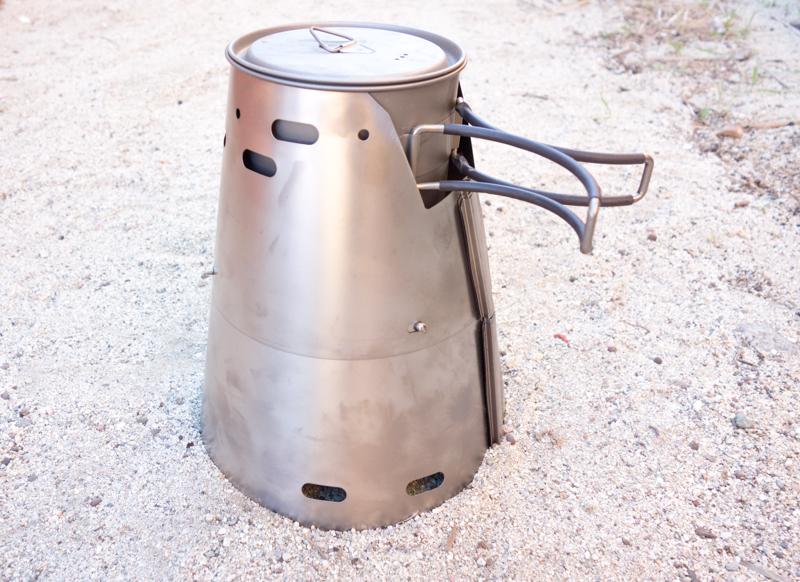
The “Ti-Tri” in the name designates that the stove system
- Is made out of Titanium
- It can burn three types of fuel
- Alcohol
- Esbit
- Wood
To burn wood, Train Designs recommends that you purchase an optional wood burning accessory called the Inferno. I passed. First of all, where I usually backpack wood is scare or it is illegal to use wood stoves. But more important to me, wood leaves a lot of residue and is a mess to clean up. Before I review the features and benefits of the Fissure, a little background information will document how I came to buy this stove.
Progression
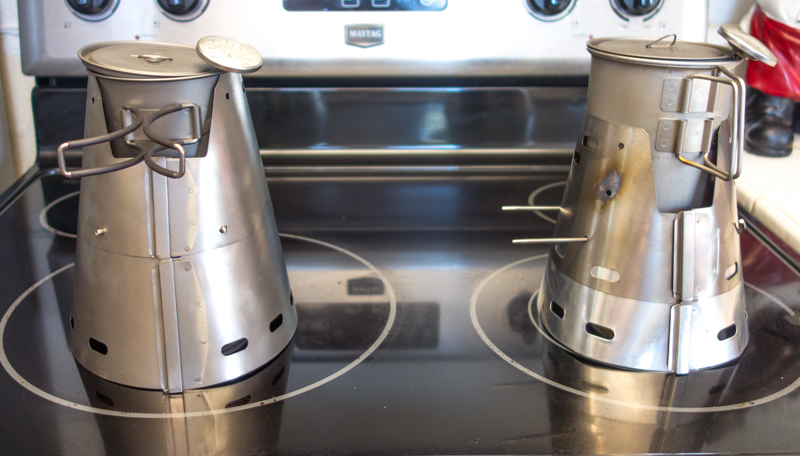
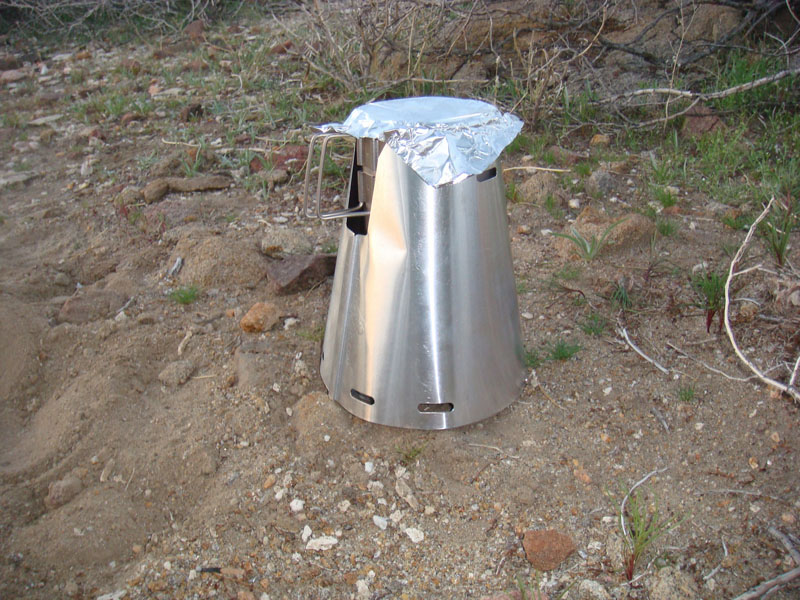
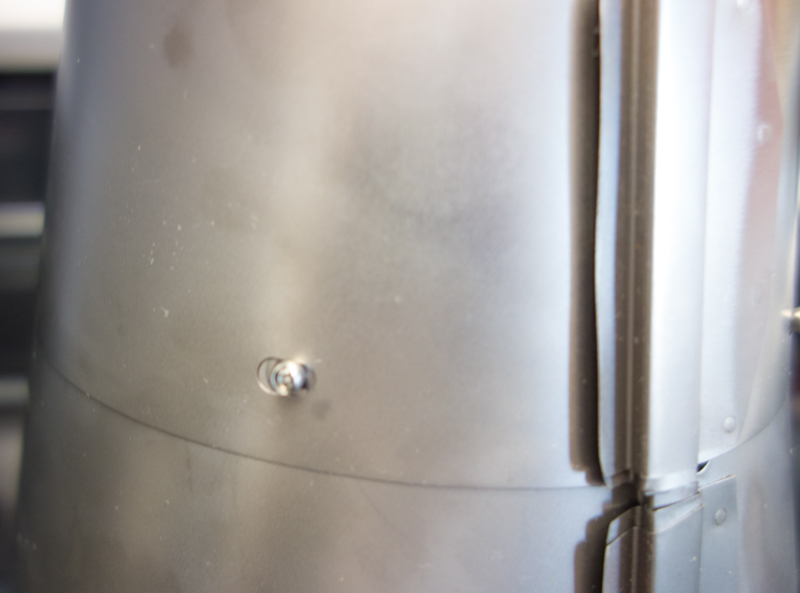
The Trail Design stoves use an integrated windscreen and pot support called the Caldera Cone. These cones are remarkable because the cone does not let heat escape around the pot, but contains most of it inside the cone to help fuel efficiency.

Cut away picture from the Trail Designs website showing how the cone works. Shown is a .85 Liter MSR Titan Kettle.
There is no goofing around with a fragile separate windscreen like the aluminum for MSR uses in its stoves, because the Caldera Cone is a sturdy assembly that does double-duty as the pot stand and the windscreen. Due to the design each cone must be matched to a specific pot you must order the stove system to the pots Trail Designs supports. If you have 5 different pots and none are EXACTLY the same size, you will need 5 different cones. This is because the pot must have a specific distance from its bottom to the top of the stove. Also, since each cone has different dimensions to match the pot, the airflow cut outs have to be matched to the pot.
I bought my first Caldera Cone in 2008. It was matched to a 830ml pot I had bought for my Snow Peak Giga Power canister stove, and in keeping with my tall an narrow pot packs best, it is of course tall and narrow. This was in the early years of Trail Designs and the cones would not fit into any of the pots they made them for. The system had a “compactness” problem.

To protect the Caldera Cone, they were shipped with a plastic caddy to protect the rolled up cone. This two piece caddy could be used as a bowl and mug, neither of which I needed and it was an additional 5 ounces of unneeded weight. Plus the pot had to be carried separately, which killed the goal of compactness. Some backpackers would discard the cone and roll it up in their sleeping pad. Some like me would just use one piece of the caddy and place the pot on top.
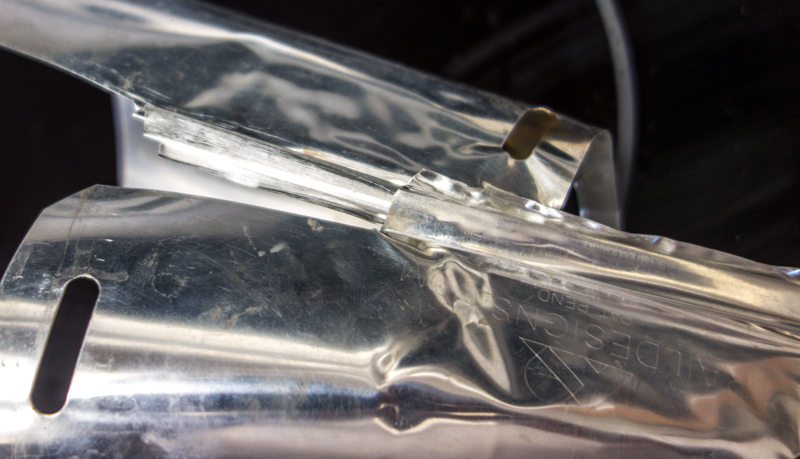
The other difficulty with these early cones that were made from aluminum was the dovetail joints that connected the ends of the cone were subject to distortion and damage that could eventually get to the point where it was nearly impossible to assemble the cone.
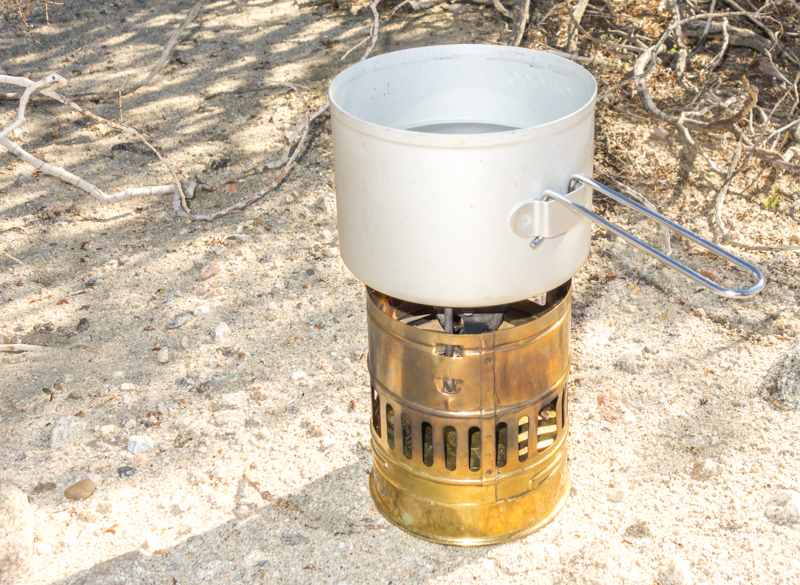
Caldera Cone ULC (ultralight cone)
3 or 4 years ago Trail Designs came out with a two-piece cone that would store in the pot, meaning the caddy was no longer needed. In addition, the cone was made out of titanium making it much lighter, and lastly the dovetail joints were improved in design and strength.
I bought one to fit the same pot I used with my original cone. I never warmed up to this cone and after a couple trips I quit using it.
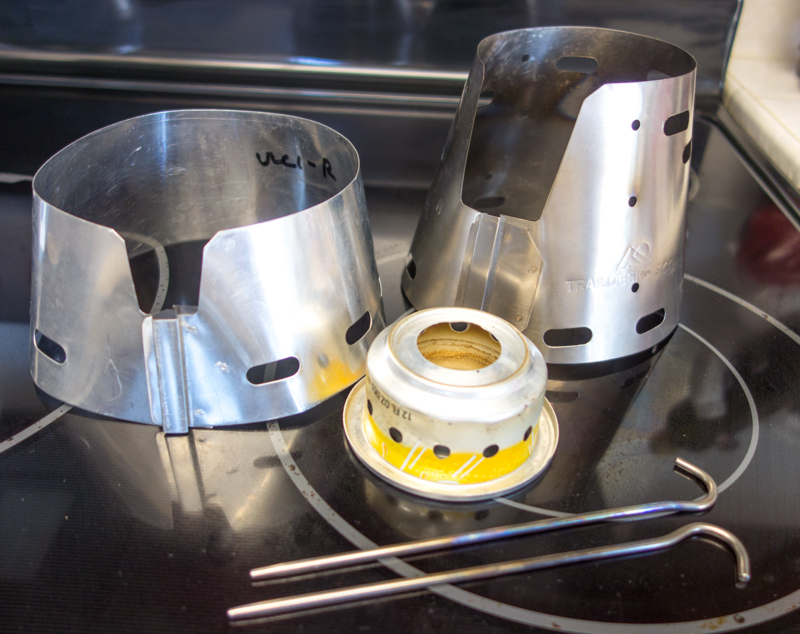
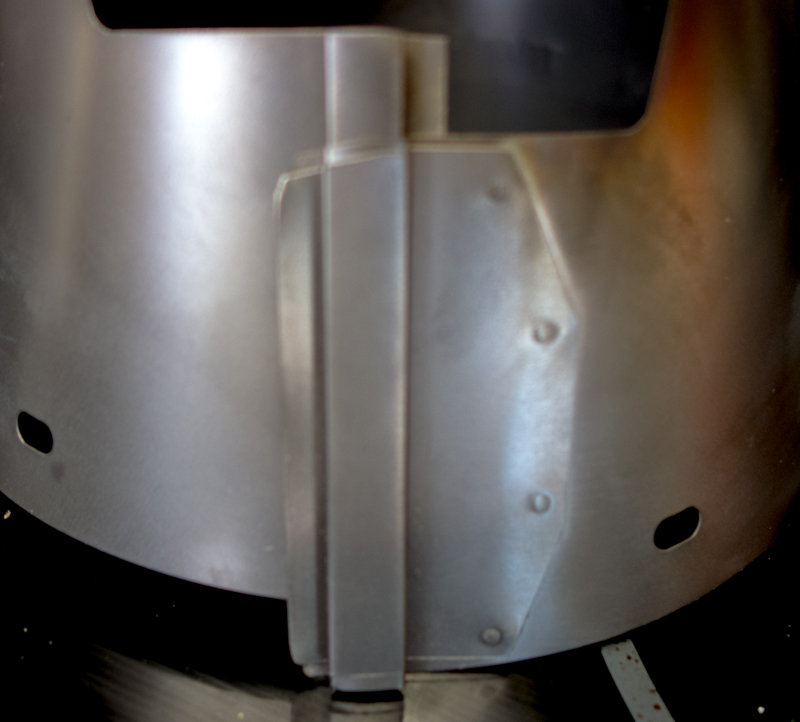
My biggest issue with the cone was it used two tent stakes to support the bottom of the pot, instead of suspending the pot from the top lip like my original cone. The tent stakes don’t fit in the pot, so now the hiker is faced with storing the stakes somewhere in the pack where they won’t poke a hole in the fabric and stove components are in two different locations, which isn’t efficient. Next, because it was a two-piece cone, the cut-out for the pot handles was fairly large, which allowed heat from the stove to escape from the cone. Lastly, the top piece of the cone just sat on top of the lower section causing to cone to somewhat tilt.
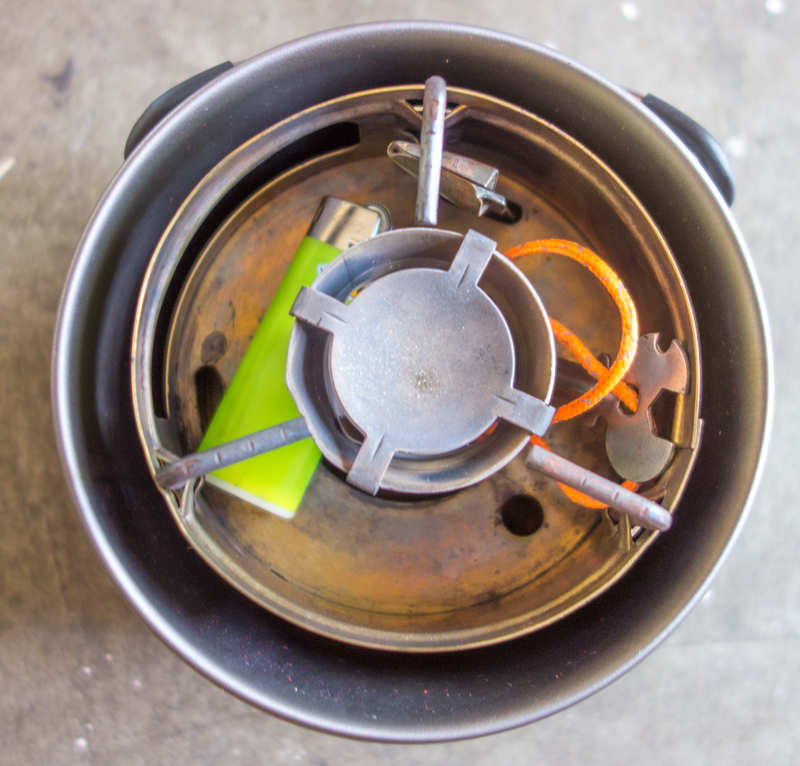
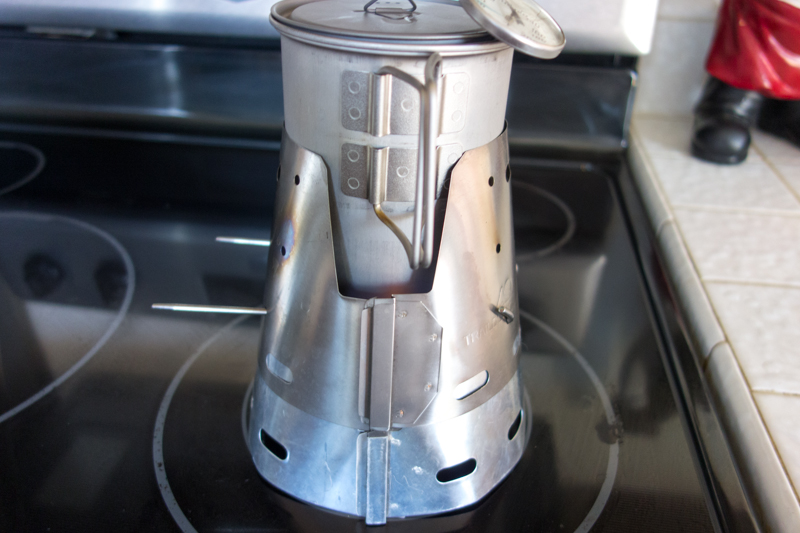
Getting it right: Ti-Tri Fissure
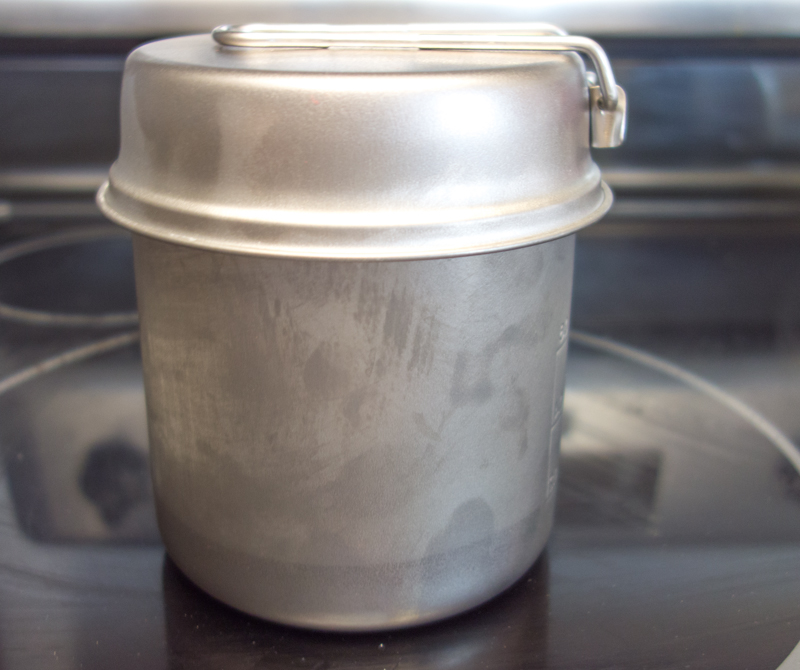
Trail Designs has gotten everything right with this cone. I bought a new pot to go with the cone, a Toaks titanium 850ml pot that has a much shorter handle, allowing better coverage around the pot. It is lighter than the titanium pot I used with the two previous cones, and is larger by 20ml of capacity. Since I bought the pot as a bundle with the cone, I saved $20 versus purchasing the pot separately.
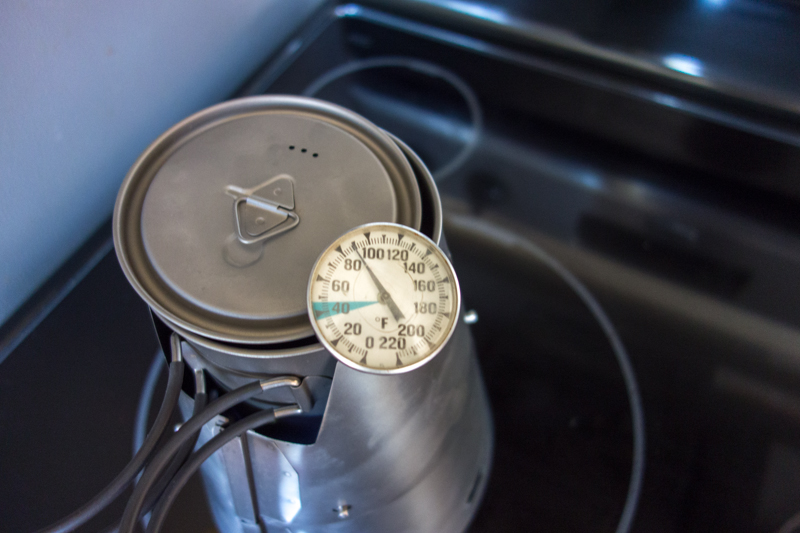
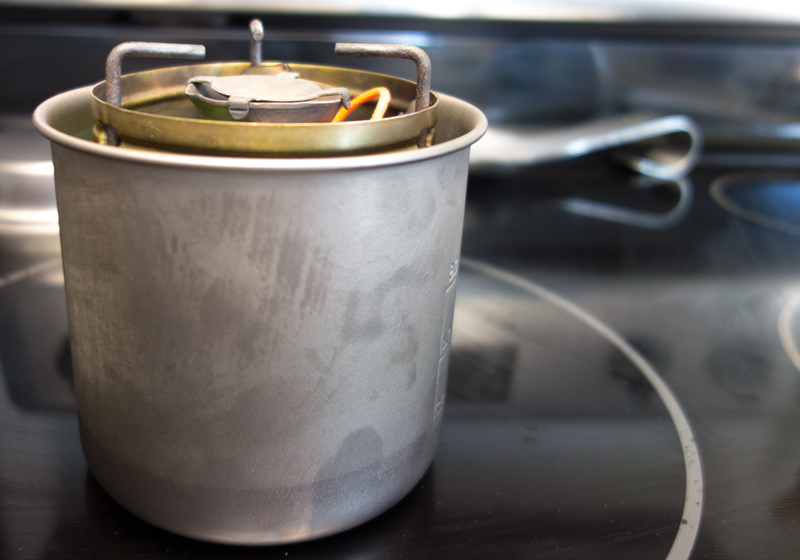
Bottom line is the system packs up compactly, is easy to set up and use, and only weighs 201 grams (7.10 ounces) with the stove, cone, pot, and fuel bottle.
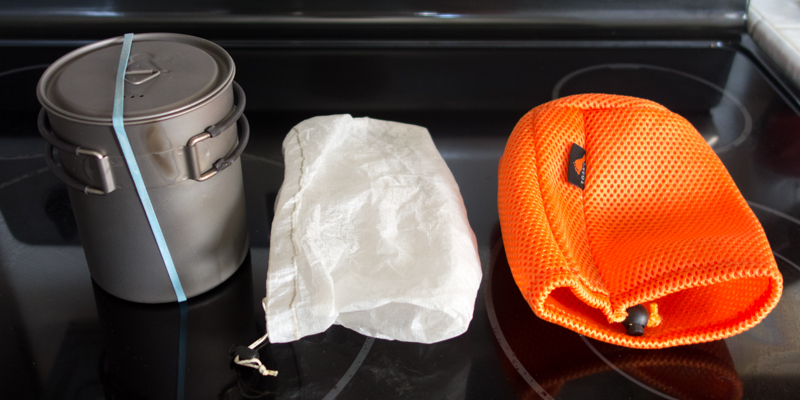
The Fissure comes with an orange sack to hold everything and weighs 16 grams. For now I am just going to use a large rubber band, but might switch to a Cuben Fiber sack that weighs around 4 grams.
WINNERS
Taking into consideration the cost of fuel, fuel availability, total stove system weight, meal preparation efficiency, packing and compactness; the winners are (from left to right)
- Trail Designs Ti-Tri Fissure Stove System in a Toaks 850 ml titanium pot
- Re-purposed P.E.T.E. heavy brown bottle
- Svea 123 Stove in a Snow Peak Trek 900 titanium pot
BONUS SECTION
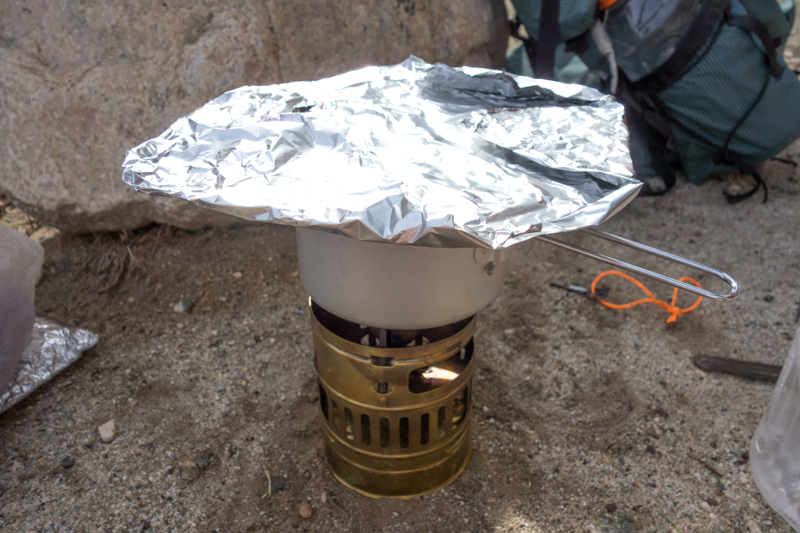
How to Use a Svea 123 and Demo
Some people who know me might be surprised that I am also going to start using my old Svea 123 stove again. This stove has cooked thousands of meals and is the most reliable stove on the planet, and simple to use. In its first 40 years, it required no maintenance other than an occasional new gasket for the fill cap. On its 40th birthday I dissembled it, replace the wick and gave it its first polishing job. New versions are now made in Asia, and I have read the quality is not as good. Mine was made in Sweden. I bought it in 1971 for $18.50, so its dollar cost average over 45 years is $0.41 per year!
Over the years many people have complained that it is difficult to light, makes too much noise, and is too heavy. Those people have mostly gone to a canister stove. Too me the pulsating sound of the stove is reassurance that the stove will always work. Difficulty in lighting is user error on the part of people who can’t read instructions, don’t follow directions, don’t practice using their equipment, and generally lack common sense. Yes, it weighs more than the typical gas canister stove that is more sensitive to wind, won’t work in colder weather, and uses fuel that costs 4 to 7 times as much.
How to use a Svea 123
All liquid gas stoves need to run under pressure and the stove itself needs to get hot to vaporize the fuel. Most liquid stoves use a remote tank that is pressurized with a pump. This pump is the weakest link to the system and should be rebuilt once a year if you are an active backpacker.
Once the stove is pressurized, fuel is added to the priming cup and lit. When the fuel in the priming cup is burned, the valve is opened and the stove is lit with a match, lighter, or sparking tool. MSR states in the manual you should expect a “soccer ball” sized flame! Wow! Once the fuel vaporizes, the stove valve can be adjusted to get a nice steady flalme.
The Svea works on the same principle, but is easier to light if you know how and you won’t get a huge flame when first lit, like the WhisperLite.
How it works
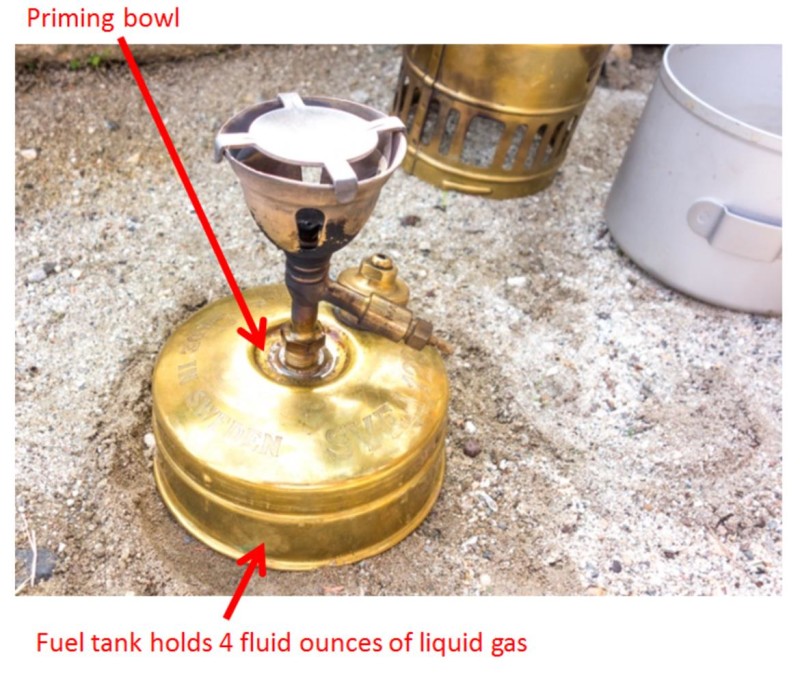
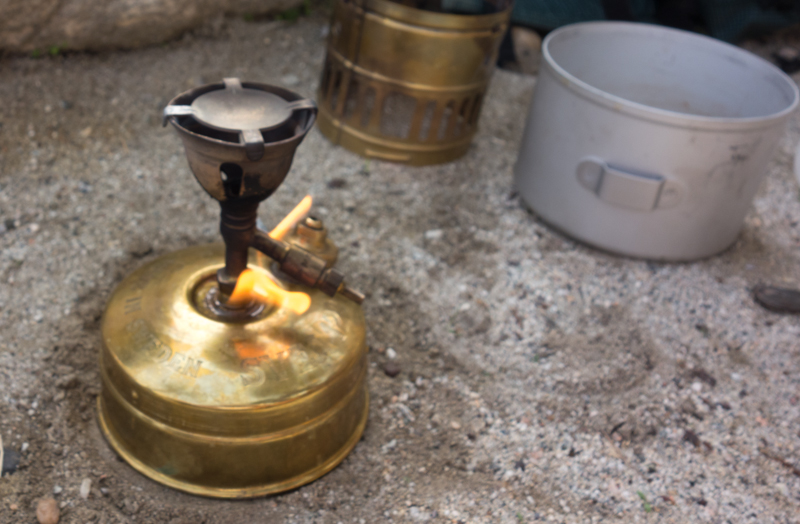
No pump is required to pressurize the tank. Just fill the priming bowl with fuel, light it, and at the moment the flame is about to go out open the valve and the stove will light.
Many people carry fire paste for the priming bowl or a separate container with alcohol to light it. Others open the tank cap and withdraw some liquid gas using an eye dropper or straw. The way I do it is:
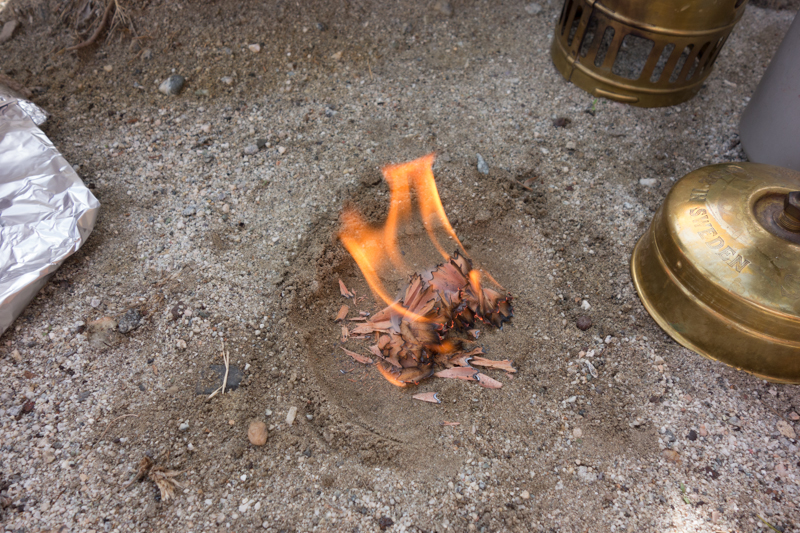
- Slightly heat the tank with the lighter or small pieces of burning tinder/paper
- Hold the stove over the burning tinder for a few seconds
- Place the stove on the ground to extinguish the flame
- Open the valve which will trickle fuel down into the bowl
- Close the valve
- Light the priming bowl fuel
- When the flame is about to burn out turn on the valve and the stove will light


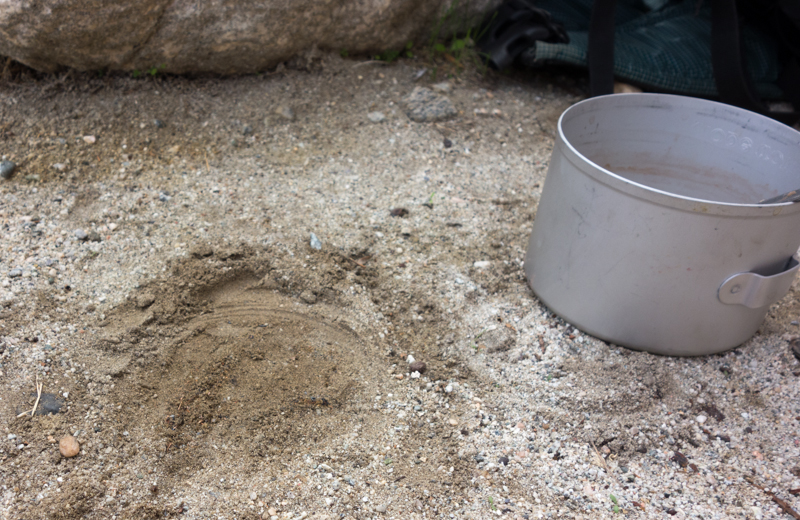
When you are done, bury the tinder residue so you leave no trace of your fire.
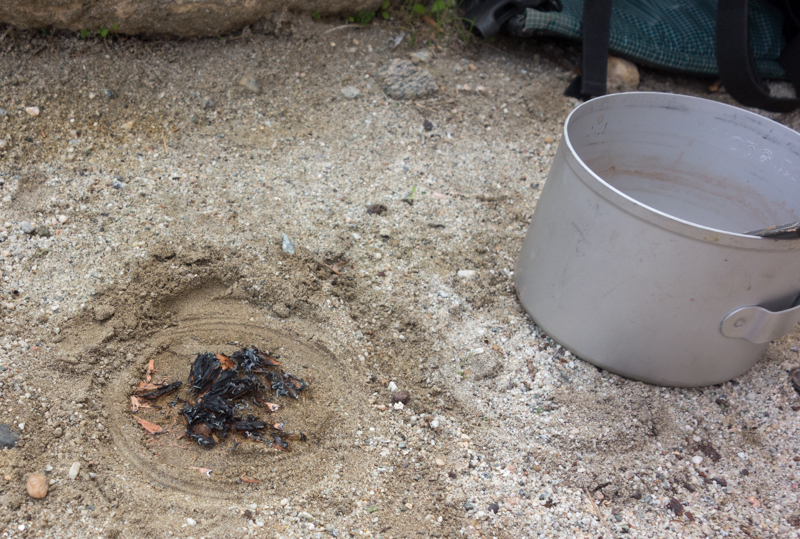
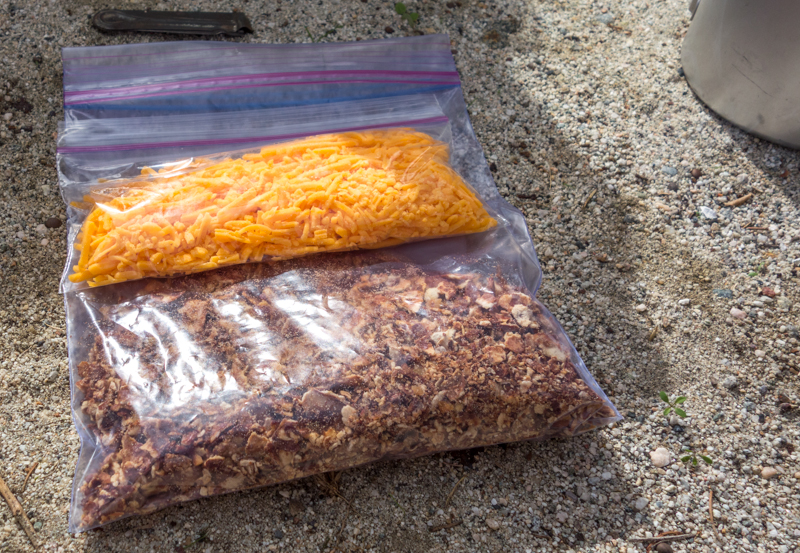
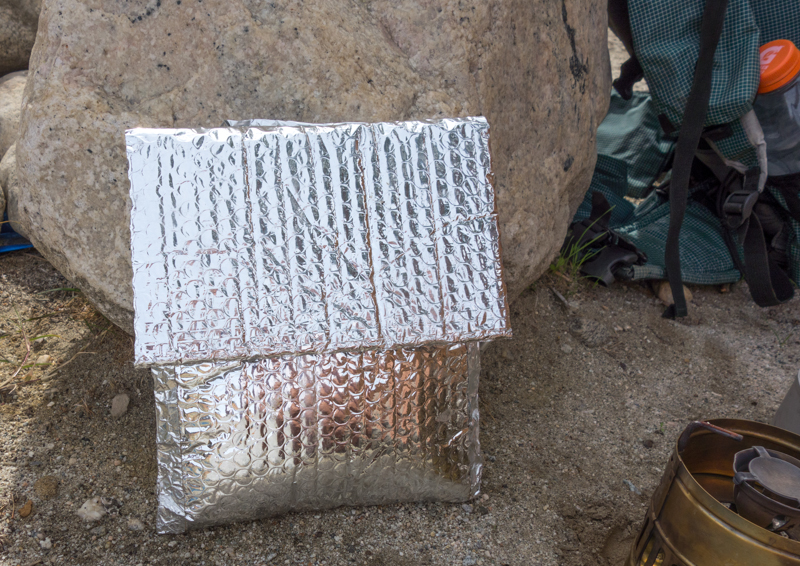
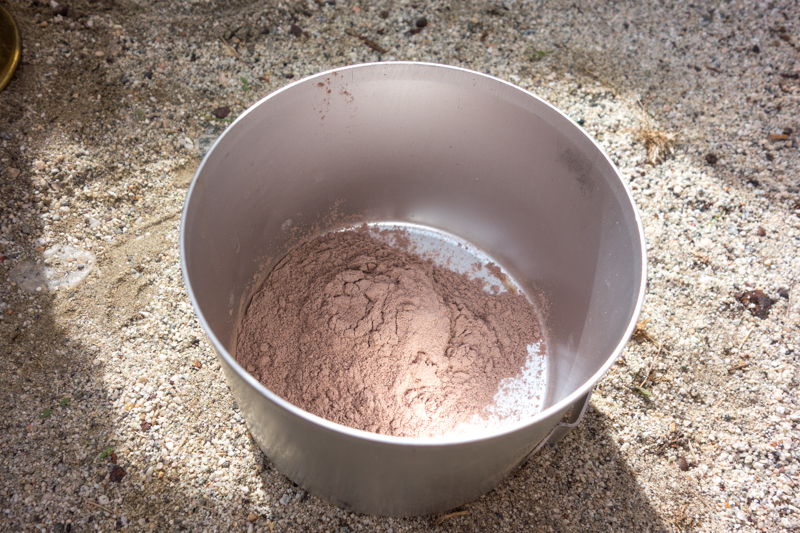
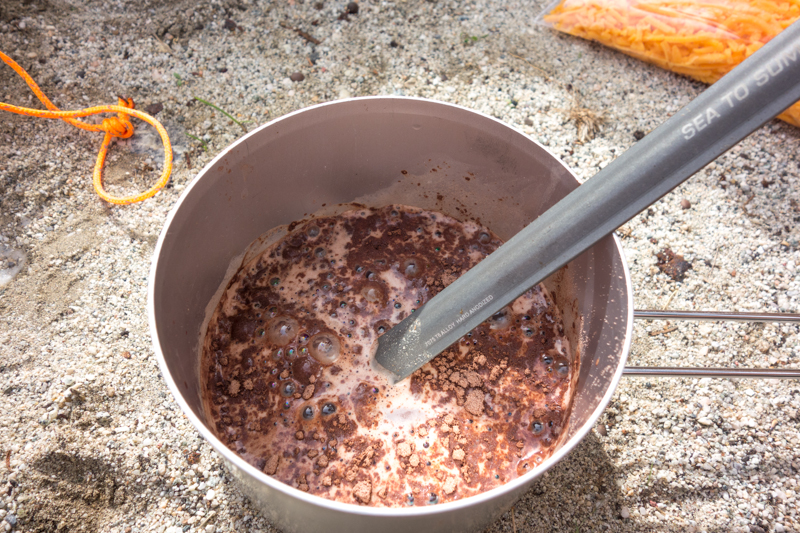
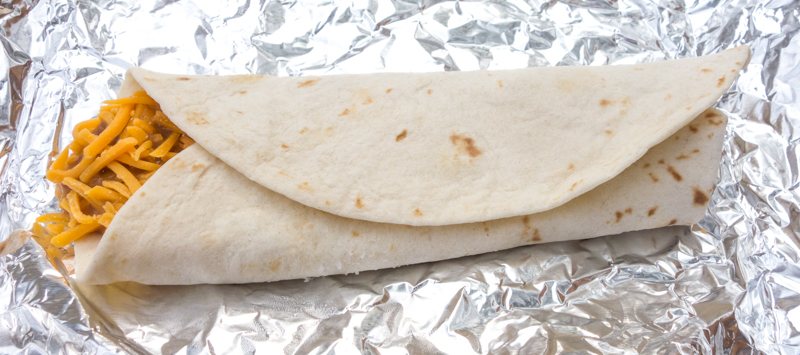
Dinner demo: Bean & Cheese Burrito with Hot Chocolate

This website may be compensated for linking to other sites for sales of products. As an Amazon Associate I earn a small fee from qualifying purchases at no additional cost to the purchaser.

Optimus Svea 8016279
$134.95 (as of April 12, 2024 23:41 GMT -07:00 – More infoProduct prices and availability are accurate as of the date/time indicated and are subject to change. Any price and availability information displayed on [relevant Amazon Site(s), as applicable] at the time of purchase will apply to the purchase of this product.)