What do you do if you are stuck at home during a pandemic and can’t go backpacking or camping? If you are like me, you build a pier in your backyard.

Opps! Not that kind of a pier.
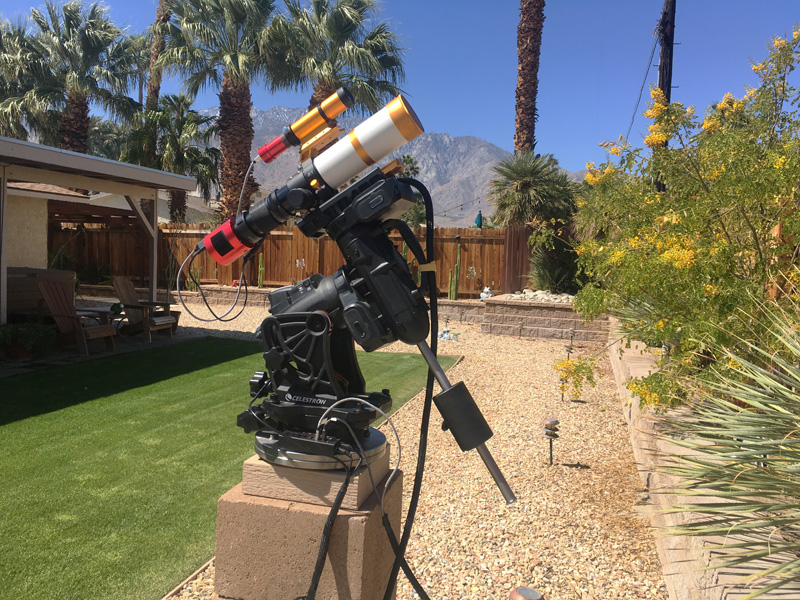
This kind of pier.

A while back I discussed how a compass could be used to align a telescope mount to the celestial North Pole. I also pointed out why a mount needs to be aligned. The method works well. However, accidentally bumping into the setup at night or even needing to bring the equipment inside every night becomes a pain in the ass requiring constantly polar aligning the telescope mount.
The Need for Stability in My Life
From our backyard I have a nice view to the Southeast, South, and Southwest all of which provide views of the deep sky objects I mostly want to image. In order to avoid our house from blocking these views, my telescope needs to be placed back along the northern edge of our backyard. However, there is an 8-foot tall fence and a neighbor’s house that blocks lower altitude views to the North. It is critical that I have a view of Polaris (the North Star) and the surrounding area so the mount can be aligned to the celestial North Pole.
When my telescope was mounted on the mount and tripod, I had to extend the tripod legs to their maximum length in order to put the scope at the proper height for polar alignment.
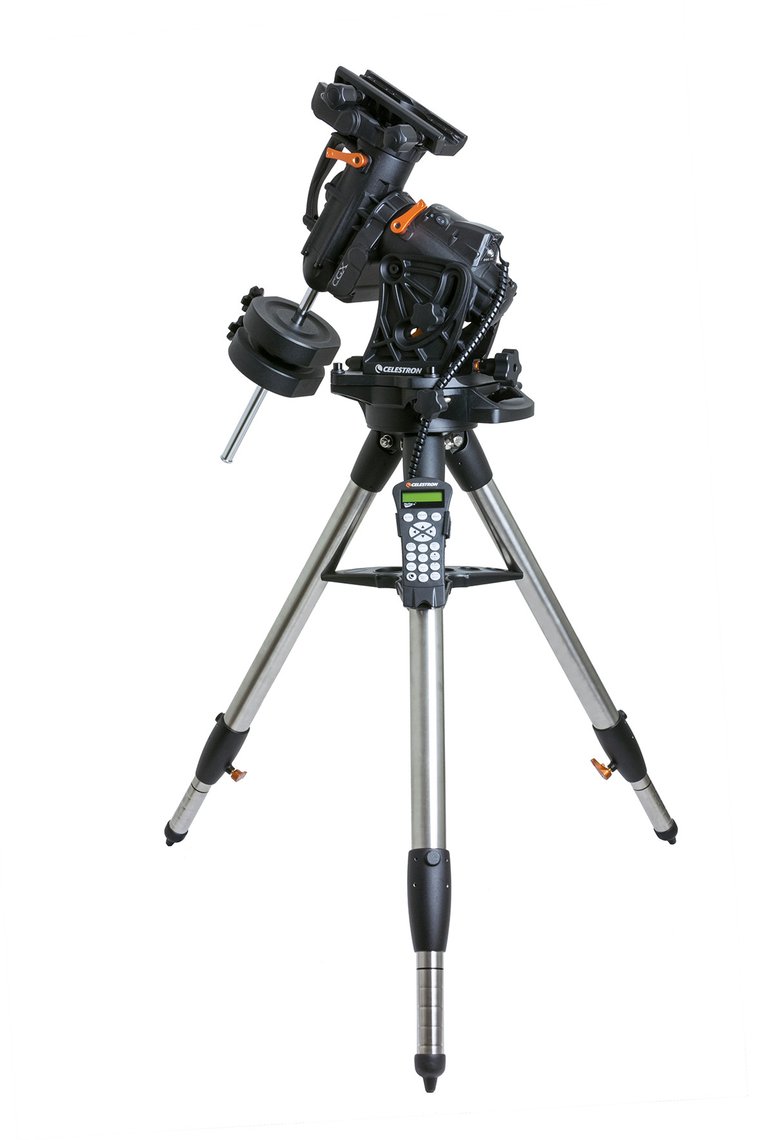
The picture below from the Celestron website shows my model mount and tripod with the legs slightly extended. For long exposure imaging shortening the legs even more would be beneficial. The higher the legs are extended the more likely the tripod can vibrate and ruin photographic time exposures.
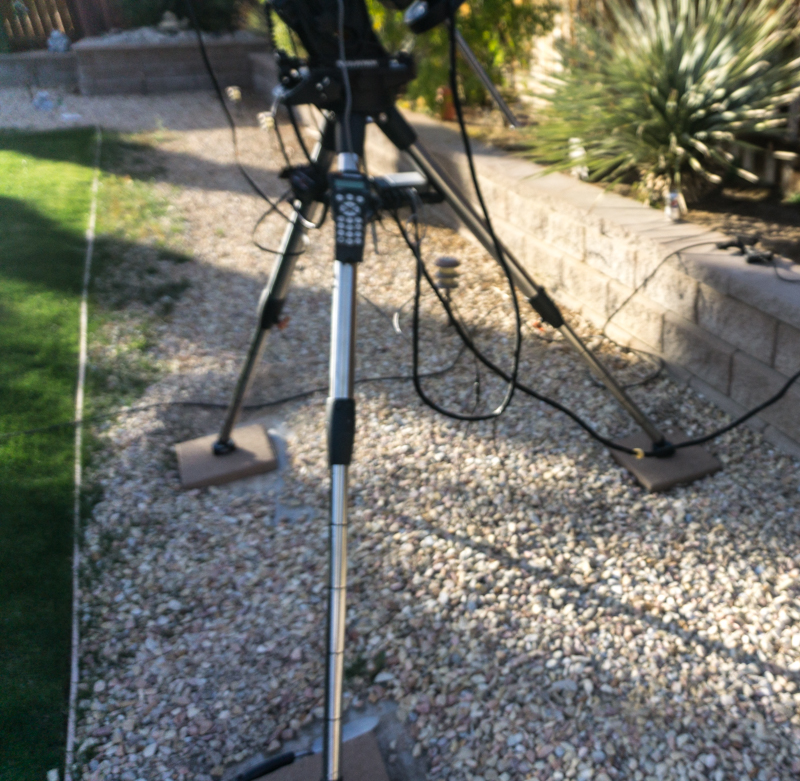
Tripod legs (below) fully extended to provide view of Polaris for polar aligning the mount. The higher the tripod is extended, the less stable it is and it becomes sensitive to wind. Many deep sky objects are trillions of miles away and the slightest movement can ruin a long camera exposure, which is necessary to capture faint distant objects. The slightest movement will wreck a 2 or 5 minute exposure.
So what is needed is some sort of permanent set-up. I considered building a domed observatory or an outbuilding with a roll-off roof that could house a permanent non-movable pier. Of course these kinds of structures are subject to oppressive government regulations or if you are unfortunate enough to live under the umbrella of a Home Owners Association (we are not) such architectural achievements may not be allowed.
These entities would not have been much an obstacle for me. I have a much more obstinate building construction foe — my wife, Joyce.
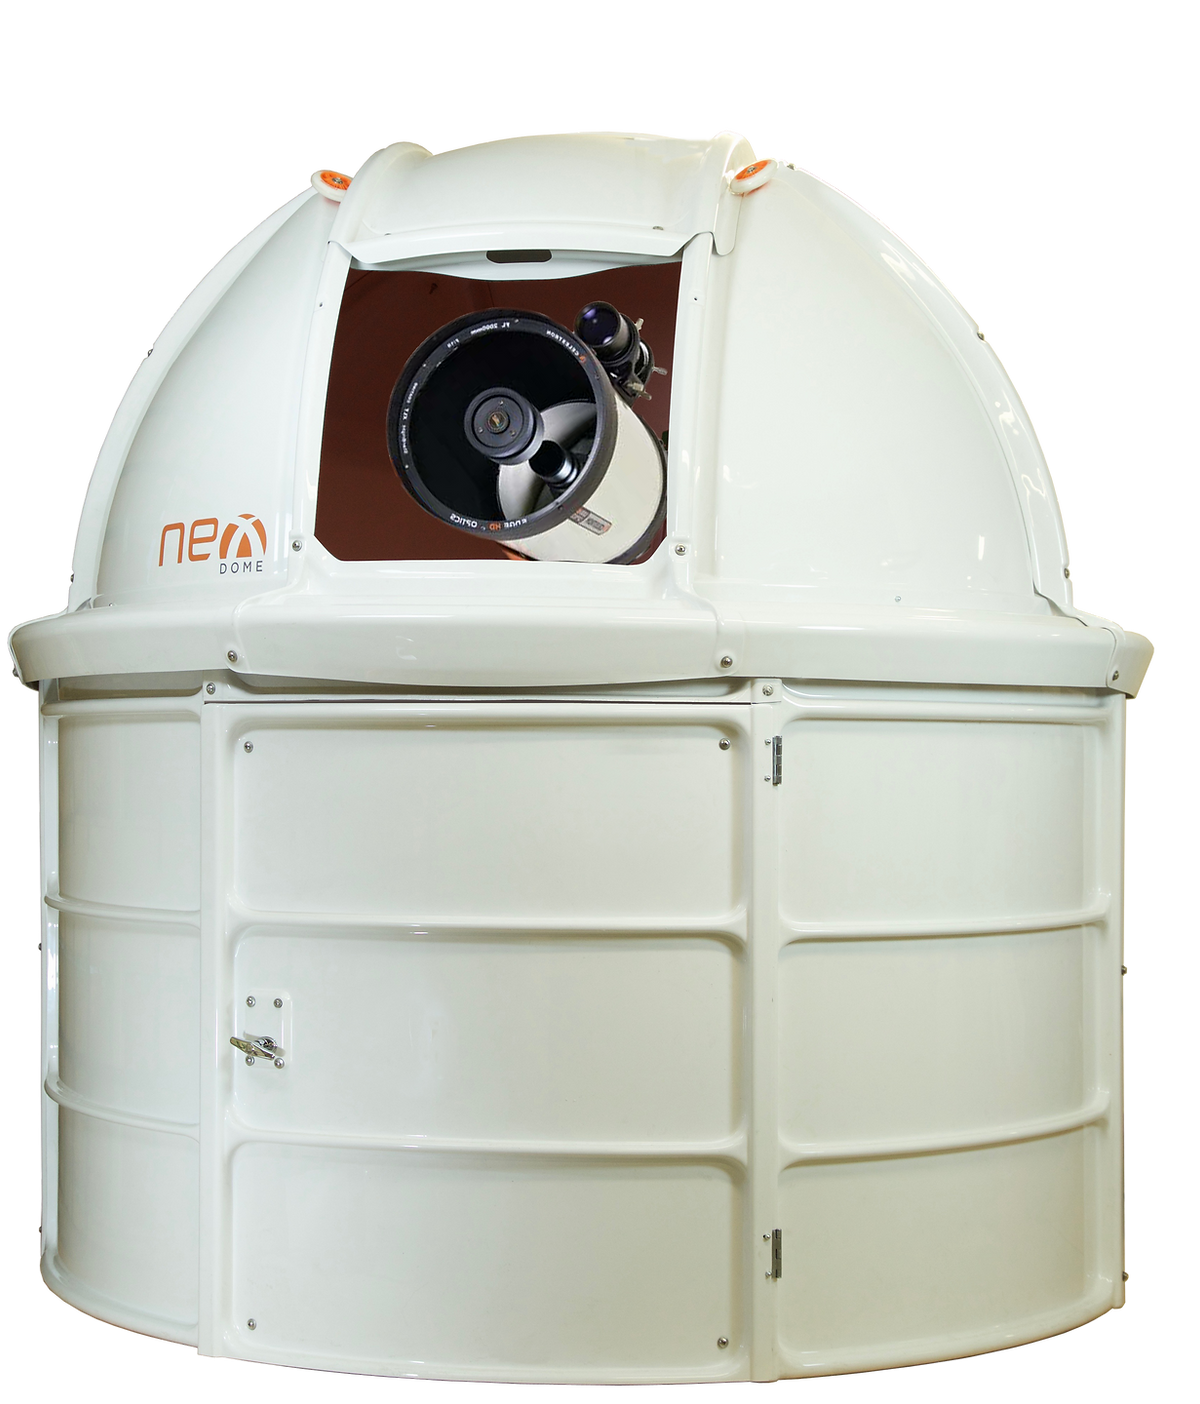
A dome? Nope.
A “roll-off” roof shed? Nada.
I Needed a Telescope Pier
Considering our weather, and the fact I can use my telescopes over 300 nights a year, a building isn’t necessarily the best option. It is actually quicker to leave my scope on a pier with a cover over it. In summer, when temps get up into the triple digits, like 120F+ occasionally, I can remove the telescope in a matter of seconds and bring it inside during the day.
The advantage of a pier is the telescope mount will rarely need to be polar-aligned, not to mention the couple of minutes it takes me to connect the telescope to a mini-computer and power supply that I carry out each night. It would be a perfect solution.
Another plus besides convenience is a properly constructed pier will be more stable than a tripod.
Types of Piers and Construction Considerations
Cement
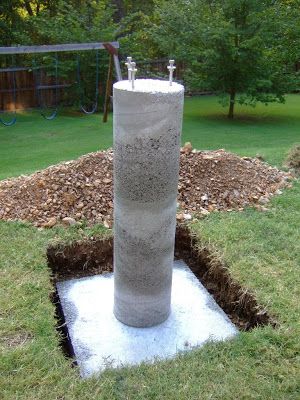
One of the best piers is a cement cylinder. A large hole is dug, and filled with cement and the above ground portion is formed using a cylindrical form that can be purchased at most big box hardware stores. Sonotube is a well-known brand.
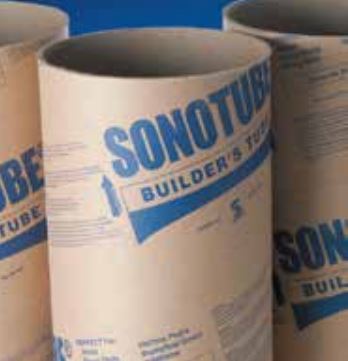
Below is a picture of a cement pier I found on the Internet.
Given access to our backyard is limited, the easiest method for me would have been to rent a portable powered posthole digger, and then have the cement delivered by a ready mix company. In my case, a cement pump company would also need to be hired because a cement truck cannot get into the back yard. This solution becomes rather pricey and not something I was interested in.
Of course I could mix the cement myself. If you are familiar with my website, you know that I mixed 866 bags of cement to pour sidewalks and patio foundations a few years ago. I documented some of the work in this post.
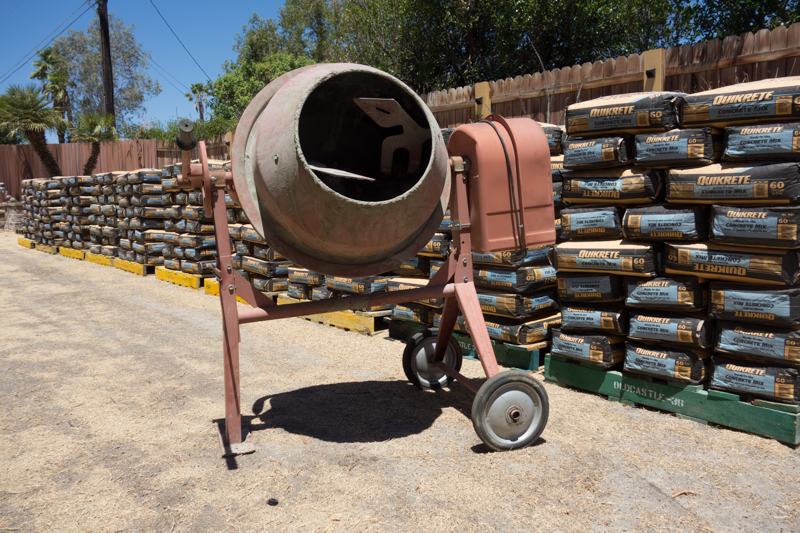
That was about 5 years ago. I am 5 years older. But the age difference between being 65 versus 70 is huge, when considering heavy lifting. Besides, I was so happy when all the work was complete; I threw the mixer away never wanting to see another one close up. Actually it was worn out anyway and I had made several repairs to it to keep it going.
Whether I hired someone to pour a cement pier or even did it myself, it was a moot point. Her highness, the household CEO, vetoed the plan for aesthetic reasons, whatever aesthetic is. Non-negotiable.
Metal Piers
Another option is to purchase a metal pier and bolt it to a cement slab. This was doable for me, even if I mixed the cement for the slab by hand in a wheelbarrow.

Metal piers are somewhat expensive. Most I researched are in the $600-$800 range as a starting point.
One positive feature about a metal pier, unlike a poured cement pier, is they are easily removed. This is handy if you sell your house and need to remove it, plus it can easily be re-used at a new location. We don’t plan on moving.
The only downside to a metal pier was the powers that be, here in Mi Casa, said it was ugly and “industrial” looking. Again, that aesthetics thingy.
Todmorden Pier
I found several of these simple piers on the astronomy forum Cloudynights.com. Using common concrete blocks a stable pier can be constructed for under $200. The first Todmorden piers appeared at the Astronomy Centre in Todmorden, UK. Thus the name, Todmorden Pier.
As expected, the in-house architectural committee rejected the design right away. Again words such as industrial and ugly were thrown around.
Being creative, I did what any red-blooded American would do. I went out and bought the materials anyway, with an aesthetic (there’s that ugly word again) twist, and dry-fitted the components for my loving wife to review.
Permission granted as long as a pot or other decorative item, like a sundial, could be placed on it when we have company. I haven’t bought a pot or sundial for it. I’ll let Joyce attack that portion of the project. But, as I expected, she has grown used to the pier and likes to show friends and family the pier with the scope on top when they come to visit. She even took pictures and sent them to her friends.
Constructing the Pier
Steps
- Dig a hole for the cement footing
- Prepare a method for inserting cement anchors to keep them vertical
- Fill the hole with cement
- While the cement is still wet insert the anchors
- Make sure the cement footing is level
- Allow enough time for the cement footing to cure
- Install the cement blocks making sure they are level
- Install a pier plate on the top of the cement block stack to attach the telescope mount
- Attach the mount and telescope, then polar align
Cement Footing and Anchors
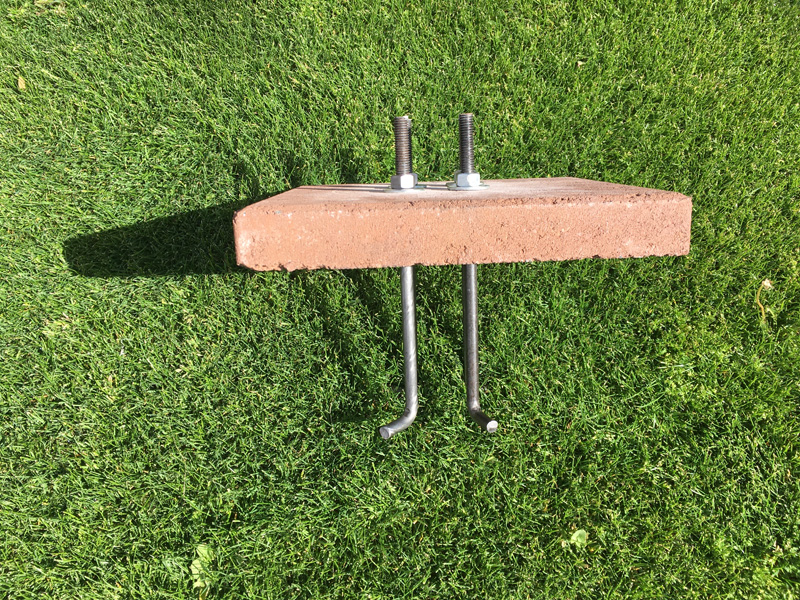
Most people use a square piece of wood with the anchors attached and then place it into the cement. Once the cement is cured, the wood is removed. Once removed, the cement blocks are stacked directly on the cement footing.
I opted to use a cement stepping stone paver instead of wood. The paver would become a permanent part of the assembly and was embedded level with the footing.
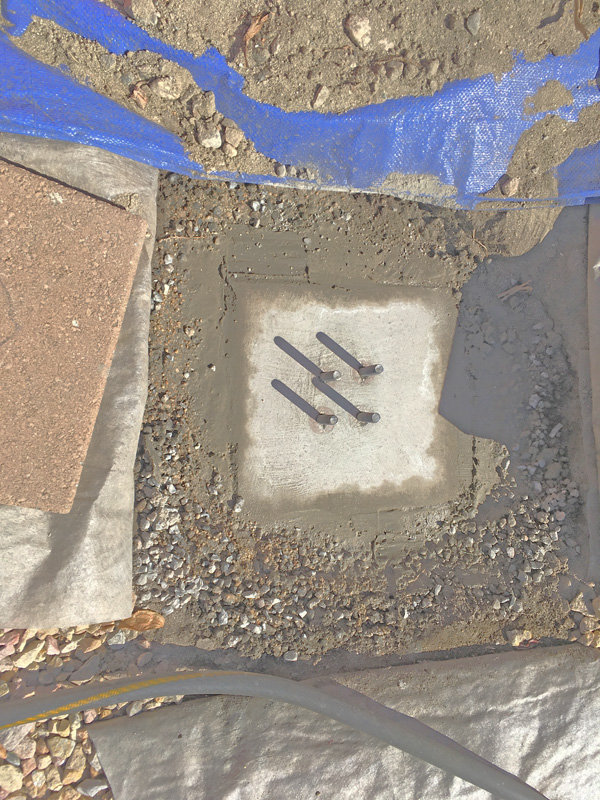
A hole approximately 18” X 18” X 18” deep was dug. Three 50lb bags of fast drying cement were mixed and filled the hole.

Below th cement paver set into the footing and leveled. It is hard to see the four anchors with all the shadows.
Stacking the Cement Blocks
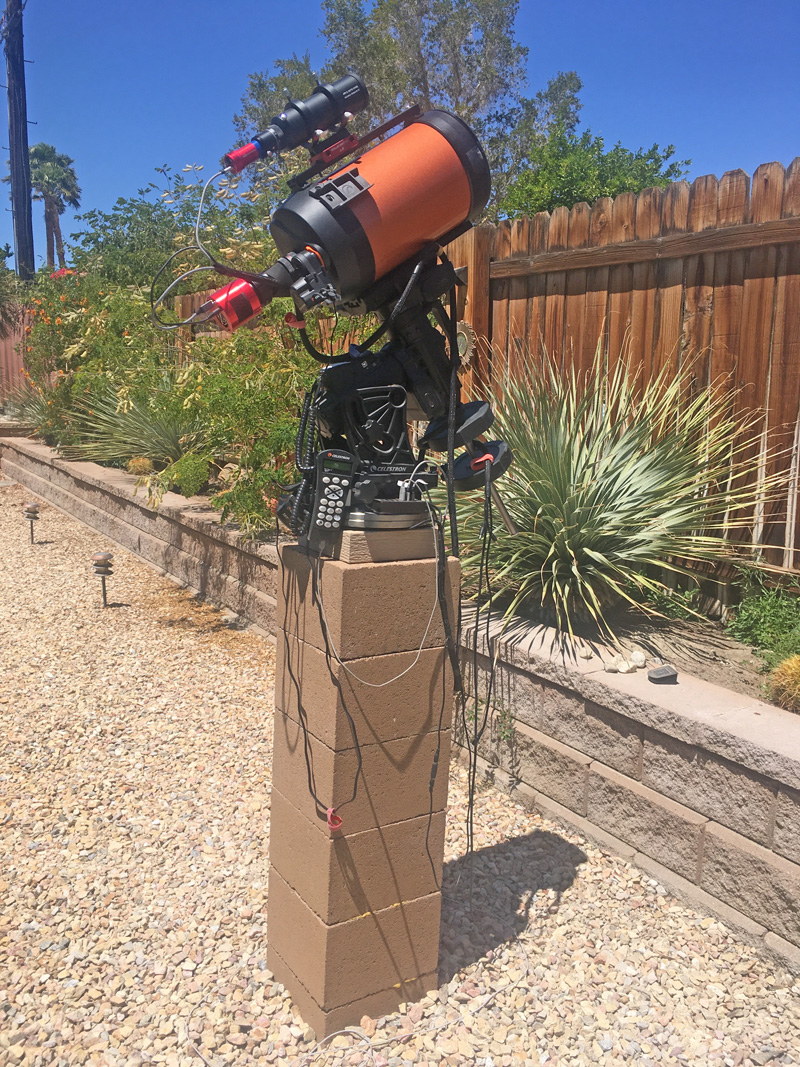
Yeah, it’s ugly and industrial looking.
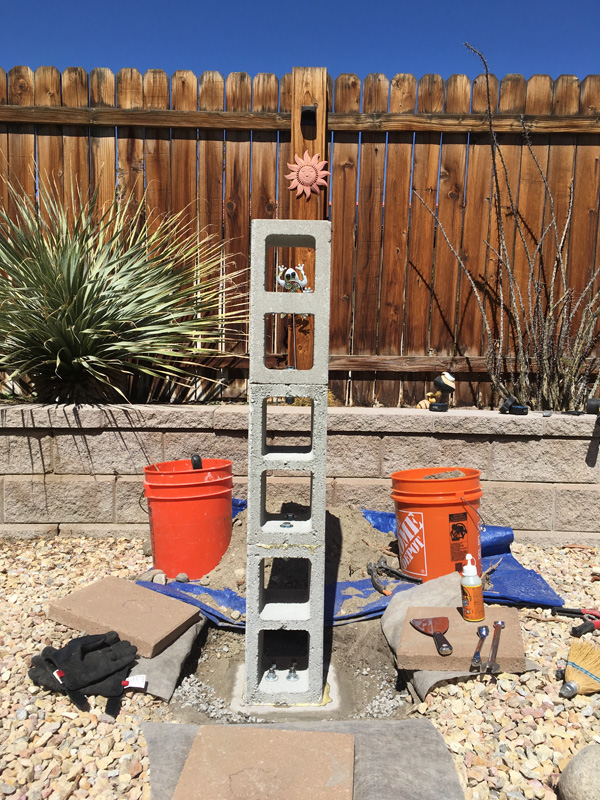
The cement blocks are 8” X 8” and 16 inches tall. Most people use just two blocks. With three blocks the pier is 48” tall, which is what I need to point the telescope over the north-side fence and neighbor’s house. With a pier this tall, it isn’t conducive for visual observing with a telescope. That’s okay. I only want to use it for taking pictures. I have a smaller mount for observing and it doesn’t need to be polar-aligned.
During construction I used a lensatic compass to align the center of the stack to true north. This would make it easy to make sure the entire final assembled pieces were pointing to true north.
I used Gorilla Glue on all the mating surfaces. Since the cement blocks are porous and not completely flat, the glue fills the voids. ½” stainless steel bolts, large flat washers and nuts were used to better secure the bond.
A long level was used to check and confirm everything was level and plumb.
Most of the Todmorden piers I have looked at are left as is, just like the picture above. Some folks paint the blocks. I saw several that used the openings in the blocks to store telescope accessories when using their scopes. A few built wooden sides to cover the cement blocks.
Happy Wife, Happy Life
I knew it would be required to make the pier blend into the backyard. After many options, that wouldn’t be acceptable to Joyce, I came upon a great solution — square blocks that are used for building block walls. These are 12” X 12” and 8” tall. Well, almost those dimensions. Those are the nominal numbers, but are really a bit smaller.
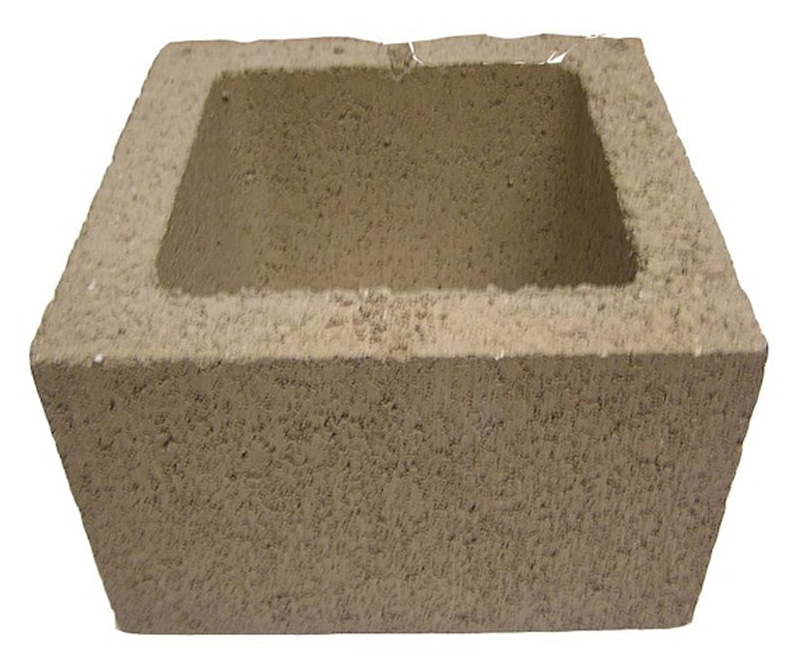
I hoped I could just slide them over the cement block pier, using them as decorative blocks, not structural blocks.
The decorative blocks wouldn’t slide over the stacked pier — they were just a tiny bit too tight of a fit. Using an angle grinder with a masonry-grinding disc, it took a couple minutes to remove just enough material from the stacked pier blocks, so the decorative blocks would slide over the stacked pier.
After grinding the edges of the pier blocks, sliding the decorative blocks over the stacked pier was a snug fit, which is good. I used Gorilla Glue between each decorative block but it really wasn’t necessary.
The picture below the arrow shows where I ground the corners.
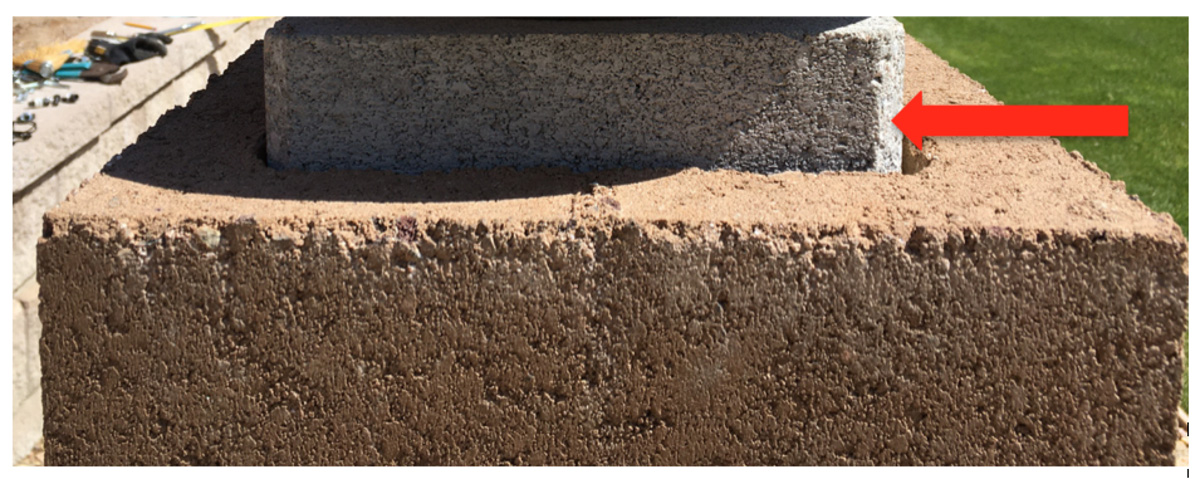
As you can see in the above picture, the decorative blocks aren’t exactly 8” tall — they are a tiny bit shorter — while the stacked pier blocks are exactly 16” resulting in the pier stack slightly higher than the decorative blocks. I would have to deal with that later to make the project acceptable to Joyce.
Pier Plate
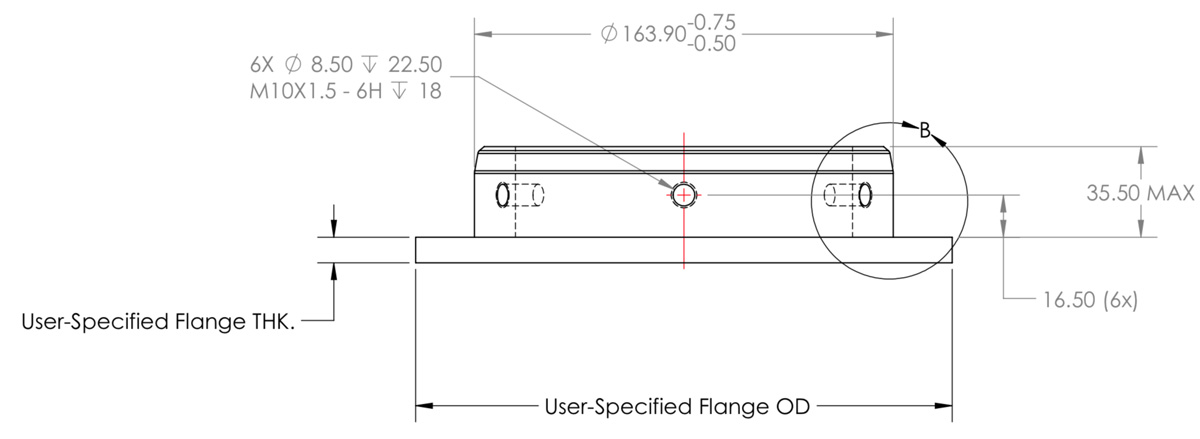
Most piers require a special machined plate between the pier and the telescope mount. The plate is designed to match the bottom of the telescope mount. Celestron doesn’t sell pier plates, but they have published detailed engineering drawings with the required measurements.
Most people just buy an after market pier plate. The two least expensive ones I could find were nearly $400. Ouch!!
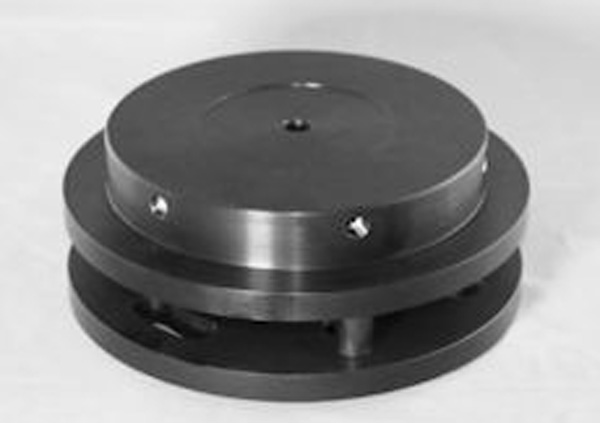
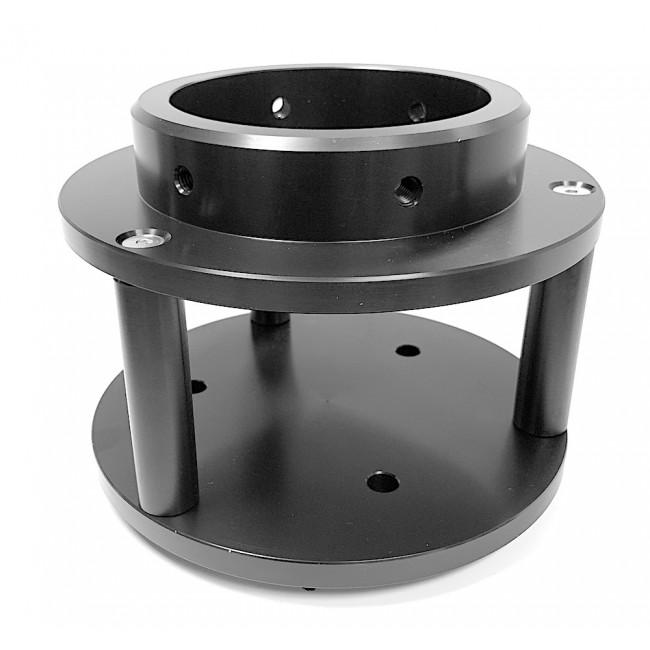
Below are a couple pictures of aftermarket pier plates I found on the Internet.
Disc Brake Rotors
Several people on the forums at cloudynights.com have used car disc brake rotors to make their own pier plates. I followed suit.
One thing all of the brake rotor adaptations I have seen use bolts to separate the two rotors to imitate the after market pier plates shown above. Commonly referred to as “squirrel cages” or “bird cages” the legs or bolts are used to separate the bottom and top of the plate assembly and can be adjusted to level the pier plate if needed. With some mounts, there needs to be open space to attach the mounts that use an attachment bolt on the bottom of the telescope mount.
I didn’t need this space. First of all, my pier was already perfectly level, so no leveling adjustment function was needed. And to be honest, a mount really doesn’t need to be perfectly level as there are some adjustments built into the mount itself. Secondly, the attachment bolts for my mount are on the sides of the mount, so I do not need access to the bottom of the mount.
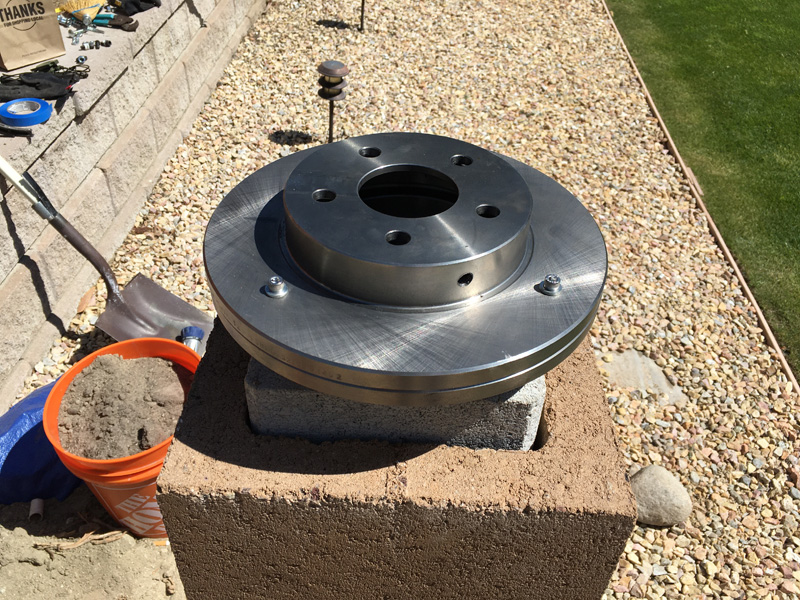
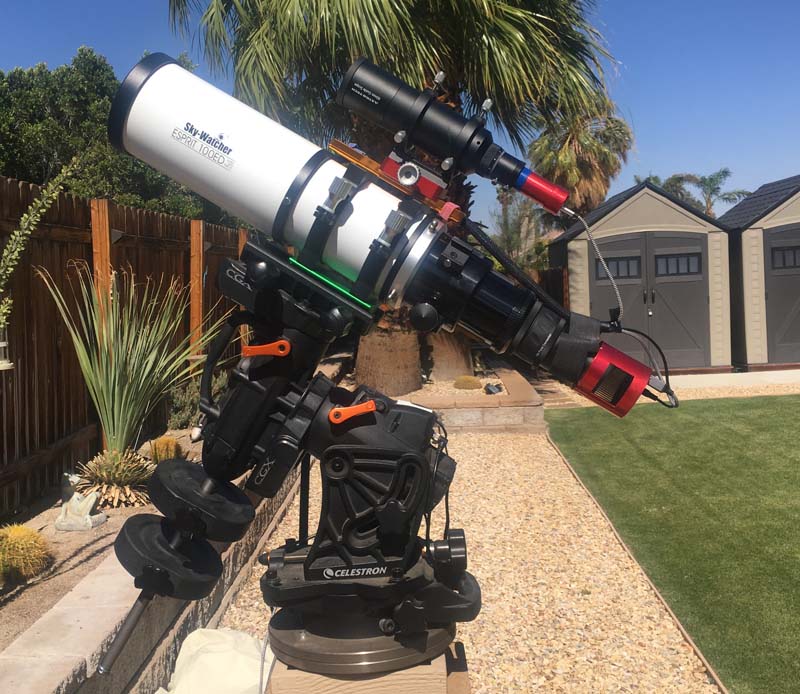
The only task was to find a brake rotor that would fit my Celestron CGX mount.
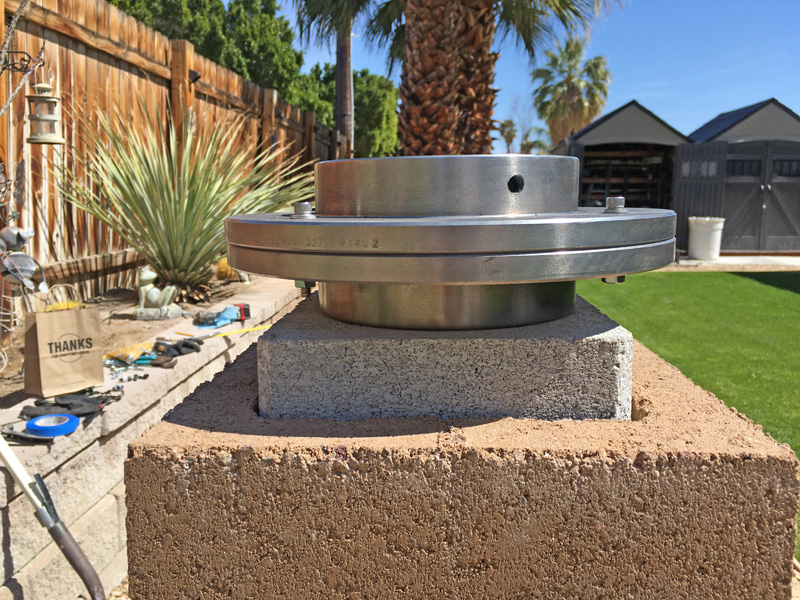
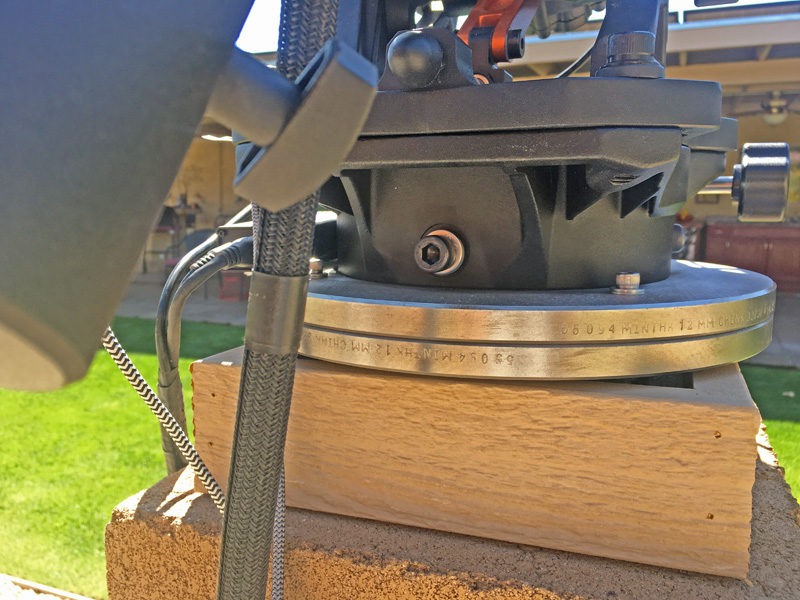
The rear brake rotor for a 2010 Malibu LS was a perfect match. The specification for the plate is 163.9 mm diameter. The brake rotors are 162.0 mm. Since the bolts to the mount go through the side, the 1.9 mm difference just makes it easier to place the mount on the pier, which is a tight fit on the tripod that came with the mount.
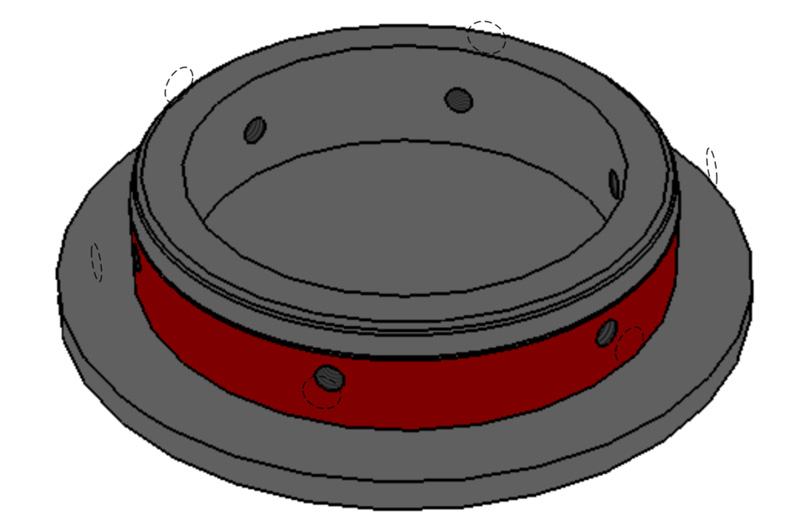
Two brake rotors bolted together. Note the hole in the side of the top rotor. I drilled and tapped three holes in the rotor that aligned to the telescope mount. The mount fits over the rotor; bolts pass through the mount, and are secured to the brake rotor via the threaded holes.
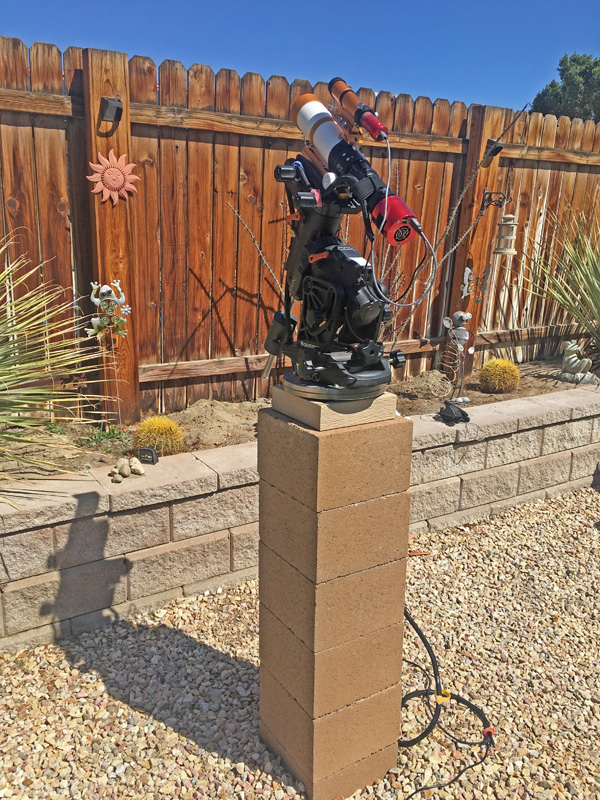
I found some outdoor fascia at Home Depot that was the perfect height to hide the small part of the pier stack blocks that protruded above the decorative blocks. The fascia was already painted a color that blended in.
That night I checked the polar alignment; it was already almost perfect without any adjustments. Took a couple of minutes to get everything to almost zero variance.
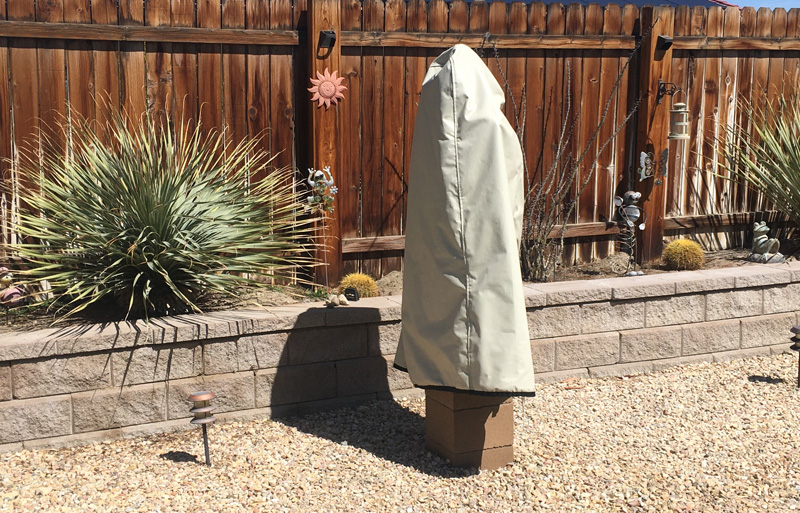
TeleGizmos 365 Cover
Final touch was a waterproof cover. TeleGizmos covers are easily the most popular covers used by amateur astronomers. I didn’t even bother to check any reviews, just searched for the size I needed. This is because they are made by the same company (owned by Bob Pitney) that manufactures PopUpGizmos. Here is a review of the PopUpGizmos I did years ago.
It has been several months since the Todmorden Pier was completed. I have used it almost every night since then and the pier has been rock steady and hasn’t moved or shifted at all.