This is not mean to be a comprehensive discourse on astrophotography equipment. It is simply a high level overview of what I use to capture images of deep sky objects.
At a minimum three pieces of equipment are required: an optical tube (telescope), a mount, and a camera.
Mounts
Deep sky objects are trillions of miles away, so the mount must be able to hold the telescope securely without any vibration or movement. The next challenge is the earth’s rotation.
The Earth’s Rotation
Not only does the Earth rotate once every 24 hours, its axis is tilted at approximately 23.5 degrees from the vertical, and this tilt remains pointed in the same direction in space as Earth orbits the Sun. The result, from our vantage point, is celestial objects move from east to west in an arc over the course of a night.
If you mount a camera on a tripod to take a picture, any exposure over 15 seconds will result in star trails because of the Earth’s rotation. On the other hand, to image deep sky objects long exposures are needed.
Equatorial Mounts
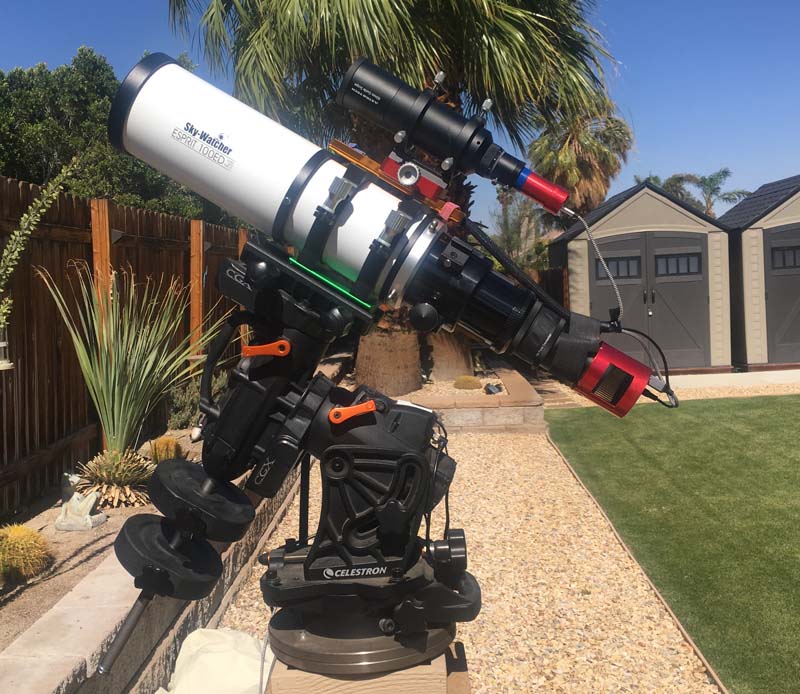
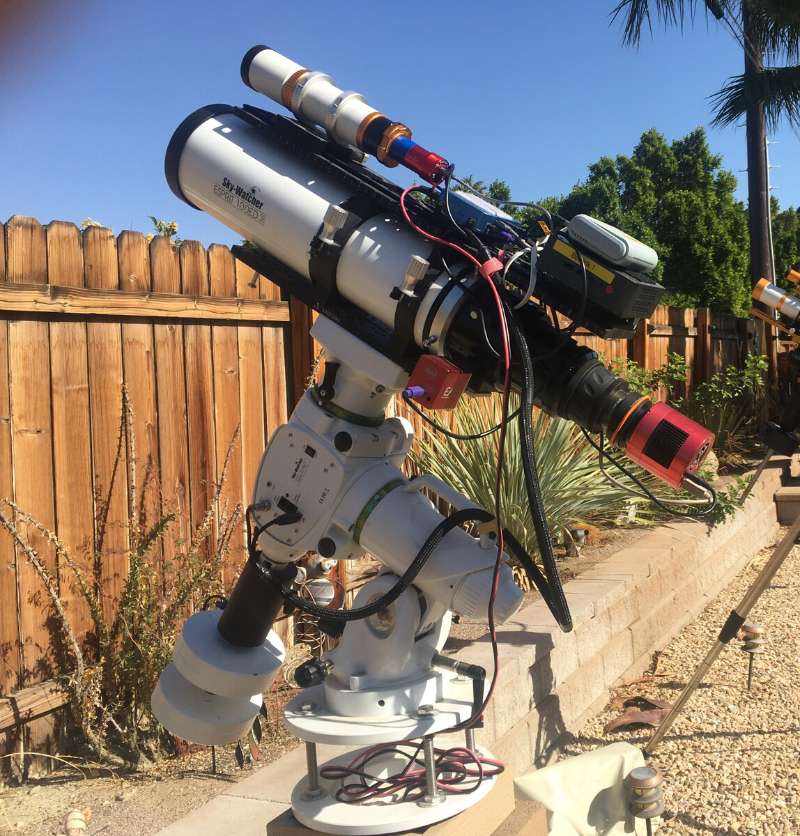
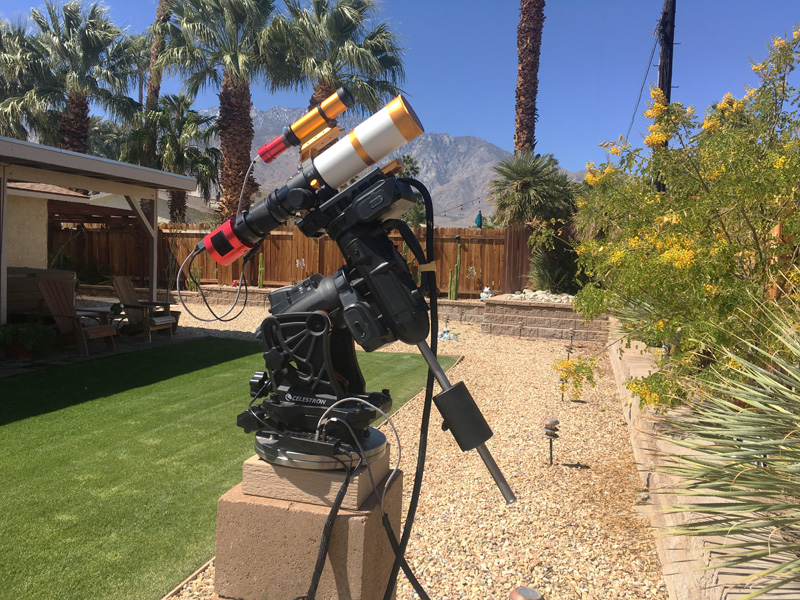
To overcome this rotational conundrum most amateur astrophotographers use a motorized mount that can be computer controlled. The mount must also to compensate for the Earth’s tilt. The solution is an Equatorial “Go To” Telescope Mount. The Go To means the mount can be controlled with a computer. I have two equatorial mounts. A Celestron CGX and a Sky-Watcher EQ6-R Pro. Most night at home I am using both mounts to take pictures of deep sky objects.
Auto Guiding
As I mentioned, a computerize equatorial mount will track deep sky objects as the Earth rotates. However to do this accurately for a period of time requires a high quality telescope mount — and we are talking about mounts that cost in excess of $10,000. My two mounts cost me about $2,000 each and cannot track as precisely as needed.
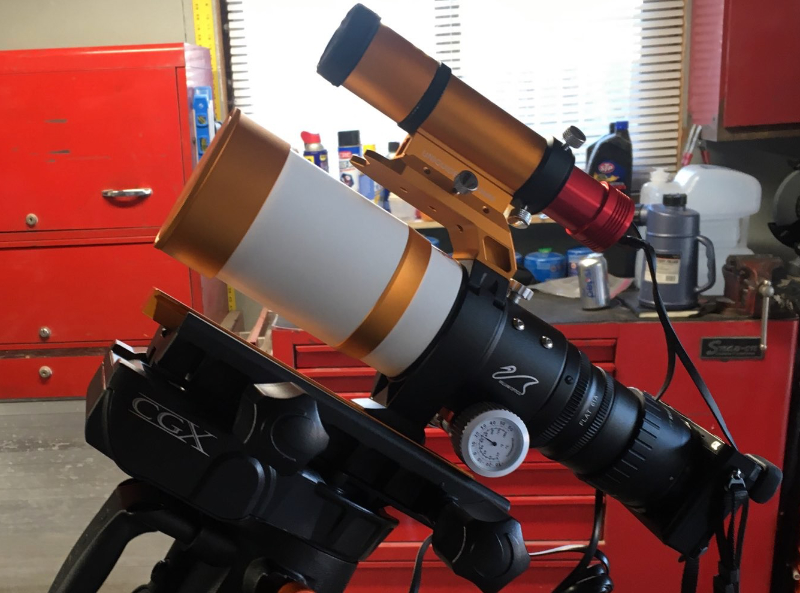
Fortunately there is an inexpensive solution — a guide scope and a guide camera.
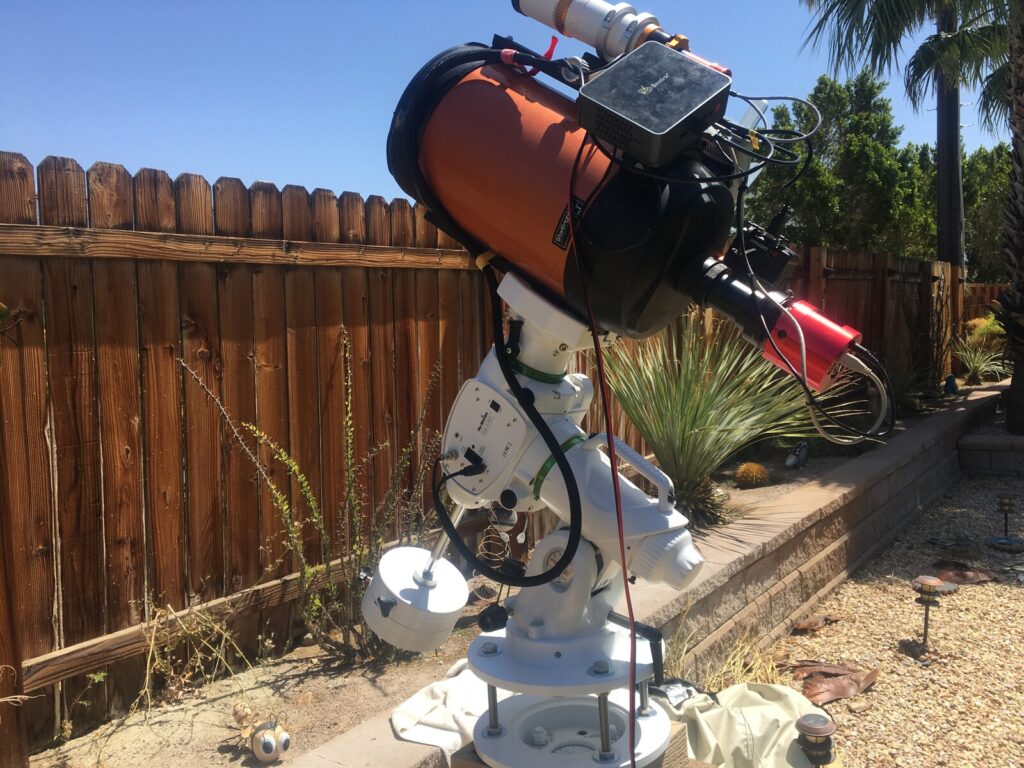
In the picture above there is a tiny telescope mounted on top of the large white scope. Connected to the back of it is a tiny camera (blue & red). This is a guide camera and guide camera.
Using a software program, a picture is taken every 1 to 3 seconds (how I set mine up) with the guide camera. If the center of a star moves at all from picture-to-picture, the software will command the mount to make minute (tiny) changes in position, which means the telescope/mount combination will track any deep sky object accurately.
Telescopes
You can just put a digital camera with a zoom lens on an equatorial mount and take pictures. For most people a better solution is an actual telescope. I have three telescopes:
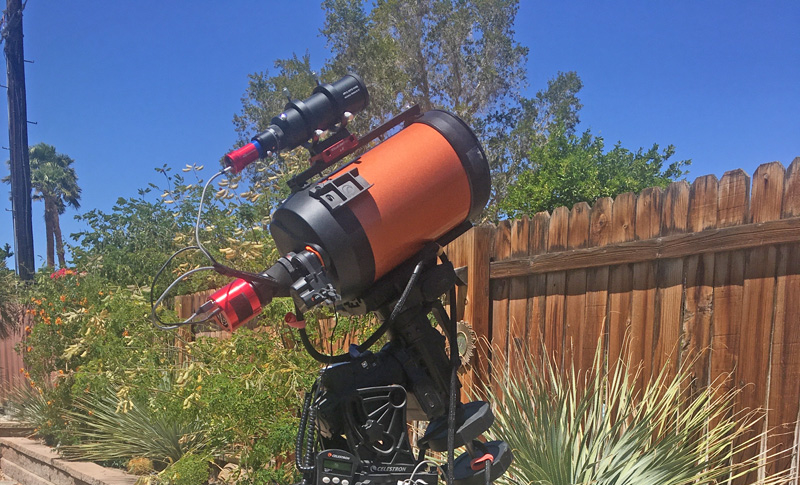
- Celestron C8 (8″ diameter Schmidt-Cassegrain optical tube assembly)
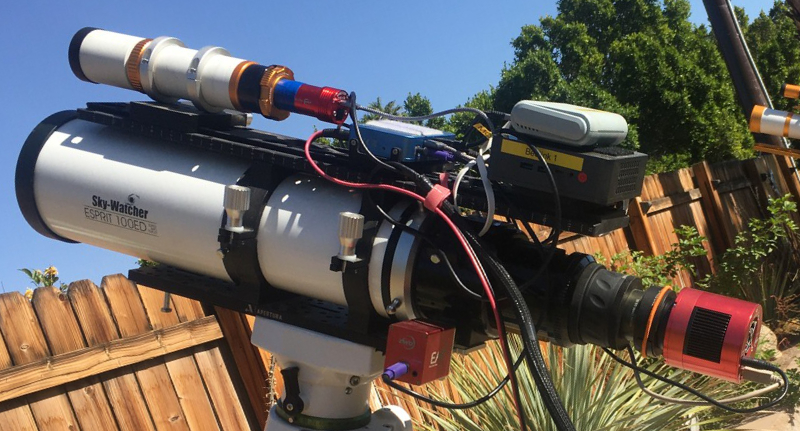
- Sky-Watcher Esprit 100ED (4″ diameter refractor optical tube assembly)
- William Optics Zenithstar 61ii (2.4″ diameter refractor optical tube assembly)
“Why three telescopes,” you may ask. Generally the greater the diameter the more zoomed in the image is. What scope I will use each night is determined by how it will be framed. Below is an example of the three scopes use the Hercules Star Cluster as an example. Using the same camera on each telescope you can see how it will be framed (see below).
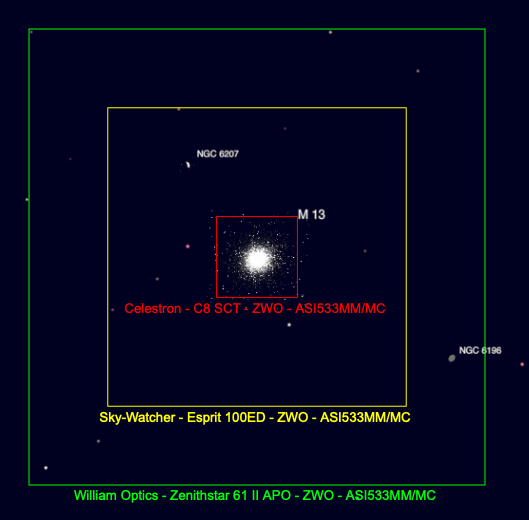
As you can see, the best telescope for this target is my Celestron 8″ Schmidt-Cassegrain.
Cameras
Yes, you can connect a regular compact digital camera to a telescope. Below is my Sony A6000 mirrorless APS-C digital camera connected to the Zenithstar 61ii telescope.
What works better is a dedicated astrophotography camera, designed only to work with a telescope. These are computer controlled. Many (all of mine) have cooler/heaters inside of them, which allows a constant sensor temperature throughout the night (very important). I set mine to 32° F (0° C) every night.
Again you might ask, “Why three cameras?” And just like my telescope, each camera is different and which I choose is dependent upon the target. Below is a simulation, again using my Celestron 8″ Schmidt-Cassegrain and the Hercules Star Cluster as the target.
All my cameras are made by ZWO ASTRO.
- Model ASI071MC Pro
- Model ASI183MC Pro
- Model ASI533MC Pro
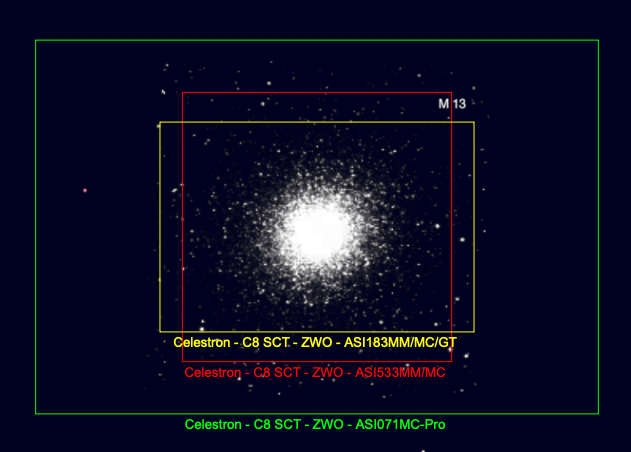
In this case the square ZWO ASI533MC is the camera I would use.
Filters
I always use a filter. There are two kinds of I use.
UV-IR Cut Filters
I use a UV-IR cut filter to block invisible ultraviolet (UV) and infrared (IR) light that the camera sensor captures but optics don’t focus well, which prevents bloated stars, reduces haze/chromatic aberration, and ensures sharper, more color-accurate images by letting only visible light pass through, critical for deep-sky shots.
I use Optolong brand UV-IR filters. They are reasonably priced and I am happy with the results.
Dual Narrowband Filters
Many nebulae are filled with Hydrogen-alpha and Oxygen-III gases, which are very colorful and really need special filters to see the details. Since my cameras are one-shot color, I use dual narrowband HaOiii filter when imaging what are called emission nebulae. The paragraph below is a more technical explanation.
A dual narrowband Ha-OIII filter works by carefully letting only two specific colors of light—Hydrogen-alpha (red, about 656 nanometers) and Oxygen-III (blue-green, about 500.7 nanometers)—pass through to the camera sensor. It blocks almost all other wavelengths, especially light pollution, which greatly improves the contrast of emission nebulae. This makes faint details visible even in bright skies. These filters create narrow “windows” in the spectrum, isolating the key light emitted by glowing nebulae for stunning images with one-shot color (OSC) cameras. Often, these cameras are used with specialized processing to separate the signals.
I will often combine images taken with my UV-IR filters with those taken with a dual narrowband filter. This is usually when my target is an emission nebula. I use two different HaOiii filters:
- Optolong Lenhance Dual-Narrowband HaOiii
- Antlia ALP-T Dual Narrowband HaOiii
Auto Focusers
The focus of a telescope changes from night to night and even during the course of a single night. I use the following:
- Celestron Auto Focuser on my Celestron 8″ Schmidt-Cassegrain Telescope
- ZWO EAF Auto Focuser on both my Sky-Watcher Esprit 100ED and my William Optics Zenithstar 61ii telescopes.
On the telescope the manual focus knob is removed and the small electronic focuser is attached.
Each night when I begin a session the computer issues the command to focus, and the software adjusts the focus much more accurately than I can. Also during the night if the focus deteriorates by a specific percentage (user defined) the computer will stop taking pictures and command the auto-focus routine before continuing to take pictures. The software looks at the roundness of the stars to determine the focus.
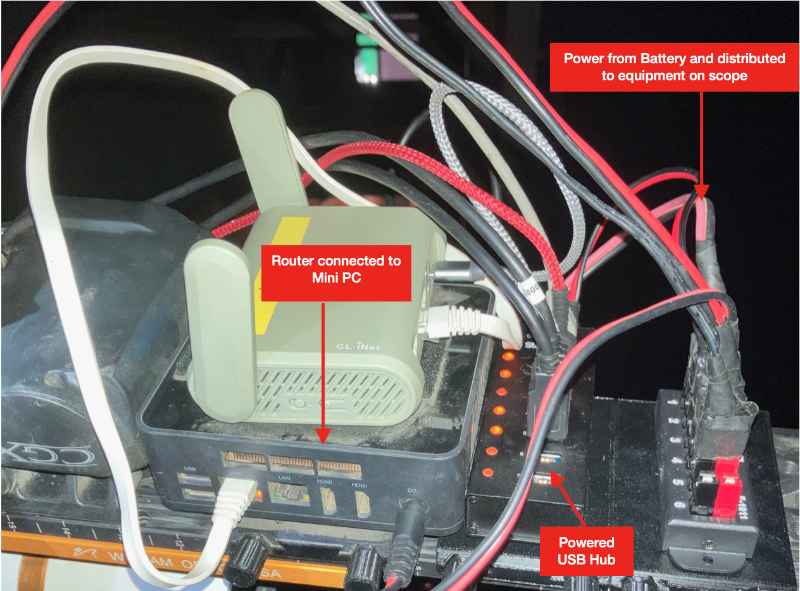
Computer
I have a mini PC connected to each telescope. These small computers do not have a monitor or keyboard connected and I control them remotely.
Both computers are BeeLink GK-55 models running Windows 10 Pro. I have the following programs installed:
- EQMOD is a communications program for my Sky-Watcher EQ6-R Pro telescope that interfaces with other programs for control of the mount.
- CPWI is a communications program for my Celestron CGX telescope mount that interfaces with other programs for control of the mount.
- SharpCap Pro is a program I use to “polar align” the mount to the celestial North Pole. For tracking to work the computer programs assume the mount is polar aligned.
- PHD2 is the auto guiding program I use (as explained earlier).
- N.I.N.A. (Nighttime Imaging ‘N’ Astronomy) — see the detailed explanation below:
N.I.N.A. (Nighttime Imaging ‘N’ Astronomy) is a powerful, free, open-source software suite for Windows that automates and manages complex astrophotography imaging sessions, allowing users to control telescopes, cameras, and mounts for deep-sky imaging.
Wireless Router
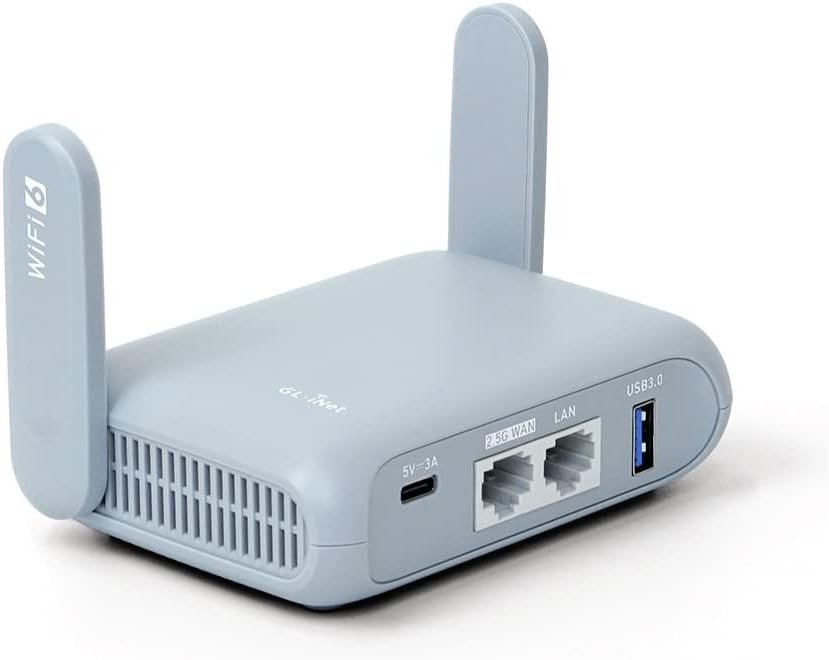
I run each night’s imaging session from inside our house or from inside our travel trailer when camping. At home I do not connect to our wireless internet, but create a Wi-Fi hotspot for each telescope. This just makes things easier for me since there is no internet or cell service in most of the places we camp.
I use a GL-iNet Beryl Router with both mounts.
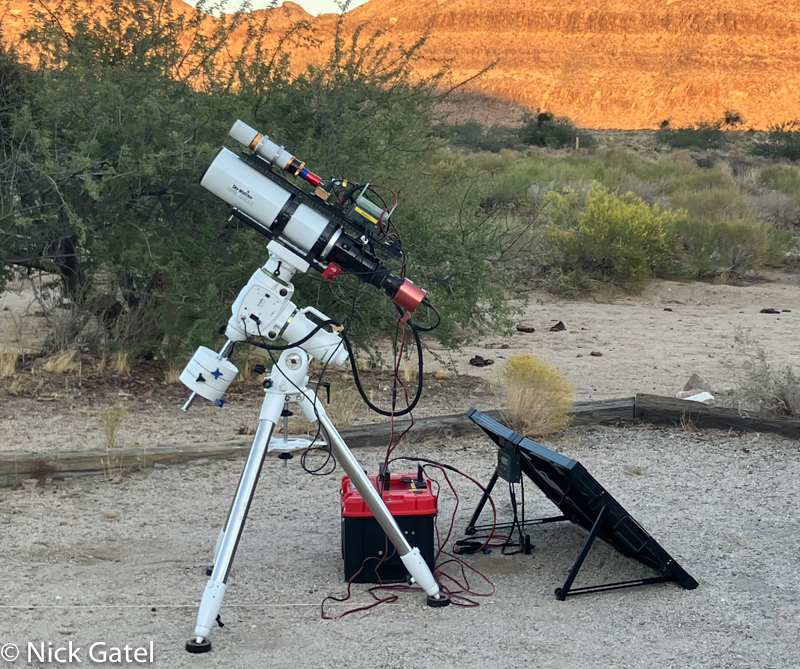
Power
Everything runs off of a 12 volt DC battery. You can read about the power system I built in this post.

Equipment in Action
These are the steps I utilize for night of imaging, whether at home or camping. At home the telescopes are outside 24/7 under weather proof covers.
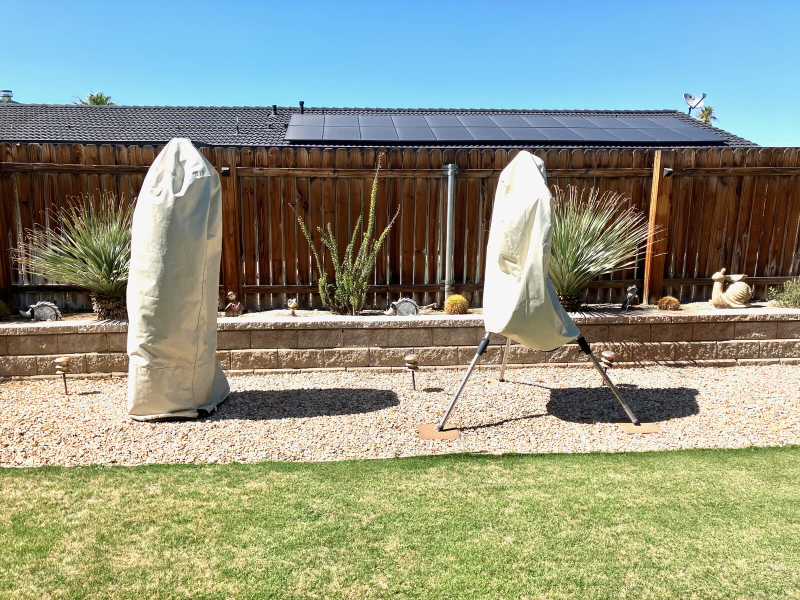
Step 1: Uncover the telescope.
Step 2: Remove lens covers from telescopes.
Step 3: Connect battery.
Step 4: Go inside house or camper.
Step 5: Connect Apple computer or iPad to the Windows 10 computers outside (via the Beryl router hotspot).
Step 6: Open the software programs and connect to the equipment.
Step 7: Instruct N.I.N.A. on what I want done.
- Wait until astronomical dusk to start
- Cool camera to 0°C (32° F)
- Focus the telescope
- Slew telescope to the designated target.
- Take a picture of the designated target and compare to data base to see if it is the correct target and centered.
- If not centered, move the mount until it is.
- Instruct the camera what exposure time and gain setting to use.
- Instruct the camera how many pictures to take.
- Instruct N.I.N.A. what time to stop taking pictures (usually astronomical dawn).
- Turn the camera cooler off.
- Park the mount (return it to the home position.
I can instruct N.I.N.A. to take images of more than one target. Sometimes of a tree is in the way at certain times, I will image two or more targets. Most nights I take images of just one target — that is one target for each telescope.
One N.I.N.A. starts I do not have to monitor my equipment. Thus I can spend the evening with Joyce. Often times, after I have started the imaging sessions, we will be in the living room and she will ask, “Are you taking pictures tonight?”
When it is time to go to bed, I can be assured the equipment will continue operating without my attention. So we go to bed. In the morning I usually transfer the captured images on a small external SSD drive, disconnect the battery and cover the telescopes. I then take the battery into the garage and charge it. When camping I just leave the battery outside connected to the solar panels.