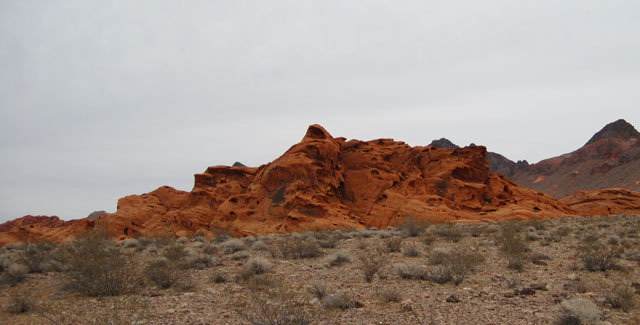
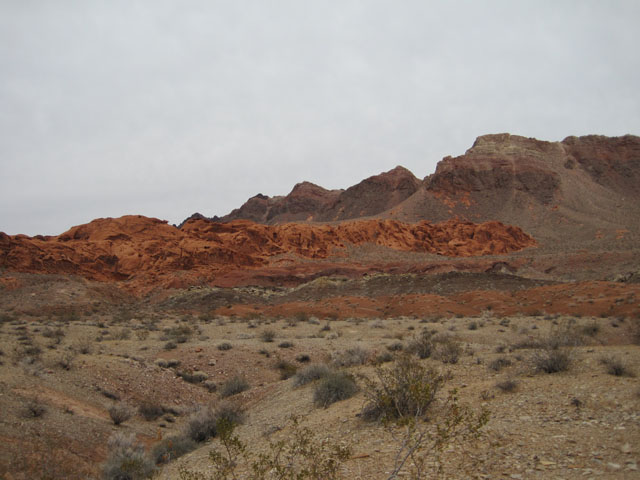
Dad’s Christmas Vacation 2009
For Nicole and Joe
Backpacking Lake Mead Recreation Area
Planning
This year’s Christmas Backpacking Trip was full of variables. First order of business was when. Originally I was scheduled to take vacation the two weeks before Christmas. This changed at the beginning of December, as I had a couple of special projects that needed to be completed prior to Christmas. So vacation was changed to the last two weeks of the year.
As with any trip, the biggest item is where to go. This year rolled out two options. The Spring Mountains above Las Vegas, including a trip to the summit of Mt Charleston (elevation 11,916 feet) was option one. A loop somewhere in the Lake Mead Recreational Area was the other. I would not make the decision until after Christmas, so I brought an assortment of equipment to meet either option.
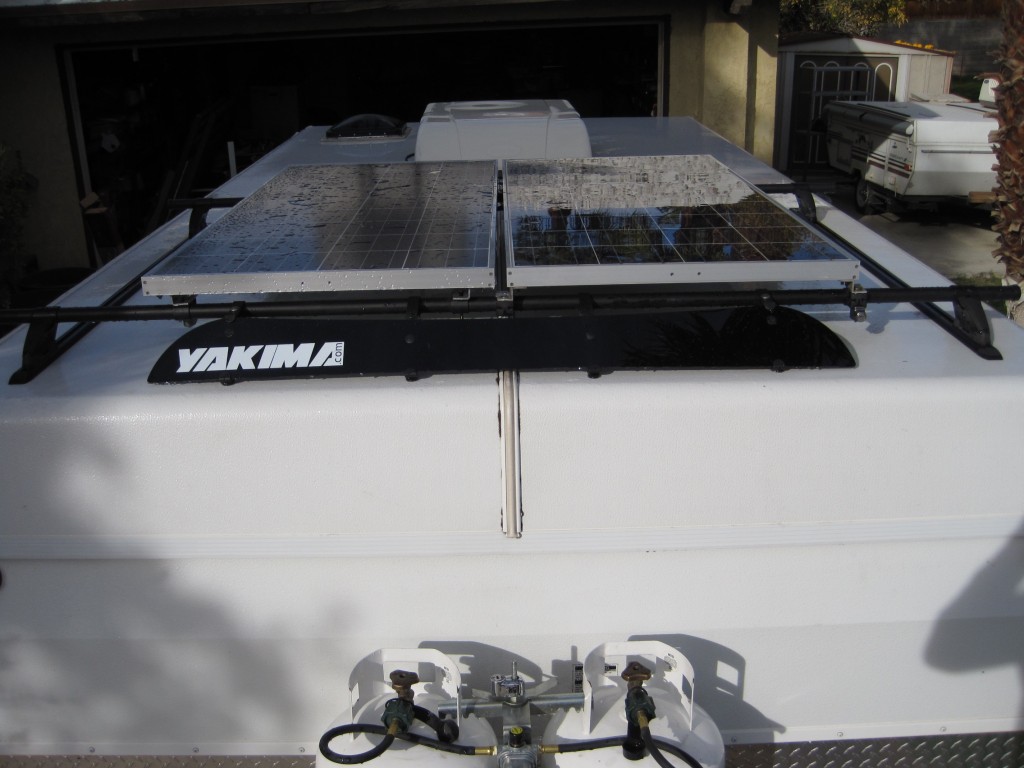
We decided to spend the entire two weeks of vacation in Las Vegas. Actually we would camp at Lake Mead and visit relatives in Las Vegas, which is about 30 miles from the campsite. At $10 per night to camp, it sure beats staying in a hotel. Solar power allows us to stay for extended periods without staying at an improved campground. Our tent trailer’s amenities include forced air heating, shower, bathroom, stove, and an oven among others.
We recently added a second solar panel, bringing our total rated capacity to 250 watts. We also upgraded our battery bank, installing two 6-volt golf cart batteries, which are wired in series to provide 12 volts to the camper and a usable reserve of 205 amp hours.


During the past few years, I have embraced Ultralight Backpacking techniques. My Christmas wish list included a pair of MSR Denali EVO snowshoes, which weigh less than 4 pounds. Much lighter than the twenty-plus year old Sherpa snowshoes in my gear closet at around 5 pounds. It is estimated that one pound of weight on the foot is equivalent to 5 pounds on the pack in energy expended. In addition, the MSR’s are better suited for terrain found in mountains. Unfortunately, it appears that this year Santa invested all his resources in making iPods and iPhones, and Joyce could not find a pair of Denali EVOs anywhere. No snowshoes eliminated the Mt Charleston trip. So it was time to plan a loop in the Lake Mead Area.
This is my methodology for putting a trip together. If interested in an area, start with a large map to identify a potential route. From there, obtain more detailed maps to research/plan the trip. Generally, I try to avoid areas with any people, which normally means traveling cross-country.
Lake Mead topographic (often called “topo”) maps can be downloaded free from http://topomaps.usgs.gov. I started with a 1:100,000 map. I roughed out a 4-day/3-night loop. I would travel through north through the Bowl of Fire, east and then south through Bitter Spring Valley, west through Pinto Valley, west along the shore of Lake Mead, and then north along Callville Wash back to my starting point. Since the route only requires two 7.5 Quad maps, I purchased them (Callville Bay and Boulder Canyon). I like these maps best, if not too many are required for a trip. The trip would cover around 50 miles in 4 days. Actually it would turn out to be 3 full days of hiking. 1/2 day each on days 1 and 4.

Here is the first rough sketch of this trip (above). Numbers indicate the approximate location for each night’s camp. The day prior to departure, the Internet predicted zero percent chance of precipitation for the next 10 days. A good sign. However, lows would be close to freezing, and probably colder the first night. And I don’t trust the weatherman. So I brought a shelter.
Housekeeping & Other Matters
The goal of this trip was solitude with no people, and an enjoyable 4 days. Should you decide to make this trip or a similar one, there are a few things to remember:
- Give someone your itinerary.
- Make sure you come back to the planned check-in spot ON TIME.
- The ground in deserts is often rocky or sand and gravel. So, plan your ground insulation appropriately.
- Water is sparse. Do not plan to find water in any spring, unless you can verify availability. In addition, wild burros spoil springs in many parts of Nevada. They can be a real mess. I started out with 6 liters of water. I am well tuned to my water needs. Given the time of year, the terrain, and length to be traveled, I knew this would be ample for two-plus days. However, other times of the year, I would need at least 6 liters a day to hike in the kind of heat that occurs here.
- Traveling in washes is often necessary. Washes can be dangerous due to flash floods. Flash floods can happen even if it is not raining where you are traveling. The water can originate in areas far from your location.
Day 1
Joyce dropped me off in the late morning on Northshore Drive (Nevada HWY 167) where Callville wash crosses under the road. I gave her a copy of my itinerary, should I not return on time in four days. We agreed that she would pick me up between 3 – 4 pm on Wednesday December 30th.
The air was brisk; perfect hiking weather. Blue skies with a couple wisps of clouds indicated good weather for the coming days. The route started northeast along Callville wash towards the Bowl of Fire. Vehicles are permitted to travel in the wash, but nowhere else. At about 1.5 miles, a small wash intersects from the north and leads to the Bowl area.
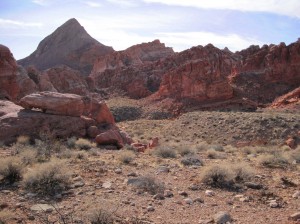
The red rocks of the bowl can be seen from the wash in the background. This area is part of the Muddy Mountains Wilderness Area. Those rocks by the pack are actually light bluish, so the color is correct.

The rock formations are so enchanting; it is difficult to concentrate on hiking. This is where one must be careful. Keeping eyes on the ground when walking, and stop to admire the scenery or take pictures. Since there is no trail through the Bowl, it takes an effort to keep one’s eyes on the route ahead.
The formations here are sculpted sandstone… sculpted by eons of water and wind erosion. About 300 million years ago, this area was sediment at the bottom of a sea. And the pictures do not do the area justice. Close inspection of the formations reveals nature’s amazing skill at sculpture. One could spend days in the Bowl, put I had a schedule that had to be met. And it was not my first visit to the Bowl.
The route would travel north through the Bowl, then turn east towards Bitter Spring Valley. Although it looks flat on the map, Bitter Spring Valley contains numerous
rolling hills with hundreds of small washes dividing them into smaller parcels. It is not difficult walking, but not as easy as it looks on the map! Navigation is easy; just keep heading toward Echo Hills, which is prominent on the map. Eventually, I hit the east fork of Callville Wash again. After a mile or so, I found a side canyon with several “no motor vehicles” signs, so it looked like the perfect route to take. As I entered the mouth of the canyon, there was a huge chain blocking access to any kind of vehicles… just my kind of place. The wash gained elevation for about a mile or so, and I was soon on a large hard gravel plateau. The sun was setting, and it was getting cold fast. I laid out my bed, and cooked a gourmet meal of freeze-dried lasagna. While enjoying a couple of cups of hot chocolate, I watched the nearly-full moon for an hour or so, with my sleeping bag draped around me. Then I crawled into the bag and went to sleep. The temperature would eventually drop into the 20s F.
Day 2
In the morning, I woke to a gray and dismal sky and it was cold. It felt like rain or possible snow. So much for the weatherman. I gradually headed southeast in the general direction of Echo Hills. West of Echo Hills is a large wash that drains north from the pass above Pinto Valley. This wash would take me to Hwy 167, just below the pass into Pinto Valley. Crossing the road, I climbed about a mile until I could see Pinto Valley.

The wash flowing down from the pass was not easy hiking and I moved westward towards a large hill, where I found an old jeep trail that took me to the top of a hill looking down into Pinto Valley.
A pleasant surprise was the number of red sandstone formations at the east end of Pinto Valley. I was expecting dark volcanic rock that is typical in this part of the Black Mountains.
Pinto Valley is a long narrow valley. From the east end of Pinto Valley a wash heads downhill for a few miles to a junction with two other washes, which is located in the center of the valley. The largest wash is Boulder Wash, which flows down from the west end of Pinto Valley, and another (unnamed) wash, which flows from a pass leading down into the Rotary Cove watershed into Lake Mead. Once I got to the junction of the 3 washes, I would head up the unnamed wash.
However, the goal for Day 2 was to camp just before the junction of the three washes. It was still overcast and felt like rain, so locating a campsite on high ground above the wash I was descending was my primary focus as dusk approached.
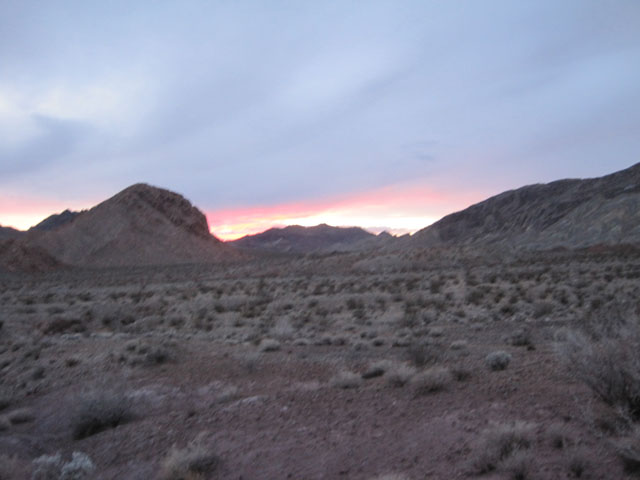
About ½ mile from the junction, was a perfect spot; a small plateau about twenty feet above the wash. In addition, the plateau was one of the few areas along the entire length of the day’s hike that was not covered with rocks. It was getting windy, so I decided to set-up my tarp and cook dinner as soon a possible. I figured there was a good chance of rain, but the setting sun gave me hope for good weather the following day.
Dinner was freeze-dried Macaroni and Cheese. It was not as good as the previous night’s dinner. I ended up eating only about half of it. After dinner, I sipped a couple of cups of hot chocolate, while sitting in the comfort of my shelter, listening to the wind beating against the sides, and watching the occasional moon beam shooting down through a rare gap in the cloud cover.


Day 3
Although there was a steady wind during the night, I slept well. Surprisingly, there was no rain. The morning sky was blue with a few white clouds. I cooked my usual breakfast of two packets of instant oatmeal, along with a cup of instant coffee. It does not get much better that cooking over a tiny stove in the wilderness, as the sun rises. Well, okay… not cooking, but boiling water.
As the day progressed, the cloud cover would increase during mid morning and by late afternoon would become all blue with not a single cloud at all.
Today I would hike up no-name wash, from the three-way junction of washes in the center of Pinto Valley and then down into Rotary Cove on Lake Mead. From there, I would generally follow the shore of Lake Mead, west to Finger Cove. I had some concern about traveling from Rotary Cove westward, but more about that later. For now, I had to hike up to the pass. Actually, it was easy hiking along no-name wash, with some nice rock formations.

Moving downhill towards the lake, I got into a rhythm and moved steadily without an awareness of my surroundings. After a while, it dawned on me that I was traveling in a state that was oblivious to environment around me. So I stopped to take inventory of my surroundings. To my right was a small plateau overlooking the wash. I sensed something was watching me, and then it dawned on me why I backpack…
Why I Backpack…


Big Horn Sheep are elusive animals and are sensitive to any encroachment in their territory by man or other animals. They are infrequently seen, and they inhabit remote mountainous areas that normally feature cliffs and other inaccessible terrain. They graze on steep hillsides that are close to cliffs, which allows for quick escape. They obtain enough water from plants, so they only need to drink from permanent water sources every few days. They are amazing climbers, adept at traversing cliffs and traveling on ledges only inches wide.
After the rush of excitement the Big Horn herd gave me, I turned my attention back to the hike. It was easy-going. This picture shows a 200-foot tall sand dune (it is the white patch in the picture).
I would need to get to the dune, which is on the west of Rotary Cove; opposite the side of the cove, I would reach at the bottom of the wash. The Topo Map showed that during normal lake levels, it would be very difficult to get to the dune by traveling along the shore. Since the lake is at its lowest level in history, it might be possible. The Topo Map also shows the elevation lines of the area which is normally under water, and that was not very encouraging either. However, if I were to travel out of this canyon before reaching the lake; over to the next canyon, which drains into Rufus Cove then, I would be fine for the rest of the trip. There is a 60-foot dry waterfall in that canyon, so one needs to cross in front of the waterfall if possible. Otherwise, if the crossing is made above the waterfall, it will be necessary to cross into a second canyon and then descend down to Sandy Cove.
Below is the topo map showing Rotary Cove and the route options (green and blue lines). No matter which route I took, I needed to hike down to the lake to get water. Since I would hike past the optional route, the plan was to try to hike along the shore. If it proved too difficult, I would simply go back and take the easier route. Since I was hiking alone, I would not take any unnecessary chances.

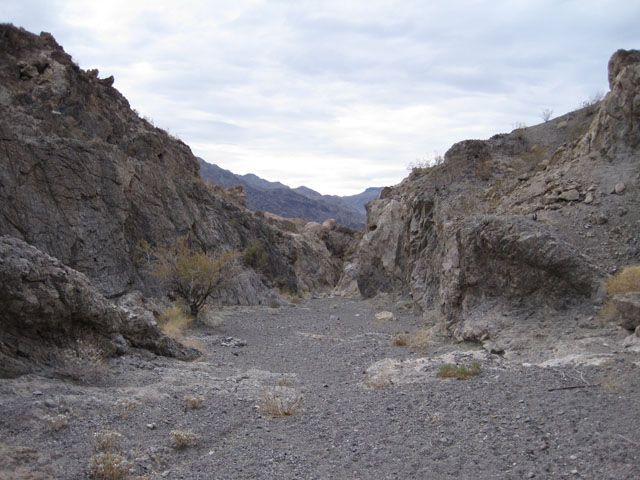
The canyon begins to narrow as I approach Rotary Cove.

Since only had one liter of water left, and it takes 4 hours for water purification tablets to completely purify cold water, I needed to refill, no matter what route I was to take to move westward along the shore of the lake. It was just about noon anyway; so perfect timing for lunch and a little strategy session.

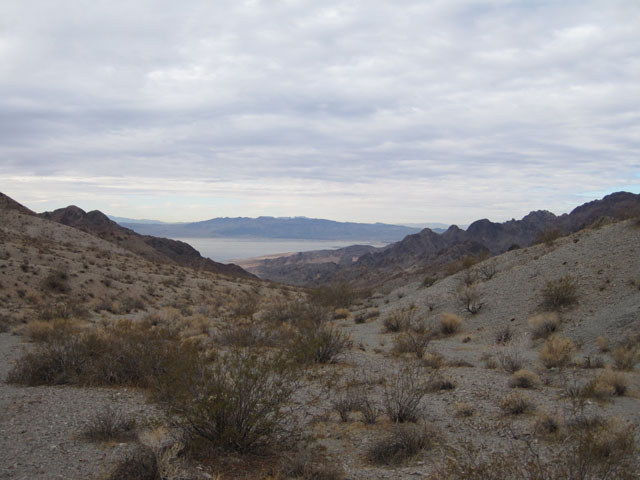
After lunch, I climbed a hill to scout my options. Here is the view from this hill, looking south across Lake Mead. You can see that the lake is down about 100 feet in elevation from its all-time high, and around 70 feet lower than the historic normal average. The shoreline at Rotary Cove is probably at least ¼ mile further out than average.
With the low water, Rotary Cove has several “fingers” in the water, which run back to a steep hill. In between each of these fingers, the lake fills the space. Although I could not see all the details of each finger, it looked promising to work my way up and over each finger, until I reached the sand dune. I would need to walk the ridge of each finger towards the lake, then descend down the side of the finger towards the back where it connected to the hill, walk around the edge of the water, and then climb up the next finger; working my way up and down; forward and backward on each finger. The hill connecting the fingers was too steep to climb. The other option was to hike back up the canyon and climb over to the next canyon above Rufus Cove. With hindsight, I recommend this route.
The route over the fingers went well until the last one. The last finger was just opposite the destination sand dune. As I descended this last finger, and worked by way back to the hill, I saw that back of the finger was a straight cliff into the water. No way to work around it. However, it looked like that back of this finger did not connect to the hill, but to another canyon. However, I could not get an angle to see for sure. In addition, I had moved far enough around the hill, that it looked like I might be able to climb up over into this little canyon, if it existed. I would need to climb up to a pinnacle above me to survey my options.
Here is a picture I took later. Above the white bathtub ring is a dark outcropping. I climbed up through the gap on the right side of the outcropping. Definitely Class 3 stuff. On the other side, was a canyon leading to the finger. However, I could not see how far back the lake reached into the canyon. If it was too far back, the canyon wall on the opposite side was too steep to climb. If it was not too far back, it would be an easy walk to the sand dune. Also, from the gap, it was too steep and loose to climb down into this new canyon without ropes. There was a sheep trail along the length of the outcropping on the backside. I would need to take this trail along the back just to see if I could get down into the canyon. Even if I descended into the canyon, I still would not know if I could get to the sand dune. I would have to climb down into the canyon and walk to the lake to see if I could continue around to the sand dune. So I took the trail to see if there was a route down to the canyon. I was now at the left side of the outcropping in the picture, but on the backside. There was nice chute going down. Once on the canyon floor, I walked back to the lake finger, and there was a clear shot on the other side to the sand dune. Knowing what I know now, I would have backtracked and climbed over to the Rufus Cove Canyon. Would have been quicker and easier.

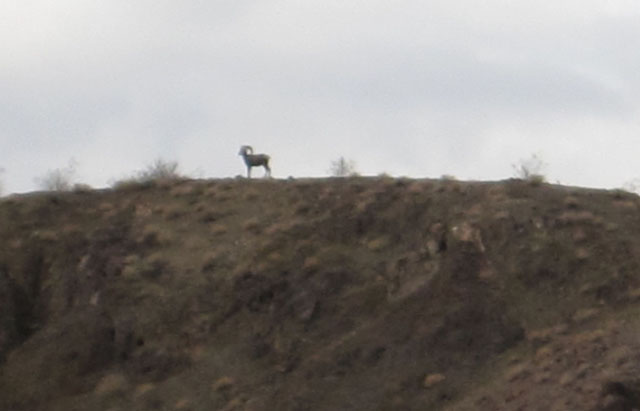
While I was working my way around the outcropping, I noticed this fellow above me on the ridge across the canyon. He just stood there watching.
View from the Sand Dune looking back at Rotary Cove. I had traversed most of the bathtub ring in the picture below, from right to left.

View from the sand dune looking across the ridge down into Rotary Cove. Going right to left, I had traveled along most of the bath tub ring.
Turning 180 degrees from the point where the picture above was taken, the picture below shows the ridge connected to the tall sand dune and looking westward across Mead. From here, the route would be down this ridge to the shore of Lake Mead. I would then be traveling along the shore until Finger Cove.
Although the Topo Map shows most of the shoreline ahead to Finger Cove as sand, about 50% of it is rock. The shoreline along most of this route slopes down to the Lake. The easiest hiking is to travel about midway in the bathtub ring. The action of the lake over the years has actually created a terrace-like effect. The terraces can be up to two feet wide, and easy walking. When you come to a terrace that has been washed out, you can move up or down to the next level terrace. In addition, the terraces are not continuous, as washes or small canyons, which require hiking inland, across, and then back to the shoreline, frequently interrupt them. When you get to Fire Bowl Cove and Finger Cove, their slopes are very rocky and unstable. Not too difficult, but one needs to take their time to avoid slipping or injury.
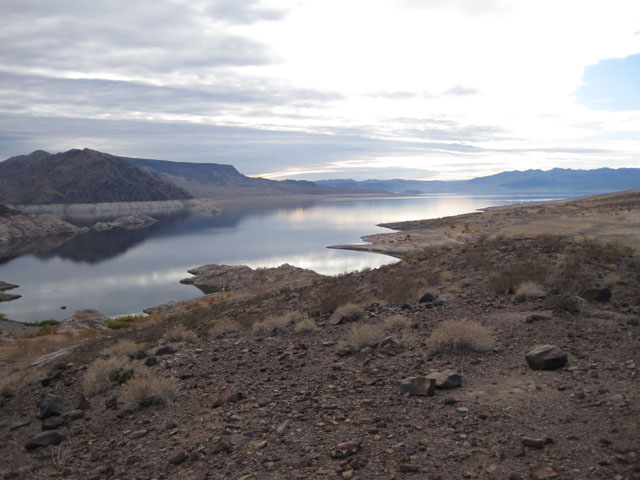
Finger Cove
I arrived at Finger Cove around 4 PM. There is a small section that has a sandy shore, although somewhat sloped. However, it is terraced and very easy to find a level spot. I decided to sleep under the stars, since they sky had cleared and a full moon was rising.

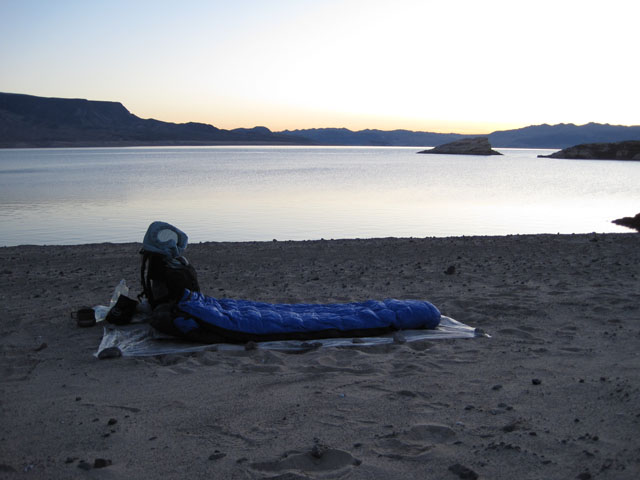
Here is campsite for the night. Notice how is parallel to the shore, using the terrace to ensure a level bed. Even a slight incline leads to a restless night’s sleep for most people. It is important to choose your site carefully to account for terrain, weather and of course a view. Whenever possible, I sleep without any shelter so I can enjoy the night sky.
After setting up the night camp, another gourmet meal was prepared. Tonight would feature freeze-dried spaghetti in meat sauce. Again a couple of cups of hot chocolate would accompany the viewing of another glorious sunset. Wished I had brought some wine, but it would have added additional weight.
Day 4
Completing the Loop
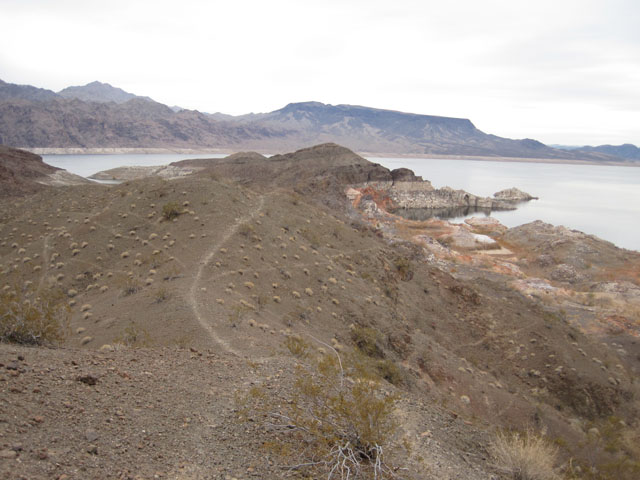
This would be a leisurely day. I needed to return to the Junction of Callville Wash and Northshore Drive between 3-4 PM where Joyce would pick me up. The plan was to hike along the side of Finger Cove, until I could cross over to the ridge on the other side. The ridge also looks down on Callville Bay, and creates the eastern boundary of the bay. I would continue on the ridge until I was north of the high-level watermark of the bay, and then climb down a canyon. The picture above shows the route along this ridge. The trail shown is a Big Horn Sheep trail, not man-made. In fact, I did not find a singe shoe print anywhere. If you look at the left side of the picture, you can see a sliver of Finger Cover. The right side shows the terrain of Callville Bay, which is now exposed due to the low water level. It would be extremely tough to try to descend into this area. The bay does become flat further north, but I would not drop into the now dry section of the bay due to over growth of shrubs and such.
Hiking around the now dry part of Callville Bay is not easy, so I would travel along this ridge until a canyon would drop me beyond the point of the high water mark of the bay. From here, I would walk outside the high water boundary of the bay, until I reached Callville wash, which flows from the north. Once I got to the spot where Callville Wash flows into the bay, I would follow it to my starting point.
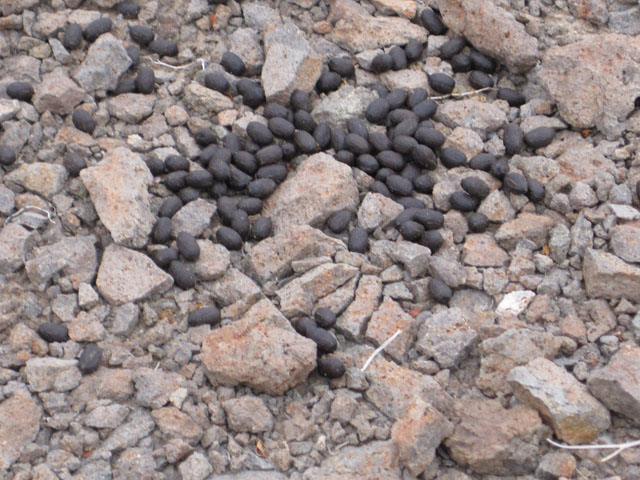
Most people never get to see a Big Horn. Here is what their droppings look like. Find a lot of this, and eventually you may see one. In an emergency you could probably use it as fuel, although I have never tried it. The ridge was covered with the stuff.
Callville Wash
The wash is mostly wide and flat. It is also open to 4WD drive vehicles. Although, there are a couple of spots that require skillful 4WD drivers to pass. Since it was Wednesday afternoon, I didn’t expect so see anyone in the wash… or perhaps it was just wishful thinking.
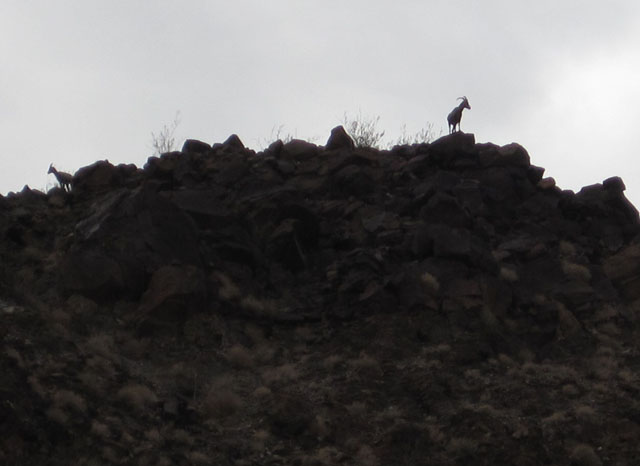
As I traveled up the wash, I found these gals watching me. If you look closely, you will see two Big Horn sheep on the ridge. Below these two, this fellow was also watching. Hard to see… look at the lower center of the picture below.


Further up the wash, I turned around a took a picture of the ridge the sheep were. I felt good about seeing them, as it is easy not to pay attention to your surroundings on this kind of hiking terrain.
And turning around looking up the wash (above), is where I am heading. The rose-colored peak in the far distance (top right) is just behind the spot I would met Joyce. I got there right at 2 PM, and she picked me up at 2:30. She was the first person I had seen in 4 days. All-in-all a great adventure!!
Ultralight Backpacking
Ultralight Backpacking is a process of evaluating equipment and using gear made from the lightest and most durable materials possible. It starts by evaluation of the “Big 3” weight items: pack, sleeping, and shelter. Most backpacks are heavy, because they are designed to carry heavy loads. As you lighten your equipment, you can use a lighter pack. And as you lighten your pack, you no longer need heavy hiking boots. I now hike in shoes designed for trail running or cross country racing.
For example, I used to carry my gear in a Gregory Whitney 95 (6lbs 9oz) or a Kelty Serac (7lbs 2oz) backpack.
My 3 season Sierra Designs Clip Flashlight 2 tent, weighs in at over 4lbs with the ground sheet.
And my older heavy down sleeping bag is close the 4 lbs also.
The total of these 3 items is 15lbs before adding any other gear. The total of all my gear (excluding consumables) for this trip was 7lbs 15.4 ounce, which is almost as much as my old packs empty! In addition, I carried several heavier items to handle the cold temperatures. Last spring on a 3-day trip, the total weight of all my gear was less than 4lbs.


