Hey, this is a backpacking and camping website, right? So, what’s the connection between So, what’s the link between backing up your computer and these cool hobbies?
Most of us snap pictures during our backpacking and camping trips. Some folks even record videos. Others bring along music and other stuff to keep them entertained.
You know, we create a whole lot of digital stuff these days – photos, videos, computer files, music, and movies. Any data stored on tablets, smartphones, or computers is fair game.
Now, here are some questions to ponder:
Do you back up your data?
If you do, does your backup plan sound solid?
This post is all about backing up data, which raises even more questions.
Have you ever thought about how valuable your data is? Or how catastrophic it would be to lose all your computer files, pictures, videos, and other media? Most people don’t think about these things until it’s too late. And guess what? Less than 10% of people back up their data! Services such as One Drive or iCloud are popular today. I use iCloud and like it. Apple’s iCloud is a cool service that syncs your stuff across devices, but it’s not a backup strategy.
I’ve been using computers for over four decades, and I’ve never lost a single bit of data. I’ve had my fair share of media failures, from computers to disks to tapes to CDs, but I’ve always made sure to back up my data. And let me tell you, it’s been a lifesaver! In this article, I’ll share some of my best practices and insights into managing my massive data collection, which currently sits at over 10 TB (or 10,000 GB) of files.
Now, I’m not a computer expert, so my explanations might not be perfect. But I’ve learned a thing or two over the years, and I’m excited to share them with you.
Back in the 1980s, I had an early IBM-compatible personal computer with two 5.25-inch floppy disk drives. One drive loaded the program, and the other stored data. The most common floppy disks could only hold 360 KB of data.
When reasonably priced consumer hard drives became available, I bought a 10 MB hard disk drive, thinking it would be enough storage for the rest of my life. But guess what? I was wrong!
Our digital world has changed a lot since then. Here are some examples:
- A raw image from my 2012 Sony RX100 camera is about 24 MB.
- My astrophotography camera produces a 42 MB file.
- My 2007 iPod had a 160 GB hard disk drive.
- Microsoft Windows 11 uses almost 70 GB of disk space.
- An Apple computer’s operating system takes up about 25 GB, and other required files exceed 25 GB.
- My iPhone SE Gen 3 has 128 GB of storage.
Most of us generate a lot of data with our computers and consumer devices. So, to avoid losing all your precious files, an effective backup strategy is a must.
The 3-2-1 Backup Strategy
This method suggests having:
- 3 copies of your data
- 2 copies on different devices
- 1 copy offsite
Creating Copies
One copy is usually on your computer, tablet, or smartphone. This is the “original data.”
The other two copies can be on floppy disks, external hard drives, USB sticks, NAS, or online storage.
Offsite Storage
Offsite storage can protect your data from burglaries, floods, earthquakes, lost electrons, hurricanes, tornadoes, power surges, and a host of potential calamities. Ah, perhaps I’m being a little dramatic or even paranoid. But the possibility of losing data that is stored in one location is real.
Offsite storage should be away from your home or office. Storing it at the next door at a neighbor’s house might be risky during natural disasters.
Physical backups at remote sites can be inconvenient if you aren’t disposed to updating them up often. Online backup services offer frequent backups, making them a convenient option.
The 3-2-1 backup strategy is simple. But it might not be so simple unless you give it some thought and take action.
Common External Storage Devices
External drives and Network Attached Storage (NAS) are the two most common and recommended storage devices.
External Hard Drives
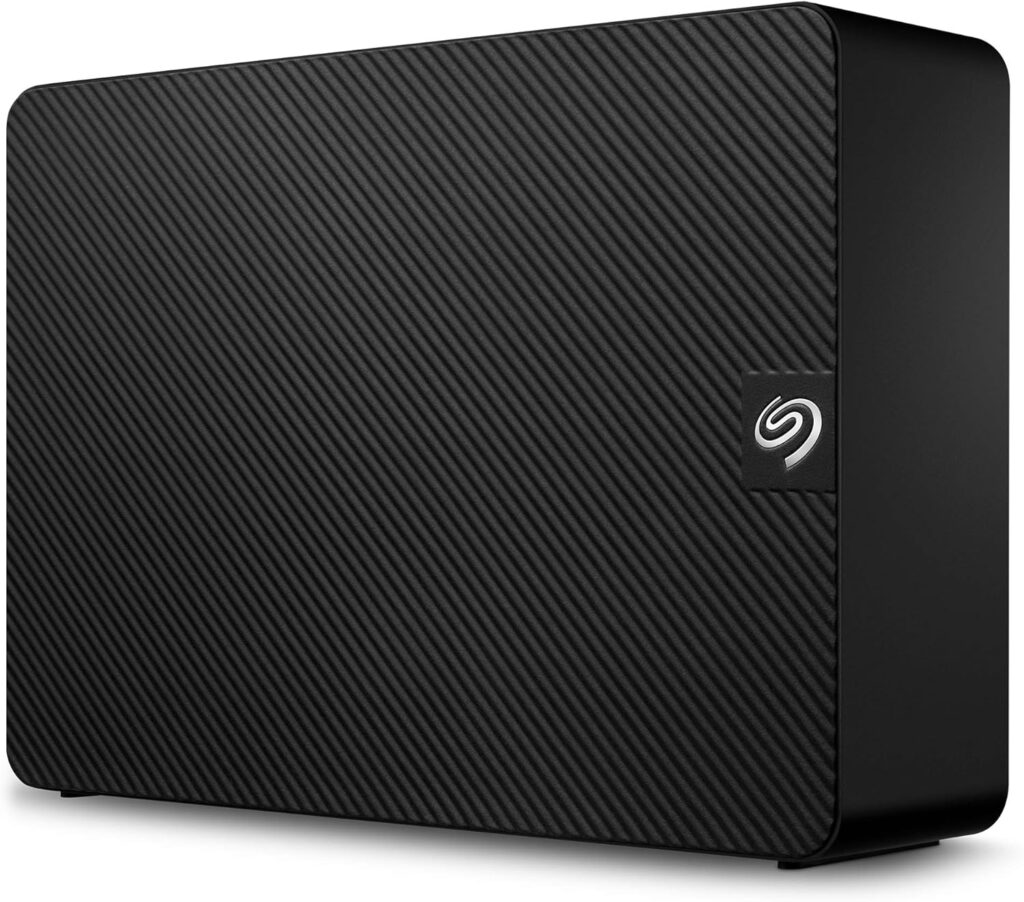
External hard drives that you plug into your computer’s USB port are super common. Mechanical drives (HDD) use spinning disks, while newer Solid State Drives (SSD) use flash memory. SSDs are faster, more reliable, and a bit pricier than HDDs.
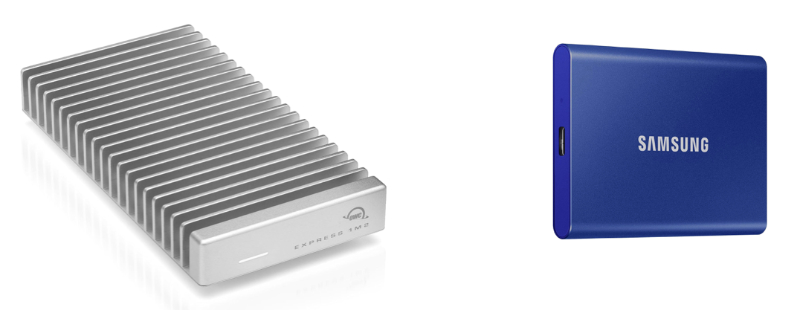
HDDs are bigger, bulkier, and heavier than SSDs. Nowadays, they’re not commonly used in computers, tablets, or smartphones. Early Apple iPods used HDDs. HDDs aren’t outdated and still have a purpose for data backup.
I use both HDDs and SSDs and will explain why and how later in this article.
Network Attached Storage (NAS)
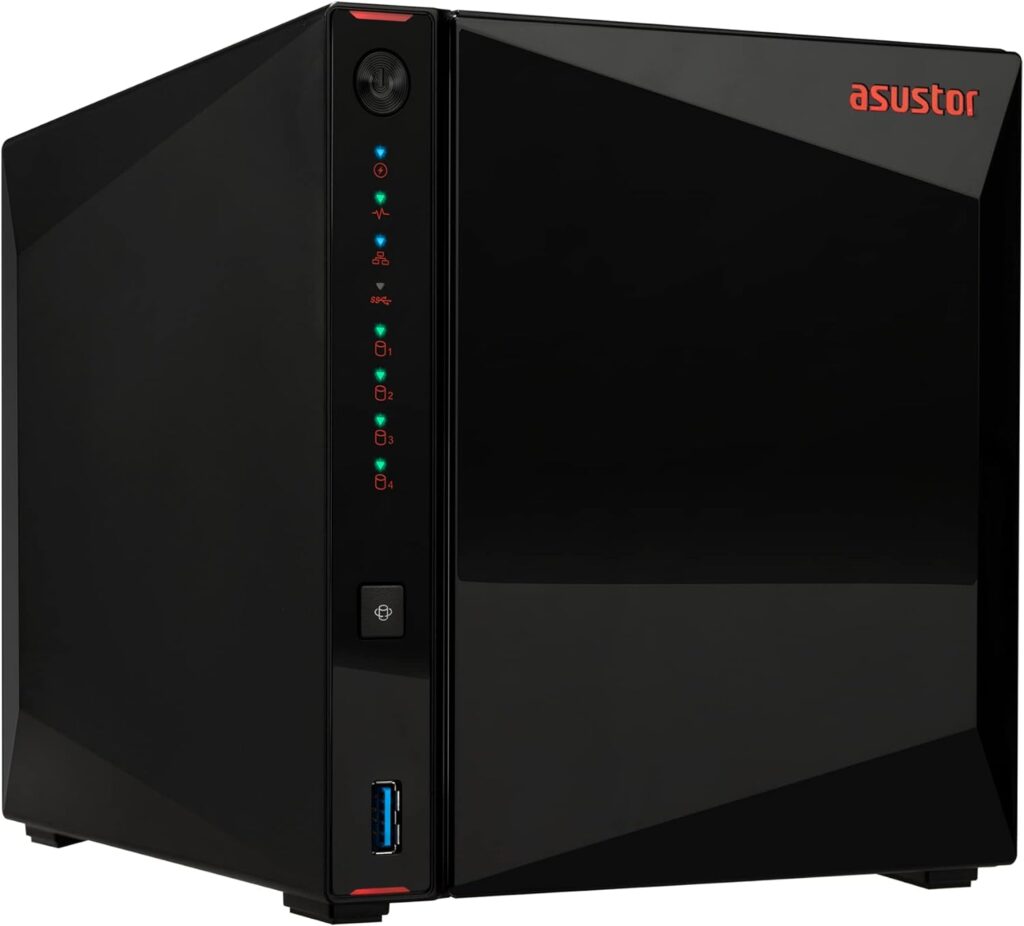
Network-attached storage (NAS) devices are handy gadgets that connect to your home Wi-Fi network and let you share files and folders across multiple computers and/or devices. They’re like mini computers that you can plug into your router.
NAS devices usually have their own processors and operating systems, so they can run their own software and applications. If you only need one hard drive or solid-state drive (SSD) for your NAS, it might be cheaper to buy an external drive instead. But if you want to expand your storage capacity, you can add more hard drives or SSDs to your NAS. Some NAS devices even have bays that you can use to add multiple drives, and you can even combine them into larger drives.
Let Me Tell You About My Tech Setup
I’ve got four personal computers, plus my digital cameras, iPhone, iPod, and two iPads. I know, I know, it might sound a bit over the top, but hear me out!
My Apple Computers
I have two Macs: a 2013 MacBook Pro laptop and an Apple Mac M1 Studio desktop. They both have a 500 GB SSD, and guess what? They mostly have the same files.
Apple Studio M1 Max
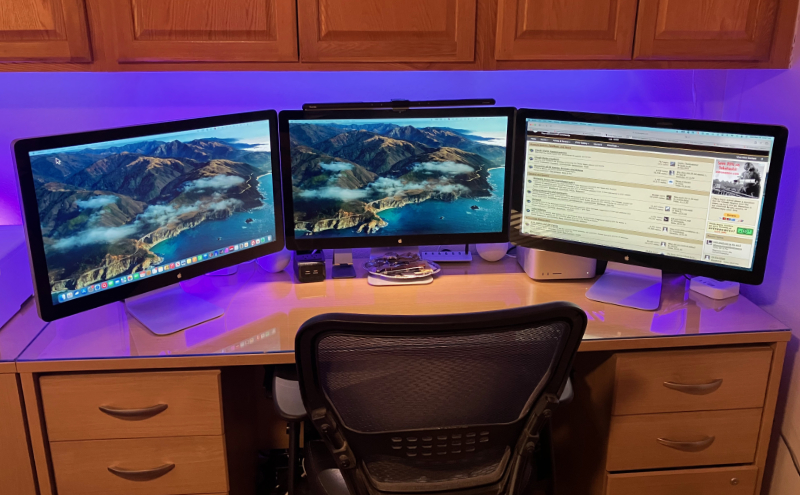
My desktop computer is a beast! It’s way faster than my laptop at processing astrophotography images, and it even has three 27” monitors, so I can multitask like a pro. Plus, it’s perfect for managing our finances because I have so much space on my office desk.
2013 MacBook Pro Laptop 15”
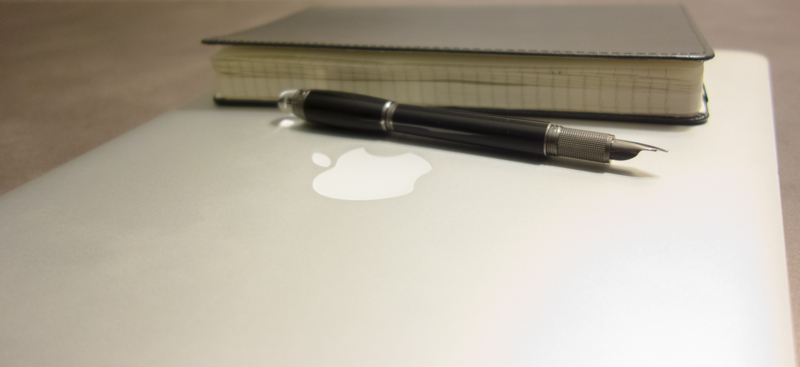
I’ve had my trusty laptop for over a decade now, and it’s been a total lifesaver! It’s been running smoothly, with only a minor battery replacement a few years back. Unlike my past Windows computers, it’s been a reliable companion.
Guess what? The software and files on both my laptop and my desktop are exactly the same! It’s like having a secret twin computer.
At home, I use my laptop for quick tasks like checking emails and browsing the web. When I’m traveling, I take it with me to do online banking and remote deep sky imaging at dark sites. I want to have all my files and documents in one place, so I’m glad I have both computers with all my files on both of them.
My Mini PC Computers with Microsoft Windows
I’ve got two BeeLink mini PCs running Windows, just for my telescopes. Every night, I take pictures with two telescopes, each with its own computer controlling the mount, cameras, and electronic focuser. These computers do all the heavy lifting — they move the mount, find targets, focus telescopes, control cameras, and turn everything off before sunrise.
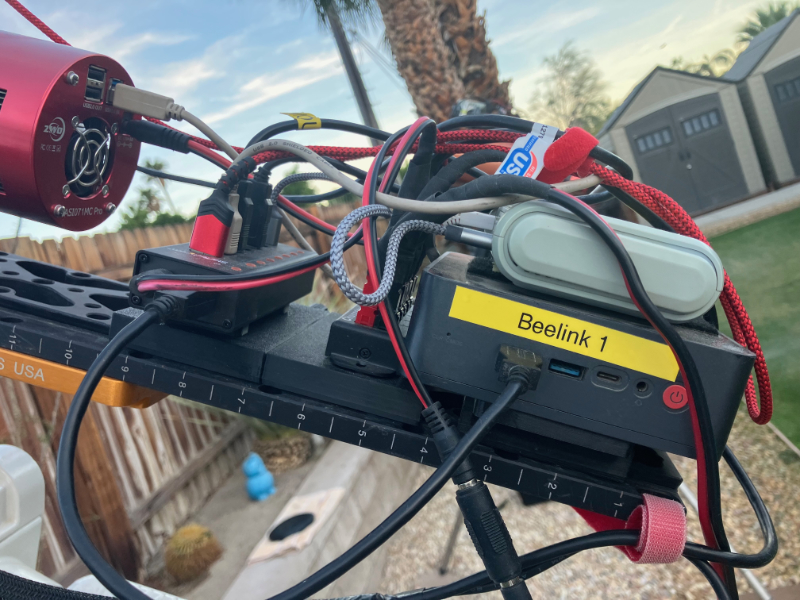
I often take a whopping 30 GB of astrophotography images in a single night, which means I have a lot of data to manage.
Since these computers don’t have monitors, I can remotely view and control them from inside our house (or trailer when camping) using my laptop or iPad.
I’m a data creator, and I take a lot of photos, from my camping and backpacking trips to everyday stuff at home, and even my astrophotography deep sky objects.
Every morning, after I’ve taken some deep sky photos, I copy the new files to a portable SSD and transfer them to my Mac Studio desktop computer (or my laptop if we are camping). I don’t back up these mini PCs, which are never connected to the internet or updated unless I want a newer version with new features. The software on each mini PC is the same, with only the programs I need for astrophotography.
I don’t back up the data on these Windows computers because I transfer the files daily to my Mac Studio. I’ve made bootable clone drives on USB flash drives in case of failures with these inexpensive mini PCs.
Here’s my backup strategy for the Apple ecosystem. This isn’t meant to be a tutorial, especially since I’m not an expert. I hope to share my methodology for figuring out what I need.
Apple iCloud is not a Backup Strategy
There are many cloud sync services today. They’re similar and two popular ones are Microsoft One Drive and Apple iCloud. I use iCloud.
Apple iCloud is a file syncing service, not a backup service. You can access your files through iCloud.com, but it automatically syncs them across all your devices. If you delete a file on one device, it’s gone forever on all your devices and iCloud.
Backup services like Backblaze only copy the changes you make to your files, so they save space. Apple iCloud doesn’t do that. Even though it has some limitations, I still use it. For example, when I use Quicken on my Mac, the latest version of the file is always available on my other devices. But I do need to connect my laptop to the internet for a short while to make sure the latest data syncs.
Apple’s free Time Machine provides incremental backups, but it’s only available on Macs and you need to set up storage on an external or network drive. I’ll tell you more about Time Machine later.
The best part about iCloud is that all my pictures, data files, including Apple’s suite of “office” programs (Pages, Numbers, and Keynote), work on all my Apple devices. For instance, I started writing this article on my Mac Studio while waiting for my astrophotography program to stack images. I later worked on it on my laptop and now I’m finishing it on my iPad Pro.
Any stored file, like a PDF on my laptop, is accessible on my Mac Studio, iPads, and iPhone. But iPads and iPhones need internet access (Wi-Fi or cellular) to open many of the files, which are stored in iCloud.
As of today, Apple accounts come with 5 GB of free storage. For $2.99 a month, you can get 200 GB of storage. Right now, I have 39 GB of data stored on iCloud.
I need more storage than iCloud offers.
My Data Storage Needs
I’ve got a bit of a data storage dilemma. I have around 10 TB of data to protect, and it keeps growing, especially with those astrophotography images. My Apple computers have 500 GB internal drives, but I often need over 300 GB free just for temporary storage when I’m working with my astrophotography files.
I love Apple computers, but I’m not a fan of the fact that you can’t replace the internal drives. When you’re buying a computer, make sure to consider the drive’s capacity so it can meet your current and future needs.
I’ve found that 500 GB drives work well for me since I don’t need much local storage. But I do need a lot of external storage. Here’s what I keep on each drive:
- Everyday personal files (financial data, emails, texts, etc.) – About 50 GB
- Archived personal files (includes 200GB of photos) – About 1 TB
- Music – About 70 GB
- Movies & Videos – About 4 TB
- Astrophotography – About 5 TB
I keep all my data on separate external devices by type. Each drive stores specific data. There are 9 external USB drives connected to my Mac Studio computer, plus a 14 TB Network Attached Storage (NAS) unit.
Ten external drives may seem excessive, but it makes sense when explained further.
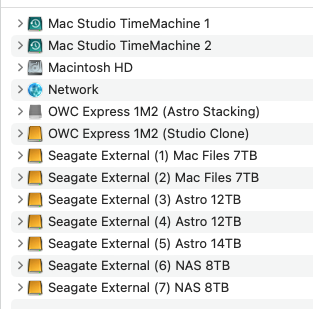
I’ve included the screen shot of all my external devices because I will be referring to them as I discuss my methodology for backups. It helps to name external drives as I have, to make it easy to remember what is stored on them.
Apple Time Machine
Time Machine is a fantastic backup solution for Mac users. It automatically copies all your computer files to an external drive during the first backup. Then, it keeps backing up your files as long as your computer is connected to the backup drives. Time Machine can back up to any external or network drive that’s connected to your computer.
I have two 8 TB external drives, and I’ve divided them into 1 TB and 7 TB volumes. The 1 TB volumes are just for Apple Time Machine backups, while the 7 TB volumes hold all my archived data and current files. This way, I have four copies of my computer’s original data on two external hard drives — however we can’t consider these as actually four copies — we need to think in terms of devices! If one of the drives fails, then all the data on that drive is gone.
Unlike iCloud, Time Machine does incremental backups. It automatically backs up your system files, applications, and personal data every hour, day, and week. It even saves snapshots of your computer at any point in time, so you can always go back to a previous version. If you make a lot of changes to a file, you can restore it to its original state by going back to a specific date in Time Machine.
I set the size of the Time Machine volume to 1 TB on each drive. When it’s full, it automatically deletes the oldest files as it writes new ones. If you have extra space on the external drive, you can easily increase the volume.
Time Machine can only save to external drives or Network Attached Storage devices, not online services. You can’t copy or move Time Machine files to another drive. If you want to completely restore your computer, you’ll need Apple’s Migration Assistant, which is included on all new Apple computers.
Apple’s iCloud and Time Machine have some really cool features, but they also have some weaknesses. If you’re only relying on them (or similar solutions) to protect your data, you might want to think about other options.
Backing Up Your Data
Relying solely on iCloud and Time Machine (or similar solutions for Windows machines) can be risky. A better option is to use a 3rd party backup software application in addition to these built-in backup solutions.
Carbon Copy Cloner (CCC)
I use this Mac-only product. It’s reliable, quick, and offers various backup options, including backing up the entire disk or specific files or folders. It has robust scheduling parameters and frequent updates.
Creating a bootable drive can be tricky with newer Apple M-series CPUs because of limitations in the Mac OS. However, I can use Migration Assistant or Carbon Copy Cloner to move or restore data.
At $49, it’s a bit pricey compared to others.
I schedule Carbon Copy Cloner to backup my computer daily to two external drives, each with about 1 TB of data that’s not permanently stored on the computer’s internal drive.
Organization is important to me, so let’s start with my music, movies, and videos.
Movies, Music, and Videos
Over the years, we collected a massive collection of DVDs, LPs, and CDs, which took up a ton of space and made it a pain to find what we wanted. So, a few years back, I made a smart move and bought a 2-bay NAS unit with two 14 TB hard drives. I used some cool software to rip all our DVDs to the NAS, copied every CD we had, and even digitized our vinyl records, copying them to the NAS too. Now, we can easily access and enjoy all our music and movies without any hassle!
PLEX Media Server
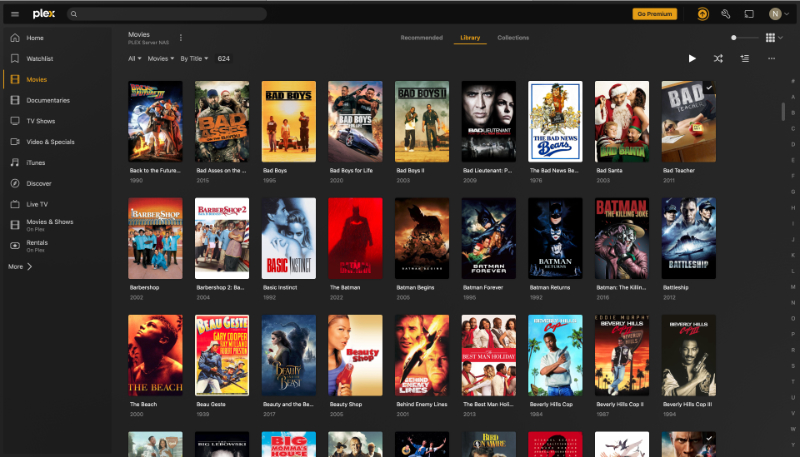
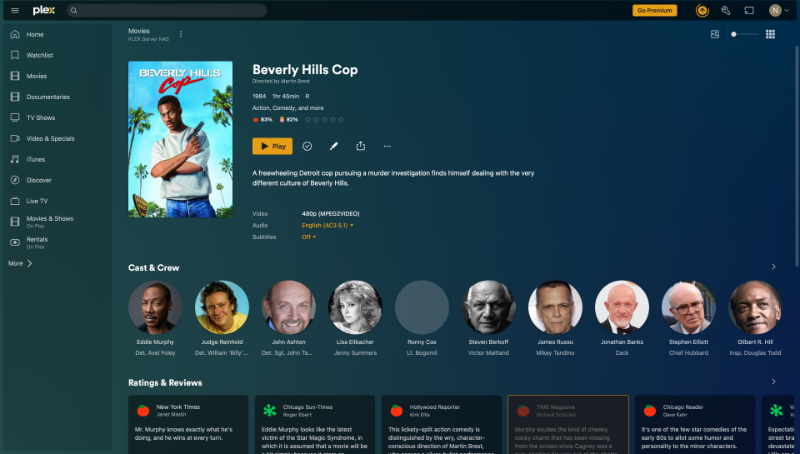
A NAS lets you share files with Wi-Fi devices. I put a PLEX Media Server on the NAS to organize and stream media. PLEX puts media into categories like movies and TV shows and adds cool stuff like posters, plot summaries, cast lists, and reviews. It also plays music on our home entertainment system and the Music app on Apple devices.
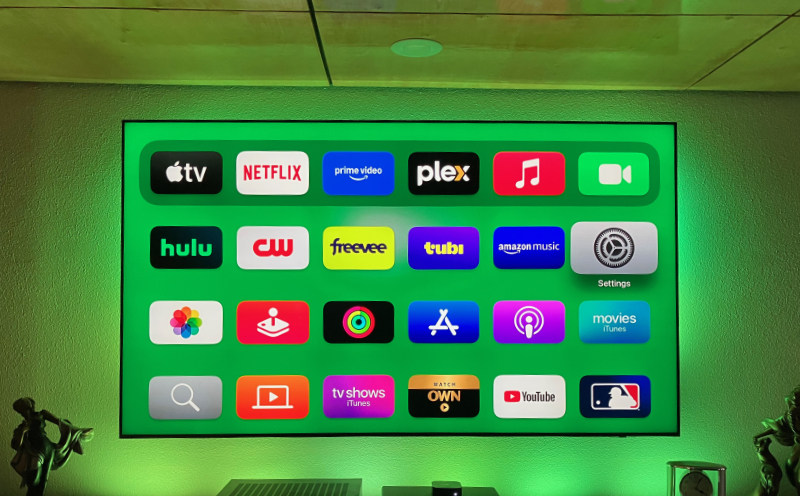
The PLEX main menu looks like streaming services like Netflix, Amazon Prime, and Hulu. All devices, including iPhones, iPads, and computers, can access media. We can stream everything to our Apple TV 4K home entertainment system with Dolby Surround Sound Audio Video Receiver.
Below is the Apple TV Menu on our big screen TV. (We don’t subscribe to everything on the menu).
The PLEX menu is similar to what most streaming services present.
Click on a movie and the screen shows the typical movie information the cast, reviews and ratings. It also shows the cast and crew.
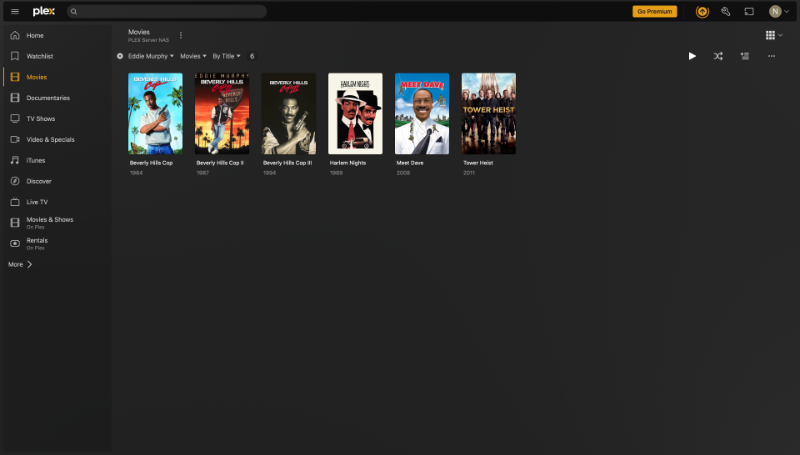
Clicking on a cast or crew member will bring up a screen showing every movie stored on the NAS that person is in. In the screen below are all the movies on our PLEX Server that Eddie Murphy is in.
So, I’m sharing all this info about our media files because it’s a real pain to rip and organize them for the PLEX Media Server. Since that’s the case, I don’t think of the DVDs and CDs as our original data. Instead, I consider the files on the NAS as the “real deal.” Losing all those files would be a huge hassle, so I don’t think of the NAS as a copy of the DVDs and CDs.
NAS versus RAID — a RAID is not a Backup!
Hard Disk Drives spin constantly when you install or connect them to a computer. They stop when the computer shuts down or goes to sleep.
Our NAS has two 14 TB HDDs. It’s always on and can put the drives to sleep, but they’ll get more use than those in a computer. So, I set up the NAS as a single RAID Drive. Any device that accesses the NAS sees a single 14 TB drive. The data is stored on the first drive and mirrored on the second drive. This is called RAID 1. If one drive fails, the NAS switches to the other. Removing the bad drive and installing a new one returns the NAS to RAID 1 and automatically copies the data onto the new drive.
There are different RAID configurations depending on the number of drives in the NAS. These levels of RAID add redundancy but aren’t a backup. Our two-drive NAS is a single copy for our backup strategy.
Backing Up the NAS
Everyday Carbon Copy Cloner backs up the NAS to the Seagate (6) and Seagate (7) drives. The only files on these two external drives are all of our media.
Astrophotography Files
Deep sky objects are super faint, even with a powerful telescope. To get all the details, you need to take long exposures. But if I try an 8-hour exposure, even a tiny gust of wind or an airplane could mess it up. So, there’s a clever way to do it. Instead of taking one long exposure, I’ll take 480 one-minute exposures. That way, I can capture the same amount of data by stacking them one on top of another. If any of those one-minute exposures are ruined by a gust of wind or an airplane, I can just throw them away and use the remaining ones to make my final image. And guess what? I’ll also create other images during the stacking and editing process. All of this takes up a lot of storage space.
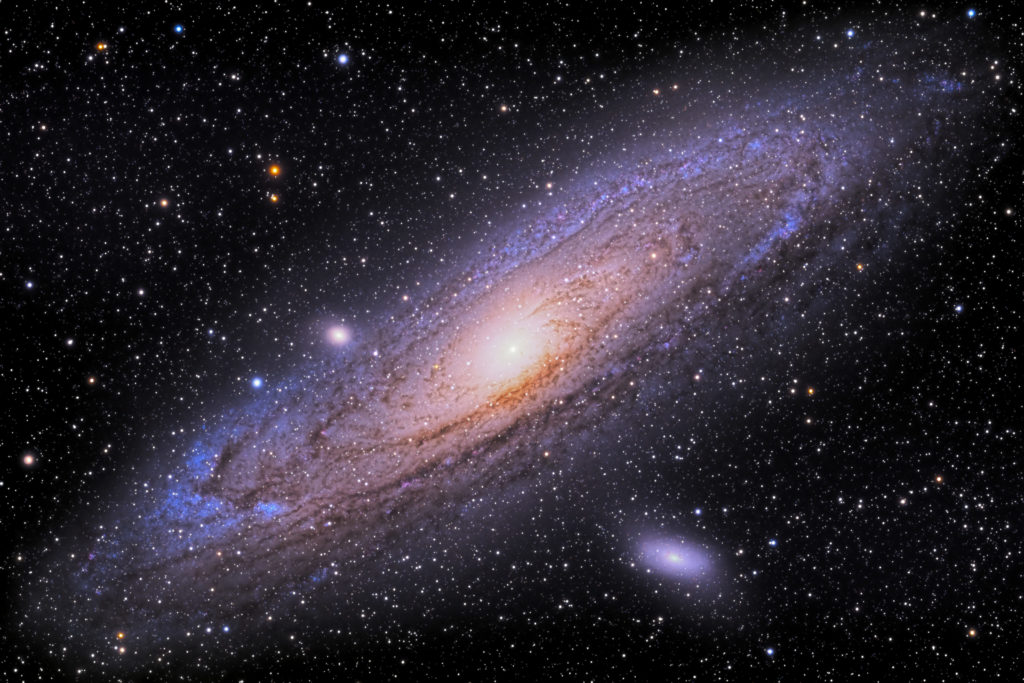
The Andromeda Galaxy image (above), taken over several nights, required a whopping 43 GB of storage space – just for one image! Over the past four years, I’ve been collecting data for over 200 deep sky objects, and each target involved taking images over several nights.
My source data (the original files) are stored on a Seagate External (3) drive. Carbon Copy Cloner makes daily backups to the Seagate External (4) and Seagate External (5) drives.
Offsite Backups
Here’s a quick rundown of the backups I’ve attached to my Mac Studio with external drives:
**Mac Studio Internal Drive Backups**
- Source files on the computer
- One copy on iCloud
- Two Time Machine backups
- Two CCC backups on two separate external drives
**Archived Personal Files**
- Source files on Seagate External (1)
- Backup on Seagate External (2)
- Some files will eventually be moved to Seagate External (1) and deleted from the computer to save space.
**Music, Movies, and other Media**
- Source files on the NAS
- Two CCC backups on two separate external drives
Astrophotography Files
- Source files on Seagate External (3) drive
- Two CCC backups on two separate external drives
As you can see, I have three copies of everything except for the old archived files on drives 1 and 2 (two copies). But I haven’t addressed offsite backups yet.
Back in the day, I used to store a backup offsite at work. It was convenient because I went there almost every day and could lock them in my toolbox. But the problem was making the backups and bringing them to work regularly. My system wasn’t automatic.
Then, in 1998, I got a remote job. My office was in Detroit, MI, and I was in Palm Springs, CA. A big part of my job was creating training and consulting products, which involved a lot of computer files. Losing any files would have been a disaster. It seems like for all my computing life, dealing with backup files was always in the back of my mind. Until the Cloud.
The Cloud is like the missing piece that makes a 3-2-1 backup strategy automatic.
Backblaze Backup Service
I’ve got my data backed up in the cloud too, thanks to Backblaze. With their personal computer plan, you can backup your PC and any attached drives for just $9 a month or $99 a year (as of 2024). And guess what? There’s no limit to how much data you can back up! The only catch is that any external drives need to be connected to your computer. Network-attached storage devices aren’t included.
I only back up one of each external drive type (like just one media drive and one astrophotography drive). I don’t see the need to backup my backups, haha!
Hey, listen up! Backups used to be a hassle, but not anymore
Thanks to automation, my computer files management is a breeze.
Here’s how it works: whenever I create or edit a file on either of my computers, they magically get stored on iCloud. And guess what? My Mac Studio desktop computer is like a backup superhero, constantly monitoring all the backup drives and automatically backing up any changes with both Time Machine and Carbon Copy Cloner. It’s like having a personal backup assistant!
Oh, and there’s this cool app called Backblaze that’s also on my desktop. It keeps an eye on any new or edited files and backs them up to the Cloud. So, all I need to do is delete any new media or astrophotography files from the Mac Studio after they’ve been copied to the external devices. No more worries about backing up my computers or other devices. It’s all taken care of!
Hardware Options
If you’re looking to set up a 3-2-1 backup system, here’s a quick rundown of the equipment I use.
This website may be compensated for linking to other sites for sales of products. As an Amazon Associate I earn a small fee from qualifying purchases at no additional cost to the purchaser.
External Hard Disk Drives
These are reliable old-school devices that use spinning mechanical disks. They’re not as speedy as newer Solid State Drives (SSDs), but they’re great for backing up your home stuff.
For most folks, a couple of external HDDs and an offsite solution would be a solid backup plan.
Seagate vs. Western Digital External HDDs
When it comes to external HDDs, Seagate and Western Digital are the most popular brands. I have a bunch of Seagate USB 3.0 external HDDs — two of them are over 10 years old! I’ve also used Western Digital HDDs in the past.
It’s like comparing Chevy and Ford — which one is better? They’re both great brands.
Network Attached Storage
NAS devices were mentioned earlier. They’re perfect for people who want to access their data on multiple devices and are great for setting up home entertainment systems. But they can be a bit tricky to use and they cost money.
Honestly, if it wasn’t for all the movies and music I’ve copied from DVDs and CDs to create my home entertainment system, I wouldn’t need NAS. Years ago, when I had two laptops, one for work and one for personal use, I had a 4-bay Synology NAS. Now, I have a 2-bay Asustor NAS.
These are probably the two most popular consumer NAS options. I personally found the Asustor to be a bit better built and the software in the Synology a bit easier to use. If I were in the market for another NAS, I’d pick either brand.
Most NAS devices come with empty bays, although some vendors will pre-load them with hard drives or solid-state drives. Installing drives into the newer NAS units is super easy – just plug and play. So if you’re in the market for a NAS, just pick the configuration you need and don’t worry about installing your own drives.
Internal HDDs for NAS
These days, they’re mostly used for backups or Network Attached Storage. You don’t see them very often in regular computers. The four most popular brands are Seagate, Western Digital, Toshiba, and Hitachi (HGST). Just like with the previous external HDD discussion, all of them are reliable brands. I use Seagate IronWolf NAS drives, mostly because they were on sale when I bought them. Any of the above named brands are good choices.
The only thing to keep in mind is that if you’re going to use a NAS drive, make sure the HDDs you buy are designed for Network Attached Storage.
Other Drive Options (SSD)
I also have four external SSD drives. These are not used for backups, since I need drives in the 8 TB to 14 TB range, but they are a great solution for some people.
Samsung T7 USB 3.2 Gen 2 External SSD
I have a couple of these I have been using for over four years. I use them to copy each night’s astro images, and then bring them inside to copy to my desktop computer (or laptop when camping). Each has a capacity of 1 TB and can store at least a month’s worth of data, making them a great temporary backup.
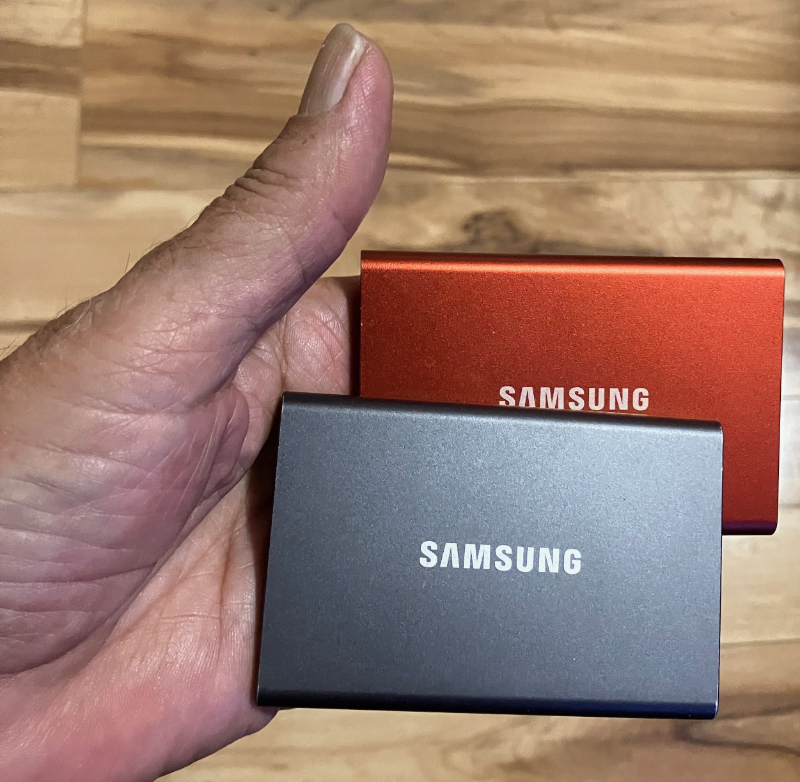
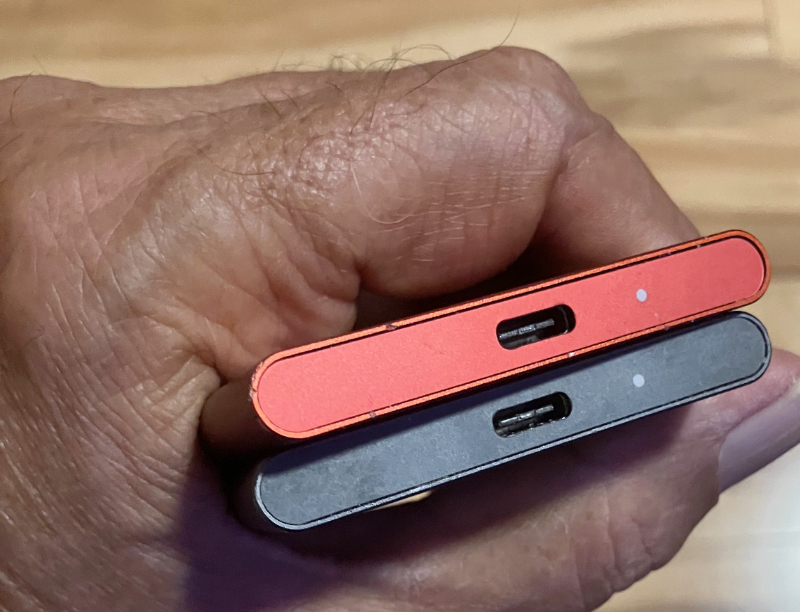
They are fast, compact, light, easily transportable and reliable. Joyce uses one or her own for backups. They come in 1 TB, 2 TB and 4 TB capacities.
They also make great gifts!
OWC Express 1M2 Thunderbolt/USB 4 SSD
These SSDs are lightning-fast! They’re almost as speedy as the internal drive in my Mac Studio. Keep in mind that these USB4 drives need to be connected to computers that have USB4 ports. They are backward compatible to earlier USB ports. The OWC Express Enclosure comes in different configurations. I have two of them, both 2 TB units. You can even just buy the enclosure without a drive and install your own 1M2 drive.
I mostly use them when I’m working on massive astrophotography projects that need more than 300 GB of temporary storage.
Recently, I had to stack 1,800 astrophotography images. The astrophotography program has to analyze each pixel in each file and then create a final single composite image. This takes up a lot of disk space for temporary files. In this case, it was almost 900 GB of disk space. The OWC handled it like a champ!
Disk Speeds
So, I had this little experiment going on. My desktop computer was backing up some files to the cloud, and I thought, why not time how long it takes to transfer them to different external drives? I copied 40 GB of files to three different drives. Here are the results:
- •Seagate USB 3.0 HDD: 8 minutes
- •Samsung T7 USB 3.2 SSD: 4 minutes
- •OWC Express 1M2 Portable NVMe Thunderbolt/USB 4: 15 seconds
As I mentioned before, speed isn’t everything when it comes to backups. But, for some people, especially if they’re in a hurry, it might be a factor.
Other Hardware Considerations
USB Cables
Critical! Cables must match the external drive. Yep, you can use a USB 2 cable with a USB 3 drive, but the data transfer will be at USB 2. Same goes with USB 3 to a USB 4 drive, it will be much slower than using a USB 4 cable.
I have found that the quality of the cable is important. Pick brands with a good reputation and track record. Match cable types to the drive type. I prefer cables made by StarTech or OWC.
USB Hubs
My Mac M1 Studio has 8 USB ports, but I have more external drives and other devices that need a USB port. It’s like everyone’s switching from big desktop systems to laptops with fewer USB ports. I even switched from a desktop to a laptop over 20 years ago! My laptop only has two USB ports, but I didn’t need a desktop back then.
I think this is becoming the norm. In fact, 90% of Apple computer sales are their laptops. For me, the desktop computer is only needed for memory and disk space-intensive operations when processing astrophotography projects.
What I really needed with the laptop and now with the desktop computer is a USB hub. This adds more USB ports. Since I keep the same files on both computers using iCloud Sync, I only need one USB hub and that’s connected to the desktop computer.
But not all USB hubs are created equal!
USB Hubs: Powered vs. Unpowered
I’ve got a setup with my OWC Thunderbolt 4 drives, each plugged into its own Thunderbolt 4 port. But here’s the catch: there aren’t enough ports to fit in the remaining 7 external HDDs. And guess what? These 7 HDDs are quite the power hogs! So, I found a clever solution – I can connect all 7 HDDs into a single USB port on my computer. Now, when it comes to connecting multiple devices that need a lot of power, powered USB hubs are the way to go. Here’s why!
More Power
Powered hubs have their own power source, so they can provide a steady and consistent power supply to all connected devices. This means you can run more devices at full power without any performance issues.
Prevent Overload
Powered hubs prevent overload shutdowns and damage to devices by providing a steady power supply. They’re like a safety net for your devices.
Perfect for Power-Hungry Devices
Powered hubs are a must-have for devices like external hard drives, scanners, and printers. They can even support fast charging for your mobile devices.
Now, let’s talk about unpowered USB hubs, also known as bus-powered hubs. These hubs are more portable and affordable, but they draw power directly from your laptop. They’re best for low-power devices like keyboards and mice.
StarTech Powered USB Hubs
I’ve been using USB hubs for years, and I’ve learned that the best ones are the industrial-quality ones. StarTech hubs are my go-to.
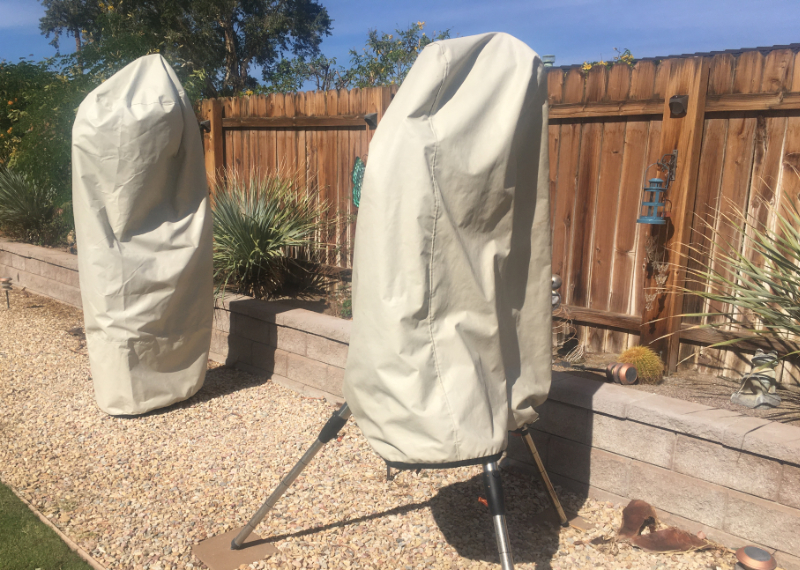
I use the same StarTech 7-port powered USB hubs on my telescopes and in my office. One of the telescope hubs has been outside 24/7 for four years, and the other has been outside 24/7 for two years. You can see the older hub on the left. It was originally black, but it’s faded from the sun, but it still works perfectly.

When not in use (during the day and inclement weather) the telescopes and electronics are covered.
Summary
If you made it this far, I hope you found some useful info. The most important thing is to take a look at your own system, data, and files. Think about how much your data means to you and what would happen if you lost it. Then, come up with your own backup plan. One good idea is to use the 3-2-1 strategy.

![High capacity in a small enclosure – The small, lightweight design offers up to 6TB* capacity, making WD Elements portable hard drives the ideal companion for consumers on the go. Plug-and-play expandability Vast capacities up to 6TB[1] to store your...](https://m.media-amazon.com/images/I/31h2rp12GjL._SL160_.jpg)


