… with an apology to Robert M. Pirsig
Yesterday was the first day of summer. The first day of summer is a good point in time to perform the annual trailer maintenance, which most importantly includes cleaning, inspecting, and re-packing the wheel bearings along with the periodic maintenance of the waste & fresh water tanks, and fresh water, and battery maintenance.
The first day of summer is of no consequence, it just was a point in time where I was home, it needed to be done, and the summer camping season is upon us. I knew it was going to be a hot day, hotter than normal for this time of year. Poor planning on my part found the job extending into the afternoon – not completion before noon as planned. Which found me outside in the sun working in this… it seemed hot so I checked the weather on my iPad…

In case you have embraced the Centigrade scale for temperature measurement, I was working in an ambient temperature environment of 50.6 C or 123 F for us mere mortals. But hey, the humidity was only 5%. Dry heat as we desert dwellers like to brag.

But let’s get back to the maintenance. No matter what the temperature, one must take their time and do maintenance properly.
Maintenance is pretty simple stuff on a trailer. The metaphysics of maintenance is quite simple: a 30,000 foot view of how the components work, knowledge of when to perform any required maintenance, and finally taking action by actually performing maintenance at the proper time intervals. There are no abstracts and maintenance is based in reality. The trailer owner can accept this, read the maintenance manual, and perform (or pay someone) the maintenance. The owner must choose whether or not to think. It is not necessary to learn all the details of every component, or understand how everything works in minute details, or even become adept at performing all the maintenance by oneself – it is sufficient to simply follow the maintenance schedule. Being able to perform your own maintenance won’t improve the quality of your life, in and of itself. There is no need to be concerned with the dichotomy of the Romantic or Classical view of the world. Objective reality, as is good trailer maintenance, your only concern.
Trailers are simply technology. Technology doesn’t de-humanize us if we leverage technology to make our lives better; to live a good life. We just need to understand the role of our minds in creating technology. Technology isn’t a gift and it isn’t a basic human right. We can use technology to enhance our lives if we choose, but we must understand each of us must earn the right to purchase technology.
I do my own trailer maintenance because it is more convenient than taking it to someone to do it for me, and because it is simple for me. Plus I enjoy it. Even if I was extremely wealthy, I would do my own trailer maintenance. In contrast, I pay someone to do the maintenance on our vehicles. Working on cars was once my job and there is no pleasure for me in maintaining a car or truck – my time is more valuable than the small amount of money I would save by doing it myself.
FRESH WATER TANK MAINTENANCE PRE-WORK (Sunday night)
About twice a year I sanitize the both of our 50 gallon fresh water tanks. This is pretty straight forward.
- Pre-mix 10 gallons of water with 2 cups of chlorine bleach and pour it into the tanks
- Add some powdered water softener to help prevent hard water build up on the tank gauge sensors
- Fill the tanks
- Turn on the water pump and run the mixture through the kitchen and bathroom faucets, using both the cold and hot water knobs – this runs the mixture through the water heater
- Now the water tanks are topped off with water to replace that which was used by the faucets
- Let the water set for 24 hours
WASTE TANK MAINTENANCE PRE-WORK (Sunday night)
The methodology is the same for both the black water tank (sewage from the toilet) and the grey water tank (waste water from the kitchen and bathroom sinks, and the shower.
- Add 4 cups of TSP (trisodium phosphate) to each tank
- Add 1 cup of powdered water softener to each tank
- Add 1 cup of chlorine bleach to each tank
- Fill each tank with 50 gallons of water
- Let sit overnight
CLEANING AND SANITIZING THE TANKS
First thing Monday morning I drove the trailer on a 10 mile loop. The movement of the rolling trailer helps agitate the mixture in the waste tanks, which are more prone to build-up on the sensors than the fresh water tanks. Returning home, both waste tanks were drained and flushed using our Poop Canon.
Next the fresh water tanks were drained, re-filled, and fresh water was run through all the lines and the water heater by turning on the sink faucets. Final step was to drain the fresh water tanks again.
Lastly, I checked the tank monitors to make sure the sensors had been cleaned by ensuring all gauges read “empty.”
Tank maintenance is simple and should be easily accomplished by any trailer owner… just read the manual that came with the trailer. Unfortunately, most manuals don’t cover how to effectively clean the waste tanks and keep the sensors working. My method is, well shall we call it, common sense. A philosopher might call it knowledge gained by reason and objectively reality.
BATTERY MAINTENANCE
Maintaining batteries is another simple task that every trailer owner should do around once a month. Inspect the cables for corrosion and clean if needed (mixture of baking soda and water works well), test the batteries with a hydrometer (a step I can skip due to my sophisticated solar system and controller), and finally top off the cells of the batteries with distilled water. My cables looked good and a little less than a quart of water was added to the batteries.
WHEEL BEARINGS
This is probably the most critical maintenance item on a trailer, along with checking tire pressure and tread. Each trailer wheel has two bearings, and in our case, with 4 tires we rely on 8 small wheel bearings to keep us safe when traveling. A bearing failure will disable your trailer and potentially be life threating to those in the tow vehicle and others on the road.
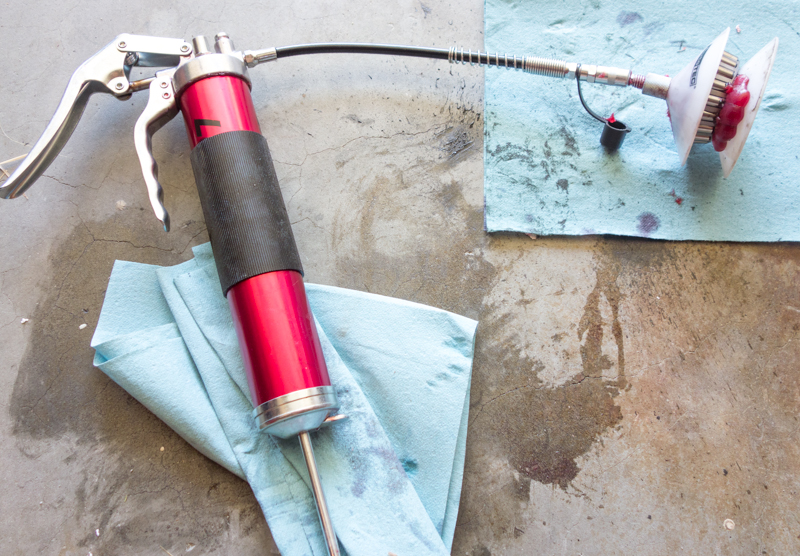
Our trailer has grease fittings at the end of each axle spindle, which allows for “packing” the bearings without removing the wheel or hubs. How this works is:
- Remove the cap on the wheel cover
- Remove the rubber cap on the grease cap
- While slowly rotating the wheel, pump grease into the grease fitting which will force the old grease out of the hub
- Pump until the old grease comes out and you see the new grease pushing it out
- Clean all the grease that has come out of the hub
This is not how to properly re-pack your wheel bearings a part of the scheduled maintenance!
It is okay to do this between scheduled maintenance with one caveat: not all wheel bearing grease is compatible, so you need to ensure you are pumping in the same exact brand and type of grease as was used for the original bearing grease packing.
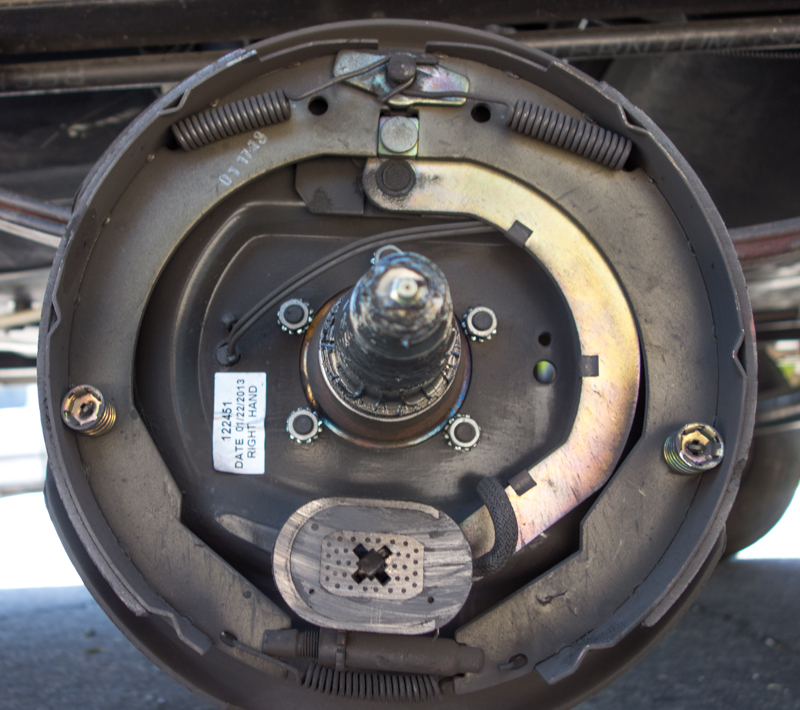
Proper maintenance is inspecting the bearings and races, inspecting the brake system, cleaning the bearings, and then re-packing the bearings.
Most axle manufacturers recommend that this maintenance is performed every 12,000 miles or once a year, whichever occurs first. If you don’t tow much, you need to perform the maintenance annually because condensation can form in the hubs when the trailer is sitting that can lead to rust; and rust is your bearings’ enemy.
So do it the right way. Proper tools are not hammers and chisels. Buy a proper seal remover, seal installation tool, and grease cap pliers. Should bearings need replacement, replace both the bearings and the races, which require a brass drift to remove the races from the hubs and a special tool to install new races.
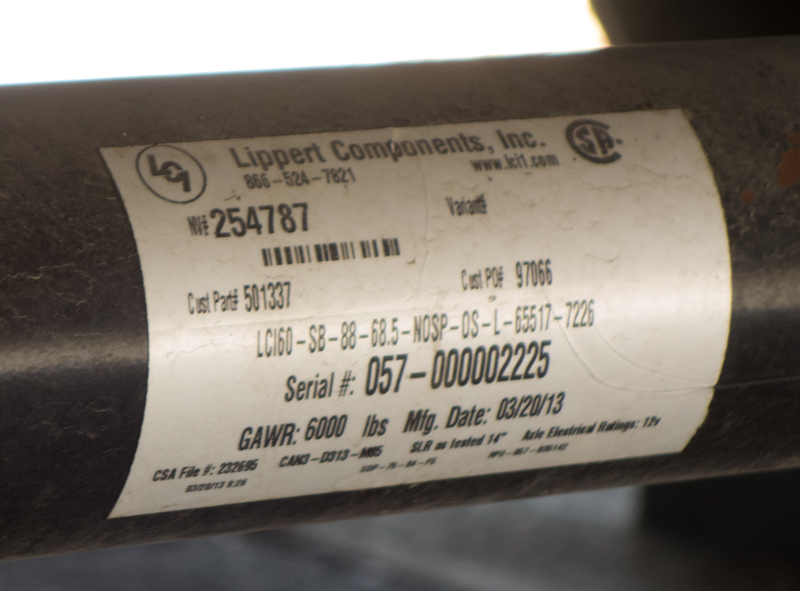
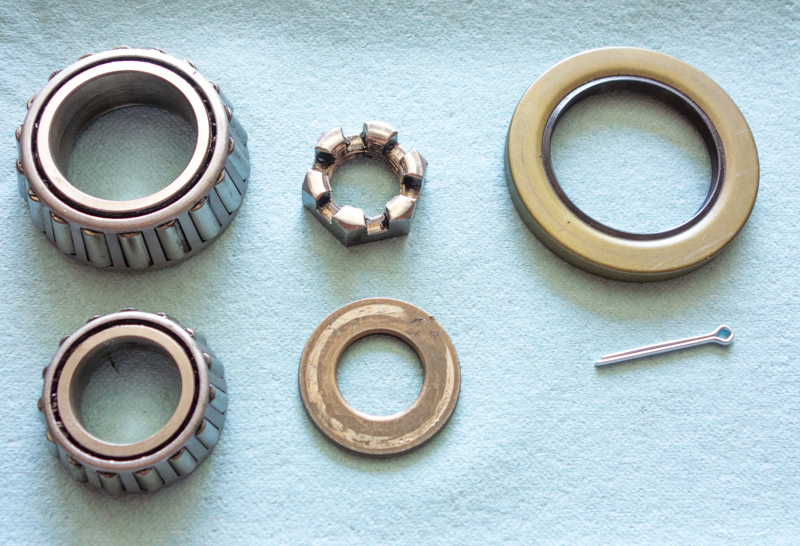
I am not going to detail all the steps to re-pack wheel bearings. Any bearing re-pack requires new grease seals and new cotter pins. And this is where I entered the realm of poor planning on my bearing re-pack. Most travel trailers come with axles manufactured by Dexter or Lippert and both use the same size seals. I figured I could just go to any parts store and they could cross reference the Lippert #122088 grease seal. Wrong. So I had to drive to San Bernardino and back; a two hour round trip, which put me behind schedule
The first RV place I stopped at had the seals, and they didn’t have to look up any part numbers. The parts counterperson simply reached under the counter and pulled out 4 seals.
Tips:
- Wipe grease off of the bearings
- Clean with brake cleaner or other automotive cleaning solvent
- Then clean with mineral spirits
- Air dry or blow dry with compressed air – but make sure you don’t let the bearing spin when using compressed air
- Replace the grease seals and cotter pin
- Buy a simple grease packer, although you can pack by hand… see the link above for my Lippert Axle Manual
- Follow the manufacturer’s service procedures
- Use a torque wrench when tightening the lug nuts

This website may be compensated for linking to other sites for sales of products. As an Amazon Associate I earn a small fee from qualifying purchases at no additional cost to the purchaser.


