Repairing a RV window screen is fairly straightforward and not difficult. In fact, the steps are the same as most window screens found on a house.
This website may be compensated for linking to other sites for sales of products. As an Amazon Associate I earn a small fee from qualifying purchases at no additional cost to the purchaser.
This might be embarrassing, but it isn’t
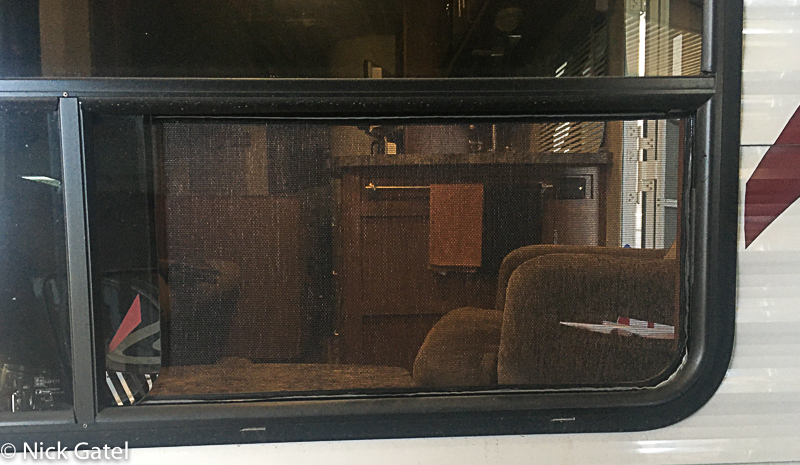
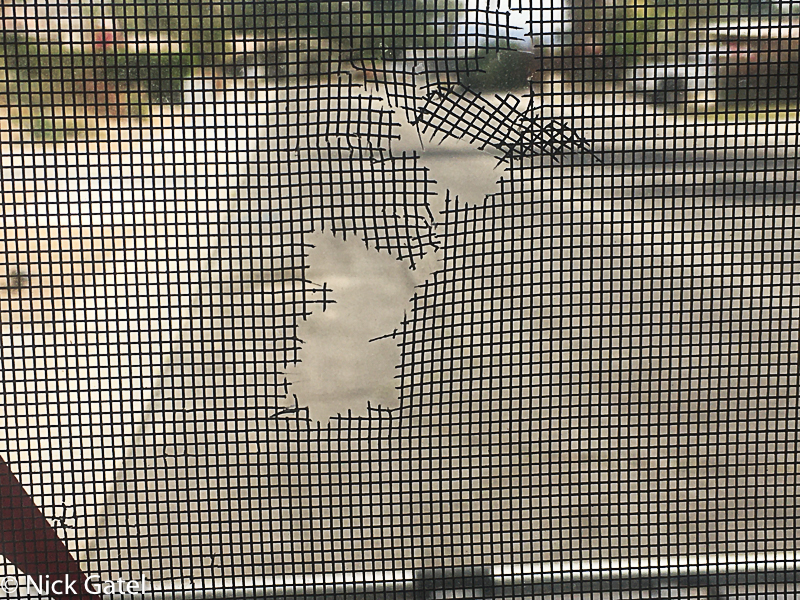
Last fall Joyce and I were camped in the Sierra Nevada. We left the camper and walked to a nearby river, spending the afternoon fishing. Upon our return, I opened the camper door and saw smoothing scurry across the floor. It was a squirrel. We had left some peanuts on the table next to the rear picture window of the camper with the window open. Mr. Squirrel chewed a hole in the screen for entrance into our camper to score the sumptuous snack. I don’t know who was more scared when I opened the door; the Squirrel or Joyce. Stepping into the camper, the squirrel planned his escape, running past me with lightening speed and exited through the damaged screen. Oh, well.
It has taken me a while to get around to repairing it, being distracting with our multi-year house remodel, which is now completely finished. On the past several trips I kept reminding myself to fix the screen when I got home. Finally on the last trip I put a reminder in my iPhone. Last week seemed like a good time to repair it, having just returned from a camping trip.
Screen Repair
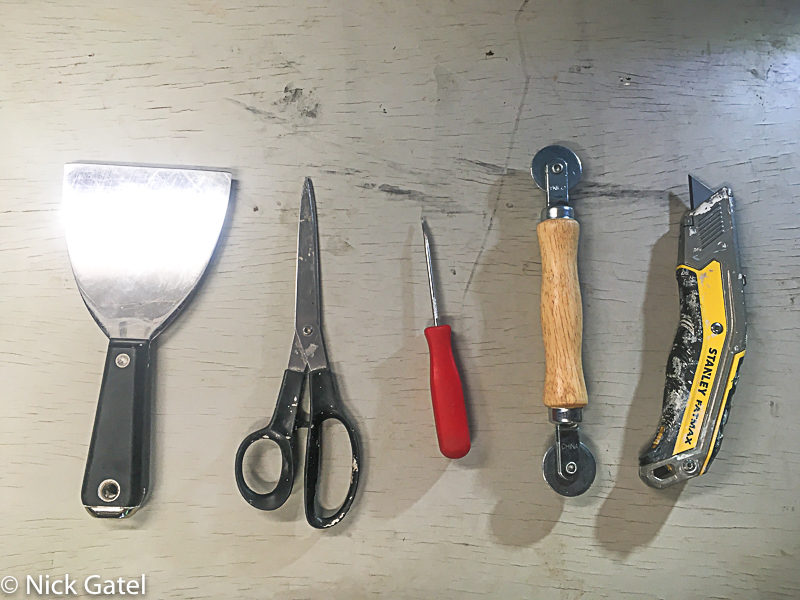
Tools Needed
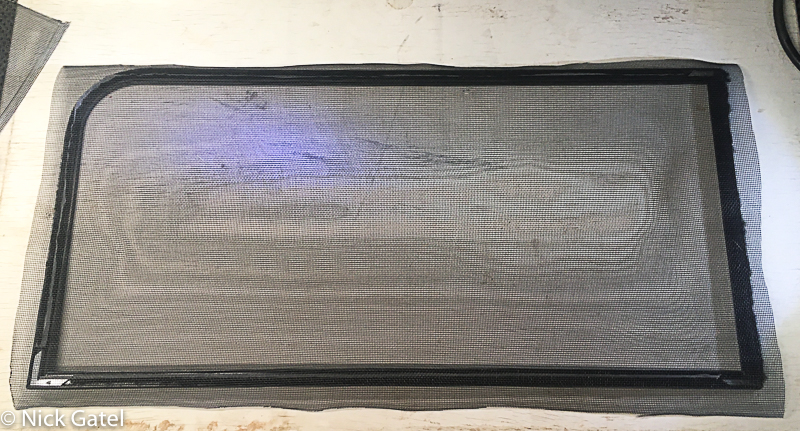
Step 1: Remove the Screen From the Window Track
The only difficult part of this repair is removing the window screen. Unlike house screens with a spring loaded frame (lift up on the screen and it pops out), most RV screens fit tightly into the window track. There is a small gap in the track of about 1.5 inches where one could pry the screen out with a wide blade screwdriver, but I was worried it would be too much pressure on such a small section of the screen frame, possible bending or otherwise damaging the frame. So I opted to use a wide putty knife.

Slightly open the screen so it clears the side window track (see left side of screen above). Gently insert the putty knife between the plastic window track and the screen frame and push the knife down until it is under the bottom of the frame. You will be able to slightly push up the screen with one hand so the putty knife can touch the bottom edge of the frame. Carefully pry up the screen – the sides of the screen will flex and bow out – you might have to slightly tug on each side – you want the frame to flex on the sides so you can pull the frame out of the window track. If you pull too hard there is a risk of bending the frame.
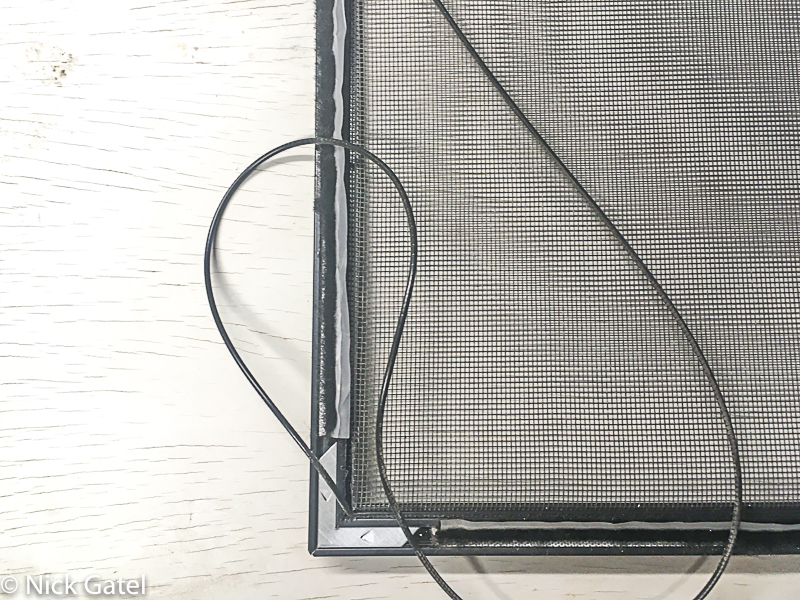
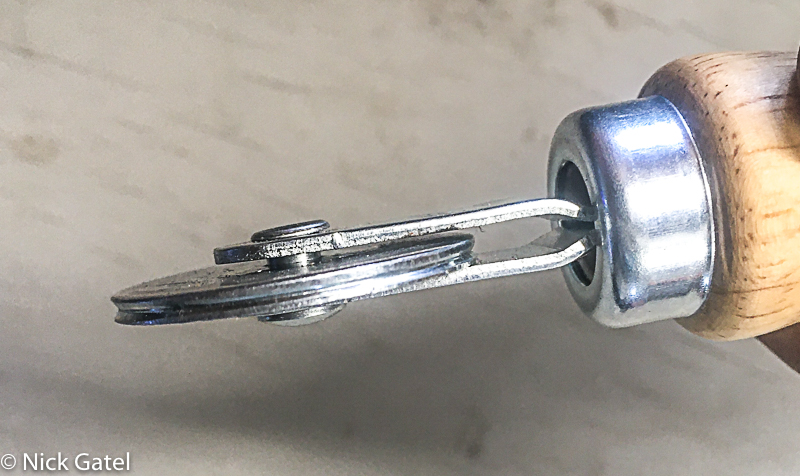
Step 2: Remove the Screen Spline
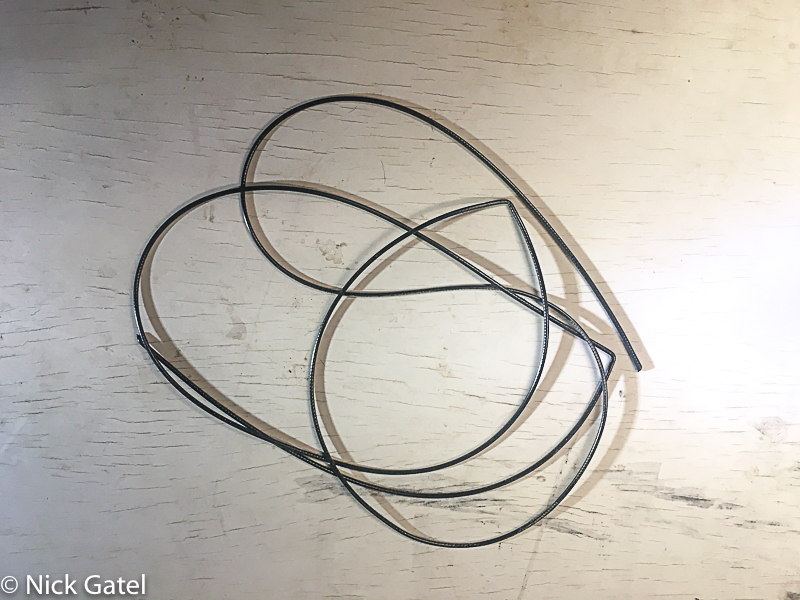
Along the entire edge of the screen frame is a recessed groove. The screen is pushed into this groove, and then a flexible spline is pushed into the groove above the screen material to keep the screen material secure in the frame..
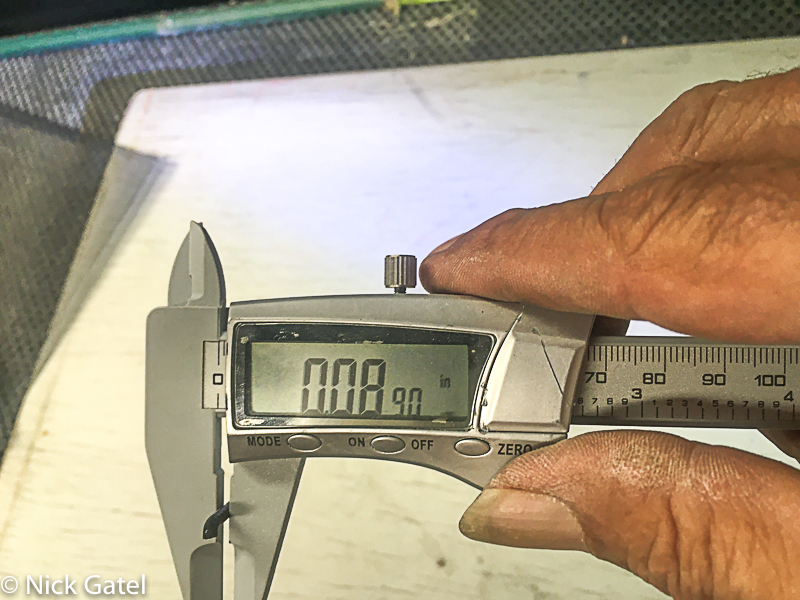
Because the groove of most RV screens is so small compared to your house screen, you will probably have to use fiberglass or similar material for the screen. Metal material will be too thick and lack enough flex to properly sit in the groove. Screen material can be found in most “big box” hardware stores or online on sites like Amazon. It is unlikely Big Box stores will have the thin splines you need. My local stores only had much too thick splines in stock. It is best to use new spline material. My spine material was in good shape (we store our camper in a covered area when not in use).
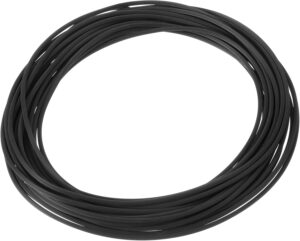
Using a digital caliper I measured my spline at .0890 inch. The original size was, more than likely, .900 inch and was compressed from the initial installation at the factory.
uxcell Screen Spline, 0.09″
![]()
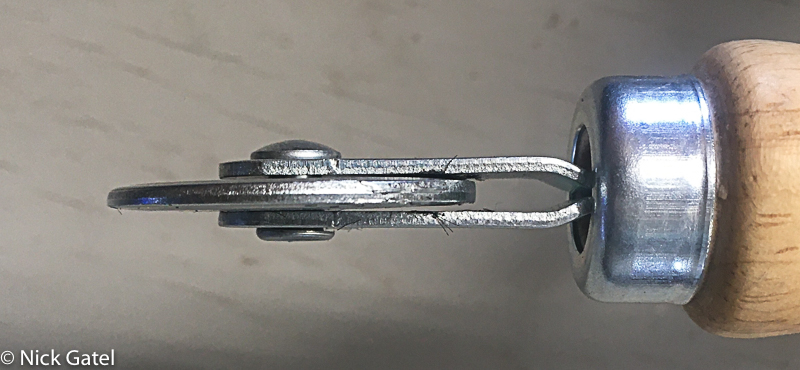
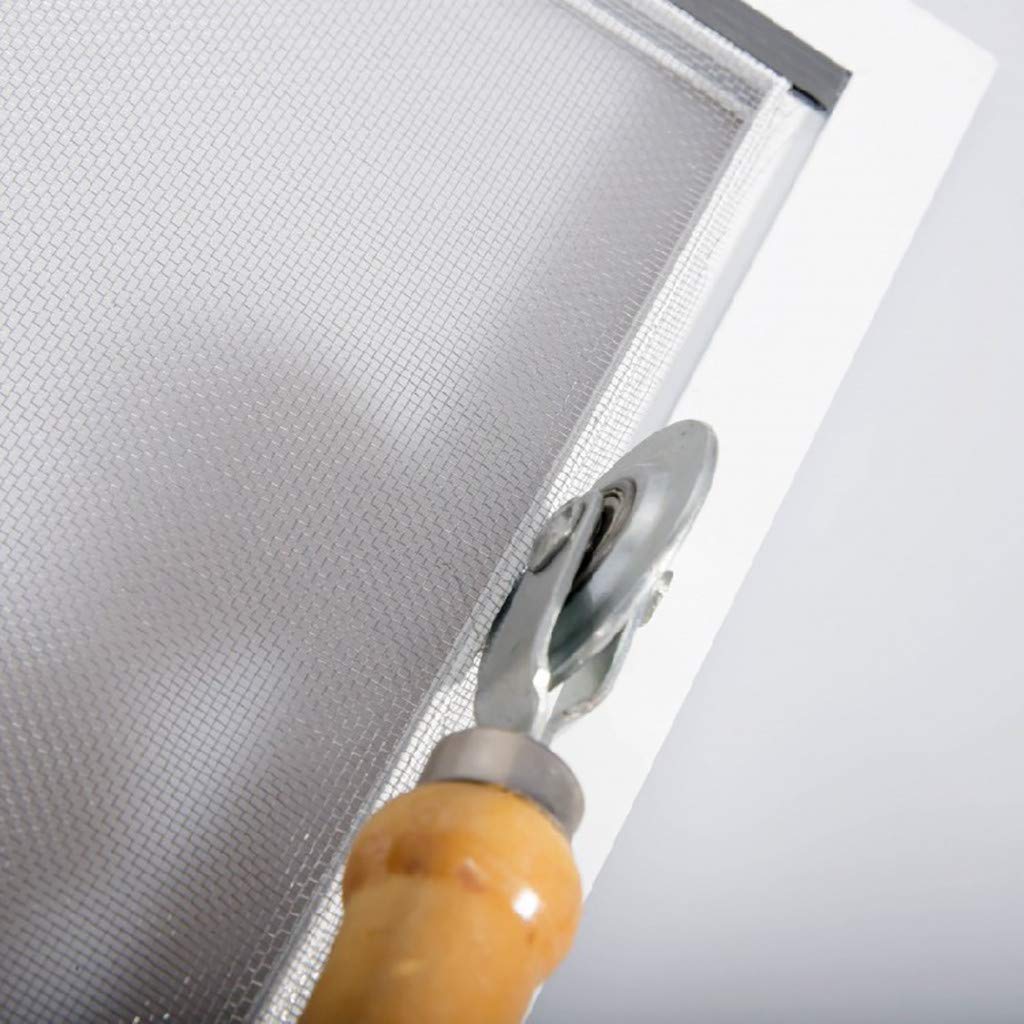
To remove the spline, find the spot where the spline ends meet (usually in a corner), and then carefully lift up one end with a pick (see picture below).
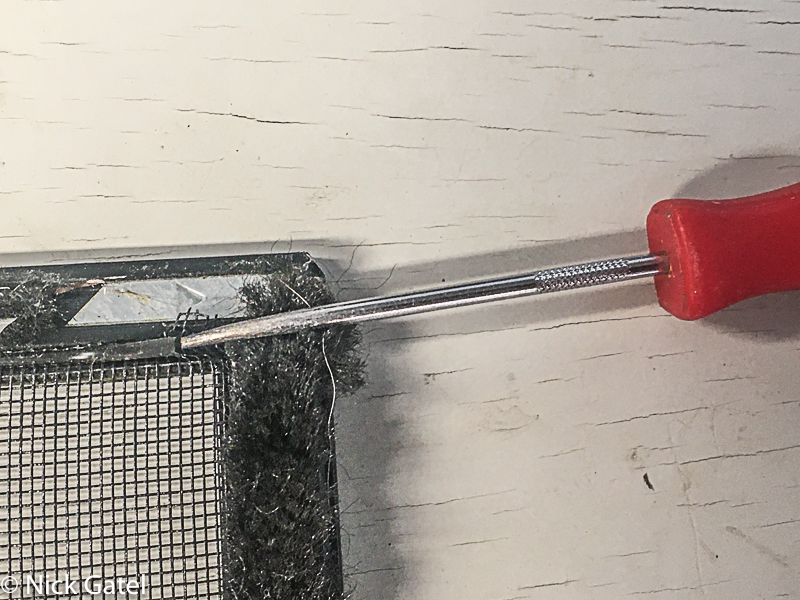
Once the spline end is pulled up, hold the inner edge of the screen and slowly pull out the spline, working around the entire perimeter.
Step 3: Measure and Cut the Screen Material
High Density Dust Proof and Pollen Proof Net Screen mesh

Cut the new screen material approximately 1-2 inches wider than the screen material.
Step 4: Press the Spline Into the Grove
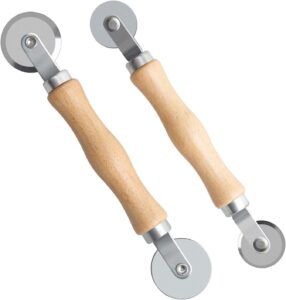
The rolling spline tool has two wheels. One wheel has a concave surface edge, the other a convex edge.
Most of the rolling spline tools found in hardware stores have a wheel for .125 inch or larger splines. These large wheels might work, but the tool kit below has two sizes and the smaller one will work on your RV.
Screen Rolling Tool
Use the convex wheel to press the screen material in the frame groove. This will help you stretch the material taunt, pulling the opposite end while the tool is in the groove. I forgot to take a picture of this step, but copied a sample from the Amazon link above:
Once you have pressed the screen material into the groove, you can start rolling the spine on top of the screen material, pushing the spline and screen material into the groove. On the first pass I used the concave wheel (below)
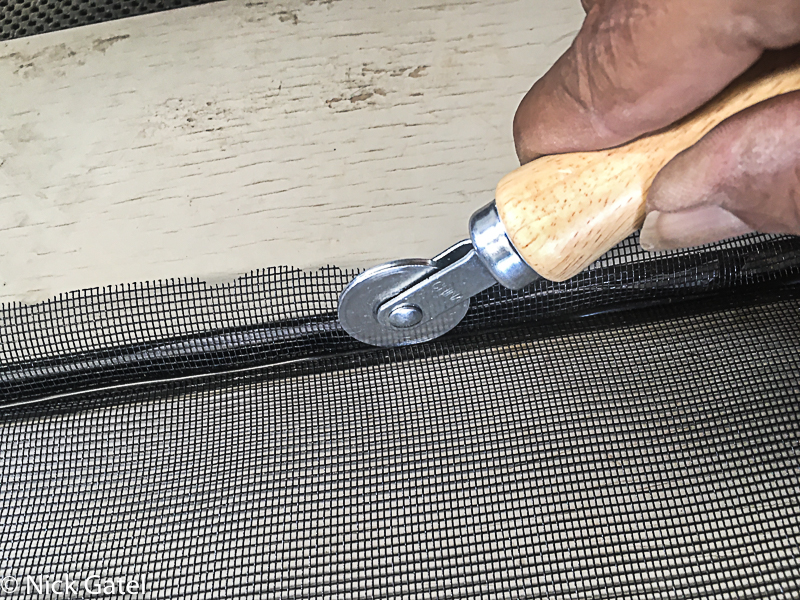
then finished by pushing the spline all the was down in the groove using convex wheel.
Step 5: Re-install the Screen in the Window Frame
Here you will just do the opposite of Step 1, install of prying with the putty knife, you will “shoehorn” the screen in. I found it easier to slide the bottom of the screen into the bottom window frame, then shoehorn in the top edge with the putty knife.
Step 6: Trim the Excess Screen Material
Using a utility knife trim the material holding the blade just above the spline (don’t cut into the spline).

Finished