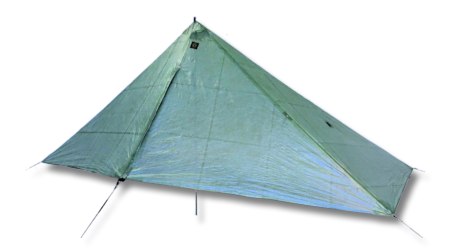
DESCHUTES?
What kind of a name is that? I can’t pronounce it and can barely spell it. So I looked it up via Google. It is a river in Oregon that is a main tributary of the Columbia River. The Deschutes also flows north, which is atypical for a North American river. The manufacturer of the Deschutes CF tarp is Six Moon Designs and they are located in Beaverton, Oregon. Mystery solved. What a sleuth I am.
CF?
That one is easy. Cuben Fiber. Also known as CTF3. It is a non-woven fabric that is strong and extremely light. A lot of my gear is made from Cuben Fiber.
Oh, and yes, I bought a new shelter, the Six Moon Designs Deschutes CF tarp.
NEW GEAR?
Over the past couple of years I have been hesitant to discuss backpacking gear, and better yet; haven’t purchased any. The gear purchase moratorium wasn’t a protest and it wasn’t budget driven. There just wasn’t a true need for any new gear.
Since 2011 my main shelter has been a zPacks Hexamid, supplemented by a Henry Shire’s Tarptent Scarp 1 for winter trips when ample snow is a concern.
A couple years ago, I bought (my last gear purchase) a Mountain Laurel Designs Trailstar for those 3 season (non-winter) trips where wind is problematic.
Each of these shelters do a good job for their intended need, and most of the time they stay in my pack, as I prefer to sleep under the stars whenever possible. One most of my trips the past few years I have used the Hexamid, which is generally adequate, but once in a while when dealing with shifting winds and wind driven rain a full coverage shelter would have worked better and the Trailstar would have been overkill, however I got by without any serious problems or consequences.
TARPS
I have always been a fan of tarps. They are lighter than tents and in most circumstances collect less condensation. When I need a shelter, I just want to keep rain, wind, and snow off me. I don’t need to replicate my house with storage pockets or hang things from the ceiling, and this is where tarps excel.
Flat Tarps and Shaped Tarps
The simplest tarp is a flat piece of rectangular or square fabric. These tarps allow the backpacker flexibility in erecting it in various configurations, the most popular being the A-frame and probably the half-pyramid a somewhat distant second .
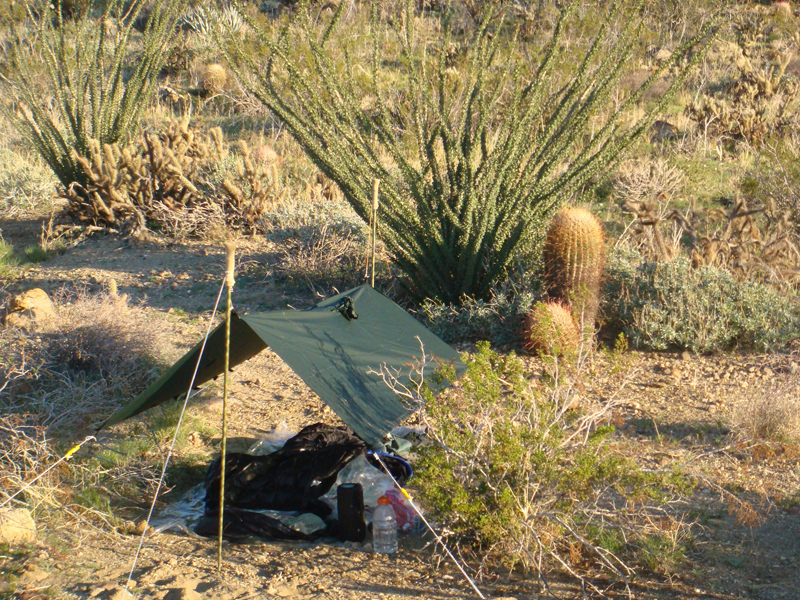
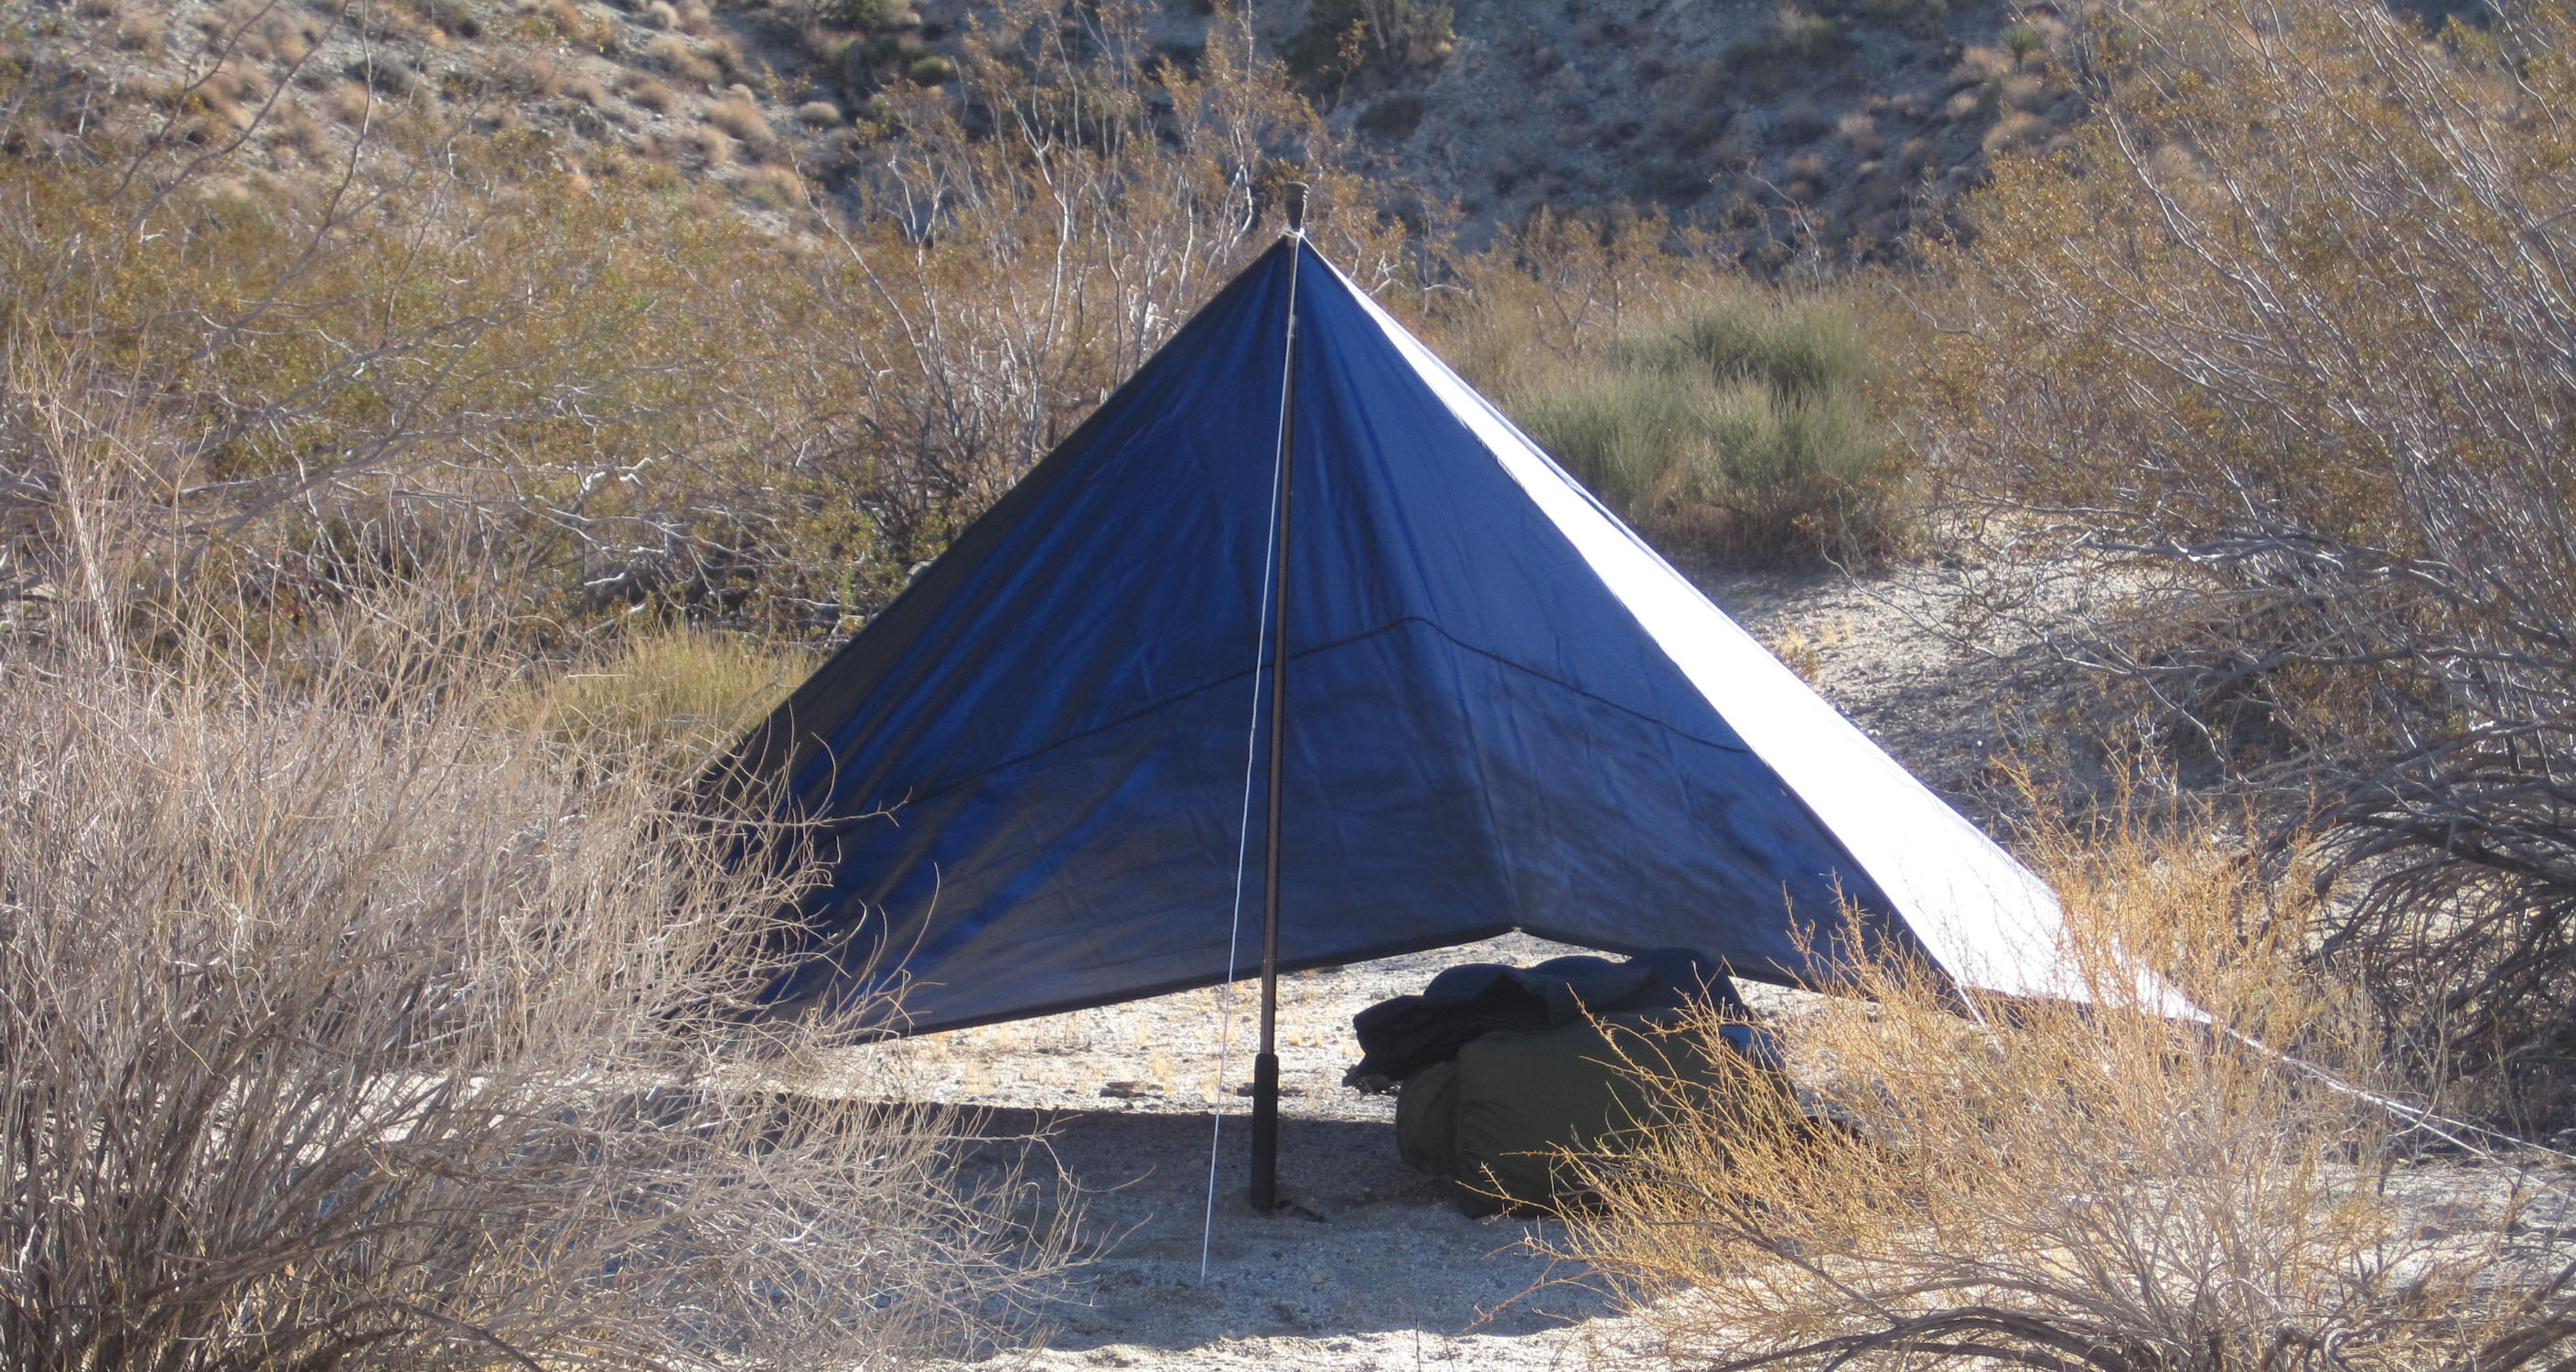
The A-frame provides the greatest overhead coverage, but requires two poles, which is extra weight. Today trekking poles seem to be a standard part of the backpacker’s kit, which is convenient since they can do double duty as tarp poles. Not to mention the spreadsheet hiker can claim they are not part of their backpack’s base weight because they carry them most of the time, thus earning them a lower published base weight.
I tried trekking poles for a couple years and enjoyed no advantage in their utilization and eventually quit using them a few years ago. Plus there are lighter options for tarp poles than trekking poles, and I don’t mind carrying the weight in my pack instead of my hands. The whole online competition for lightest base weight or attaining some arbitrary threshold of base weight classification is downright silly, as I wrote here, and there is my tome stating we need to shit-can the whole UL, SUL, and XUL thought process.
Anyway, let’s get back to the tarp discussion.
Shaped tarps are just that; a tarp shaped into something other than a flat piece of material. The simplest shaped tarp is a flat tarp with a curved ridge-line, called a catenary cut.
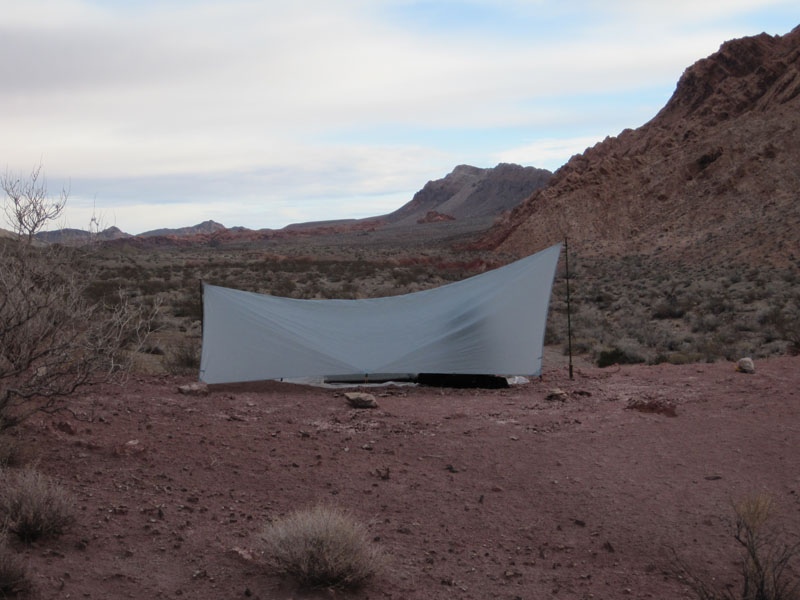
Because the ridge-line is curved, it allows the backpacker to achieve a more taunt setup, which is beneficial because the tarp has no structural elements other than the tension of the material created by the two exterior poles, guylines and the stakes in the ground. These simple tarps can only be setup in the A-frame mode and require two poles.
More complex shaped tarps use several pieces of materials that are sewn together and usually can only be configured in one way, most commonly some iteration of a pyramid. One exception is the Trailstar whose pitching options are probably limited to the imagination of its owner. All these pyramid-like tarps are often called mids and many are secure shelters that can handle seriously bad weather. Most mids utilize a single pole, but there are models that use two poles and look like a cross between an A-frame and a mid. Most mids can be setup quicker and easier than a flat tarp, but often require more real estate to pitch it. (e.g., a larger footprint).
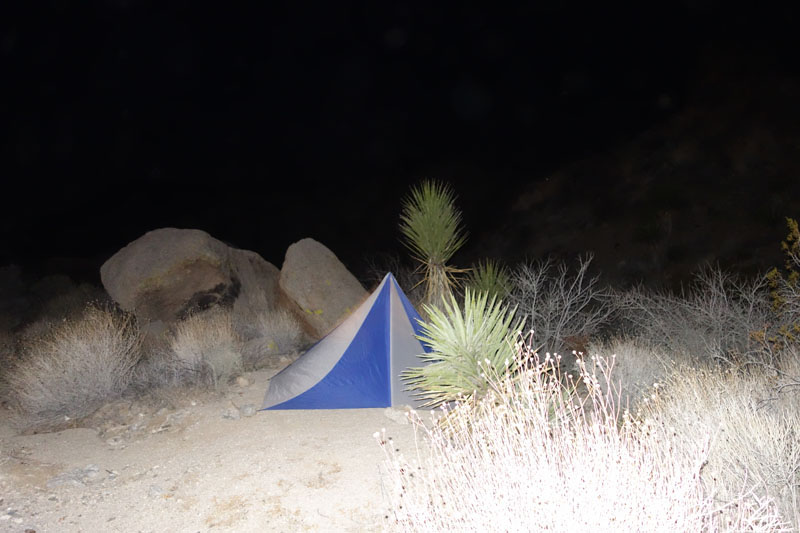
My first shaped tarp was a Chouinard Pyramid purchased in the 80’s and for over 20 years it was my bad weather shelter on trips where a “bomber” shelter was needed. It is heavy by today’s standards, but it has lasted all these years and I occasionally still use it.
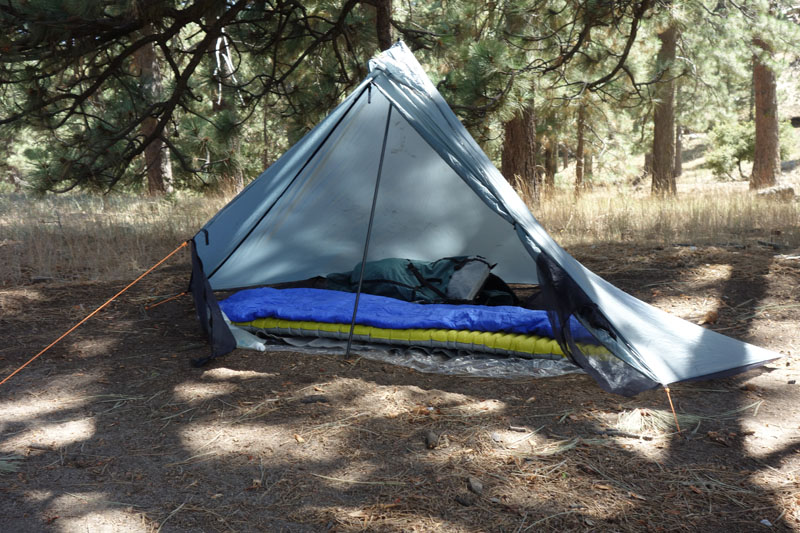
In 2008 I purchased a Six Moon Designs Wild Oasis mid. The material is silicone impregnated nylon and it is more than twice as light as the Chouinard, but has much less living space. The construction is top notch and overall a great shelter. With the advent of extremely light tarps made from Cuben Fiber I moved in that direction using a Cuben catenary flat tarp before switching to the Cuben zPacks Hexamid, which is not a fully enclosed shelter. The full coverage Cuben pyramids were (and still are) very expensive. Also, Cuben mids are more difficult to pitch because the material doesn’t stretch at all, meaning stake placement needs to be virtually perfect.
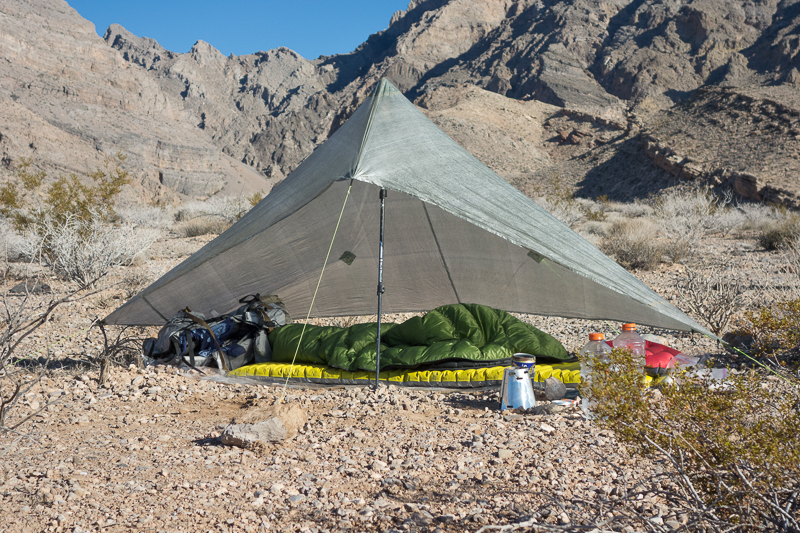
The Hexamid does not have a front door, but it weighs less than 4 ounces excluding guylines, stakes, or a pole.
A couple years ago I started using my Wild Oasis again, but infrequently. It is just a nicely designed and well-constructed shelter, although a little short on interior space. This got me to thinking I might be better served with a fully enclosed Cuben mid as my “go to” shelter if I could find one light enough (5 – 7 ounces) and well made.
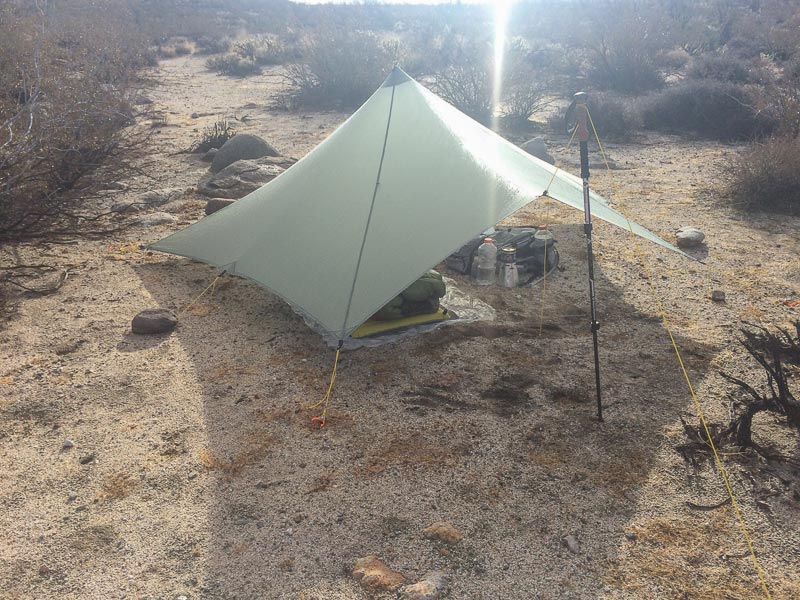
Two companies have the most experience building Cuben shelters: Mountain Laurel Designs and Six Moon Designs. Although my zPacks Hexamid has held up just fine, the workmanship is not quite at the same level as MLD or SMD shelters. This isn’t a knock on zPacks. It is like comparing a Toyota Camry with a Mercedes or BMW.
Thinking about a new shelter, zPacks, SMD, and MLD didn’t have a product that interested me and Henry Shire’s Tarptent company doesn’t make Cuben shelters, although I wasn’t seriously looking. Then last year SMD came out with the Deschutes CF mid that weighed less than 7 ounces. Nonetheless, two things I didn’t like about it: the zipper looked too small, limiting the opening and potential views, plus it did not have a top vent like my Wild Oasis to help reduce condensation. To be honest, I just forgot about it because I wasn’t actively looking for a new tarp – just a “nice to have,” that no one was making.
Earlier this year I saw someone on the Web mention that SMD had upgraded the Deschutes with a zipper that is 10” longer and it now had a top vent, all for 7 ounces. So I checked it out and saw the Deschutes has almost 30% more ground space than my Wild Oasis and the recommended pole length is 49 inches, which would provide plenty of interior height. So I ordered one.
Normally when there is a product on the market, you can find plenty of reviews. For the most part, I am skeptical of online reviews, as I talked about in the Business of Backpacking. Although this tarp has been on the market for around a year (maybe longer – I don’t pay much attention to new gear any more) there really weren’t any thorough reviews to read. So… no reviews = apparently very few purchasers, or at least no one was talking about this shelter.
The good news is I don’t need the recommendation, approval, testimonials or gear reviewers to help me make a buying decision. I use my own judgement and experience to make decisions. Based on my experience with SMD quality, my background and exposure to mids, and some time spent analyzing the specifications, I was able to decide all by myself that this shelter would fit my needs perfectly. I didn’t need any SMD fanboys, Facebook, or Twitter people to make a decision. This leads to a discussion of disclosure.
DISCLOSURE
I have noticed that some bloggers who frequently review gear include a disclosure of any relationship to the manufacturer and sometimes they even quote some Federal Trade Commission statute. So here is my disclosure:
I buy ALL my gear at full retail unless there is a discount offered to all customers.
I am not a backpacking, camping, or gear expert.
I do not accept any gear for free, or purchase anything with the condition that a review is forthcoming from me.
I hate the concept of Gear Ambassador. If you don’t know what that means, then there is no need for you to Google it. If you know what it is, then no explanation needed. I am not a Gear Ambassador for any company.
I have no gear company “sponsoring” me. No gear company has ever offered to sponsor me. I bet that few, if any, gear companies even know who I am, other than maybe a couple very small concerns.
I do not do business with any company that offers any sort of perk or chance of a reward if you “Like” them on Facebook. Of course I can only confirm if this is happening if they post it on their Website because I do not read anything on Facebook.
I am an old curmudgeon, opinionated and resistant to change. I dislike most people. Dogs, mosquitoes, and children usually dislike me back.
There is no benefit to me posting anything on my Website. There is no advertising, no comments from readers can be posted, and there is no email contact form. Basically I don’t care what anybody thinks about what I write.
What works for me probably won’t work for you.
If you buy something because I like it or use it, you probably made a poor purchase decision.
My Website is essentially for my kids, and a few friends to keep up with what I am doing. In general I have an aversion for email, cell phones, and I especially hate texting; so the website makes easy for them to see what I am up to, if they choose to do so.
Okay, let’s take a look at the new tarp.
SIX MOON DESIGN DESCHUTES CF TARP
It comes with a stuff sack.
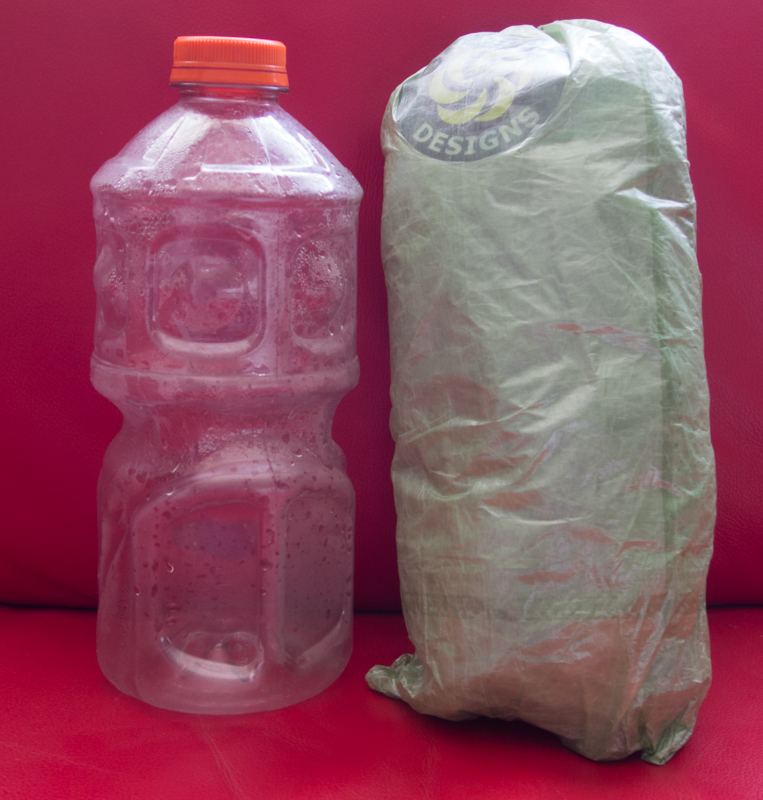
There are short nylon loops at the 5 tie-out tent stake points along the bottom edge of the shelter, just long enough to insert a tent stake. Inserting stakes in these loops will pitch the bottom of tarp close to the ground. It comes with a length of thin line that can be cut into 5 small sections to extend the distance from the shelter loops to the stakes allowing you to pitch a little higher off the ground, plus there is one longer line that is for the guy line at the front to the top of the shelter’s zipper area. I found the extension cords too thin and I didn’t like the black front line material. Optionally there are two loops midway up each side that can be used for extra stability. That’s it. No instructions – I guess Six Moon Designs figures that if you need instructions, this shelter really isn’t for you – I like that.
This means, at a minimum, the shelter needs 6 tent stakes or with the optional pitch, 8 stakes. Many backpackers balk at this, saying they want fewer stakes and guylines in a shelter, which makes their spreadsheet base weight lighter or requires less effort to erect the shelter. Many want a shelter that is “free standing,” that is no stakes. Here’s the bottom line, in bad weather you need many stakes; stakes that are secure and won’t pull out or move — the stakes keep the structural integrity of the shelter in place. With a flat or shaped tarp this is a matter of paramount importance. There is no way around it. Yes, the numerous stakes can be lost and they add weight. So the question becomes, do you want to stay warm and dry, or have the lightest spreadsheet kit?
Also, a tent that can be pitched with just a couple of stakes is going to be much heavier than a tarp, requiring a robust pole structure to support it. A properly pitched the tarp will withstand the enemy, wind, much better than most lightweight tents. It comes down to the fact that using a tarp requires skill. It is a skill that is not difficult to master.
Seams
The Deschutes CF is constructed from several pieces of Cuben material and all of the seams on the Deschutes are sewn first then tapped. The sewn seam allowance is not seen as it is buried under a wide 1.5” piece of seam tape. This protects the stitching and makes for a very clean seam.
SMD also use their own custom seam tapes and glue. The normal transfer tapes used on Cuben can peel under the right conditions. However, SMD wet tape bonds more completely to the Cuben when it dries. The tapping also waterproofs the seams.
Tent Stakes
Experience has taught me that tent stakes are probably the most important and potentially weakest link to keep a shelter secure in wind. This is not the place to try and save weight.
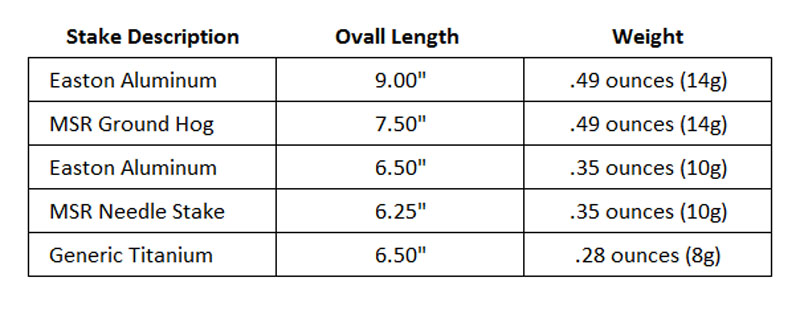
Holding power is a combination of length, diameter and shape, along with the type of soil the stakes are driven into. This is not going to be a thorough tutorial on stakes, but I have found two brands and types of stakes have the best combination of holding power and light weight: the Easton 9″ aluminum Nano Stake and the MSR Ground Hog, with a very slight overall edge to the Easton. The Eastons are cylindrical in shape and the Ground Hogs have a “Y” shape. Both weigh the same. Usually I bring a mix of both do cover different types of ground. I use these stakes for the corners and the main line to the pole on most of my tarps. Occasionally I may bring along some of the thin Titanium stakes for the remaining guylines; these titanium stakes are the easiest to drive into hard or rocky soil. Often I will place heavy rocks on top of each stake when strong winds are expected. There are other methods for securing stakes in problematic locations, but I won’t delve into that subject. Pitching a shelter in snow usually requires different kinds of stakes and methods, something for a discussion in another post — someday maybe. I don’t care for the MSR Needle stakes shown below and no longer use them; they hold a little better than the titanium shepherd’s hook but I find the guyline sometimes come off the hook. The small Easton stake in the middle is just too short for my uses.
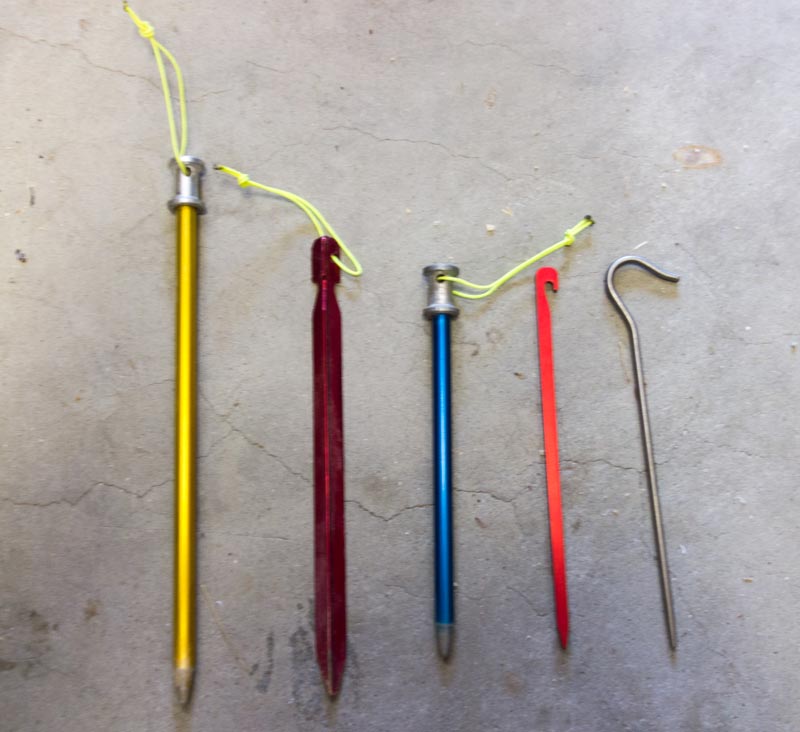
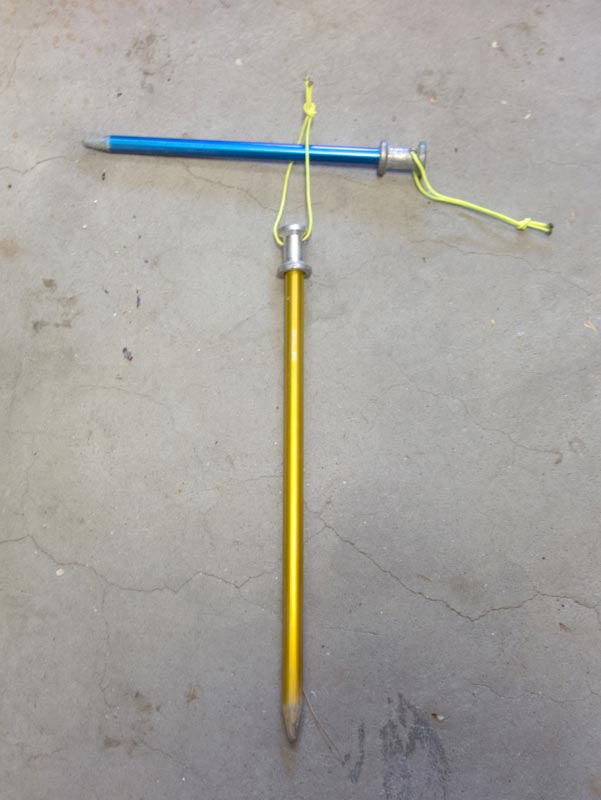
Once nice thing about the Easton and Ground Hog stakes is the loop at the top. You can easily remove the stake from the ground using another stake or some other object. With the thin cord I use for these little loops, I need to be somewhat careful if I use a Ground Hog to pull out another stake as it could (and has) broken the cord.
Sometimes When Things Go Wrong, Good things Happen
When I opened the box and inspected my newly arrived Deschutes tarp, I noticed that there weren’t any guyline loops. I went to the SMD website and filled out a “Contact Us” form describing the problem. Within minutes I received a reply from Brandon apologizing for the oversight telling me he would email a pre-paid return shipping label and he would sew on the missing loops. A couple seconds later the email to print the label arrived.
I sent another email asking if he could sew on some LineLocs if I included them in the return package. “Yes,” was the immediate reply. So I put everything back into the box, printed and attached the shipping label, and dropped it off at the Post Office. It was Tuesday afternoon.
The following Monday the tarp was delivered back to me with the Line Locks attached to the newly sewn loops.
LineLoc 3
For years I have been adjusting the tension on my guylines using 3 methods. The first was to just use a loop at the end of the guyline and place the stake through it while pulling the line to create enough tension. This works well if you find the perfect spot to set up your tend and the soil is perfect at each spot where you need to place a stake. This is a no-adjustment after the stake is placed into the ground method. If additional tension is needed, the stake must be removed and relocated.
The other method I employed was to use longer guylines with plastic tensioners that would slide up and down the line to achieve the right tension. Most of these adjusters were fiddly and heavier than they needed to be. I eventually gave up on them.
The last method was to run the line around the stake and tie the end back on the line with knots that are easy to tie and adjust. These are called a “something or other” hitch, the something or other being a name I can’t remember. I am not a knot expert, but this method was the best overall if the line wasn’t too thin.
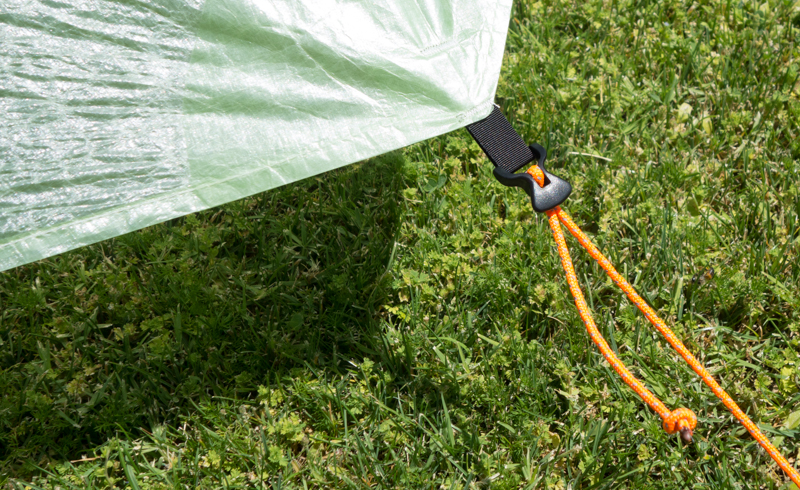
In 2010 I bought a Tarptent Scarp 1 tent, which had tensioners sewn to the tent. The tensioners are called LineLoc 3 tensioners. The end of the guylines use a loop for the stakes to go through, and the tension is applied by pulling the guyline through the tensioner which is attached to the shelter itself. These worked well. Plus if you need to adjust tension during the night, most of the tensioners can be reached by just reaching out from inside the shelter. LineLoc 3 tensioners weigh about .05 ounces each.
Then, a little over two years ago, I bought the Trailstar tarp that also had these tensioners built into the shelter.
I find the LineLocs to be quick and easy to use even with gloves on, and they are very secure in wind. Attempting to tie a knot in a guyline when the wind is gusting at 40+ mph or when you are cold and wet in a storm is not an easy task for a mere mortal like me.
The LineLocs are designed to be used with 2.5 mm – 3.0 mm cord. Some hikers remove the LineLocs and replace the guylines with thinner cord in an effort to save weight. I have done the opposite. Last year I bought a big bag full of LineLocs and installed them on all my shelters.
Guylines
For many years I have been using thin 1.2 mm spectra cord wrapped in nylon for guylines on most of my tarps. The nylon covering comes off over time, and the thin diameter is susceptible to knots.
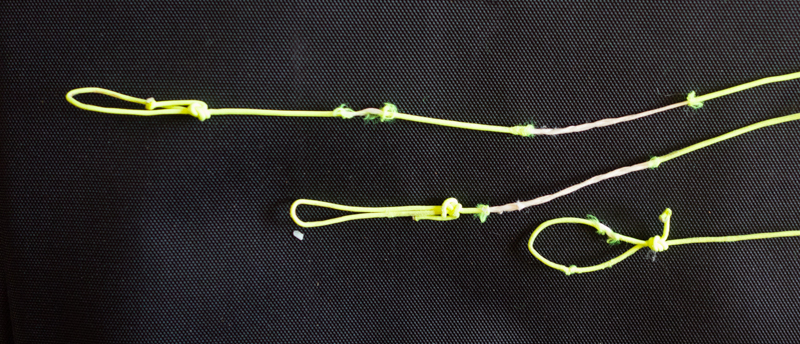
With the LineLoc 3 tensioners requiring a line diameter between 2.5 and 3 millimeters, I tried both. In really wet and windy conditions I found the 2.5 mm cord would sometimes slip a little. Today I am exclusively using 3 mm guylines from Lawson Outdoor Equipment called Glowire. The outer sheath is made from UV resistant polyester, with a bit of reflective 3M Scotlite thread interwoven in it, which makes it reflective at night when a light is shined on it – a great safety feature so you won’t trip on it. The core of the line is a high tenacity polyester parallel fiber. The cord is strong and has almost no stretch to it. It is not the lightest option out there, but it is strong and extremely reliable – all good attributes when keeping your shelter secure is Job 1.
Poles
If you are a trekking pole user you can use one of them as a pole for a mid shelter. If not, you will need a pole. You can buy a 3-section carbon fiber pole from Six Moon Designs that weighs 1.8 ounces. The pole diameter is not specified on their website. I opted not to purchase one because I already have several. A pole discussion is probably in order.
When I bought my Hexamid from zPacks, I also purchased a 3-piece carbon fiber tent pole from them. The diameter is .292” and only weighs 1.13 ounces. However in strong winds, the pole shook and flexed too much for my comfort level. Keep in mind that if your only tent pole breaks, you have no shelter. In addition, a pole break would probably result in a nice hole or gash in your shelter.
This pole was replaced with a 4-section carbon fiber .450” diameter pole from Ruta Locura. This pole was stable in high winds and weigh a little over twice as much as the previous pole.
Mid style tarps produce a lot of tension on the single pole. When I got my Trailstar, which is a serious shelter, probably one of the best wind-shedding shelters on the market, I wanted a more robust pole. Also the Trailstar requires two poles, not to mention it is best to have an adjustable center pole. The reason being is that tarps are prone to condensation and the higher it is pitched, the less likely condensation will form. But in bad, bad, Leroy Brown bad weather, it needs to be pitched low to the ground. So I again contacted Ruta Locura and bought a 4-section .600 inch diameter, 48 inch long carbon fiber pole weighing 3.56 ounces, and another same diameter 4-section pole with an adjustable jack weighing 4.62 ounces . I can use the adjustable pole with just 3 sections with a height range of 38 – 46 inches or using 4 sections it is adjustable from 50 – 58 inches.


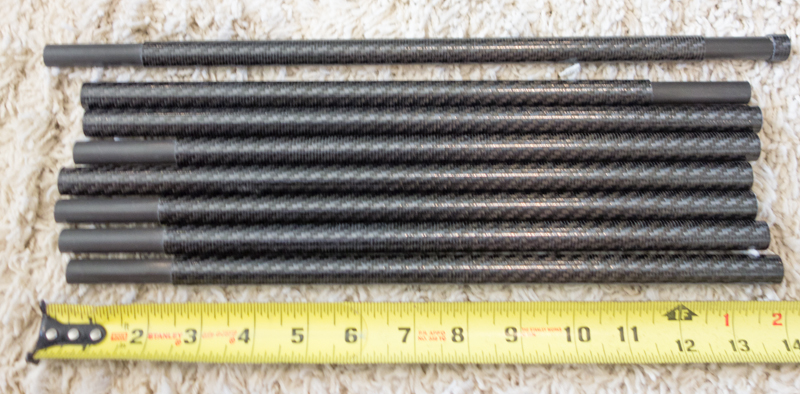
If you are looking for tarp poles, this discussion should be pole overload enlightenment.
Shelter Comparisons
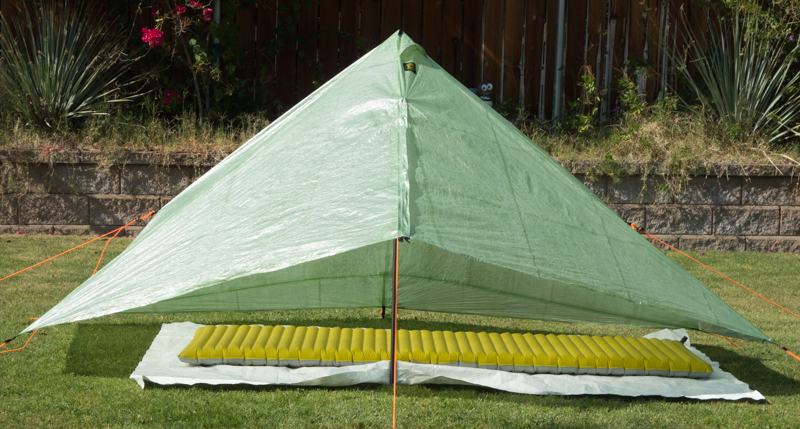
The Hexamid and Wild Oasis are almost identical in dimensions and size with around 35 square feet of coverage. The Hexamid does not have doors in the front. The Deschutes is the largest shelter of the three, at about 44 square feet of coverage. As these are minimalist shelters, the extra 9 square feet of coverage for the Deschutes is significant; roughly 30% more.
 The table above has more comparison data. Keep in mind that the Wild Oasis has perimeter netting that will keep bugs out of your shelter if the door is closed. I have considered cutting off the netting several times, which will probably reduce the weight by a couple ounces or so. This shelter is no longer made by SMD, and has been replaced by the Deschutes Plus, a silicone impregnated nylon material that is larger than the original Wild Oasis, and is the same size as the Deschutes CF. The stated weight is 16 ounces. You can also get this shelter in silnylon fabric without the netting at a stated weight of 13 ounces.
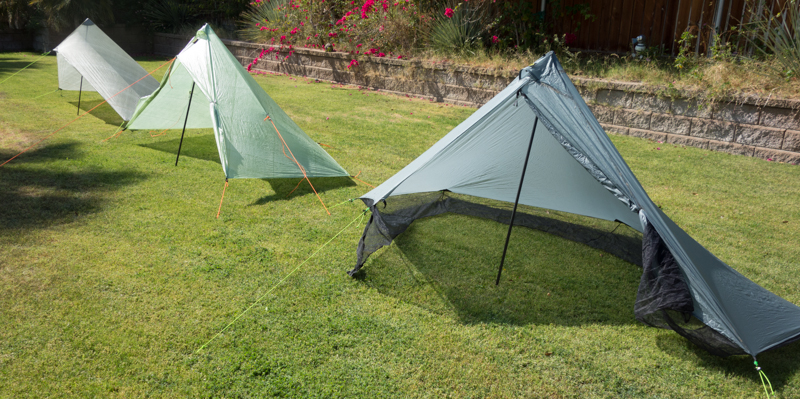
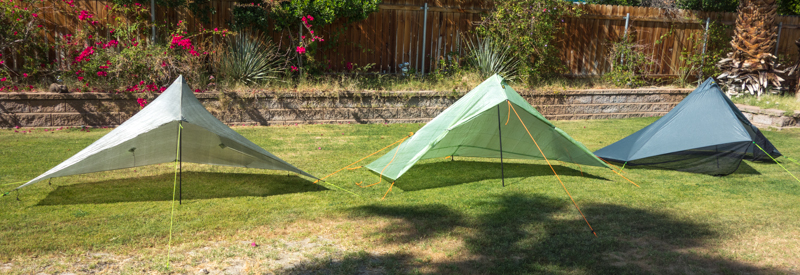
Below are a few pictures of all three shelters (left to right) Hexamid, Deschutes CF, Wild Oasis.
Below are all three shelters with a Tyvek groundsheet (46” x 78”) and a NeoAir mattress (20” x 72”). I no longer use Tyvek groundsheets as there are lighter options, but the white makes a good visual.
 Deschutes CF Tarp Features
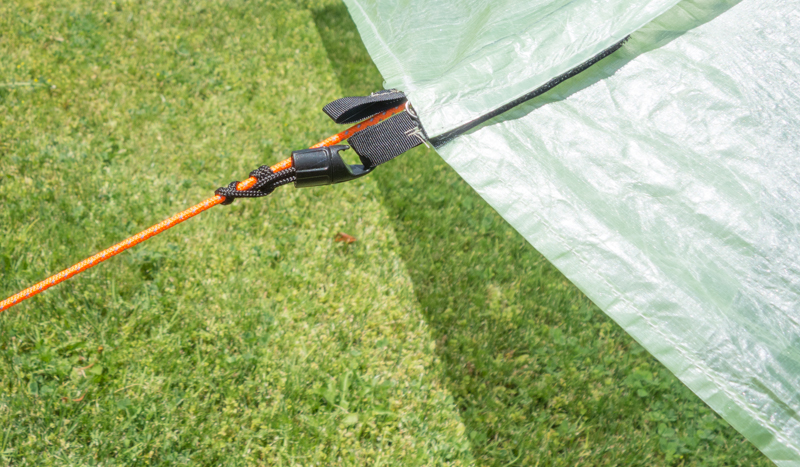
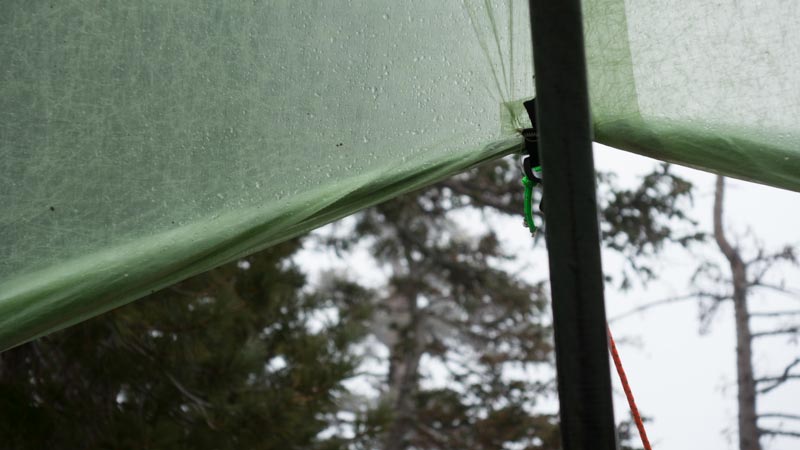
In the wind, the front doors are pushed upward by the force leaving you less protected than you probably want. This nifty sliding hook on the front guy holds it in place and by sliding allows it to adjust to any pitch height of the shelter.
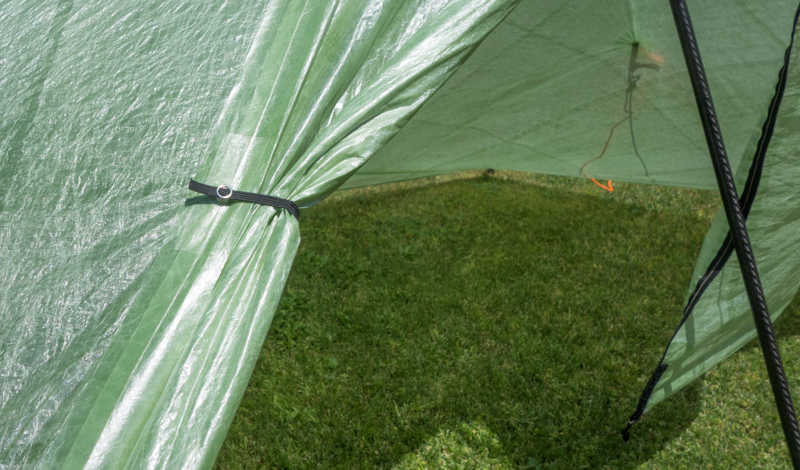
There is a snap on each side of the front so the doors can be rolled open and held by an elastic strap.
A backpack, stove, and water bottle placed in the shelter for perspective.
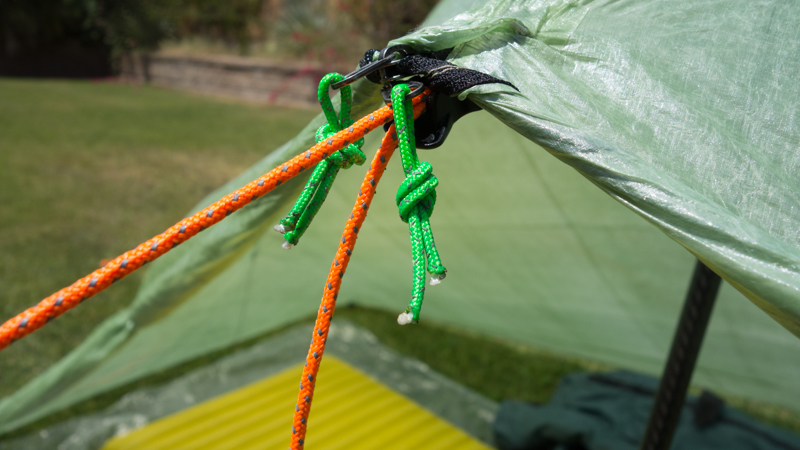 I added a couple pieces of green cord to the zipper pulls to make it easier to open and close the door. The shelter has a number #3 YKK zipper, which is not the most robust zipper available, but it is a a good compromise between light and durable. The zipper is not water proof, but there is a flap that covers it and is secured at the bottom with Velcro. I expect in most weather I’ll be able to leave the doors open.
Lastly there are loops inside the shelter to fit a mesh inner, which SMD calls their Serenity NetTent. This requires a conversation about inners…
TARPS, FLOORS, INNER NETS, AND OTHER CRAP
There is an elegance and aesthetic beauty in a simple tarp. A flat tarp or the Hexamid have no doors, which means you always have a view of the world around you. Non-tarp users will be surprised how much protection these shelters provide in inclement weather. The Deschutes tarps are similar to the Hexamid in design, but provide the option to close the door in awful weather.
Floors
These shelters do not have a floor, although you can order a Hexamid with sewn-in mesh door and partial floor, but if you need a groundsheet it is not built in. With all of these the user must camp in a spot that is well drained or else they could end up sleeping in a small pond and soak their gear and themselves. This is a function of experience and skill – how to choose a good campsite. In lieu of a floor, most tarp users opt to use a thin lightweight ground sheet when setting up on wet ground or to help keep things clean and off the dirt. When I use a groundsheet, it is cross-linked polyolefin film that is also used to tint car windows. I buy mine from Gossamer Gear. You can also get it at some automotive, hardware, and department stores in larger pieces. After I trim mine down, they weigh about 1 ounce. Sometimes I don’t even bring a ground sheet; I have a thin waterproof 1/8” foam pad that I bring when using an air mattress.
There is a growing trend for backpackers to add a waterproof “bathtub” to their tarps. With waterproof sides extending several inches above the ground, they feel it is extra protection in case their site gets flooded during a rain. This need is a function of poor campsite selection. I have a zPacks Poncho Groundsheet that is used primarily as my rain gear. It can be converted into a bathtub floor and attached to the Hexamid. I did this on the first couple of trips just to play with it. Since then, I have never used it as a groundsheet. It is not needed and as a groundsheet will eventually get holes in it, which would defeat its main purpose as rain gear.
Pockets and other Storage Options
Lately I have begun to see bathtub groundsheets for tarps with storage pockets sewn it. Really? That is why we carry packs – to store our gear. Plus most backpackers have small stuff stacks to hold some gear items. Need something at night within easy reach? Put them in your shoes.
Turning Your Tarp into a Double-Walled Shelter
The average person loses about a liter of water through body evaporation and breathing each night. If the temperature is cold enough and the air already has high moisture content, you may get condensation on the inner walls of your shelter. If you have plenty of open space at the bottom of your shelter and a large opening on one side or in the front, then condensation usually isn’t a problem because air can circulate and the moisture laden vapors from your body and breathing can escape from the interior of the shelter. But pitch the bottom edges close to the ground and close off any openings, you have a little greenhouse. Water can then drip down on you and your gear.
One method to deal with condensation is a double-wall shelter. An inner tent made from a solid breathable material allows the vapor to pass through to the outer shell. This movement of warm air from your body “hangs” between the inner and out walls, which keeps the inner wall a little warmer and helps to reduce and delay the formation of condensation on the outer wall. A double wall shelter makes sense in the cold of winter, especially where it snows.
I don’t see backpackers adding a solid breathable material under their tarps to create a double-wall shelter, but I often see them adding an inner made from mesh material that often has a waterproof bathtub floor. The penalty for these inners is that they usually weigh more than the tarp! An inner made of mesh is not going to work to minimize condensation, because the material will not warm up like a solid breathable material.
The other reason I see backpackers add an inner mesh is to protect themselves from insects, especially biting flies and the worst flying predator – the mosquito. I have backpacked in almost every state in the lower 48 at all times of the year and have never needed a netted shelter to protect me from these pests so I could get a good night’s sleep. The problems with flying insects are multifold:
- Psychologically the hiker cannot ignore them flying around and buzzing – I have learned to ignore them
- The hiker has camped in a less than optimal site – the hiker must stay away from low lying areas with water, or in places with a lot of shrubbery and/or trees – get up high and in open places
- The hiker is not wearing mosquito-proof clothing like woven nylon and they are not wearing a simple mesh head net – this has been my best defense along with an application of DEET repellent on any exposed skin
These three items should eliminate the need for a net inner.
Other people tell me that they just sleep in the inner and leave the tarp in their pack; they feel protected in the inner. See the bullet points above for bug control.
I have never backpacked in Minnesota or Alaska, and those environs might require a net tent.
However, if you want an inner for a Deschutes shelter, SMD will sell you a Serenity NetTent that is designed to fit into the shelter. It will set you back $120 and an additional 11 ounces.
THE PERFECT STORM
Testing a shelter in your back yard doesn’t cut the mustard. If one could special order weather to test a 3 season shelter, they would probably request rain and snow flurries with an overnight low just below frrezing. Additionally they might order a northwest wind 35 to 45 mph decreasing to 20 to 30 mph after midnight, with gusts as high as 70 mph. Well, that kind of wind might be a little extreme for a maiden voyage.
The weather I describe above just happened to be the forecast in our local mountains this past weekend. My Trailstar could probably handle 70 mph gusts, but the Deschutes probably isn’t designed for that kind of a storm. This is where the skill and experience factor come into play — find a protected area to pitch the tarp.
Since Joyce and I had been camping the last two weekends, and it didn’t look the weather would lend itself to a stellar camping trip, the only reasonable option to me, other than Joyce’s desire for the “Honey Do” List to receive some serious attention, was to go to the mountain. Further contemplation begged for a return leg down into some desert terrain. There will be no trip report on this one, seems I may have ventured into some ‘off limits’ places in the aftermath of a forest fire a while back. The Deschutes soft green color is beneficial for stealth camping.
Site Selection
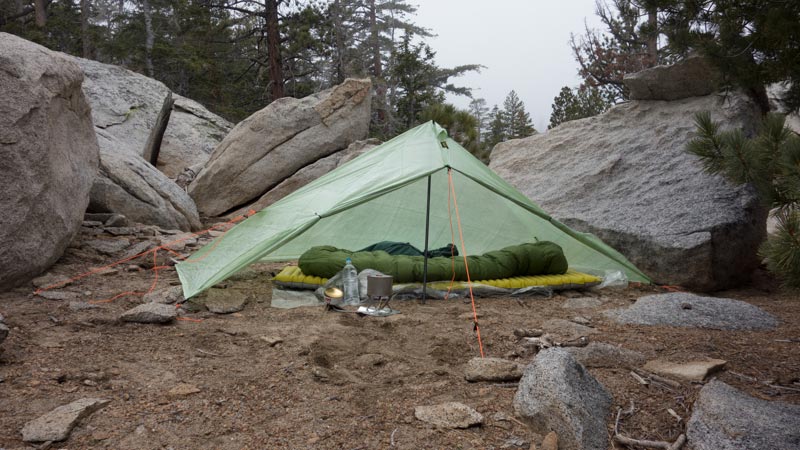
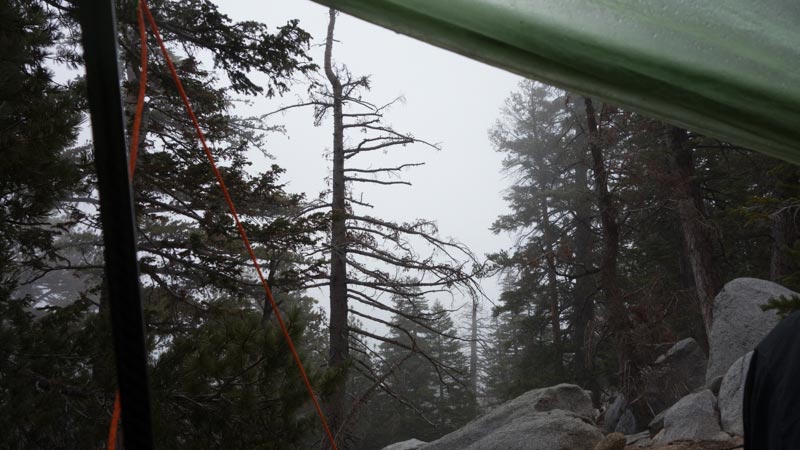
The perfect site would be protected from the brunt of the storm by boulders, would have good drainage, and not be too close to trees that could be toppled by the wind and kill me. After some searching I found such a place.
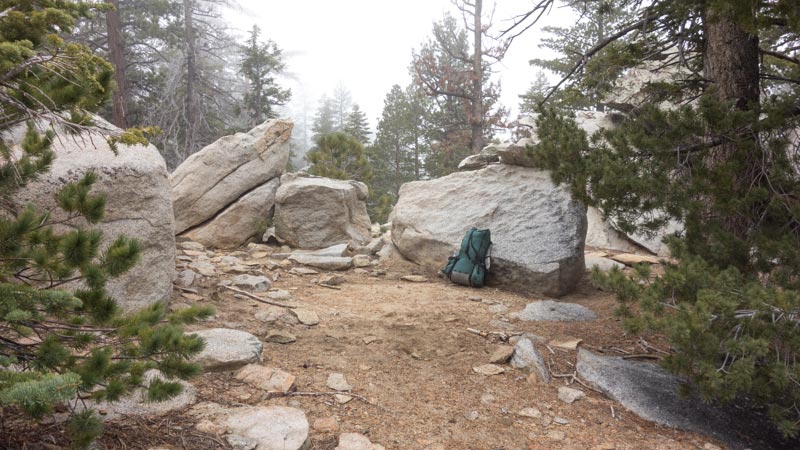
The only trees that were close to it were on a slope downwind of the storm. The large boulders sit on the top of a small hill, so any precipitation that would fall would drain away from my site. It wasn’t perfectly level and it could have been a couple feet wider, but all-in-all it was a great site.
Using just 3 pole sections, I set the height to around 45 inches, providing a lower profile and enough room to sit up when next to the pole. You may have noticed in previous pictures that three of the guylines (sides of the mid and the front) are too long. I want to use the shelter on a few more trips before I trim them.
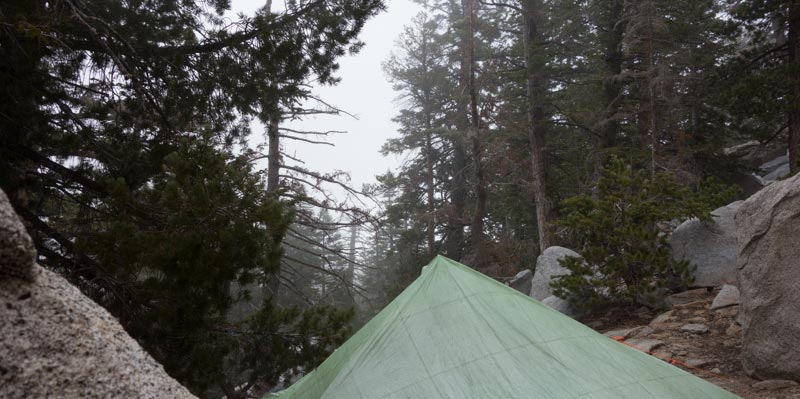
There weren’t any fabulous views, no sun, no moon, or stars. The overhead view was shrouded in clouds. I took a couple pictures, but was more concerned with staying warm and out of the wind. Good news was the little bit of snow flurries didn’t leave any snow on the ground.
Final Thoughts
This is going to be a good shelter for me. For a 3 ounce penalty it may replace my Hexamid for most trips. It does well in wind, although there was some flapping, as expected.
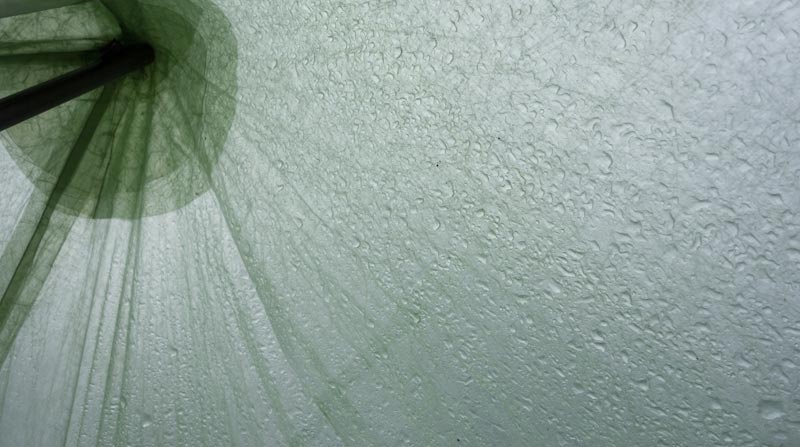
I like the light green fabric, which is somewhat transparent and allows some diffused light into the shelter. This is nice in rain or snow, the material doesn’t make you feel like you are trapped in a dark dungeon.
Total weight with the LineLocs, 3 mm guylines, 4 section pole with jack, four 9-inch Easton stakes, four Ground Hog Stakes and the stuff sack is 18.80 ounces (533 grams). The stuff sack only weighs .25 ounces (7g), but I probably won’t bring it on most trips.
