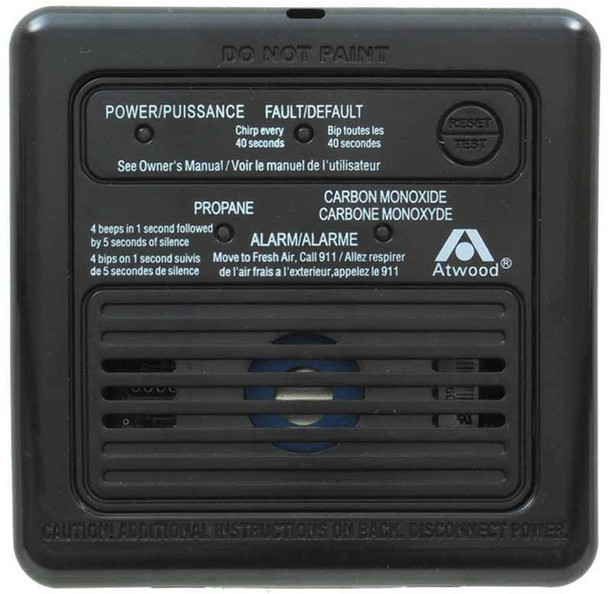
RV manufacturers have been required to install Propane/CO detectors for many years.
Our 1992 Starcraft Meteorite tent trailer did not have one. I installed one that also included a solenoid that shut off the propane near the tanks. Both our 2006 Fleetwood Niagara tent trailer and our Eclipse Milan travel trailer came with propane and carbon monoxide (CO) detectors. Nowadays it is rare to see a detector that includes a shut-off solenoid.
These need to be replaced periodically. Most RV manufacturers include the owner manuals for every single appliance and other equipment installed. These are separate from the RV’s owner manual. Our Milan came with over a dozen manuals. Most people don’t read them. And if they do, there’s a good chance they have become misplaced or lost over time.
So let’s go over some information about these devices and a quick documentation of a replacement unit.
How Long Do Detectors Last?
The most common devices are combination Propane and CO detectors. The life span of these vary among manufacturers with most being between 5-10 years. Our Milan travel trailer came with an Atwood (owned by Dometic now) unit. The owner’s manual states:
The Detector will operate in end-of-life mode after the Detector has been powered for 7 years +/- 128 days. This represents the operating life of the sensors used to detect CO and LP gas.
Most propane detectors are wired so that they remained connected to the RV’s 12V system even when equipped with a battery disconnect switch.
How Do They Work?
The specifications for our detector (what trips the alarm) are:
Triggers
Propane: 2100 ppm for 10 seconds
Carbon Monoxide:
- 70 ppm for 60 to 240 minutes
- 150 ppm for 10 to 50 minutes
- 400 ppm for 4 to 15 minutes
Volume
The audio alarm volume is a minimum of 85 dB at 10 feet. How loud is this? The chart below and descriptions will help to understand (from Decibel Pro )
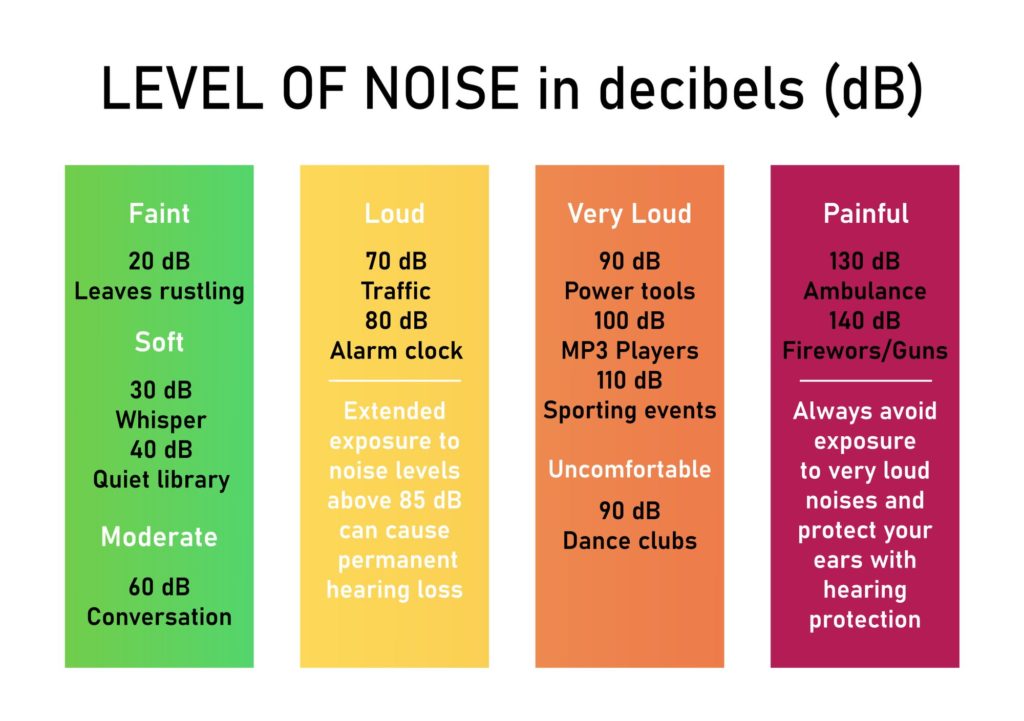
85 decibels is a noise or sound level equivalent to that of a food blender, heavy traffic while you are in the car, a noisy restaurant, or a cinema.
To better understand how loud 85 decibels is, here are some common and specific sources of sounds reaching this level:
Some common sources or examples of 85-decibel noise are:
- Noisy restaurant
- Noisy hotel lobby
- The inside of an airport
- Heavy road traffic
- Train or truck passing
What These Detector Don’t Do
They are not smoke detectors. You need a separate smoke detector(s). I’ll cover smoke detectors in another post in a few days.
Replacing Our Propane/CO Detector
This was straight forward as I purchased a direct replacement unit. The original was white. I opted brown because dirt and dust aren’t as noticeable. I bought it from Amazon and got it the very next day. It appears Amazon sells over 500 of these a month, which probably means you will receive a very recently manufactured product.
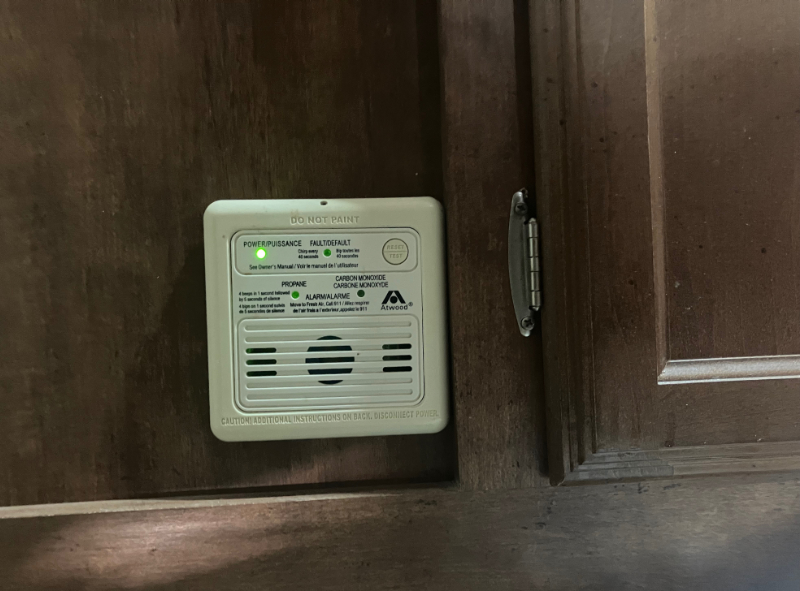
The front bezel was was easy to remove. A small screwdriver inserted into a slot at the top center of the device. You can see the 4 screws that attach it to the wood panel (belo
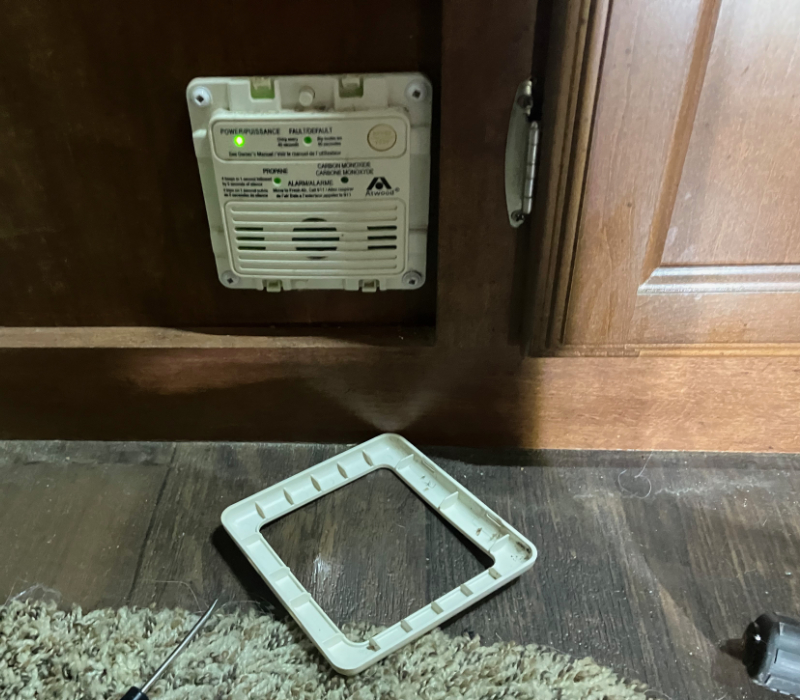
(Below) The old unit pulled right out. You can see the square cut-out the unit fits into. There are two red power wires (one for propane and one for CO). A single black wire is the ground.
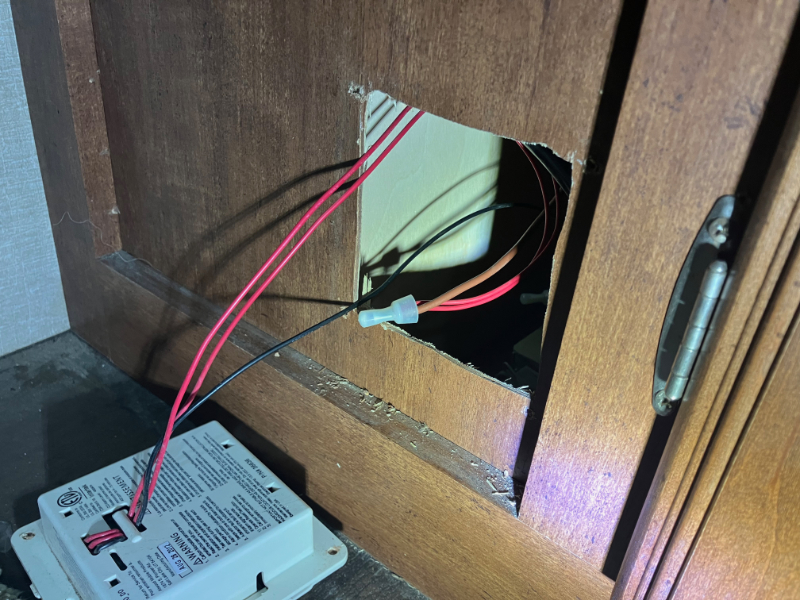
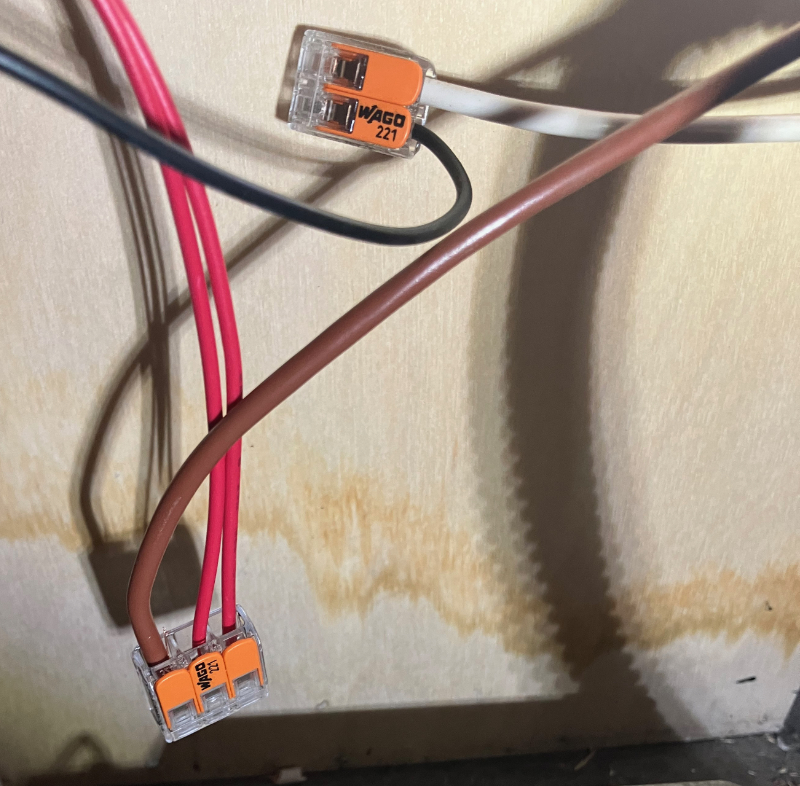
The wires from the detector were connected to the trailer’s wiring loom using crimp connectors. I cut them off and used WAGO brand lever nuts to connect the new unit (see image below). These are fantastic and I have used them for rewiring projects in our house and other projects such as the power box for my telescopes. If you want to use lever nuts, get the genuine WAGO product as they are UL Listed. I have tried other brands and they were all inferior.
Next I mounted the new unit into the cabinet face using the original screws, reversing the process (you need to remove the bezel on the new one before installation). Once mounted, the bezel snaps on. Whole job took about 15 minutes, including time to get my tools for the job.
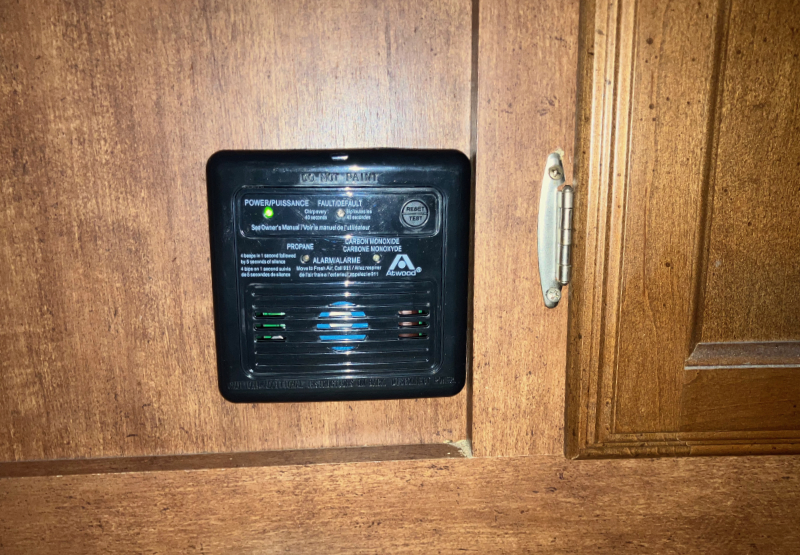
Once connected to power it takes about 3 minutes for the unit to initialize. You’ll know when it is ready when all the red lights quit blink and the green power light in bright and steady.
This website may be compensated for linking to other sites for sales of products. As an Amazon Associate I earn a small fee from qualifying purchases at no additional cost to the purchaser.
Auto Amazon Links: No products found.
