Dad’s 61st Birthday Extreme Ultra Light Walk-About
Dear Nicole and Joe,
Thank you so much for the birthday gift. I will put it to good use and maybe even learn something.
It dawned on me that I had not written a backpacking story for you in almost a year, so here is what I did to celebrate my birthday. Hope you enjoy it, I sure did.
Love,
Dad
The “Why”
The stated purpose of this trip was (1) tell myself I am not old yet, and (2) try and hike in various weather conditions with a total weight of gear (carried and worn) under 5 pounds. This does not include the weight for food, water, and stove fuel.
Of course the real purpose was to simply walk alone, and hopefully not see anyone else on my trip.
So why hike, or more specifically backpack? Those who engage in this avocation have different reasons. For me it is a productive endeavor. Create a hike plan, execute the plan with options for flexibility, and be self-sufficient with only the gear carried. Physical exertion and tired muscles communicate positive sensations telling you that you are alive, healthy, happy, and are living a good life.
Many would say it is an excuse or reason to escape the reality of our everyday lives. But hiking and the wilderness are reality, as is our life in society. If one needs to escape their everyday environment, a hiking trip will not change anything at home or work. The everyday environment is still there when you return home. If one’s everyday life is not good, the solution is to find a new place to live or even a new job. I enjoy living and working in the city. I enjoy being productive at home and in my job. I enjoy being productive during my hikes. Returning from a hiking trip sometimes makes me appreciate the city and the life we build even more; and to appreciate the wilderness areas we have set aside for enjoyment more. Hiking accentuates the good in both. Every trip is different as is my mental state upon return.
For me solo trips are more enjoyable than those trips with company. Hiking solo often is not as safe as hiking with others. If one wants to hike in a group, then your partners must be carefully chosen. Choosing excellent hiking partners is like choosing excellent equipment. But for the most part, I will accept the potential extra risk for the solitude. However, an excellent hiking partner can make a trip even more rewarding and should not be systematically avoided for all trips.
The “Where”
Since one of the stated purposes was a total kit of less than 5 pounds, certain weather parameters needed to be established. Five pounds is how the gear is quantified. What it really means is taking only those things that are truly necessary to stay warm, dry and safe.
Gear and Location Considerations
Rain would be preferable so the kit can be tested for functionality, as is nighttime temperatures under 40 degrees F, but not below freezing. Also the trip needed to be in November to meet criteria 1, which was my birthday celebration. Also a 3 day, 2 nights minimum was established as part of the guidelines. 50 to 60 miles was also included in the formula.
The initial plan was to hike from our house up and beyond Mt San Jacinto on day 1, then hike south along the Pacific Crest Trail to Cedar Springs on day 2, and return home via the Jo Pond Trail on day 3. This is a loop I have done several times and shared with you previously.
As my birthday approached, we had several snow storms in the San Jacinto Mountains during October and early November. The planned route would now have snow and ice on the trail, the planned days’ weather prediction was for snow and low temperatures around 20 F. This was beyond my equipment goal, requiring winter gear.
So a new destination was in order if a minimum of gear was to be utilized. Anza Borrego State Park became the new destination.
Anza Borrego State Park
The California State Park Website describes it as:
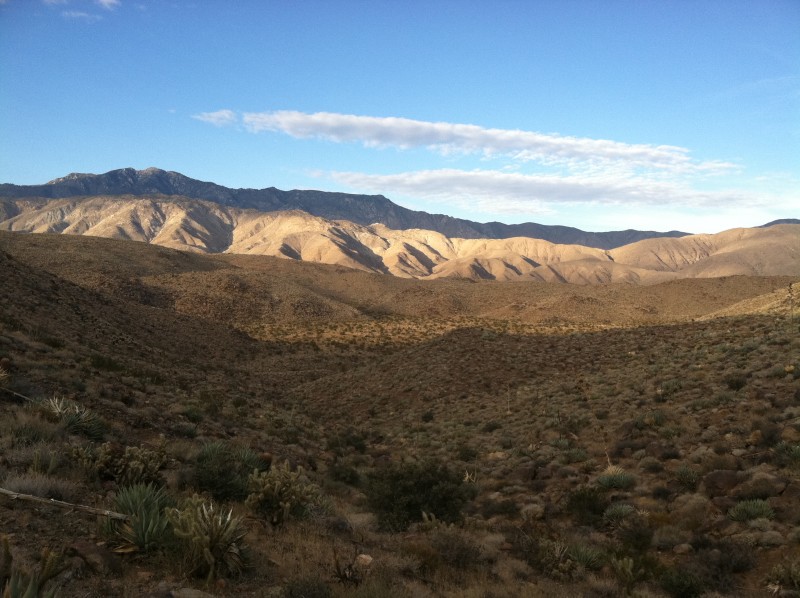
Anza-Borrego Desert State Park is the largest state park in California. Five hundred miles of dirt roads, 12 wilderness areas and many miles of hiking trails provide visitors with an unparalleled opportunity to experience the wonders of the California Desert. The park is named for Spanish explorer Juan Bautista de Anza and the Spanish word borrego, or bighorn sheep. The park features washes, wildflowers, palm groves, cacti and sweeping vistas. Visitors may also have the chance to see roadrunners, golden eagles, kit foxes, mule deer and bighorn sheep as well as iguanas, chuckwallas and the red diamond rattlesnake.
The park is almost 1,000 square miles. Many areas allow multiple uses such as off road vehicles, mountain bikes, horses and hiking. Wilderness areas do not allow vehicles of any kind and permits are not required. Most of the wilderness areas do not have established trails, which tends to eliminate 99.9% of the hiking population. Perfect.
Weather forecast was over 80% chance of precipitation on days 2 and 3. Again, Perfect. Nighttime lows of 39 F in lower elevations, and even a little colder where I would be sleeping. Perfect.
Juan Bautista de Anza (1736-1788)
De Anza was a Spanish military officer and explorer, becoming the Governor of New Mexico in 1777 when it was under the control of Spain. In 1769 Spain began colonizing California, and de Anza led two famous expeditions to California. The first was in 1774, traveling from southern Arizona to the area near present day Monterey, California, which was the then capital of Spanish California. This expedition was to establish an overland route and consisted of around 30 people. The second expedition was in 1775-1776 with the purpose to bring 240 settlers to California. The expedition consisted of 300 people including soldiers and over 1,000 head of cattle. Part of the route went through Coyote Canyon in what is now part of Anza Borrego State Park. De Anza traveled up California and established the Presidio in San Francisco. On December 26, 1775 the expedition camped near the Cahuilla village of La Puerta, causing the natives to flee. Having never seen a white person, the Indians thought they were ghosts. That same night there was an earthquake, which de Anza captured in his journal as lasting 4 minutes. Today the fault line in the area is known as the de Anza Fault.
Coyote Canyon
The Coyote Canyon watershed includes nearly 1,000 acres. The canyons on the western side are particularly gorgeous in winter and spring when the creeks are flowing and these steep rugged canyons display beautiful waterfalls. Most of them have stands of native Washington Fan Palms, cottonwood and sycamore trees.
Along Coyote Creek three large areas of lush plant life thrive. The first and largest is called Lower Willows and provides year round water from Santa Catarina Spring. The other two are called Middle and Upper Willows respectively. Water flow above Lower Willows along Coyote Creek is dependent upon winter rains and snow, although the spring at Middle Willows has water year round also.
A Jeep trail runs from Lower Willows to Middle Willows, but it is easy to hike along the creek and stay off this track. Motor vehicles and not allowed to go past Middle Willows. The entire Coyote Canyon watershed to is closed to all use, including hiking, from June through September to protect the water rights of the Big Horn Sheep.
The Trip Route
Day 1
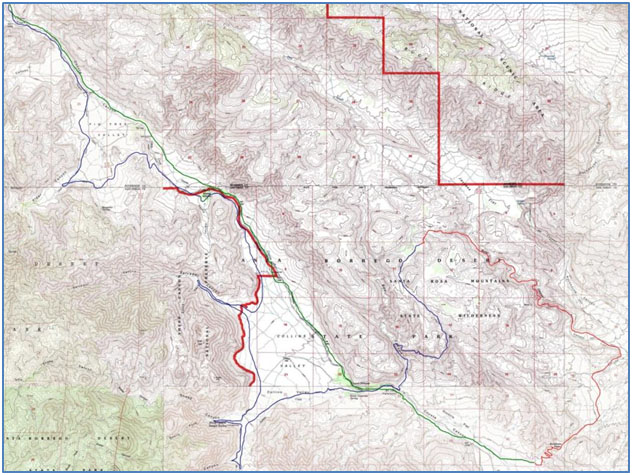
Coyote Creek would be the perfect spot to start my Birthday hike. I would park my SUV three miles below Lower Willows and hike up the Canyon to the point where it touches the mouth of Nance Canyon, the same spot that de Anza’s expedition camped on December 26, 1775. This would be an easy 15 mile hike. I limited this day to 15 miles because I would not be able to get to the area until mid morning, as it is an 86 mile trip from home.
Day 2
This would be the long day, starting just after sunrise. My course would mostly be cross country (off trail) and paralleling the bottom of the San Felipe Mountains. Along this route I would hike into the entrances of Alder, Salvador, Sheep, Cougar, and Indian Canyons. There would not be much time to explore the individual canyons, but I had never been in any of them, except for Sheep Canyon. Of particular interest to me was Salvador Canyon, which has several large stands of Washington Fan Palms.
After visiting these west side canyons, I would hike cross country back to Lower Willows, cross the creek, hike up and then out of Box Canyon on the east side of the Coyote Canyon watershed, spending the night in a wonderful playa (large depression). This leg of the journey would be 25 miles.
Day 3
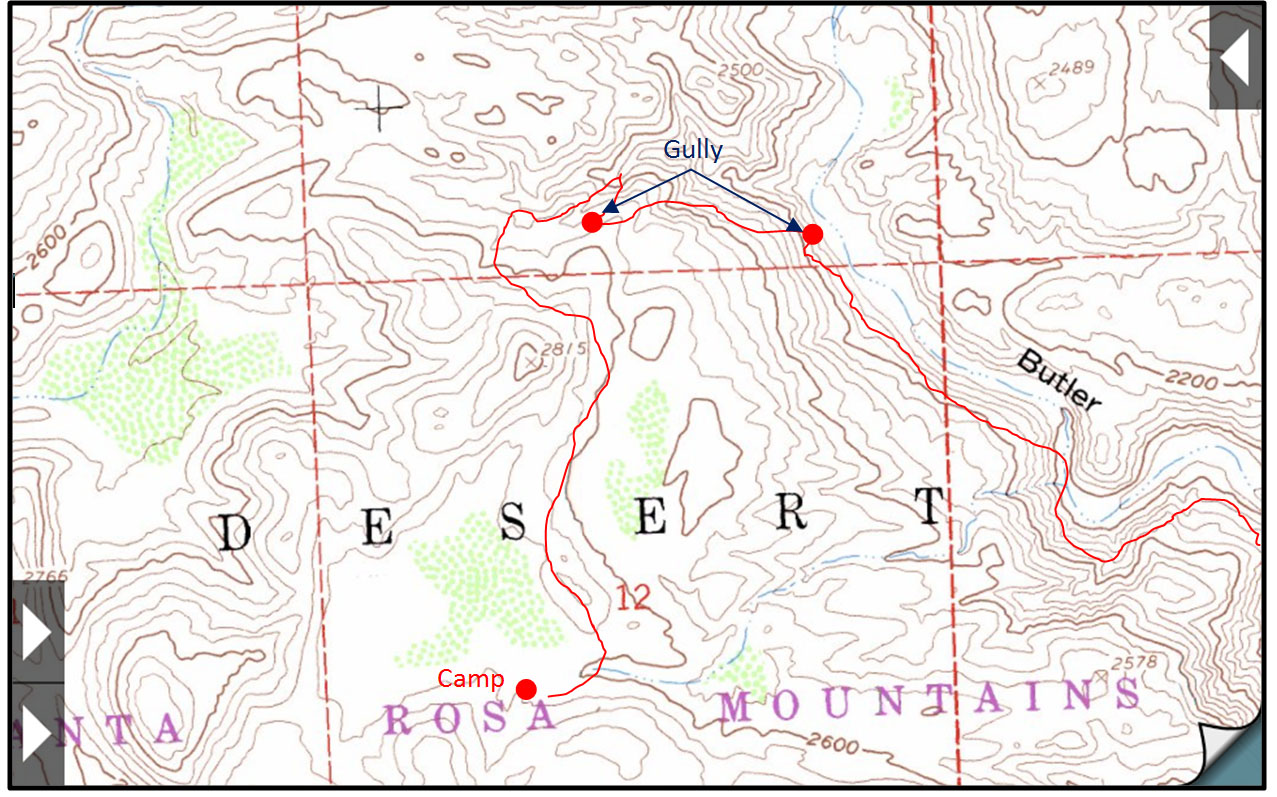
This would be the shortest day, and most likely have the worst weather. The mileage would only be 10 miles, but exiting the playa down into Butler Canyon would be the most difficult section of the entire trip. I would then hike down Butler Canyon, exiting the surrounding Santa Rosa Mountains through Alcoholic Pass. Once at the pass, there is a trail dropping down several hundred feet in elevation to where my SUV would be parked. The pass gets its name from the Cattlemen who would hike this route to get to the saloons in Borrego Springs in the late 1800’s.
The Map
Legend
—— Day 1 route —–Day 2 route —– Day 3 route
Get Ready, Get Set, Go
Getting ready for most trips takes very little time. My gear is always packed except for food, clothes, and sleeping bag or quilt. I always review my gear list to make sure I do not forget anything. There were a few changes for this trip, to meet the 5 pound limit. One was a lighter pack. Joyce is going to buy me a small custom made pack from McHale Packs for my birthday. I already have one McHale, but it is a little large for short trips like this. Dan McHale makes the best packs on the planet, and he encouraged me to consider using Cuben Fiber material. Cuben is used for sail cloth in racing yachts as it is strong and extremely light. Dan has been experimenting with Cuben for many years, and now is ready to make packs from the material. I already have other gear made from Cuben, and although it has tremendous tear strength, it is somewhat fragile when it comes to abrasion resistance. To overcome this, Cuben is sometimes laminated with other materials. Not completely confident about Cuben as a pack material, I bought a tiny Cuben pack from a company in Florida, named zPacks. This pack is nothing more than a stuff sack with shoulder straps, but very functional. It is made from a more robust Cuben than my other Cuben gear, weighing 1.43 ounces per yard. I own several other gear items make by zPacks and they make quality products. But the pack I purchased from zPacks is not very comfortable for me when carrying total weights over 10 pounds, and I would be hauling over 8 pounds of water at the beginning of the hike and when I returned to Lower Willows on day 2. This is the reason I want a McHale for most of my short trips; his suspension systems are second to none. Since I mostly hike in deserts and usually need to carry one or two gallons of water between water sources, I need a pack to handle heavier loads. But the zPacks pack would let me experiment with a Cuben pack without breaking the proverbial piggy bank.
One other change and a huge paradigm shift for me was to bring my iPhone. I am not much interested in electronics when it comes to backpacking. But the iPhone can be used as a camera, map, and a Global Positioning System receiver. At 4.8 ounces versus 4.6 ounces for my camera alone, the iPhone would be used as a multi-function piece of gear. The problem with the iPhone is that the battery cannot be replaced so a spare battery is out of the question. I suppose one could bring an external battery bank. Plus should it break, I would have no map, and no compass. Normally I bring a paper map and a compass. Even though I really would not need a map for a trip like this, I never hike without one. However navigating around Box Canyon can be very difficult. There are no trails, and numerous ridgelines and side canyons can make navigation troublesome, as I have found on many trips in the Box Canyon area in the past. So a map of some sort was required to be safe.
Now that gear, food and water were packed I went to bed to get a good night’s sleep. Got up around 8:00 AM, had a pleasant drive to the trailhead and started hiking around 10:00 AM.
Day 1
The weather was partly cloudy with temperatures in the 60s. Good hiking weather. Leaving the SUV, I crossed the dirt Jeep trail, and walked toward Coyote Creek. The plan was to generally follow the creek and/or stay close to the base of the mountains, to avoid running into people or 4WD vehicles, but since it was a weekday, I really did not expect to see anyone.
Once I got to the creek bed, I was pleasantly surprised to see water flowing. Usually the water does not flow this far south until late December.
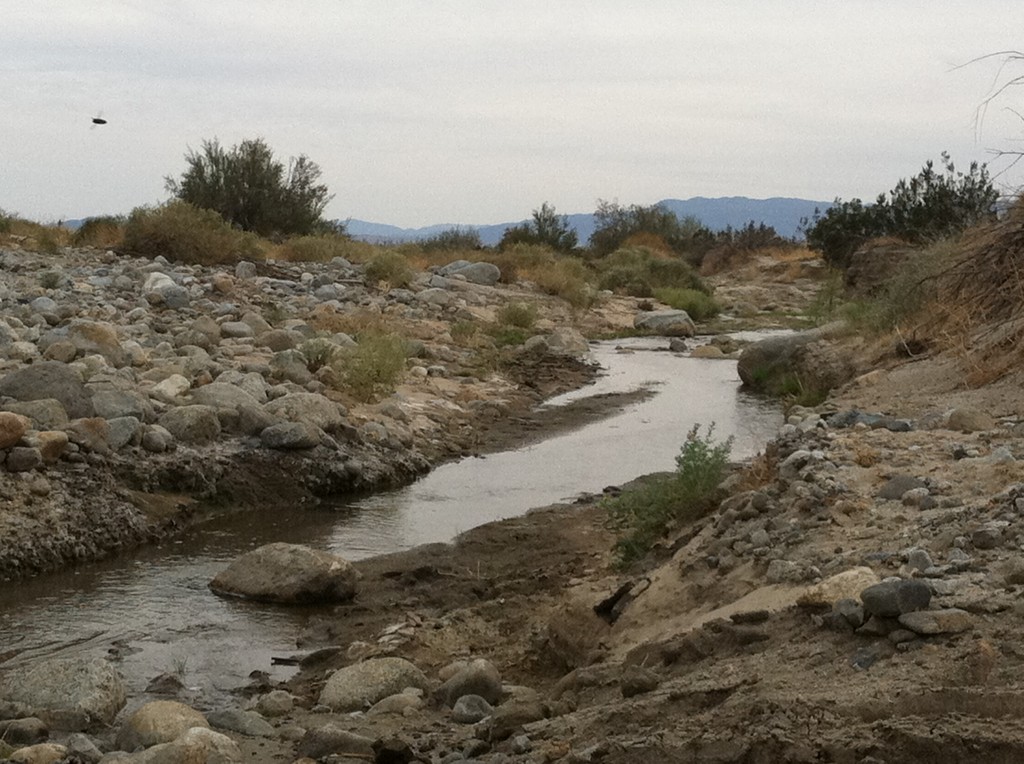
I would need to cross the creek several times as I moved up the canyon. I was wearing shoes used for running in cross country meets, called racing flats (Joe knows what they are). These are made by Mizuno and called the Wave Universe 4. Ridiculously light at only 4.9 ounces each for a size 12, using mesh construction that quickly drains water and dries.
Many people believe that heavy leather hiking boots are required for backpacking (espcially in deserts), providing support and protecting the feet. But with an ultra light pack, extra support is not needed. A light shoe allows one to react quickly to uneven terrain. I have fewer (actually none) foot problems with these types of shoes. However they do have two limitations: somewhat slippery on rocks and zero protection against cactus. So it is tread lightly and know you will get cactus spines in your feet, and with the Mizunos cactus spines will go through the sole of the shoes. Since they are so light, one can react quickly when stepping on a cactus and easily remove the offending spine.
The nemesis cactus in this desert area is the Cholla family. Specifically the Jumping Cholla (also known as the Teddy Bear Cholla) and the Buckthorn Cholla. The difficulties with Cholla are the pods that fall off the main plant and are not always easily seen.
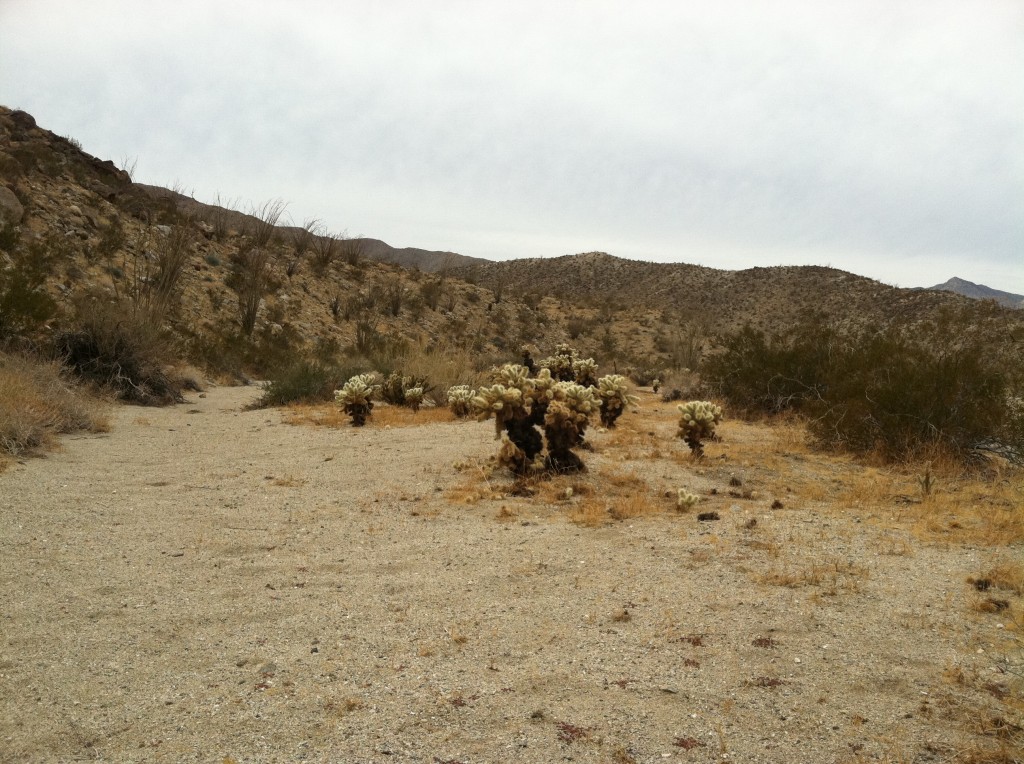
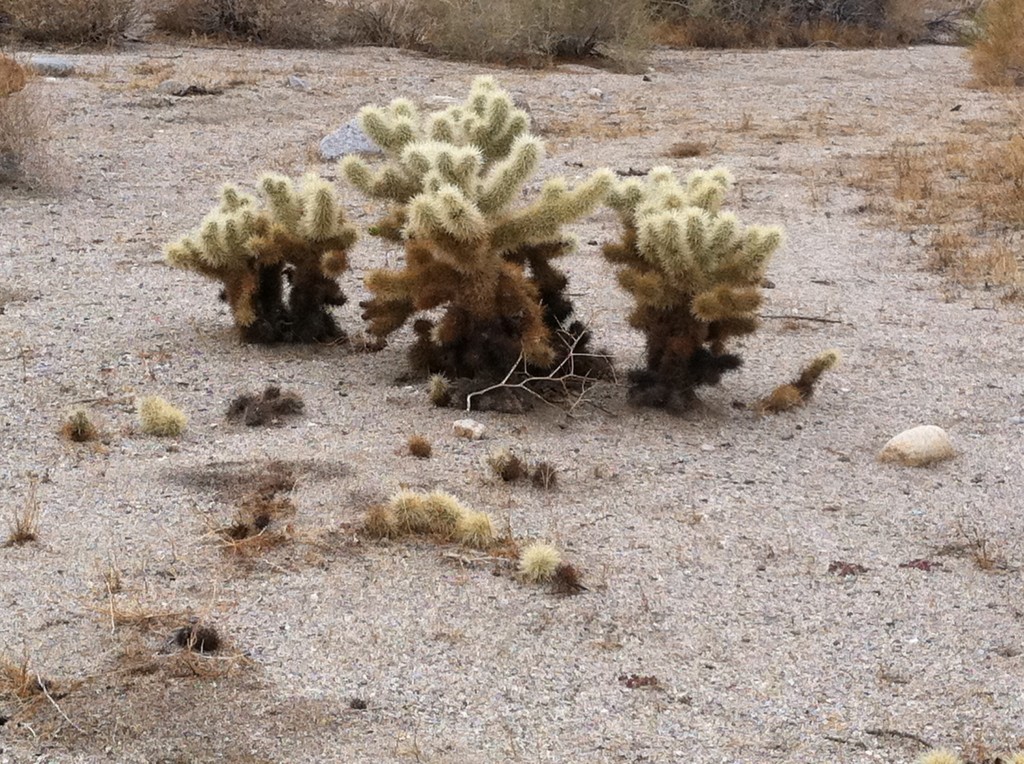
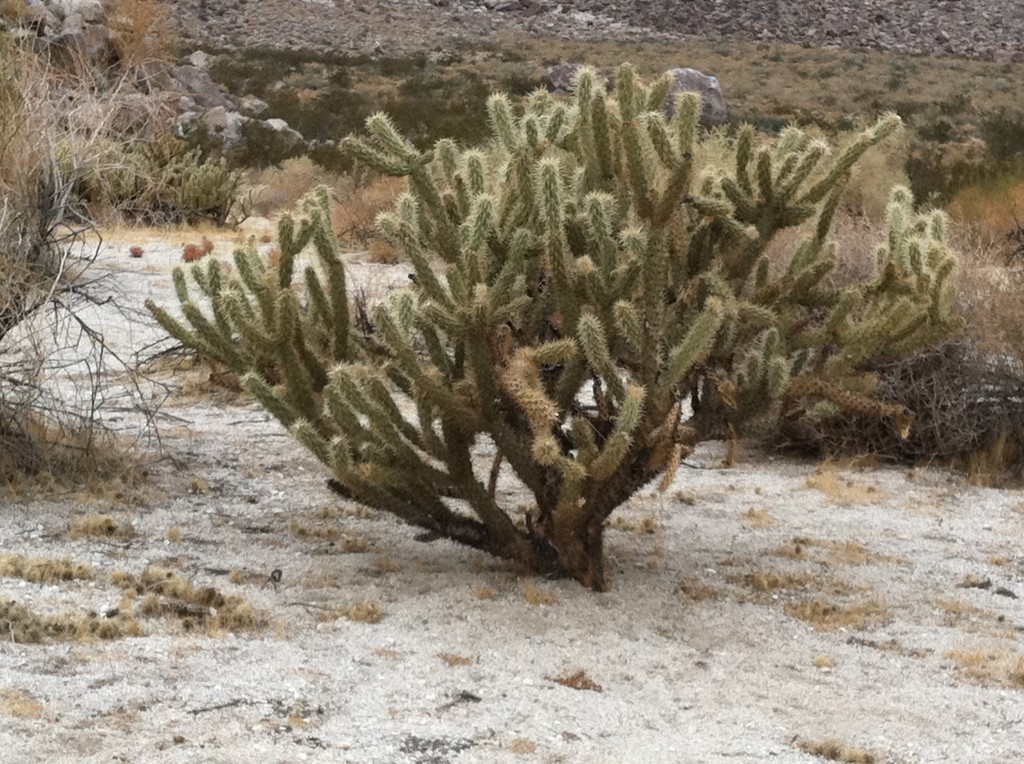

The Buckthorn pods are much more painful than Jumping Cholla pods. Both can be difficult to remove. The trick is to not let them get deep into your skin, and this is where the cross country flats shine. Even though the soles of the shoes are slim, one can quickly feel the spine and stop. If you try to remove them with your fingers, the pod is like fly paper; it becomes more and more difficult to move as more spines puncture your skin. Simply find a small stick or stone and flick them off the shoe. Works like a dream! And the pain goes away in a few seconds.
Colors
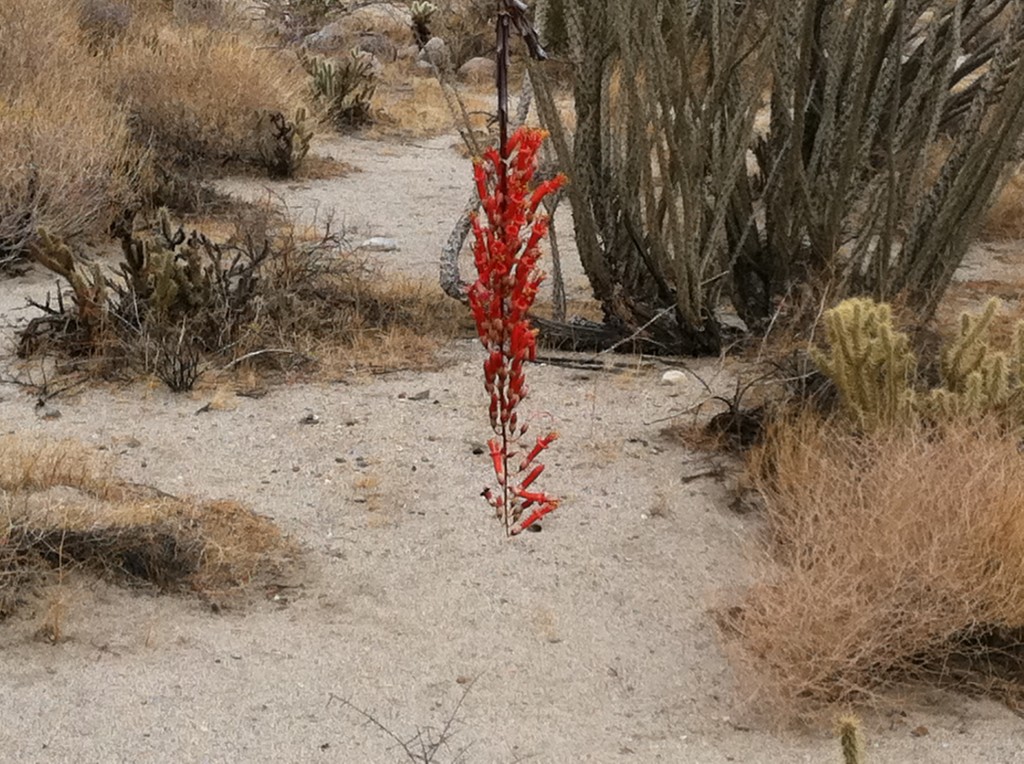
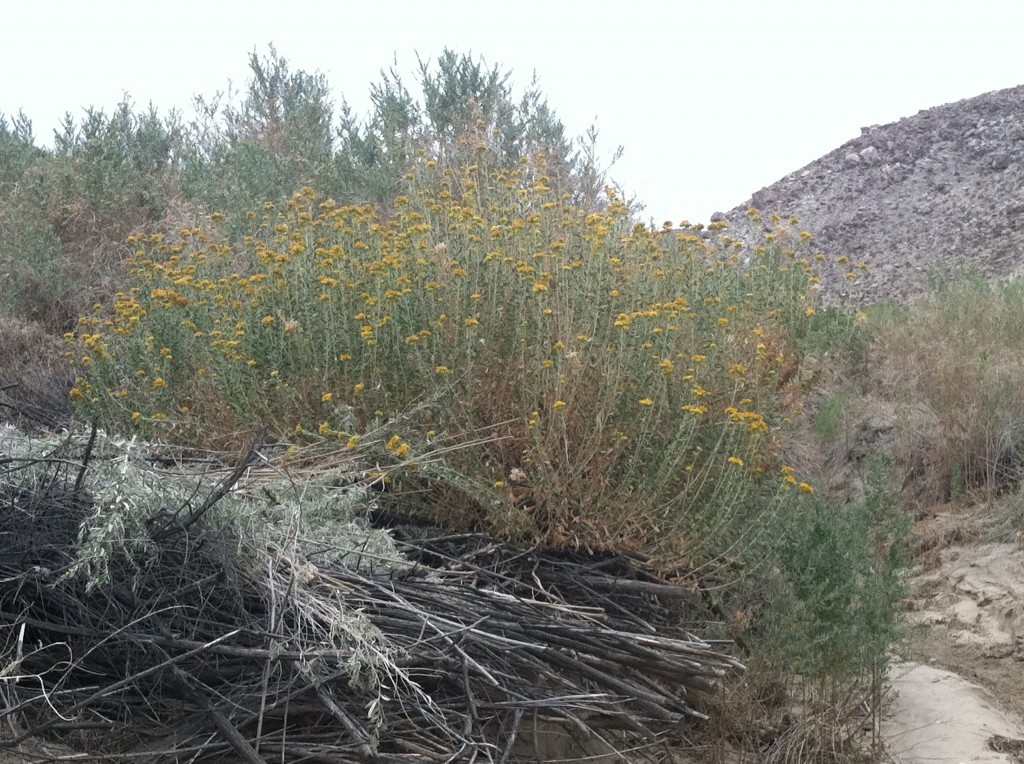
The desert is enchanting during spring blooms, especially the years that have rain just before it is time to bloom. To most people, the other two seasons of fall and winter in the desert are sand and brown plants. But if you look, you will find color.

Lower Willows
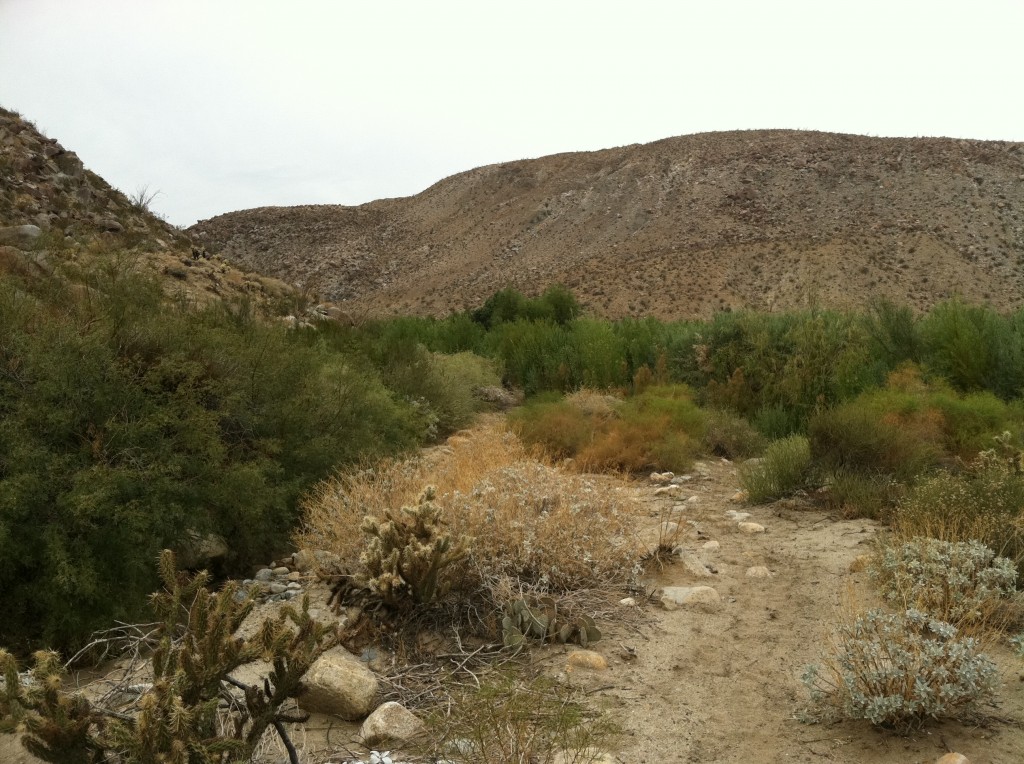
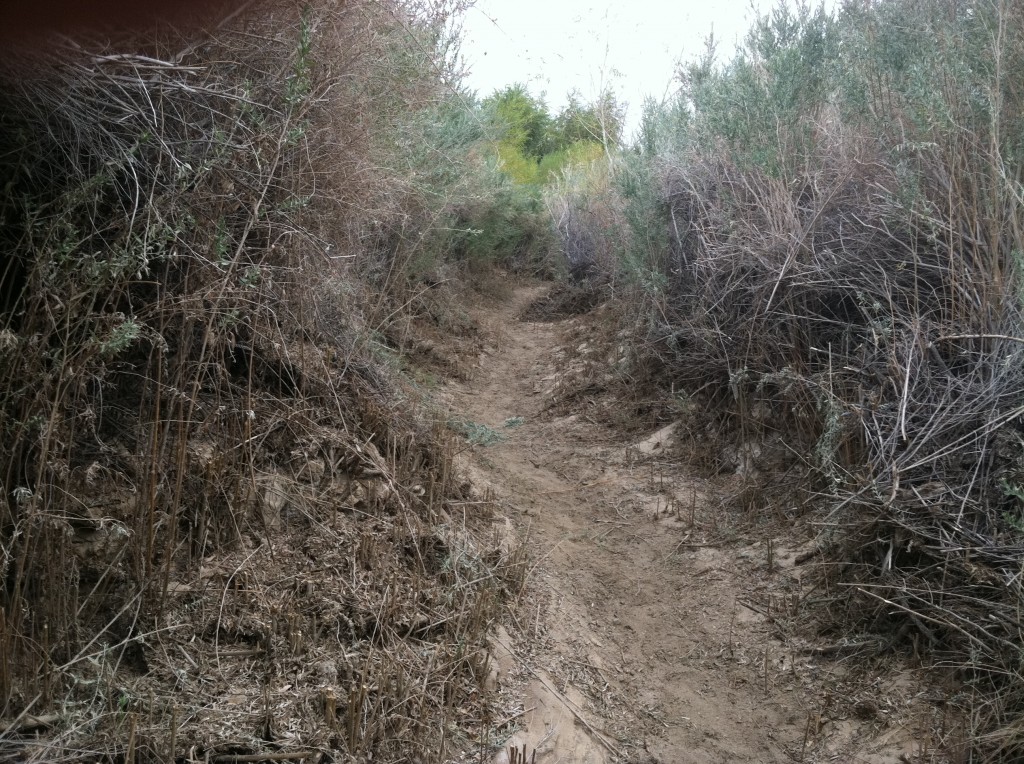
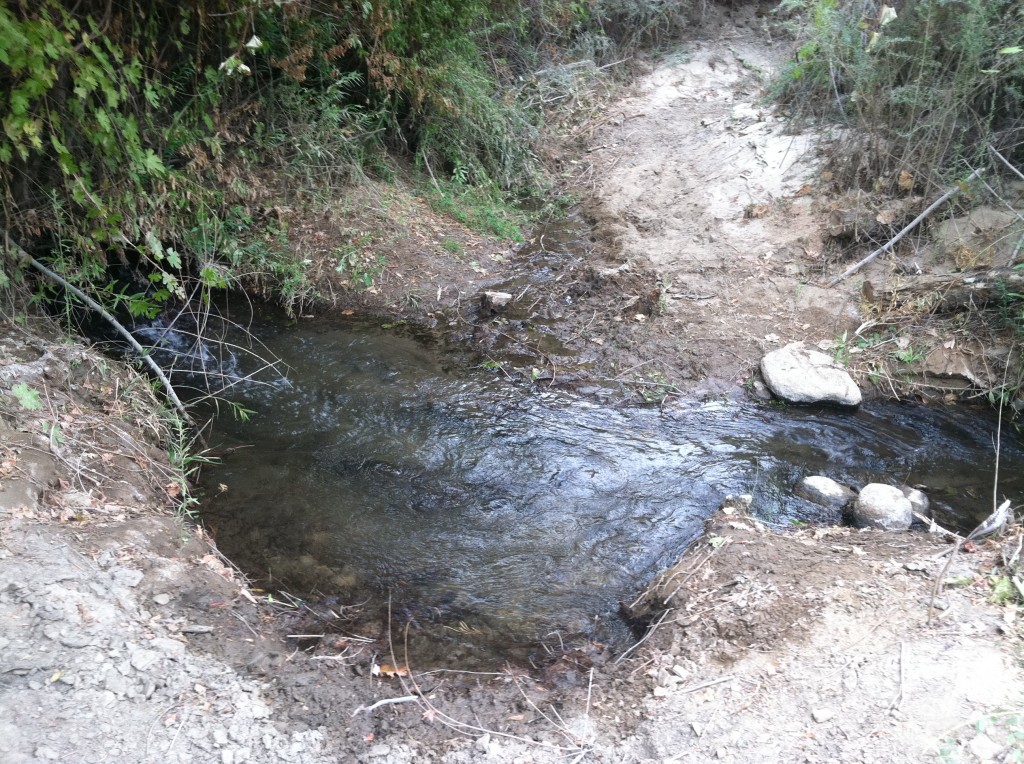
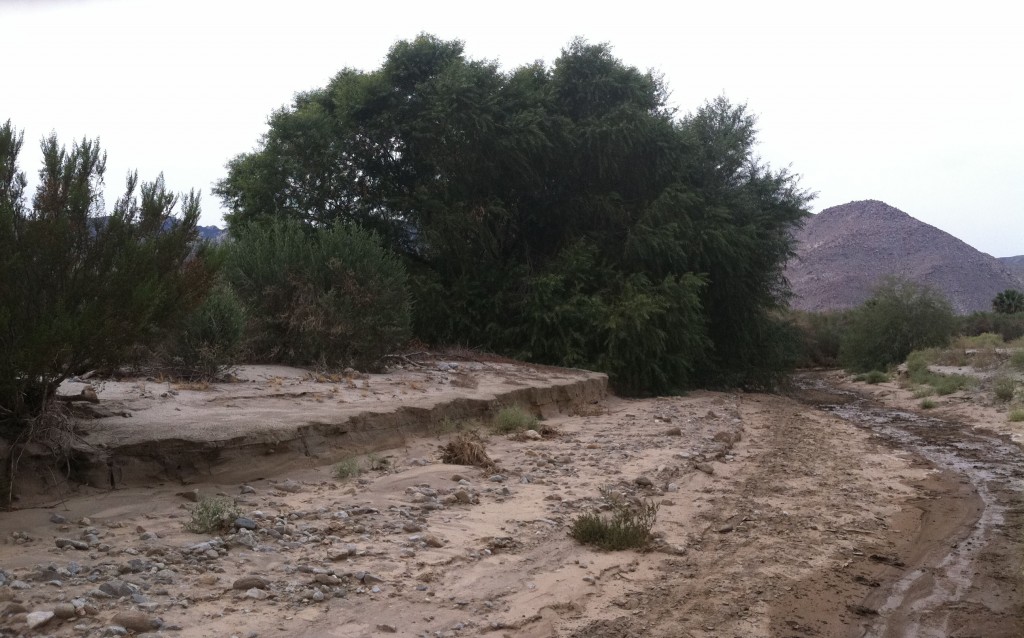
This is a two mile section of green, thick vegetation in a slot between the San Felipe and Santa Rosa Mountains. Trees include Mesquite, Desert Willow, Cottonwood, and Washington Fan Palms. Often it can turn into a wet slog of mud, but on this trip the trail was mostly dry.


The One That Got Away!
On most of my trips I don’t bring a camera, or if I do there just isn’t time or an inclination to take pictures. Cameras suck up valuable mind-wandering time. Usually I make an effort to take pictures if it is a trip I want to share with the two of you. And on those trips I put the camera in a shirt or pants pocket for quick and easy access.
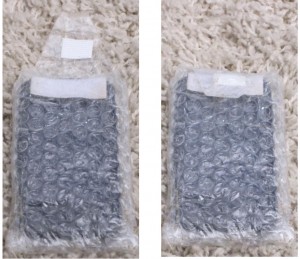
On this trip neither my shirt nor shorts had pockets, because pockets add weight, which is something I was trying to minimize. Since I was using the iPhone as a camera, it was in my pack wrapped in bubble-wrap to protect it. Remember, I might need it in case I got lost and could not afford to break it.
As I was walking through the willows, the trail veered east to the foot of the Santa Rosa Mountains on my right. Suddenly there was no vegetation to my right. As I exited the cover of the willows, I came eye-to-eye with a Big Horn ram that was sitting on a ledge about 5 feet above me. I could see the hairs in his nostrils, he was so close. Ah, the photo opportunity of a lifetime and my camera was in my pack! Slowly I lowered my pack and before I could open it he raced up the side of the hill and out of sight. This is the only picture I have ever regretted missing. At least the moment remains in my memory. I was so disappointed I walked the rest of the day without even thinking about pictures and the hike through both Middle and Upper Willows is somewhat of a blur. Soon it was 4:00 PM and I arrived at my night campsite. All in all, an easy and pleasant day of walking about!
Night Camp
It was quickly getting cold, so I set up my shelter as the sky threatened rain. Sitting in the shelter I cooked a freeze-dried meal of lasagna, ate some crackers, and generally just enjoyed my surroundings for a couple of hours. Although it was now only around 7:00 PM, I went to bed. This time of year nights are long and many hikers complain that they get bored and cannot sleep all night. Many bring books, music or other things to occupy their minds. For me it is different. I don’t get bored, can sleep longer than normal, and generally enjoy myself. Typically if I go to bed this early I know I will wake up in 4 or 5 hours. Then I just watch the stars if they are out or observe things around me. I know I will fall back to sleep in a couple hours and then awaken just before sunrise. Since I have been doing this for decades, I really don’t give long nights much thought or concern.
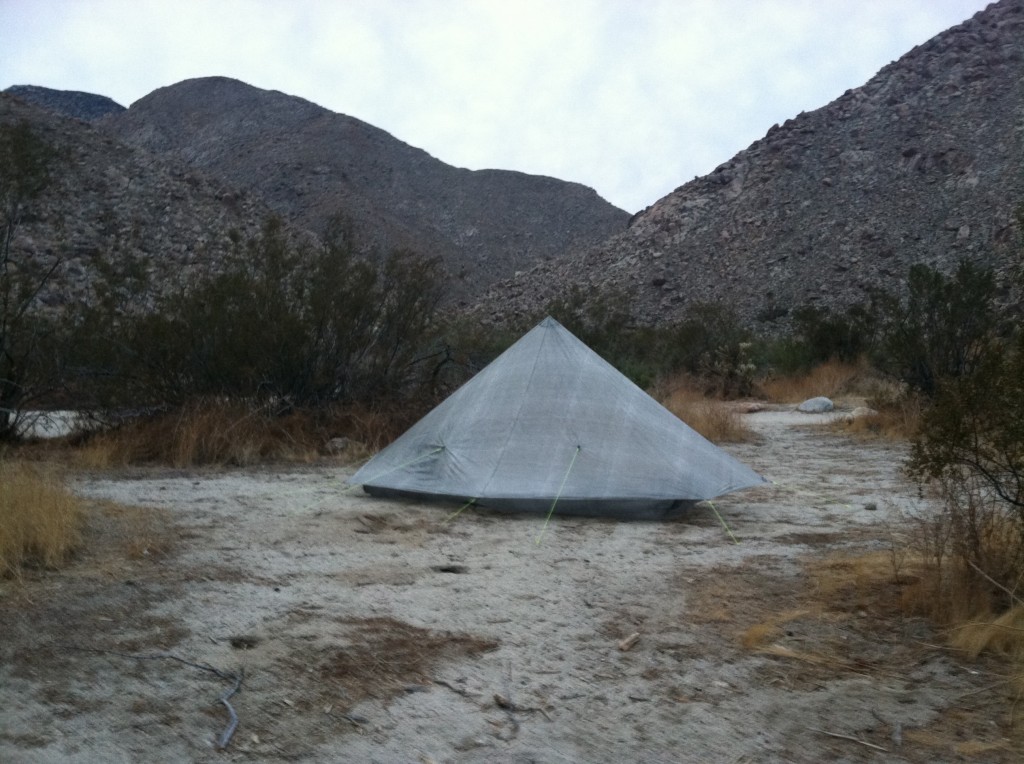
zPacks Hexamid
This shelter is so amazing to me, it deserves special mention. Construction is Cuben fiber.
The ground sheet is made from a heavier Cuben material. If you take a close look at the ground sheet in the “Front of shelter” picture you will see it clips to the shelter and forms a “bathtub” shape. Upturned sides theoretically help keep flowing water out, and it is much easier to keep items on the sheet and organized. Additionally the ground sheet does double duty as a poncho for rainy conditions (remember light often means multi-function).
However, proper site selection should eliminate the need for a “bathtub” floor. I bought the poncho/ground sheet to be used as a poncho only. For this maiden voyage of the shelter, I decided to set up the shelter with the poncho/ground sheet. Going forward it will only be used as a poncho, as continued use as a groundsheet would result in pinholes, which is not a good thing for rain gear.
The shelter is excellent in keeping me dry, even though the front is always open (which makes stargazing easy when needed).

Now the truly amazing part… weight:
To put this in perspective, most of the single person tents you two have seen weigh around 3 pounds or more. Joe’s Sierra Designs Clip Flashlight tent weighs 3lb. 12oz. Nicole, the small tent tent you borrowed from me several years ago weighs over 5 lbs. My complete system plus rain gear weighs less than 11 ounces. Wow!
Ponchos tend to be big and billowy in wind. Not this one. It has two small zippers that secure the bottom sides in poncho mode and a zipper for the hood that acts like a half zipper used on some jackets. Unlike a poncho that you can simply throw over your head and cover your body and backback, this is much thinner and requires the poncho to be put on over your head, torso, and pack before zipping up the sides. It covers the pack and almost goes down to my knees. Since it covers the backpack, no other cover is needed to keep the pack contents dry.
As expected, I awoke around 1:00 AM the first night. It was the moon that woke me up. If you take a look at the shelter it is translucent. The sky had cleared somewhat and the full moon illuminated my tent. The ground was still wet from rain although I did not hear it during my deep sleep. I watched the stars for a while then drifted off to sleep again. Next thing I knew the sky was beginning to lighten and it was 5:30 AM. While still in my bed, I boiled some water to make instant oatmeal and a cup of coffee. Sitting up with my quilt draped around me I finished breakfast. Quickly packing up in less than 5 minutes, I headed out for day two. Normally I would have laid in my quilt and watched the sunlight slowly creep down the mountainsides and then inch its way to warm me. These are my favorite camping mornings, but there would be no sunrays to warm me. The sky was overcast in dull grey.
Day 2
This was my long day. I had 25 miles to cover and wanted to explore some of the west side canyons, especially Salvador Canyon. Starting out I was a little chilly wearing only my top and shorts, but in a few minutes was comfortable. I hiked to the mouth of Alder Canyon, and realized I had been here years ago, but was not exactly sure when or how. Turning around I headed towards Coyote Creek with the intent not to hike the same real estate twice. I stayed as far west as possible hugging the edge of the mountain. Once around a point that opened to Collins Valley, I headed cross country toward Salvador Canyon. This is a large canyon and I have been told there are several stands of palms in the upper sections. Knowing there are palms and no trail on my map, I hoped to find one of the old Indian trails can be found throughout this area. Unable to find a suitable footpath, I worked my way up the canyon on the right side which was a small plateau overlooking the wash. Eventually the plateau converged into the mountainside and ceased to exist. Dropping down into the wash, travel was slow due to many large boulders. I brought out the iPhone and went to the Topo Map application. To use this application one must download all the needed maps prior to going on a trip, and unfortunately I had not downloaded the maps that covered the west end of this canyon. Unsure of the terrain ahead and a big hiking schedule to complete, I decided to turn around and head over to Sheep Canyon. But Salvador is definitely on my list of places to return to.
I had been in Sheep Canyon many years ago, hiking up the entire canyon and beyond. That was long and arduous hike/climb/bushwhack up 3,000 feet to a high flat area, and then I had traveled north and down into Alder Canyon — aha! Now remembered why Alder looked familiar earlier in the morning. One cannot go far into Sheep Canyon before the travel becomes difficult. I had heard that a fire had burned one of the Palm stands years ago and wanted to see the result. As I headed up the canyon, I could see the stand was still alive and thriving. So I stopped to take a few pictures before turning around and heading over to Cougar and Indian Canyons. I did not plan on hiking far into either, unless water was flowing. In that case I would climb up both to see the waterfalls.


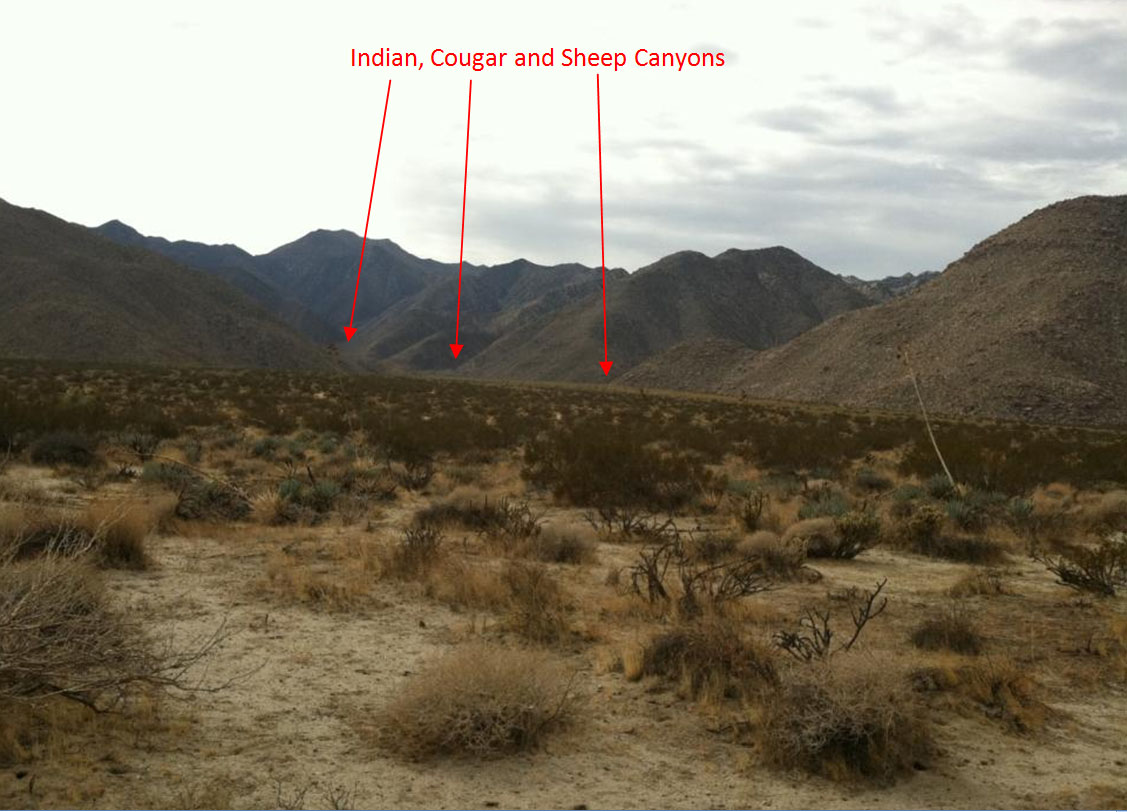


Leaving Sheep Canyon I walked to Cougar and Indian Canyons. Not seeing any water, I headed across Collins Valley toward the Lower Willows. I wanted to get there by noon to eat lunch and fill my water containers. Along the way I saw this stand of Palms at the north end of Lower Willows.
Box Canyon
After finishing lunch, I filled the water containers and added MicroPur tablets to purify the water, and then started working my way up Box Canyon. I had hiked down Box Canyon before on several trips and would have no difficulty locating a route to the Playa that would be Night 2 camp. Navigating this route can be very daunting, due to many impassible side canyons and ridges. Finding the route to exit up and out of Box Canyon was straight forward. But the ridge I hiked to get out of the canyon was a Cholla infested mountainside.

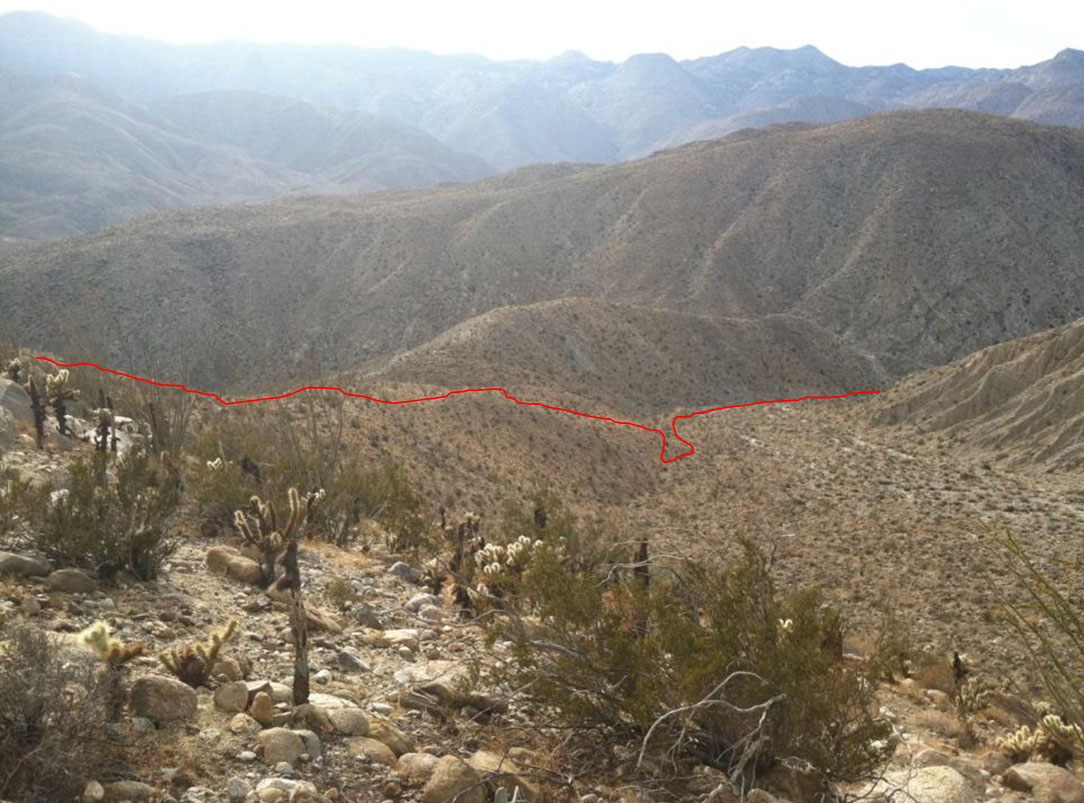

I arrived at the Night 2 campsite around 4:00 PM. Notice the blue sky with scattered cloud in the the picture above. During the night it would start raining and continue to rain for most of the duration of this trip.
Once I got to my campsite, I set up the shelter and made dinner. Tonight’s main entrée would be freeze-dried spaghetti. Mountain House is my favorite brand for dinner… just boil water, add it to the meal pouch, and wait for 8 minutes for a hot tasty meal. I use a Fosters Beer can as a cooking pot and cup, Esbit chemical tablets for fuel, and an aluminum stand/windscreen. This unique system is made by a company named Trail Designs, and the windscreen/potholder is called a Caldera Cone (Trademark of Trail Designs).
- Place protective sheet on the ground.
- Place Esbit fuel tab in holder and place on sheet, then light.
- Place windscreen/pot holder (called a Caldera Cone) over fuel tab.
- Fill Foster beer can with water, place in Caldera Cone and wait for approximately 10 minutes for the water to boil.
After dinner I sat around for a couple hours just looking at things and lost in my thoughts. Went to bed and woke again around 1:00 AM. Had some scattered clouds which provided for a couple hours of interesting star gazing as the moon played with the clouds, stars and flickered moon shadows all around me and I was soon asleep again — notice pattern?
I Woke up around 5:30 AM to a light, but steady rain.
Day 3
Sitting up in my shelter with the quilt wrapped around me I boiled some water for instant oatmeal and coffee. I never tire of Quaker Oats instant oatmeal for breakfast It has been my mainstay since the early 1970’s. While waiting for the water to boil I began to organize gear for a quick getaway in the rain. Of course, with very little gear to deal with, it didn’t take long!
I had slept in my “long johns” (Calipene 1 bottoms made by Patagonia) and was wearing my down vest. I removed the vest and replaced my Calipene bottoms with walking shorts. Now somewhat organized, a leisurely breakfast was enjoyed.
While eating, I looked at the iPhone Topo Map for the way down into Butler Canyon. Previously I had climbed up out of Butler Canyon to reach this spot several times, but had not found an easy route to do this. Last year while eating lunch in Borrego Springs after a trip, a local “old-timer” engaged me in conversation and told me about an old Indian Trail from Butler Canyon to this spot, but said it was not on any maps. Looking at the map, I knew where the approximate location of this trail should be but did not want to try and find it in the rain, deciding to take a steep gully down instead.
Twice I had come up via this gully through the very bottom section and then slowly working my way up the steep hillside of the gully. With the rain, it would be best to stay off the mountainside and enter at the top of the gully and then hike down the gully. I was not concerned about flooding, but slippery rocks on the side of the mountain were a concern, making the gully look like the most promising route.
What the map did not show were potential dry waterfalls or boulder fields. Plus I could expect considerable brush in the gully that could be problematic. Since the day’s hike would only be 10 miles, I would have plenty of time to circle back should the gully prove impassible.
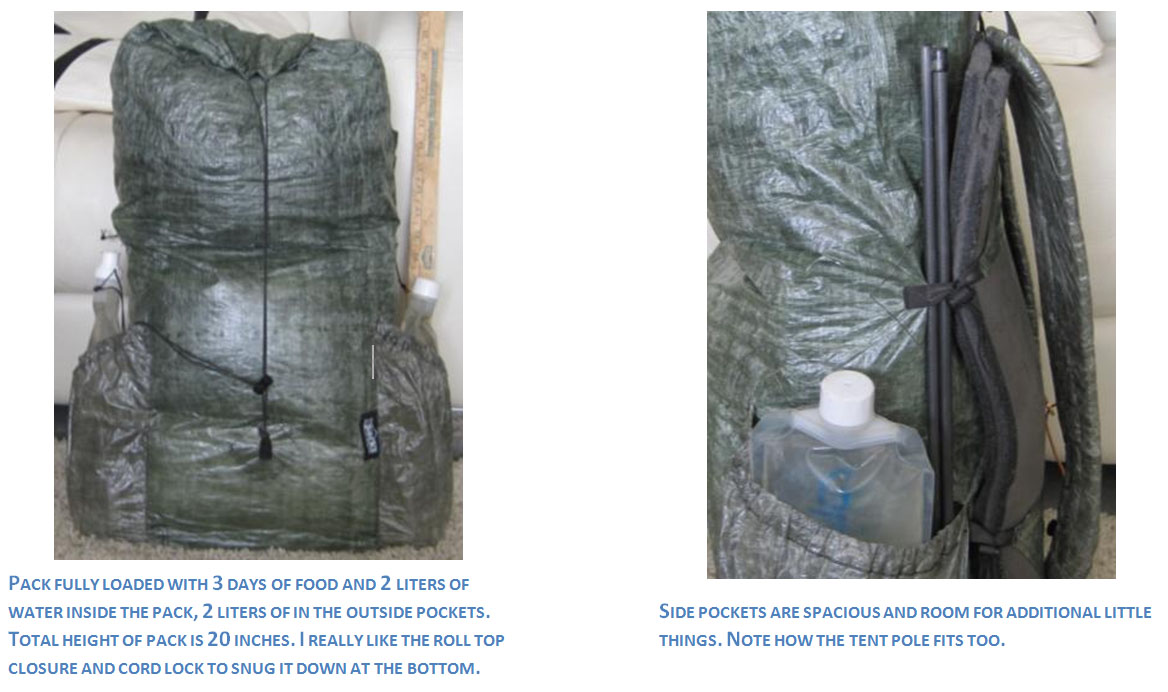
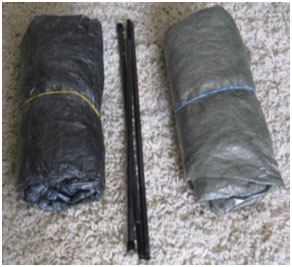
With the route established, I rinsed out the Fosters beer can and packed up the stove. All other small gear and clothes went into a stuff sack to include two rolled-up empty water containers, and the quilt into its own stuff sack. One full liter of water went into a side pocket of the pack, and the shelter would go into the other pocket after I took it down. I put on my shoes. The ground pad was folded and placed into the holder in the pack. Now all remaining gear was put into the pack. I unclipped the groundsheet and put it on as a poncho. Leaving the pack under the shelter, I went outside into the rain, removed the 8 tent stakes, folded the shelter, and then placed the collapsible tent pole, tents stakes, and shelter into the side pocket of the pack. Still wearing the poncho, I slipped on the pack underneath my poncho and zipped up the sides of the poncho. Less than a minute to get all of this done, and I was ready to start walking.
Getting to the top end of the gully was straight forward, and the route down looked do-able, but it would be slow going. There were some boulders but nothing that looked difficult. My cross country flats do not grip rocks well, so I would have to take my time.
There was quite a bit of Cat Claw in the gully, so I had to be careful not to rip the poncho or my shoes on the thorns, but my lower legs did not escape their vengeance – got a few scratches. Cat Claw is a thorny vine and the thorns are like fish hooks, but I only caught a couple and did not damage the poncho. Unlike nylon clothes, brush tend to slide over the smooth Cuben Fiber material and not catch.
The hike from the campsite to Butler Canyon proper took 2 hours. It was slow, careful going but not difficult.
The hike from here to the SUV is 9 miles and I would get there in 3 ½ hours, crossing Clark Valley and then cross country up to Alcoholic Pass. It rained the entire way and when I got to the SUV the temperature was 48 F. Hiking through Alcoholic Pass was fun as usual, but the view into Coyote Canyon was blocked by clouds and rain. As I was putting my gear into the back of the vehicle, a 4WD truck drove by. It was the first person I had seen in 3 days, and that meant it was a successful trip.
Gear and Housekeeping
Nicole, you may not find this interesting, but give it to Will he might.
Definitions
Lightweight backpacking is about lightening weight, but more importantly scrutinizing each piece of gear as to function, weight, and looking for items that can be used for multiple purposes. In the 60’s and 70’s backpackers typically had huge packs and gear that might weigh as much as 60+ pounds and included a lot of stuff that might not really be necessary. This weight required heavy boots to support the load and everything in combination reduced the mileage a hiker could do in one day.
A pound on the foot is equivalent to the energy required to carry 5 lbs in a pack. So reducing footwear from 5 pounds to 2 pounds would be the same as shedding 15 pounds from the pack. You probably remember the large red Kelty pack I used on our trips when the two of you were little. That was the big heavy equipment used years ago, and that pack weighed over 7 pounds empty!
Today a light kit allows me to travel further and faster than I could 40 years ago. It is not about going fast and light, but about hiking at a reasonable pace in comfort. The days become focused on the hike and not that huge monkey on the back.
Most backpackers have a gear checklist that is used for each trip to ensure they do not leave any critical items at home, and the list becomes a convenient tool to analyze and refine gear based on weight. Backpackers have developed terms to help them review their gear and compare it to the lists of other hikers. These terms and definitions are not “official” but generally are in common use by lightweight hikers.
Base Weight
This is the weight of the pack with all the gear in it. It does not include consumables such as water, food, and fuel. Usually the consumables change according to the type and length of a trip, but the gear may not. Some hikers stuff a lot of gear into their pockets to get their base weight down, which is rather silly. Publishing your gear list should not be about “I am lighter than you,” but about how well your gear works for you.
Pack Weight
This is the total weight of you back with all the food, water, and other consumables in it.
FSO (From the Skin Out)
This is how much everything weighs – the pack weight plus all the items one is wearing. This is the important metric.
Light Base Weight
Base weight under 20 pounds.
Ultra Light (UL) Base Weight
Base weight under 10 pounds
Super Ultra Light (SUL) Base Weight
Base weight under 5 pounds
Extreme Ultra Light (XUL)
This one has no commonly accepted definition. Some people define it as all gear carried or worn under 5 pounds, and other as a base weight of 2.5 pounds.
All of the above categories are really kind of silly. People tend to go to extreme lengths to hit some arbitrary threshold. Some even resort to carry a bunch of gear in their pockets so they can say their base weight has hit some magical number.
I also wanted to hit a certain weight. This was part of the stated goal of my birthday trip. For me the definition was all gear carried or worn under 5 pounds. In reality I wanted to see if I could handle rain and nighttime lows near freezing with a minimal amount of gear that would keep me warm, dry, safe, and enjoy the trip.
Goal accomplished.
My Summary Gear List for this Trip
My Detailed Gear List for this Trip
Gear Discussion
The biggest change for me this year is no longer using trekking poles. They were handy as a multi-use item when used as tent poles with a tarp. For the most part they just got in the way, actually slowed me down going up and down hills, and were generally a pain in the ass. Some would say I did not know how to use them properly. Even so, I am much happier without them.
What follows is a look at most of the gear and comments on each.
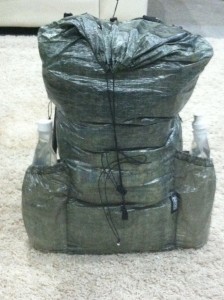
ZPacks Zero Backpack – size small (1500 cubic inches capacity or ~ 25 liters)
This purchase was just to test out a Cuben pack. It does not have a frame or a hip belt and all the weight is carried by the shoulders. This is fine for a total pack weight around 10 pounds or less, but on this trip the total was as high as 15.49 pounds, which was not comfortable. The intent was to try it out and then sell it. After many trips I have grown to like this pack and am going to keep it. Just won’t use it much for trips with weights over 10 pounds.
Sleeping Pad
Many people find sleeping pads uncomfortable, especially if they tend to sleep on their sides which makes for sore hips. And some need a full length pad so their entire body is off the ground. I am a side sleeper and have found that if one bends their knees, tucking the hip inward at the top and placing most of the weight on the thigh and knee, hips will not get sore. It takes practice but works. I do not need padding under my legs so a torso sized pad is just fine. When temperatures get around freezing, then I need the insulation of a pad under all parts of my body.
Last year I bought a Thermarest NeoAir air mattress, which is extremely comfortable. But most of the time I just take a simple torso length foam pad.
The picture on the left shows the pad folded in thirds before it is inserted into the sleeve on the pack. Dimensions are 30″ long X 18″ at the top X 14″ at the bottom.
Sleeping Quilt
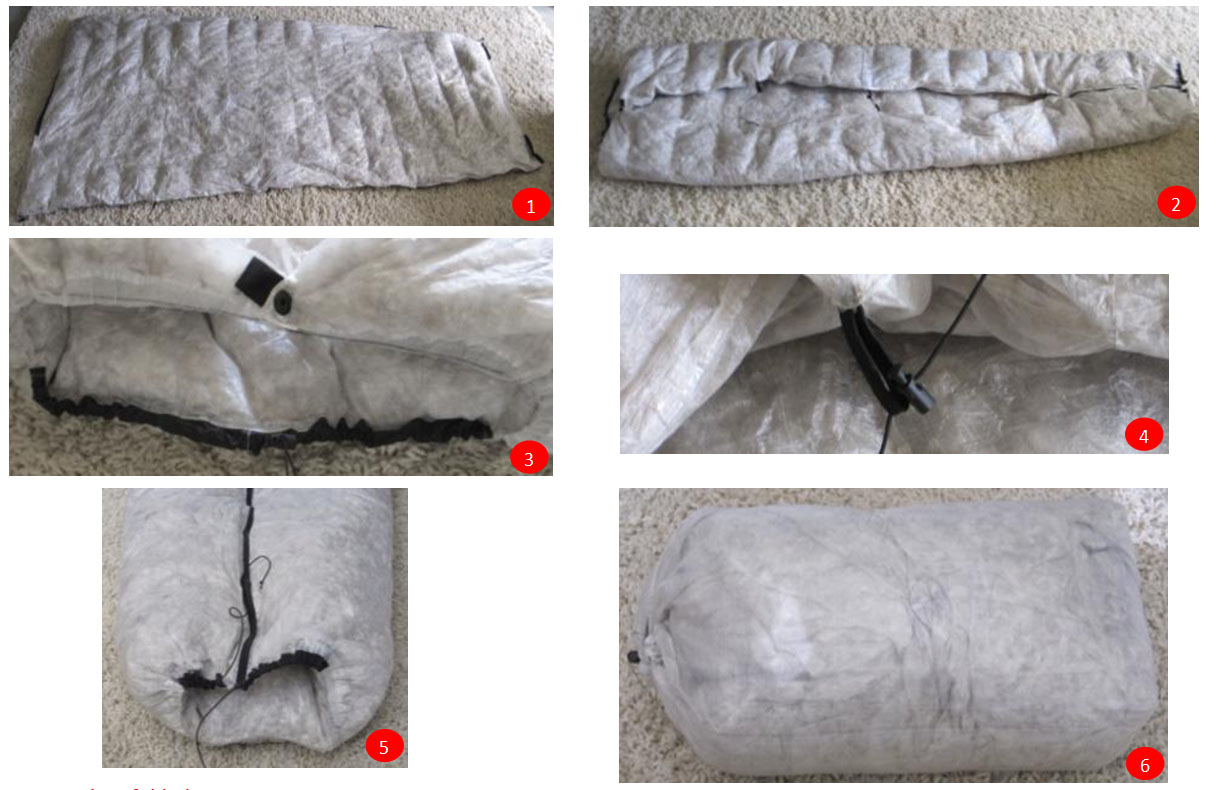
When using a sleeping bag, laying in it compress the insulation on the bottom which mostly renders its ability to insulate the bottom next to zero. So a solution is to use a quilt with no insulation on the bottom, saving weight. This quilt was made by Tim Marshall of enLIGHTed Equipment. It weighs 10.9 ounces, has 2 inches of down filled loft, and the shell is Cuben fiber material. The Cuben does not breathe, so it can make your skin feel clammy and you can sweat if it is not vented a little. The good news is that it is waterproof (except for the sewn seams), so a fully enclosed tent is not needed, and little bit of blown rain or snow is not going to get the down feathers wet. Two inches of loft should keep most people warm to about 25 F. I sleep cold, and need to wear additional clothing as the temperature drops.
- Quilt unfolded.
- Quilt shown upside down. Right side is the foot with a zipper to close it. There are to cords in the center which go under the body to keep the sides around the body. Snap closure at the top with a drawstring is shown on the left or top of the quilt.
- Top of the quilt snapped together and draw string snugged up. Unlike most sleeping bags, there is no hood. I use a balaclava to keep my head warm.
- Close up of the cord and line lock that is used to keep the quilt secure under the body. Surprisingly it never gets loose.
- Foot can be left open or drawn close. This helps ventilate water vapor from the body and regulate temperature.
- Normally I just shove the quilt into the bottom of my backpack. Because the Zero is so small, I needed to store the quilt in a Cuben sack so there would be room for all the gear.
Gear Worn
Clothing worn (left picture)
- Asics Trail Sensor 1/4 height socks (pair) = 33 grams or 1.16 ounces
- Mizuno Wave Universe 4 shoes (size 13) = 139 grams or 4.9 ounces each
- Mountain Hard Wear Cliffer LS T (15% merino wool / 85% polyester) Med = 141 grams or 4.97 ounces
- Patagonia Field Shorts (Med) = 77 grams or 2.72 ounces
Joe, I know you don’t like Mizuno shoes, but these have worked well. Over 200 miles of granite, scree, sharp volcanic rubble, sand, water crossings, rain, cactus, and general abuse. The mid-sole is starting to crack a little under the ball of my left foot. The upper mesh still in great shape despite epic battles with Cat Claw and Cholla pods. Poor traction on rocks though.
The Patagonia Field Shorts are fabulous. Soft, comfortable, quick drying and a 7” inseam for less than 2.8 ounces. I have not been able to find anything as light. Also several slips and falls in canyons and slopes have not damaged the material at all. No pockets or liner.
Extra Clothing in Pack
Left to right, top to bottom.
- Montbell Extremely Ultra Light Down Vest = 109 grams or 3.84 ounces
- Nike DriFit Wind Gloves = 43 grams or 1.52 ounces
- Patagonia Capilene 1 Base Layer Bottom (medium) = 141 grams or 4.97 ounces
- Smartwool Balaclava = 46 grams or 1.62 ounces
I have the jacket version of the Ex UL Down Vest and was worried the vest would not work as well. But keeping the torso warm is most important. Worked great.

A Balaclava is needed with a quilt in cold weather. It can also be rolled up and used like a watch cap. A very versatile piece of equipment. I have insulated versions for snow camping.
Shelter and Rain Gear
I discussed this at length earlier. Normally I bring a wind shirt in addition to rain gear. A wind shirt is breathable and a must for most hikers. The Cuben poncho did a good job in this function. Although it is not breathable, the sides and neck zipper did an adequate job blocking the wind and venting. A wind shirt is more convenient, but for this trip the poncho was fine.
Here is the poncho in action. It covers the pack completely. Bottom of my shorts get wet in the rain, but dry quickly. When the rain gets really cold, I just put my arms inside and keep warm. Legs are fine exposed when you are moving. I am thrilled with it.
iPhone 4
Not sure about this. Weighs almost the same as my camera, but the chance of breaking it and then having to buy a new one is not exciting. Picture quality is acceptable. Being much thinner than my camera it cannot be placed on edge to take a self-portrait. Where I hike, there is no cell phone coverage so no advantage there. Doesn’t have a camera timer, but I downloaded one. The Topo map is too small. You can read iBooks or Kindle books and listen to music, none of which interests me.
But it is versatile. I guess my issue is a “philosophical” problem using electronics in the backcountry. In the future I plan on leaving the phone at the trailhead in my vehicle.
Because I was worried about damaging or losing it (this was constantly on my mind) that did not sit well.
I made a 2 gram bubble wrap case for it that worked out well.
Miscellaneous
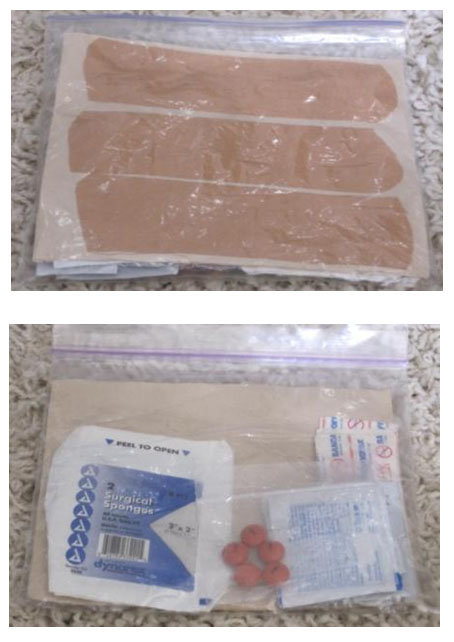
First Aid Kit – Top is the back side showing the Leuko Tape on peelable backing. Since I have never gotten a blister since I switch to running shoes, don’t know why I keep taking it. But it could be useful.
A few grams could be saved by placing the First Aid kit and personal items in a Cuben sack. But I find it convenient to use the see-through Ziploc bags.
Stove, Pot and Drinking Mug
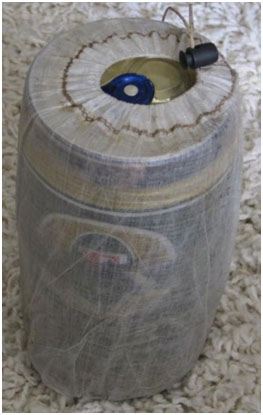
Personal Items

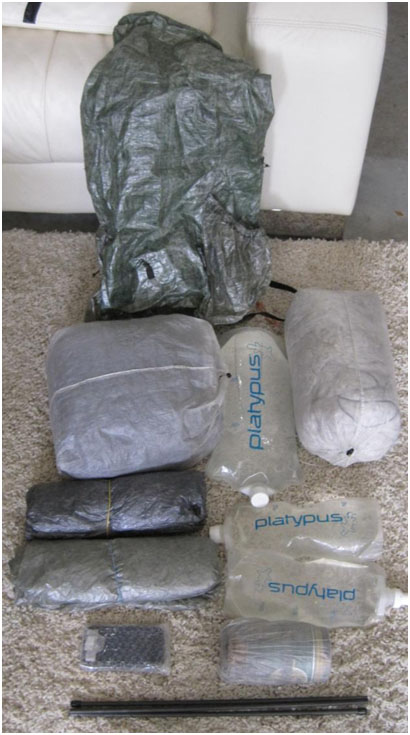
Putting it all Together
Top to bottom, left to right:
- Pack
- Cuben Sack with food, clothes, First Aid Kit, and personal items
- Poncho
- Shelter
- iPhone in bubble wrap case
- Tent pole
- Water containers
- Quilt
- Stove kit
Organization
Whenever possible you want to pack things in the order you need them with an eye on loading. With a SUL or XUL kit, loading is not so important because you are not carrying much weight. Here is how I load this gear, in the order it goes into the pack.
Items I only need at night
- Sleeping Quilt
- Shelter
- Stove
- Poncho/ground sheet (this will be moved to the top if rain threatens)
Items needed during the day
- Water if I am carrying more than 2 liters in the side pockets
- Cuben sack with extra clothes, food, First Aid Kit, and personal items. It is easy to get to these items during the day since they are on top.
MISCELLANEOUS pictures


