
I’m in maintenance mode around the house. One thing that has been problematic from the time we bought our boat about 15 years ago is a solution for attaching the Hull ID number to our boat. Even though our boat is only 10 feet 2 inches in length and many folks would consider it almost a toy, we have to register it and identify the hull ID along with the current registration tag. ANY boat in California that is not solely powered by oars or paddles must be registered, and of course, registration means you have to pay a FEE to the government. My old solution, numbers painted on a plastic board hung from the grab robe, was technically illegal.
Regulations
California regulations state the hull ID must be permanently affixed to the vessel. The numbers can be painted on the hull. However, the registration sticker must be affixed, which cannot be attached to an inflatable boat. Additionally, for the past few years, a fee must be paid for invasive mussels requiring an additional sticker. I don’t mind paying the mussel mitigation fee.
Solution
I found a company that makes customized hull ID plates, https://www.boatnumberplate.com. These are made from a fabric and are glued to the hull. Gluing things onto inflatable boats is common and with the proper preparation and adhesive will provide a long-term secure result. For example, over 10 years ago I glued some D-rings to our boat to attach a storage bag to the front bow area. We no longer use the storage bag and I needed to remove the D-rings to make room for the new hull ID plate. This required using a hairdryer to soften the glue and a putty knife to remove the D-ring. Each took about 15 minutes to remove.
There are two ways to order a number plate. One is to order directly from the company.
The other is to order online from a retailer, such as West Marine, and save around 10%-15%. The process of going through a middleman seems cumbersome. Once you have purchased the item, the retailer sends you a redemption code. Then you have to go to boatnumberplate.com to redeem the code and order the plate yourself. If the retailer hasn’t submitted the confirmation to the manufacturer then you have to wait for that to happen.
So I just ordered direct. Total price was $45.99 and I got it in a week with free shipping and no sales tax.

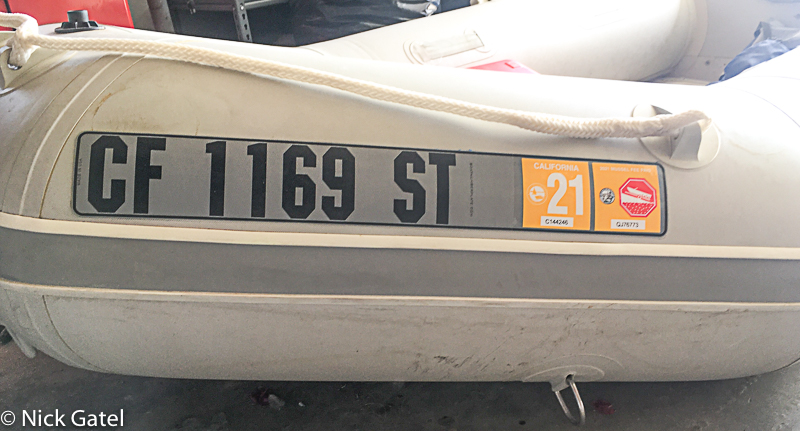
Note that my plate has an area for two stickers, a requirement of the People’s Republic of California. The company will sell the correct plate for whatever state you live in.
Installation
You only get the number plate. Nothing to install it is included, and in fact, the company does not sell any installation materials.
I won’t go through the detailed installation instructions. You can view them on the company’s website:
Hypalon Boat Installation Instructions
PVC/Polyurethane Boat Installation Instructions
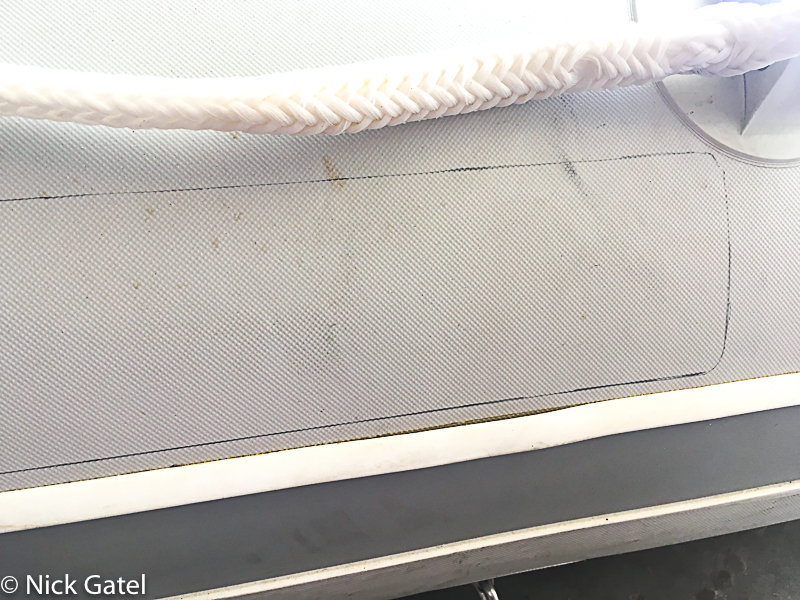
First the boat material needs to be cleaned and lightly sanded. The best cleaning solvent for this job is M.E.K., which cannot be purchased in California (along with any useful cleaning chemical or paint, as the government has hundreds of regulations to protect us from ourselves). Acetone will do a satisfactory job and is available here.
After the boat is cleaned, then lay the number plate on the hull and draw an outline with a pencil.
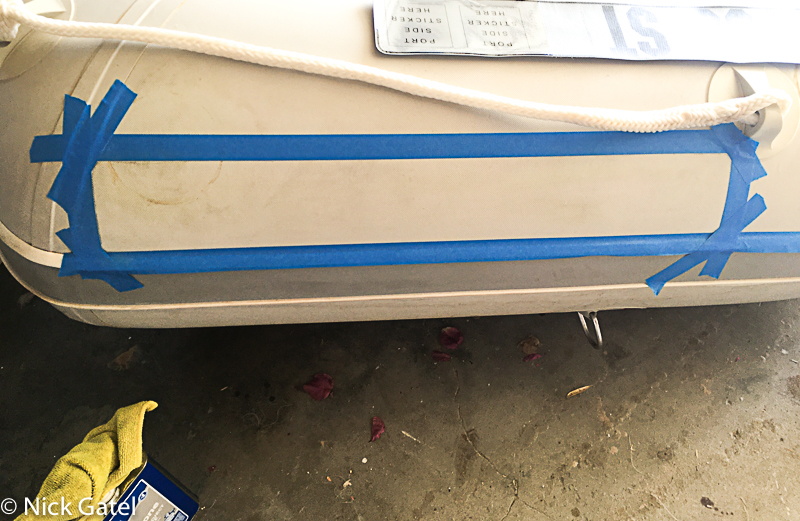
The glue can be messy and hard to get off if it seeps beyond the edges of the number plate, plus you want ample adhesive along the edges of the plate. Placing painter’s tape along the pencil lines works great!
Following the glue manufacturer’s instructions apply the adhesive to both the boat and the back of the number plate. I bought mine from Amazon. This particular brand is well reviewed, but I can’t tell you how good it works until the job is about 10 years old 🙂
The little applicator ball that was attached to the glue cap was really too small, so I used a 1” brush to apply it.
Line the number plate to the painter’s tape and press it on the boat. You will need to quickly smooth it out to remove any air bubbles – a plastic putty knife works great – starting at the center and smoothing it out to the edges. For extra security, I used a 4-inch J-roller to complete the job. The roller is optional.


HH-66 Vinyl Cement, 8 oz. can – RH Adhesives
23% Off
POWERTEC 12″ Long Handle J Roller, 1-1/2 Inch Diameter, 3 Inch Wide, Flex-Free Stainless Steel Laminate/ Veneer Roller Tool with Rubber Roller for Edge Banding, Wall Coverings, 1PK (71010)

Set of 2 1 inch European Professional Flat Paint Brushes – Natural Bristle Wooden Handle – for Acrylic, Chalk, Oil, Watercolor, Gouache, Stain, Varnish, Wax & etc. – for Art, Kids, Walls, Details.
$7.95 (as of April 12, 2024 23:48 GMT -07:00 – More infoProduct prices and availability are accurate as of the date/time indicated and are subject to change. Any price and availability information displayed on [relevant Amazon Site(s), as applicable] at the time of purchase will apply to the purchase of this product.)This website may be compensated for linking to other sites or for sales of products. As an Amazon Associate I earn from qualifying purchases.