
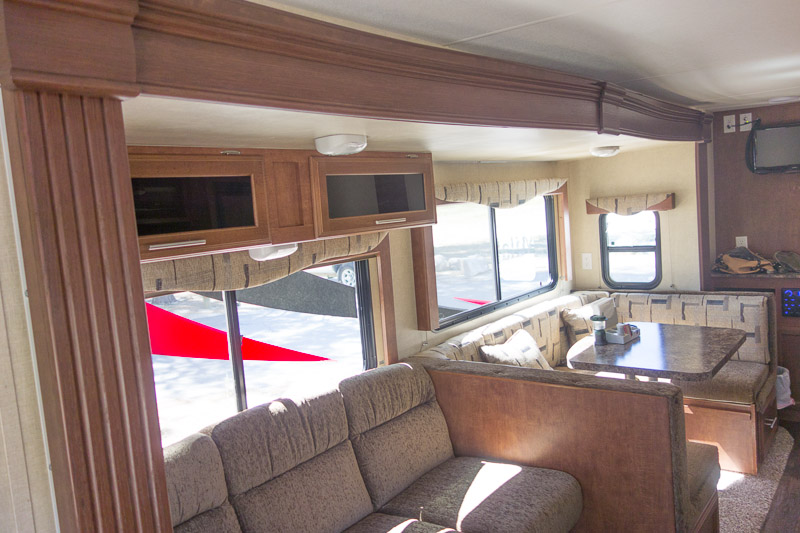
After a 250 mile drive to our campsite in Nevada to enjoy a week-plus Thanksgiving vacation and escape the Black Friday insanity, we unhitched the camper and began our quick set-up routine. As I was outside beginning to lower the stabilizers, I heard some funny noises as Joyce was extending our powered slide-out dining room.
Entering the trailer, I saw that one side of the room was partially extended and the other was still in the closed position – the slide out room was cocked and wedged against the frame. Oh, oh. Smartly, Joyce had stopped trying to open the slide. I pushed the button to retract the slide so I could investigate the problem and unfortunately, as I discovered, the drive chain on the working side created extra slack and wrapped itself backwards creating extra force and breaking one of the cables. As Trump would say, a Disaster!
Our slide-out was one of those things you just don’t think about until it breaks. So I thought I would share some thoughts on what I should have done (e.g., learn how it works mechanically and inspect/maintain it) and what pre-emptive steps I could have done.
Most important learning was I didn’t have a spare cable and if I had, I didn’t own the necessary tools to repair.
Our slide out unit is an Accu-Slide which is made by BAL, a Norco Industries brand. It is the most common slide unit used by trailer and RV manufacturers today.
First things First
If you have an Accu-Slide, you more than likely cannot see the motor, chains or cable adjustments. On our trailer, these items are hidden by trim pieces at the top of the room.
To access the cable connectors we had to remove the trim at the top of the slide out room.
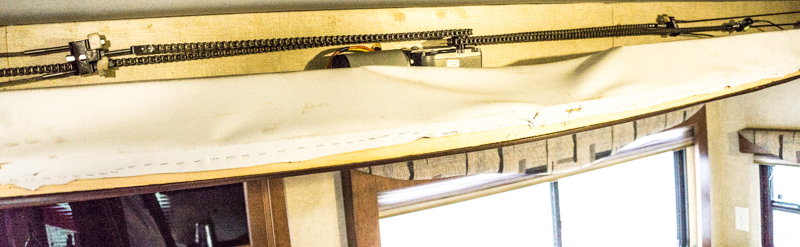
Removal of the trim (5 pieces) was accomplished without damage, scuffing, or marking by sliding a butter knife under the trim and then a screw driver when enough of a gap was established. Re-installing the trim when we got home required a staple gun, pneumatic brad nailer, and color matched wood putty.
How the Accu-Slide works
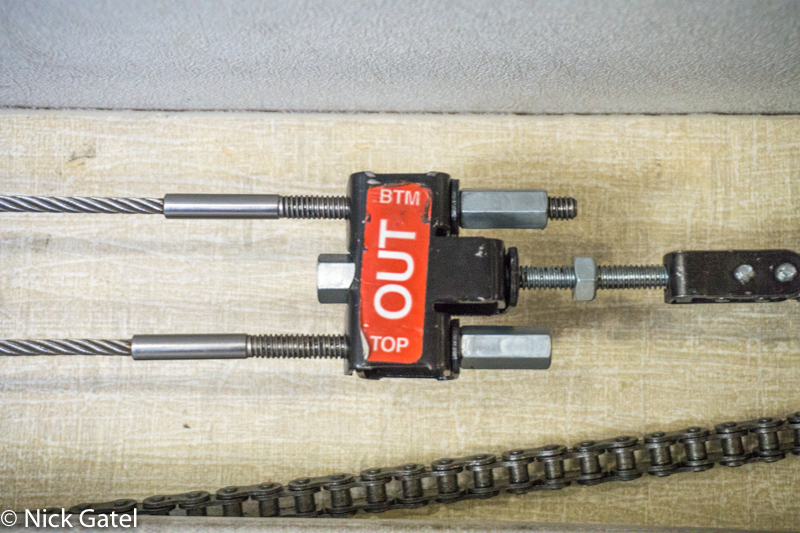
Just like chain-drive garage door openers, our powered slide-out is also chain-driven, which means it is inexpensive to manufacture and can be prone to problems if it was not adjusted properly when the RV or trailer was manufactured. The electric drive motor has two gears; drives one chain: one for each side of the slide-out room. Each end of both chains has a connector attached to two cables. One chain connector has a top and bottom cable that pulls the slide-out, and the other end of each chain has a connector that pulls top and bottom cable to move the slide-out back in. All of these cables (8 of them) are guided by several pulleys. A “Rube Goldberg” contraption if I ever saw one. But it works and works well as long it is inspected and maintained.
What happened exactly
The jam nut that secures the adjustment rod on the right side “out” cable connector on the chain had come loose so both “out” cables were disconnected. That is why one side moved out and the other stayed in place. When the switch was pressed to bring the working side back in, there was too much slack in the chain and it wrapped itself backwards on the gear creating a much shorter length of travel and generated too much tension, which caused one of the “in” cables on the working side of the slide-out to break. In hindsight, it would have been fairly easy to reconnect the connector that came loose, but now we had a broken cable – not a simple solution when you are parked in a campground. The cable would need to be replaced.
What a cable replacement entails
One cannot just buy a matching cable, because the originals were installed during manufacture and a made-to-length replacement cable is not available. However a new “universal” cable kit without the threaded rod is slid in and then using ferrules and a special crimping tool, and along with an eye-bolt, the new cable is connected to the fixture. I know it sounds complicated. I will post a couple links at the end of this post that will explain this much better than I can.
Bottom line: it was unlikely we could find a repair kit easily while camped, and we didn’t have the special tools with us to install a new cable kit. Now, we could camp just fine without the room extended. Our problem is that the broken cable is what holds the slide in place under tension while traveling, so traveling with the broken cable was dangerous. Plus the room was partially extended and too heavy for me to push in anyway.
Our apparent options…
- Have trailer towed to a RV place and spend a fortune (good news is after our Niagara nightmare from hell, we have AAA towing for the trailer)
- Pay a mobile repair company to come out and fix it, which is another fortune
- Other?
America Ingenuity
I am an American. We were once a nation of individuals who had self-reliant skills. Most of us could fix anything. As a society we have become so narrowly specialized; having abandoned most competencies beyond what is required in our jobs or careers – meaning most people can’t fix things without Google, and even then many still can’t fix things. The Renaissance Man has all but died and been replaced by Specialized Man.
Luckily I can fix most things without assistance. The broken cable broke at the end of the threaded rod. Because it wasn’t a “clean” break, the threaded end was bent and the threads damaged. Not something that could be fixed in a campground with a few hand tools.
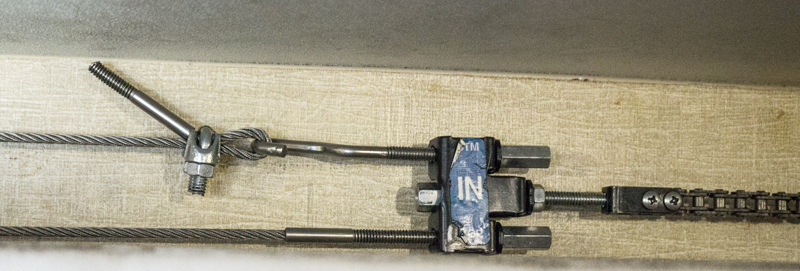
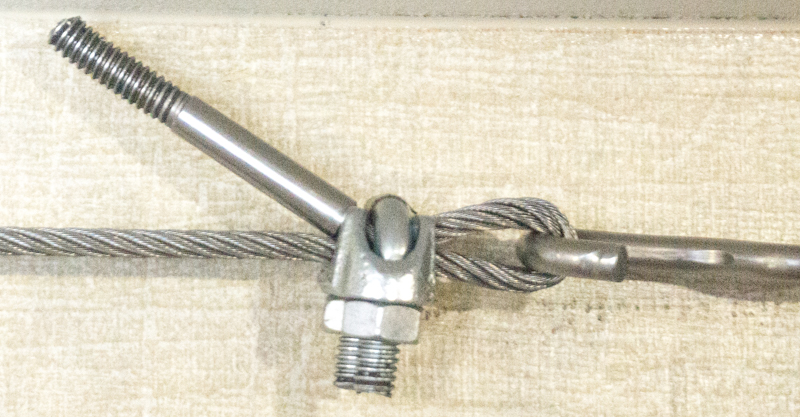
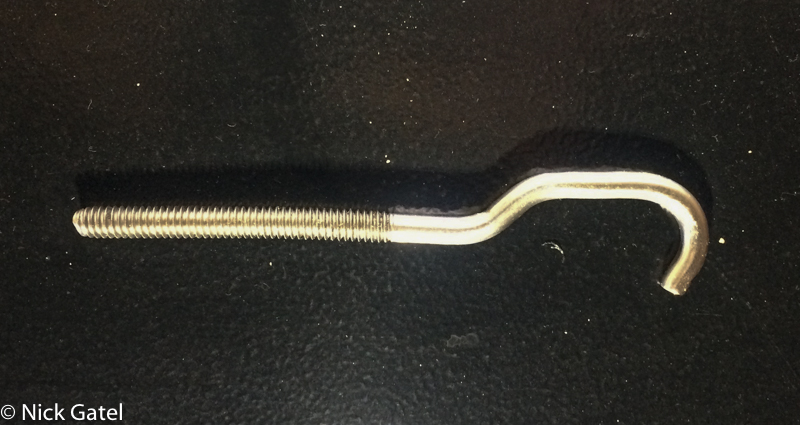
I figured that if I could find a long enough 1/4”-20 eye bolt along with a cable clamp, I could fabricate a temporary repair.
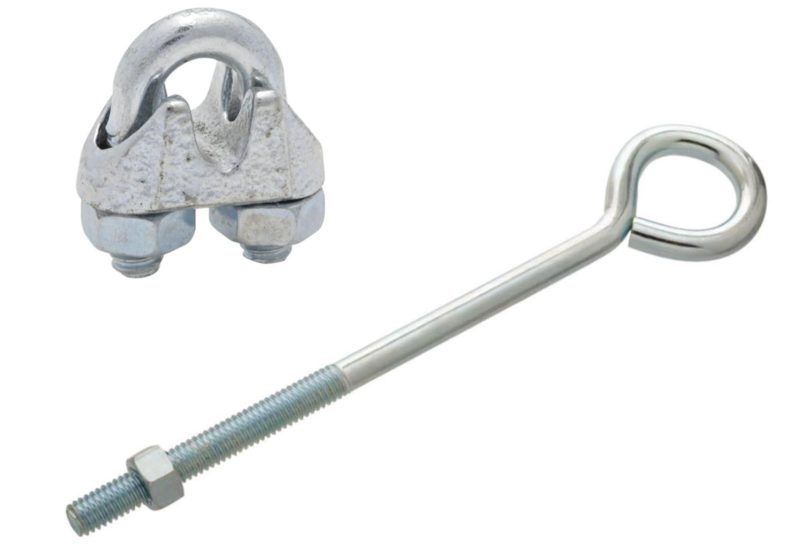
I found both at a local hardware store and it didn’t take long to make a temporary repair.
Temporary is Temporary
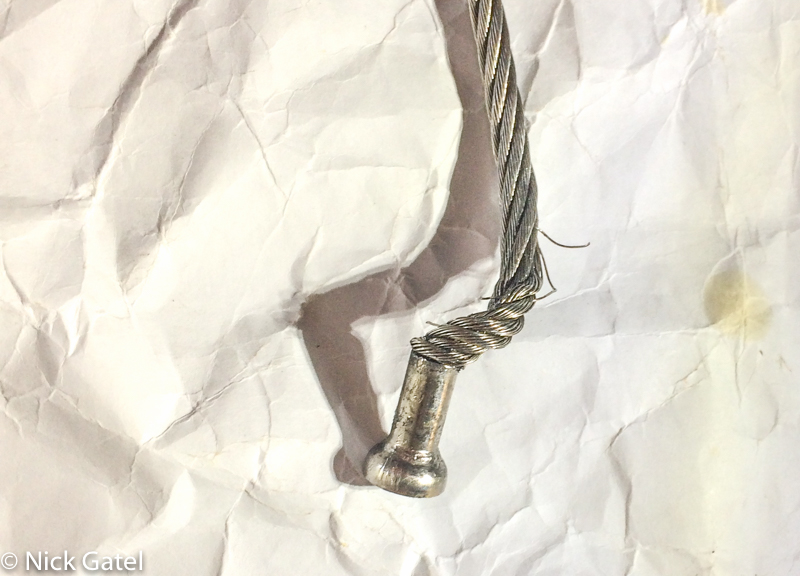
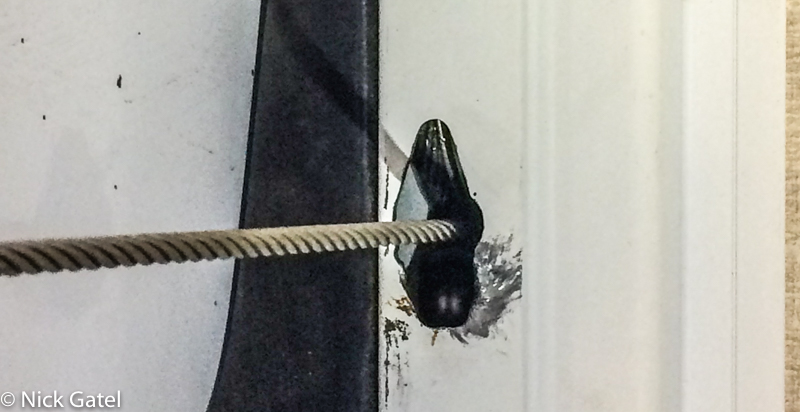
If you take a close look at the eye bolt, you will see the “eye” part is curved into a circle, but it is not attached to the straight portion (see below)
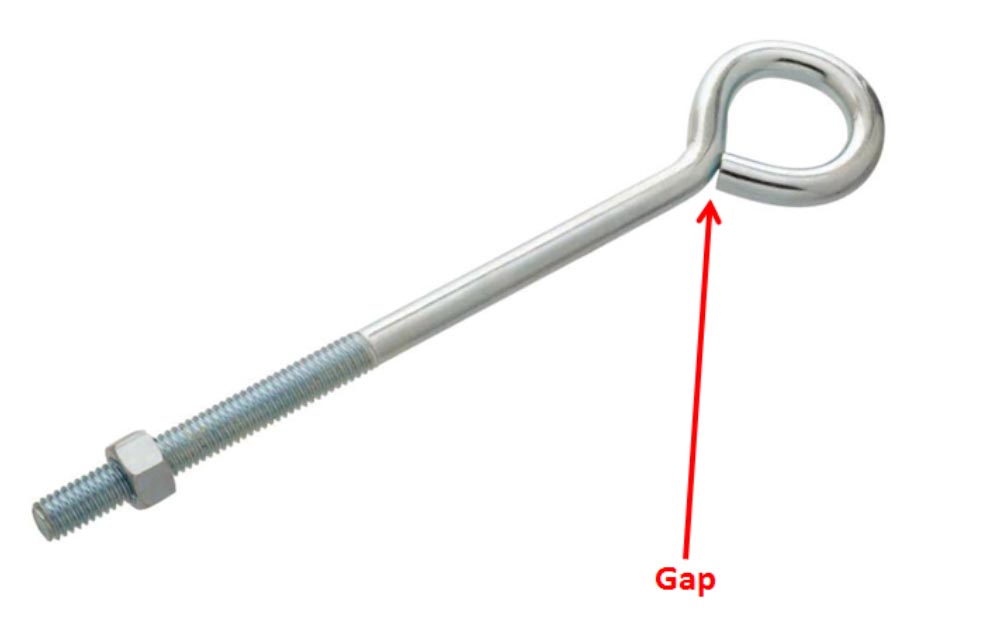
I knew that the eye bolt could not handle repeated cycles of moving the slide out in and out; the tension would pull the rounded end of the eye bolt away from the gap. I extended the slide out about half way out, so it would be easy for us to spend the next week moving around the camper, and ensure that we could move the room all the way in when it was time to go home. All in all, everything worked out and we returned home without incident.
Tips, Water Hazards, and Sand Traps
As I mentioned earlier, I will provide a couple links that will give you all the information you need about the Accu-Slide system. But here are a few things you should keep in mind.
The temporary fix
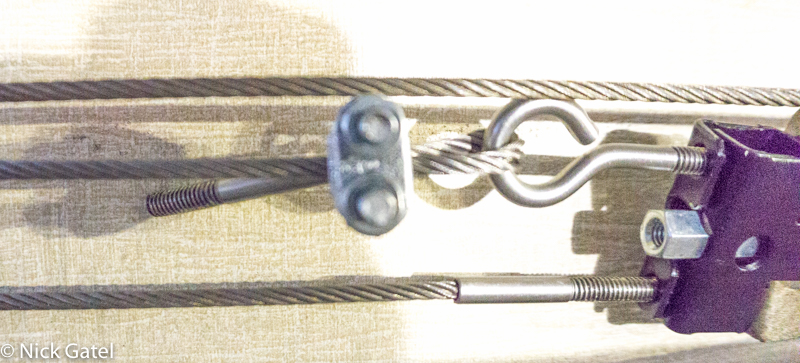
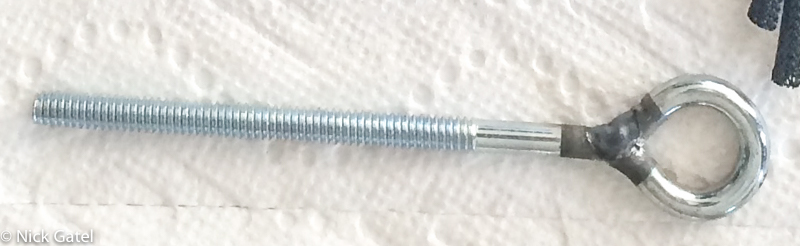
As I mentioned earlier, the gap in my temporary eye bolt would not handle repeated cycling of the slide out room. When I got home I found the adjustment of the cables was way too loose from the factory. Before replacing the broken cable, I adjusted all the cables per the manufacturer’s specifications.
When the “out” cables were pulling the room out, the “in” cables and the chain would actually lie on the slide out room’s roof – there was so much sag. The same happened to the “out” cables when the room was being pulled in by the “in” cables.
While adjusting the cables, I ran the room out and back in several times. Below is what happened to the hardware store eye bolt, as I knew would happen, and why temporary is temporary.
Adjustments
The Accu-Slide cables are stainless steel wire rope. In a properly operating system the cables will stretch less than 1% of their length – in other words, you should never need to adjust the cables. However, should the cable connector jam nut or the cable adjustment anti-vibration locks come loose, your cables will become out of adjustment – or worst case scenario the cables will become disconnected from the system as happened to us.
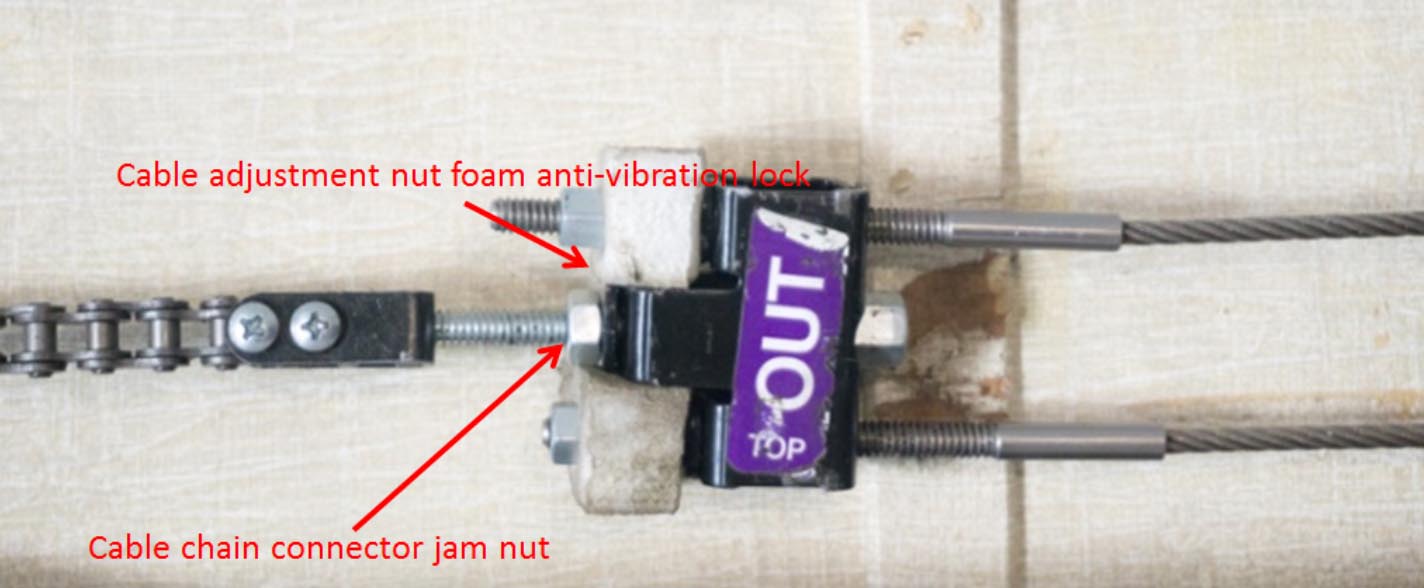
Since I removed all the trim covering access to the drive system it was easy to make some modifications to the jam nut and anti-vibration components.
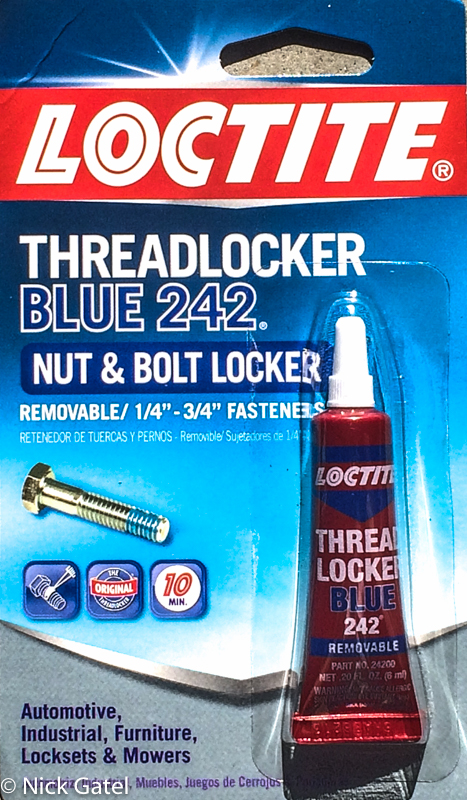
I used Loctite Threadlocker on the adjustment bolts. Loctite is applied to the threads of the fastener and when it dries (24 hours) the fastener is not going to come loose without the use of wrenches.
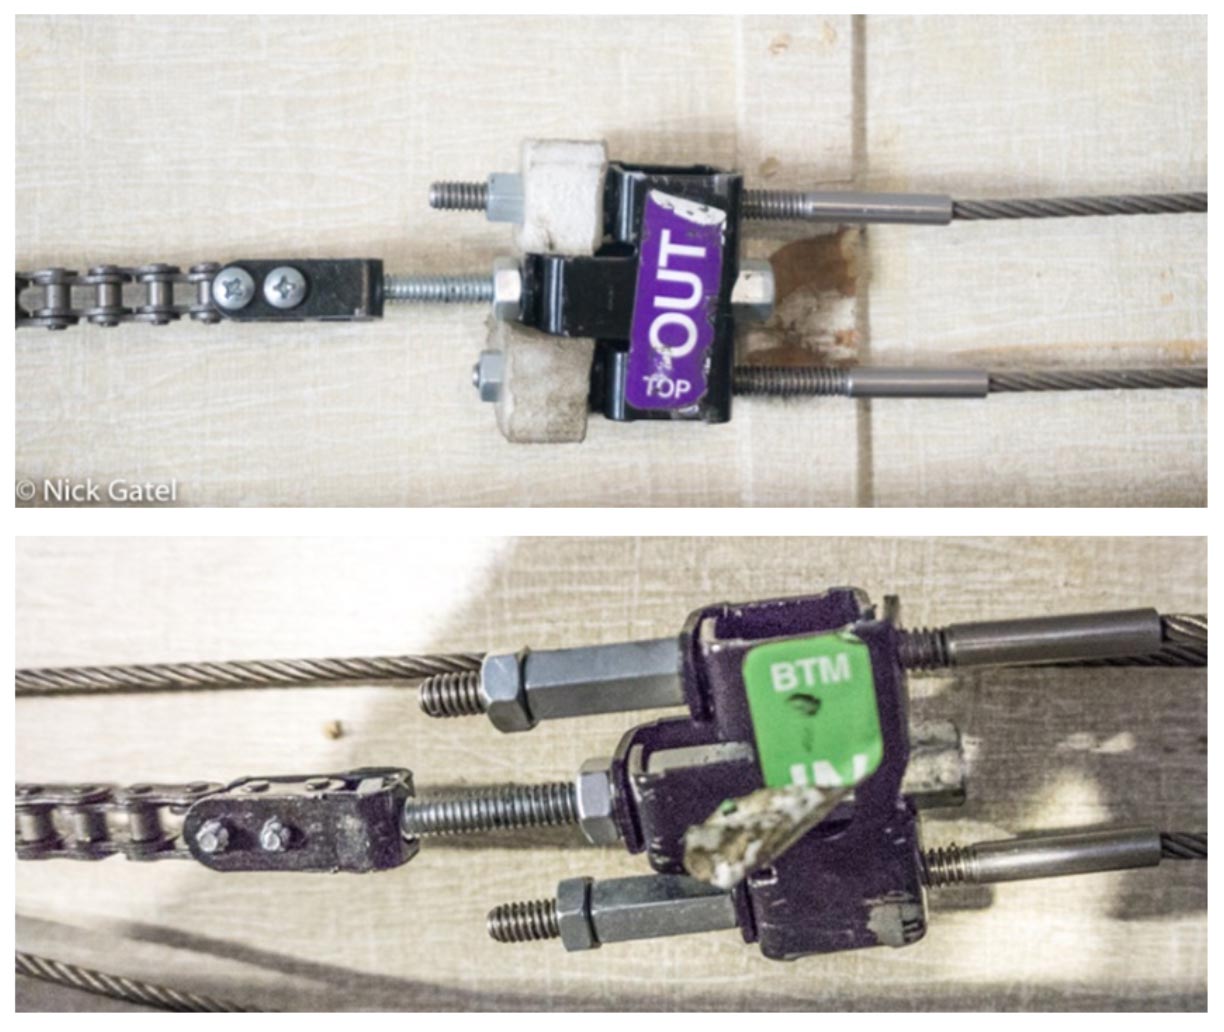
I replaced the foam anti-vibration locks (top) with real jam nuts (bottom).
Cable Replacement
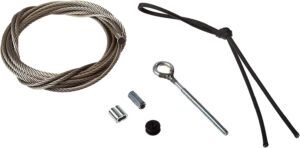
You can get a cable kit on Amazon.
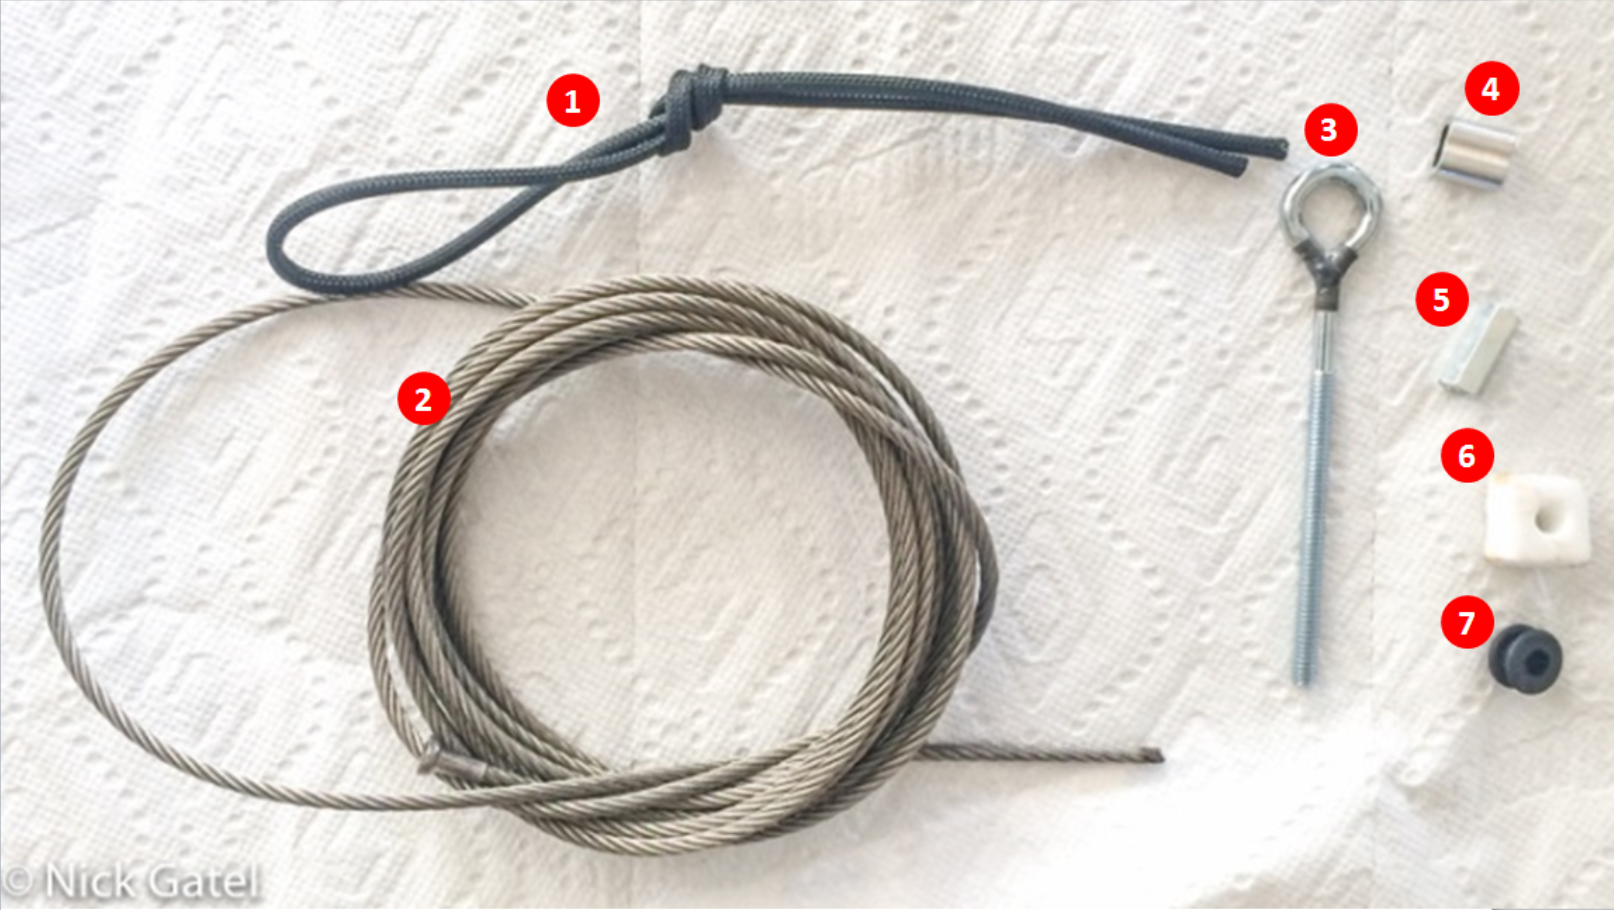
- Braided sleeve
- Replacement cable
- Eye Bolt
- Ferrule
- Adjusting nut
- Foam Anti-vibration lock
- Rubber cable grommet for stand-off bracket
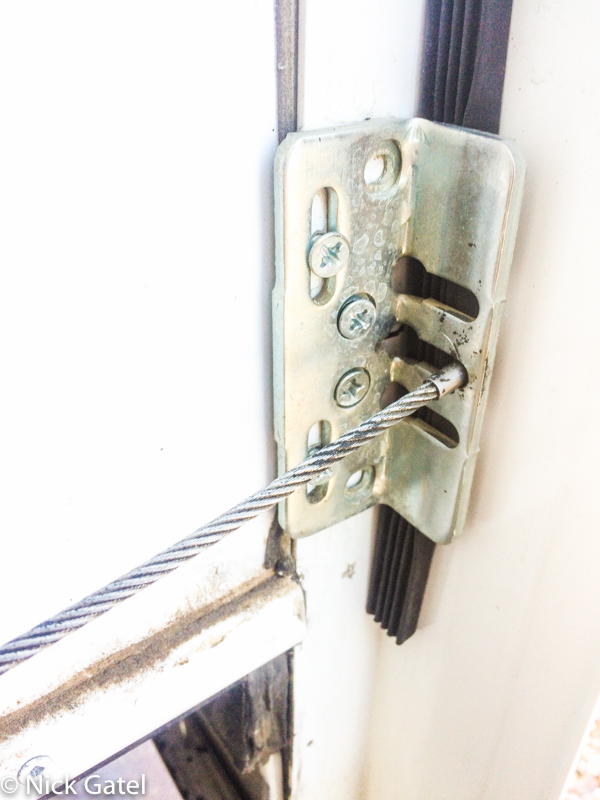
None of the instructions or videos I checked were clear on how the rubber grommet is used (item 7 above). The grommet is inserted into the stand-off bracket where the cable end is inserted (see below).
All four of our interior grommets were in good shape after 3 years. All four of the exterior grommets had deteriorated and fell out of the holes. In a properly adjusted system it is unlikely the cable ends can come out of the stand-off brackets. But a loose cable can. Since all of our outside grommets were gone, I decided to install some weather stripping instead because it is more robust and unlikely to fail.
To replace the cable you will need:
- Two 3/8” box wrenches
- Two 7/16” box wrenches
- Ratchet with 3/8” and 7/16” deep sockets (I suggest ¼” drive)
- Needle nose Vise Grips
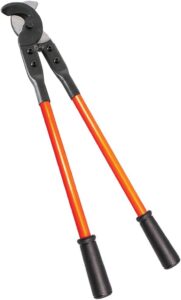
- Stainless steel wire rope cutter (cable cutter)
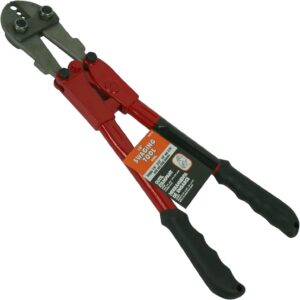
- Steel swaging tool (crimp tool for ferrule)
Notes on cable cutter and crimp tool:
I suppose you could use a cable clamp as I did for our temporary fix. But it is extra bulk that might catch on the opposing cable when the motor is turning. To crimp the ferrule you will need a steel swaging tool with handles at least 18” long.
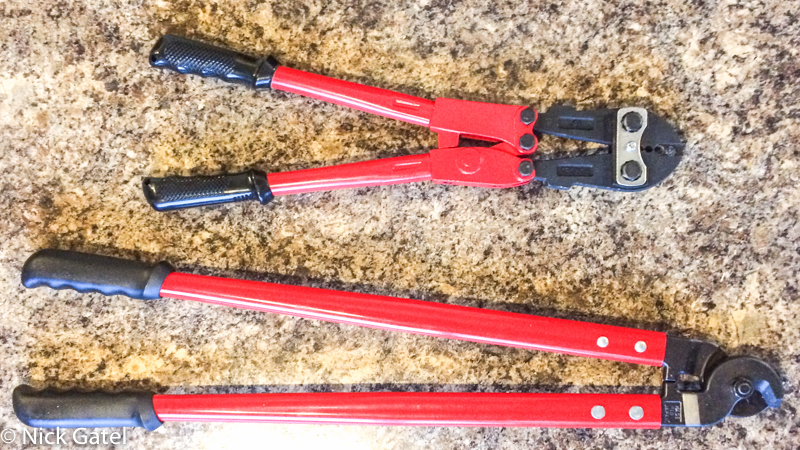
Forget the cable cutters sold in big box hardware stores. They are for aluminum and copper, not the stainless steel replacement cable. Get some real cutters rated to cut 3/16” stainless steel wire rope. You will need a very clean cut without any fraying to pull the new cable up to the motor.
Jam Clamp
The instructions for replacing a cable suggest removal of the Jam Clamp for easier access.
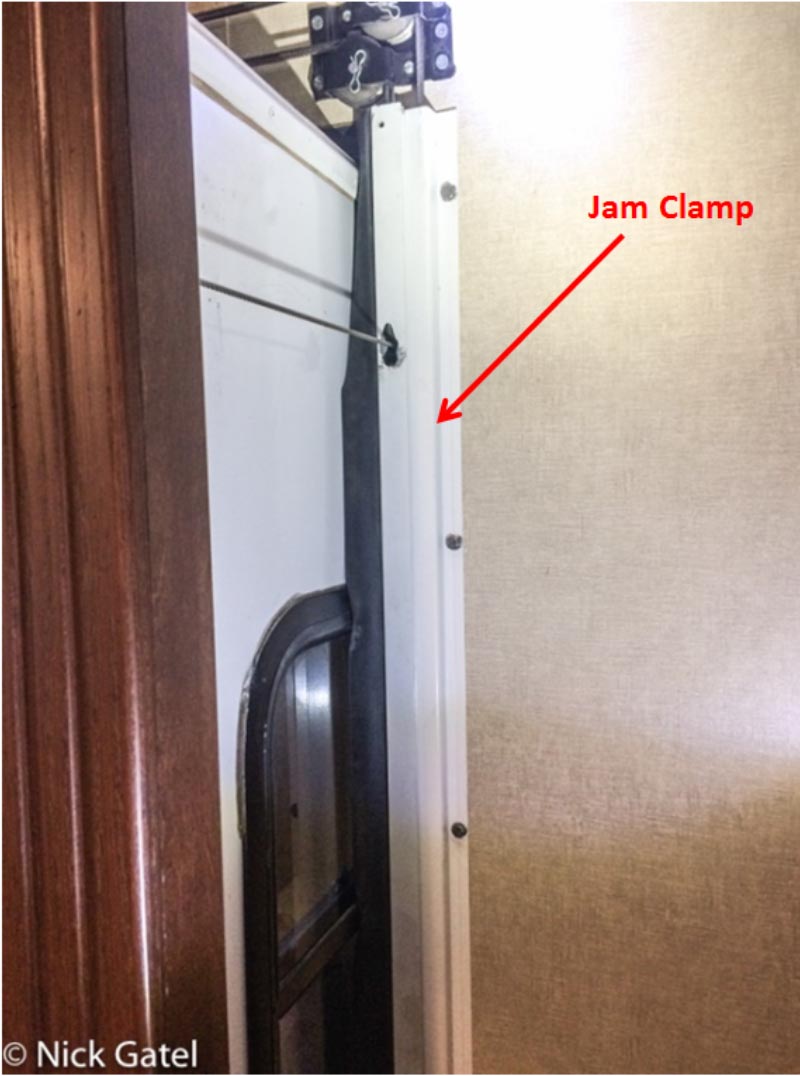
You want to make sure you replace the Jam Clamp before running the motor and moving your slide out. The Jam Clamp provides support for several pulleys (4 of them) and operating the motor without the clamp secured could damage, tweak, or bend the pulley channel.
Inspections
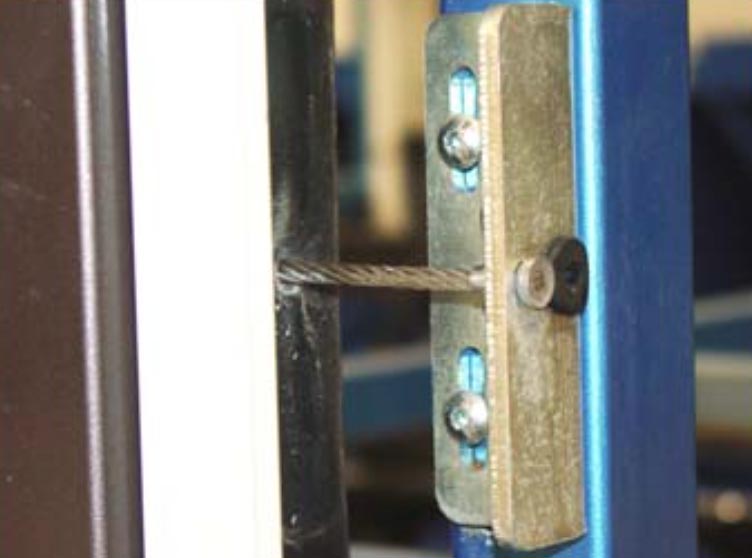
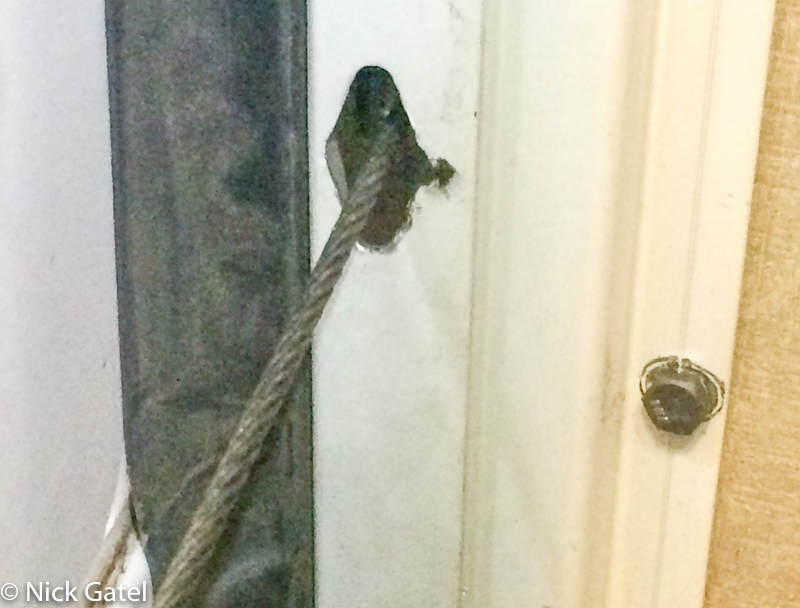
I will now visually check our cables before every trip. The chains and cable connectors can be seen from the side of the slide when the room is all the way in. You want to make sure all cables and chains have proper tension.
Look and confirm that all cables are centered in the channel hole (below).
While adjusting and inspecting the cables, I noticed the right upper “out” cable was mis-aligned in the hole and there was evidence of other problems. The cable looked okay, but I could not see the cable end, which was covered with the interior seal. Pushing the seal back I saw the cable was kinked and beginning to fray — the result of a cable that was too loose — so I replaced that cable too.
Normally a mis-aligned cable is caused by a stand-off bracket that is not lined up properly, but don’t assume so. Inspect and verify!
Manual Operation with Flex Shaft Tool
If you have an Accu-Slide system you should have been given a flex shaft tool.
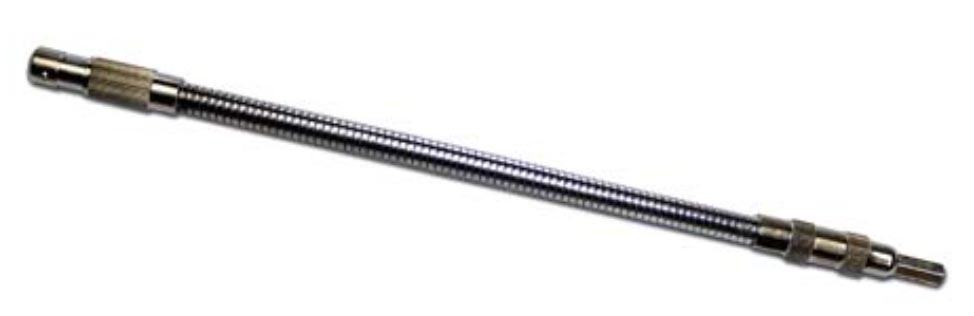
This theoretically will allow you to manually move the room with an electric drill (assuming there are no damaged gears in the gearbox or other frozen components). The tool has a 1/4″ female hex fitting on one end, and a male 1/4″ hex fitting at the other. The male fitting is inserted into the drill chuck and the female end fits on front end of the motor… maybe! Not all motors are the same and our motor has a square female fitting on the front end of the motor. A number S2 square drill bit fixed that issue.
Additional Resources
This video is a must watch (at least twice) if you need to replace a cable. It also does an excellent job explaining how the system works.
You probably want to buy a couple spare cable kits and the necessary tools for a field replacement. After changing your first cable, additional cables should take about an hour or less — excluding any time required to remove trim work.
This website may be compensated for linking to other sites for sales of products. As an Amazon Associate I earn a small fee from qualifying purchases at no additional cost to the purchaser.
BAL Accu-Slide Cable Replacement Kit
![]()
Crescent H.K. Porter 28″ ACSR, Wire Rope and Cable Cutter
![]()
Lehigh Group 18″ Steel Swaging Tool
![]()