Most of us are sheltered in our homes due to the coronavirus pandemic. Now might be a good time to plan your next project, whether it be a bathroom remodel, making your own backpack or sleeping bag, or even just painting a room. I’ll share some tips on planning big projects, which of course, can be applied to almost any task.
Planning and research can help you complete projects as well done as professionals do it.
The Pros versus Us Mere Mortals
I spent several decades as an auto mechanic. We had books that estimated how long a specific job should take (i.e., a water pump on a 1975 Chevrolet Monte Carlo with a 350 cu in engine and air conditioning). Experienced and skilled mechanics could usually do it in half the time, and do it right the first time. Also, experience would teach the pro what particular problems could occur during the job, or identify an additional problem during the repair.
But when it comes to work around the house, or anything non-auto related, I am a rank novice – a DIYer.
I have learned over several decades that tasks outside my realm of expertise can be accomplished with professional looking results. But this takes a few steps:
- Researching how to do it
- Anticipating difficulties, obstacles, road barriers, sand traps, and water hazards
- Realistic assessment of how long it will take
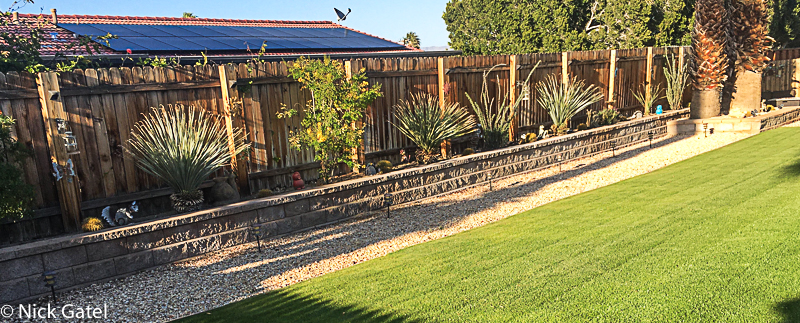
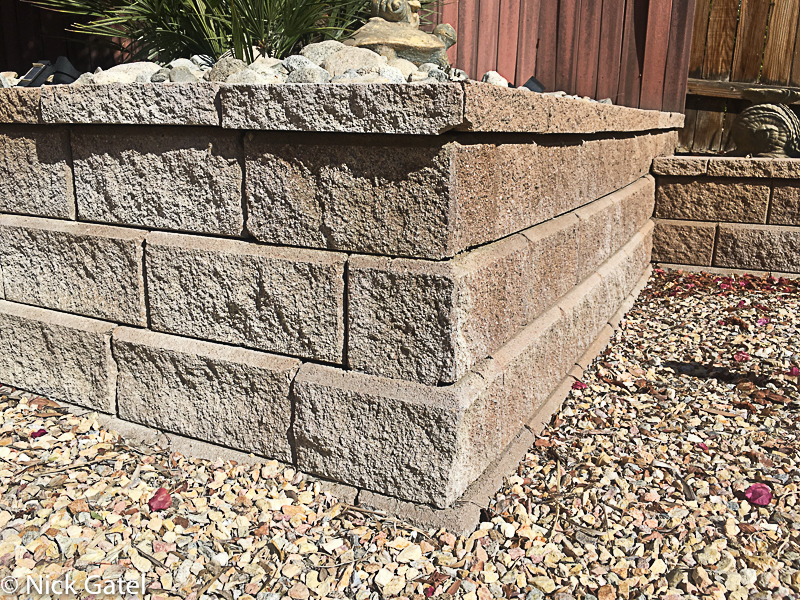
Retaining Wall Example
The retaining wall in the picture above was far beyond anything I had done before. The lot behind and the lot to the west of us are elevated about 3 feet higher than ours. When these adjoining homes were built, the builders plowed dirt against our prefabricated cement fence, which was not designed as a retaining wall. Unfortunately I didn’t realize what they had done until the walls started to crumble in place.
Fast forward 28 years later, and this is what our fence looked like due to the backfill.

This picture (below) shows how high the adjoining grade was while we were building the wall.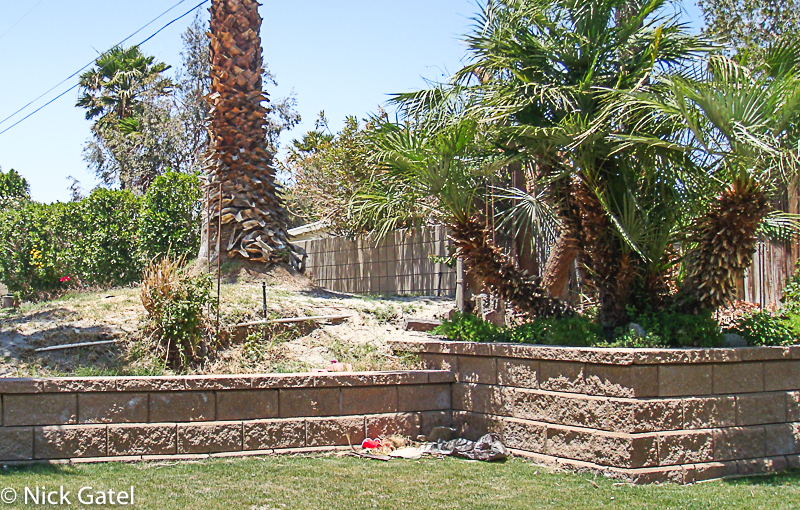
Research
What kind of a wall?
- A cement block retaining wall on a poured cement foundation was well beyond my skill or confidence level and prohibitively expensive
- An interlocking block retaining wall would be within our budget
So I began research on interlocking block walls. I found the retaining blocks sold at the big box stores like Home Depot and Lowes were not applicable to the scope of our project. This meant I would have to search for specialty blocks and settled on the Allan Block Company for our blocks and caps. They only sell to distributors and I found a few in the Palm Springs area. My calls to these companies were less than disappointing, they were awful and not friendly at all. There was one exception, Whitewater Rock and Supply Company in Whitewater, CA about 20 minutes from our house. Not only were they extremely friendly and helpful on the phone, in person they had extreme patience in answering all my questions. So along with their advice and a lot of online research, planning and drawing plans, and measuring and measuring, I was confident that we could do the job.
This was a true “We” job. Joyce helped dig foundations, move dirt, and assist in laying each one of the 75 pound blocks. Yep, each one of those blocks in the picture weigh 75 lbs and each had to be perfectly level.
Part of the planning was we would not have enough room to store all the materials during construction. The gravel alone will cover our entire 4-car driveway in huge piles. So we would have to dig the foundations and lay a bed of gravel before the blocks and caps could be delivered.
Possible Obstacles
The first one was obvious – four 30 foot tall palm trees that were exactly at the spot the retaining wall needed to go. There was no other practical or workable option other than removal.
Not only did they have to be removed, the stumps would have to be ground down at least three feet below the grade of our backyard, which requires a special tool that most gardening companies don’t have. I would have to call a tree specialist. After a little bit of negotiating and an offer of straight cash, we settled on $1,700.
The other possible obstacle was our underground utilities, which run where the wall would need to be built. Those utilities were installed when I moved into the house. As I recollected, they were pretty deep and would not be in the way. But caution did beckon. As it turned out, it wasn’t a problem.
Time Restraints
This is where homeowners and DIYers get into trouble. Unlike the auto mechanic who knows how long a job will take, inexperienced homeowners, like me, have no idea how long it will take. Especially when they have full time jobs, as I did in 2007.
When folks decide they have to get something done by a certain time, such as a plumbing job by Sunday night, this is where things can go south real quick. Time pressures cause rushing and often shoddy and faulty work. If you think a job will take one day, plan for four. Seems unexpected problems always raise their ugly heads when time is short. Rushing a job can turn a project into a disaster and possibly the need to rip everything out and do it again – the correct way.
Retaining Wall Construction
When the tree guy was removing the trees I went to Whitewater Rock and paid for everything in advance. $4,800. We arranged to have the 3/4 inch gravel and pea gravel delivered the following Saturday. The 70 tons of gravel would have to sit in the driveway until the foundation ditches were dug and we had no idea how long that would take us. Whitewater said they could hold the blocks as long as we needed, but since they don’t stock them, they had to be paid for advance. That was fine with us.
Our wall would run on two sides of our lot with a total of 170 linear feet. The foundation ditch would be 18 inches wide and 15 inches deep. Deep enough to allow for 6″ of a gravel base under the full block that would be level with the grade. This is the short version of the process:
- Pre-soak the area because sand is loose and excavations with vertical walls cave in.
- Because of the sandy soil, trenches for the foundation would have to be 24 inches wide, with a 18 inch wide bed of gravel.
- Measure, measure, measure to ensure wall is parallel to the property line.
- String line level and yardstick to ensure the entire trench was level – very important to building a level wall.
- Lots of water and a tool to compact the soil – the trench HAS to be compacted and solid or it will sink over time. This was the most important step to our success.
- Lay an 18 inch wide layer of gravel in the trench – 4 inches high using 3/4 inch gravel – tamp with compacting tool.
- Lay a 2 inch layer of pea gravel over the first layer of gravel – tamp with a compacting tool – use a long level (at least 48″ long) to confirm trench and gravel are level.
- Using a string line level, set it at the height of the first row of blocks. This will help the accuracy installation. Double check with a 24″ and 48″ levels.
- After the first row is in place, fill cavities with gravel and tamp.
- Continue each successive row in the same manner.
- After last row is in place and filled with gravel, use landscaping adhesive to glue the caps onto the blocks.
- Backfill the area behind the wall, tamping and compacting the soil as you add it.
Blueprints
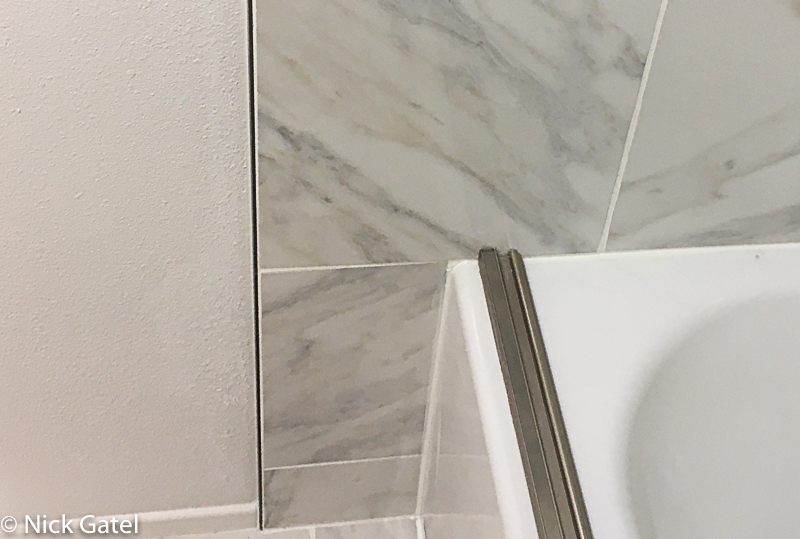
On almost all of our remodeling projects I started with drawings. Sometimes I would have to change the drawings several times to work around obstacles. When working with cement blocks, pavers, laminate flooring, floor and wall tiles, and similar materials one wants to avoid little slivers or these materials in corners or edges of the project. Nothing shouts out amateur like a 1 inch sliver of floor tile along a wall.
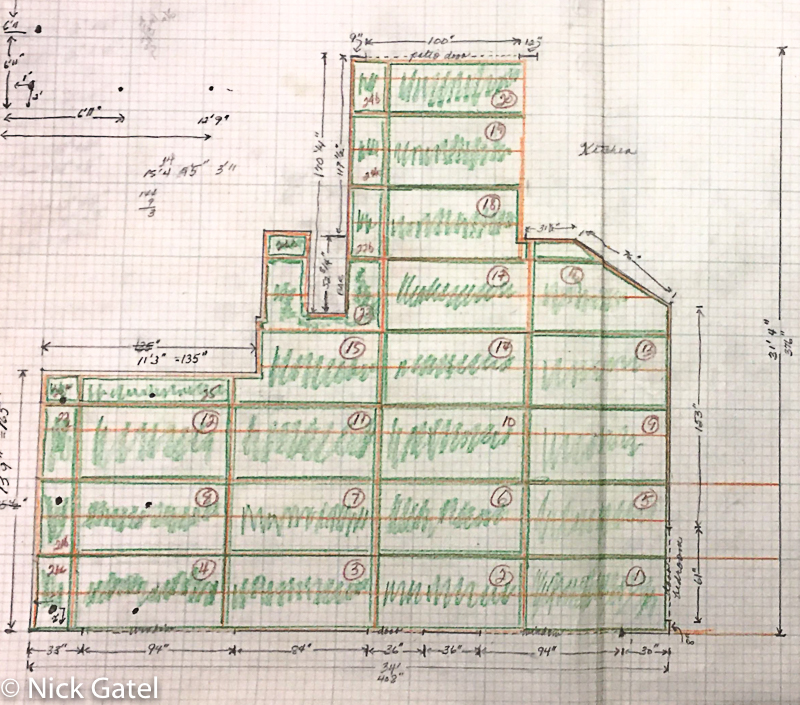
I bought a pad of 11″ X 17″ graph paper for planning purposes. Here are some examples:
Living/Dining Room Ceiling
We decided to install birch plywood panels on our ceilings. There needed to be an 1/8″ gap between the edges of adjacent panels. Also I wanted to avoid little slivers of panels along adjacent walls. To compound the planning, years ago we had installed 25 ceiling lights, 2 smoke detectors, 4 ceiling fans, in addition to the 3 air conditioning vents that were already in the ceiling. It would not have been practical to move any fixture because we have 6 inches of blown in insulation in the attic.

The challenge was to install the panels so no adjacent edges would be under a light, ceiling fan, smoke detector, or A/C vent, while avoiding any little slivers of paneling along the edges where the ceiling meets a wall. I knew ahead of time that one fan would have to be along a seam, which Joyce approved. Nothing else would be under a seam. The blueprint would also mark where the furring strips would need to be located to nail the panels to the ceiling.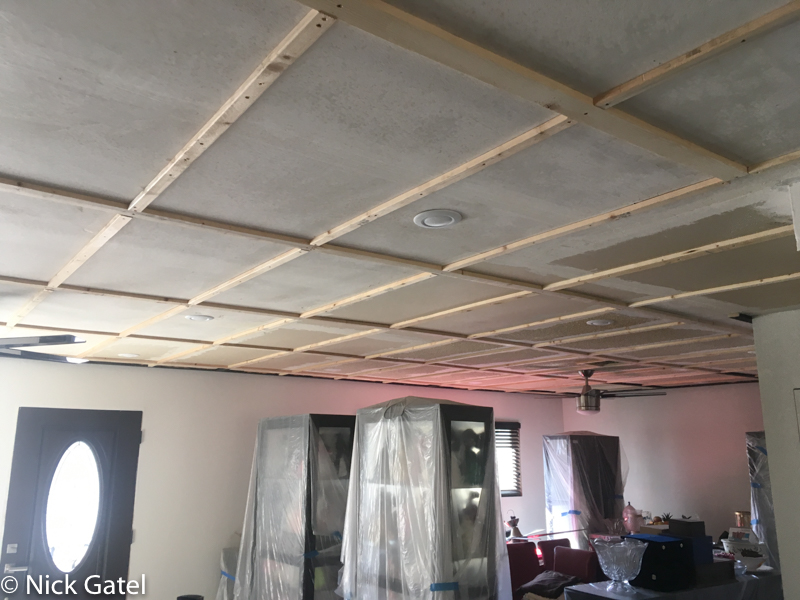
The furring strips would be painted flat black to give the entire project a three dimensional reveal look. Below is the final blueprint, which was used to calculate the number of plywood panels needed.
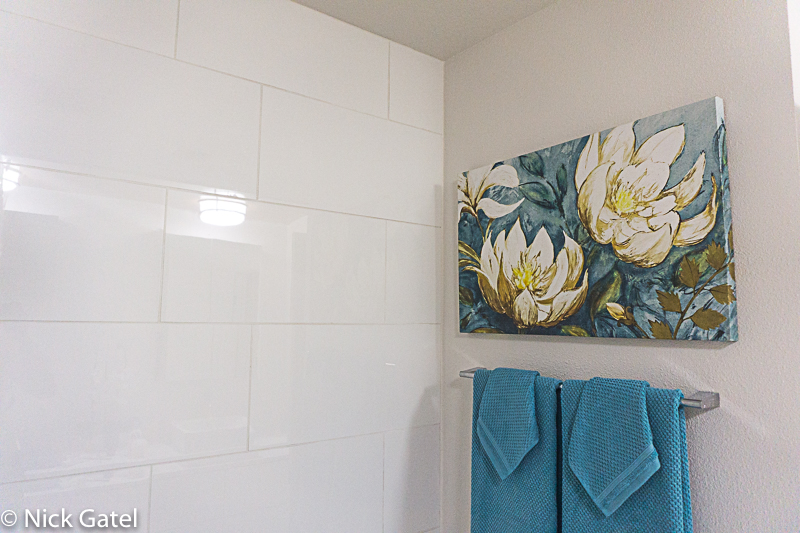
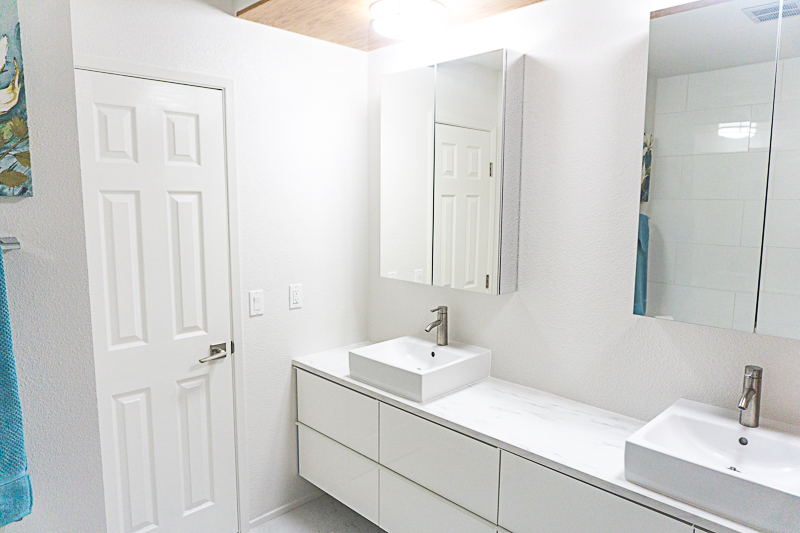
Master Bathroom
In this room I had to move water and sewer lines, insert stud wall blocks for hanging the vanities and medicine cabinets. Since all the drywall was replaced, I took pictures and measurements to assist with the blueprint. This way I could hang these fixtures without having to locate a stud, especially important because the Ikea vanities and cabinets have a weird mounting system.
I also made drawings for the floor and wall tiles so there would not be any tiny slivers of tile on the floor or wall.

Guest Bathroom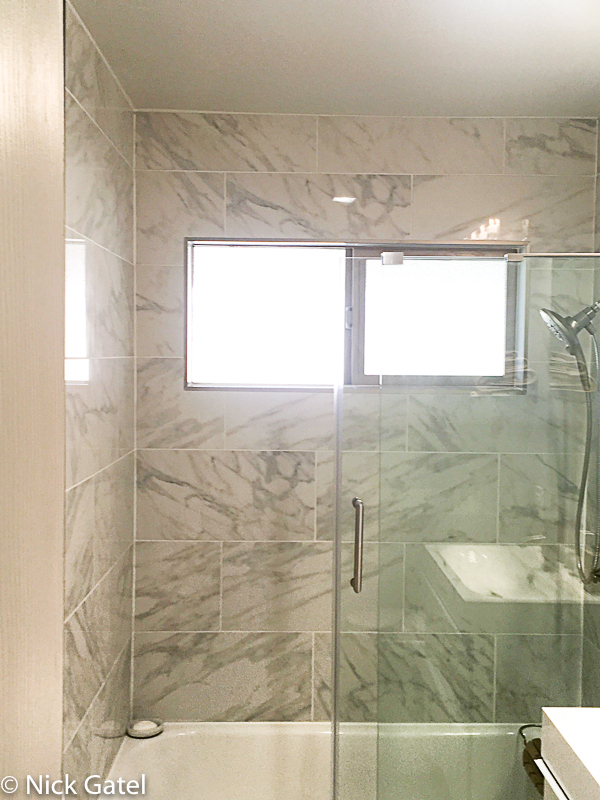
Laminate Flooring
Laminate flooring requires a transition strip between rooms. We had installed flooring years ago in the bedroom. When we installed laminate in the living, dining, and guest bedroom, we used a different color and type of laminate.
For the transition from the living room to the bedroom, I needed to make the strip blend in with the two different colors and patterns. It took a bit of a search, but I found a perfect one.
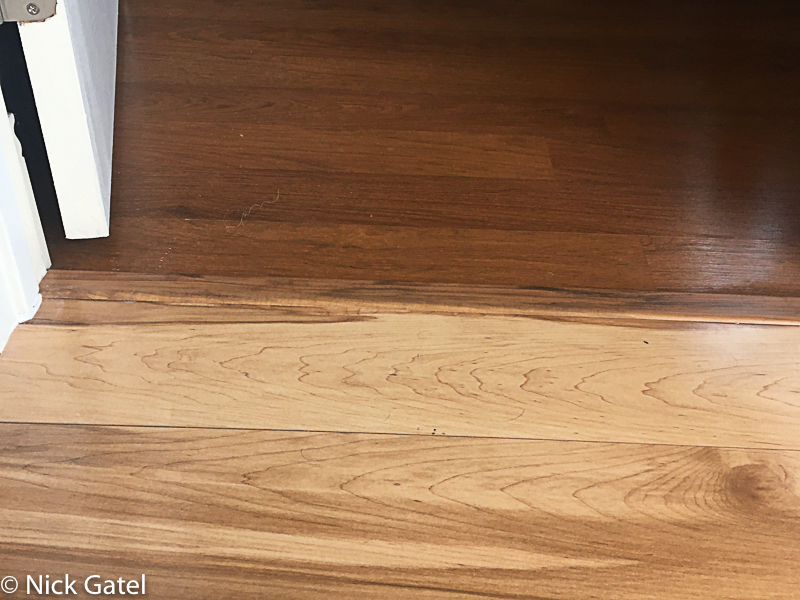
You can barely notice there is a transition strip between the two rooms.
The other thing with transitions, is they should be positioned so the transition is not seen from either side when the door is closed. In other words, the strip should be under the bottom edge of the door, as shown below.

Patio
This was a complex project that took several months to complete, to include many, many hours of planning. For a more detailed view of our backyard upgrades, you might want to read this post.
The original patio area had a cement slab measuring approximately 10 feet X 40 feet, as shown in this picture.
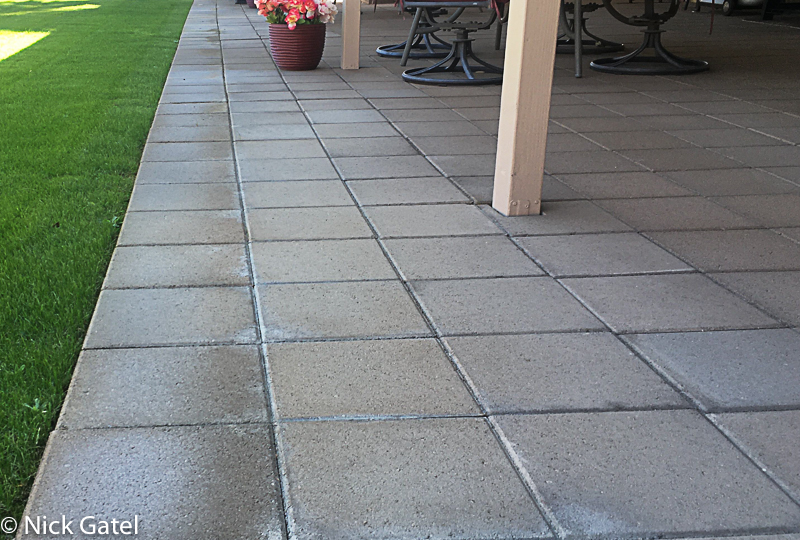
I extended this to 60 feet by 16 feet. The original slab had a slope away from the house, so I needed to match this slope when I added the extra 6 feet. Pavers are normally set in sand, however I opted to place them all on a cement slab, using cement block adhesive. This would avoid settling which often happens with sand.
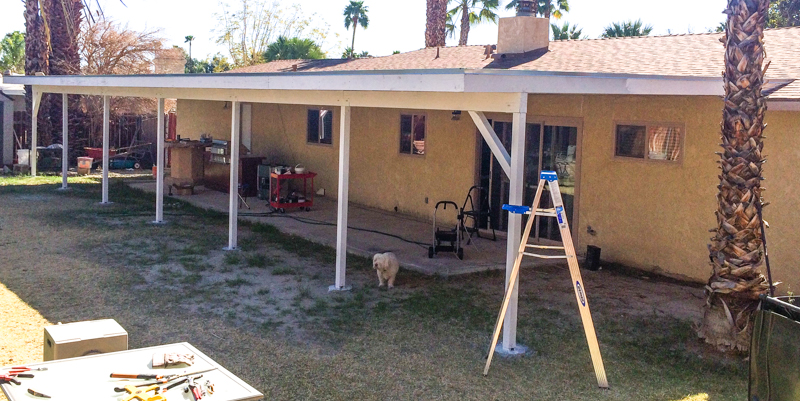
We had to build the new patio cover first, before extending the slab.
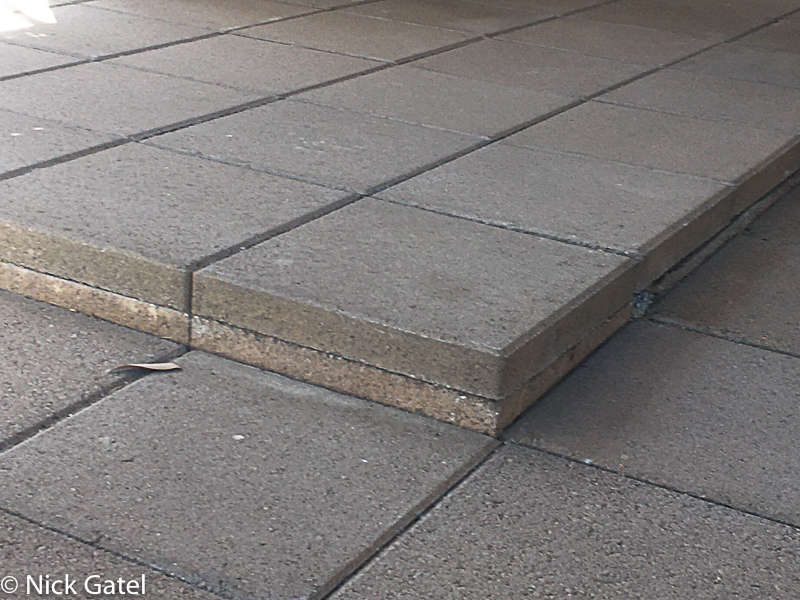
I added 10 feet to each end of the patio. On one end the hot tub would be located and at the other end a natural gas fire pit bar. Both of these had to be level. And, of course, I needed to avoid any slivers. Another minor issue is pavers are not all exactly equal in dimensions.

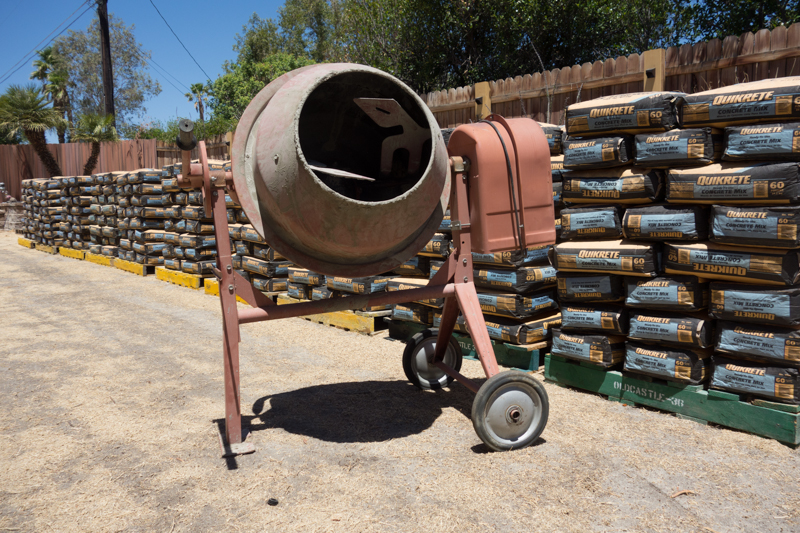
This project also required planning for the delivery of the materials. Needing over 680 60-lb bags of cement and over 1,000 square feet of pavers, I couldn’t just leave the materials in the driveway where they would be delivered. Also, I realized I was getting too old to lift 90 lb bags, so I opted for the light 60 lb. Because it was July, with triple digit weather, it would be tiring work for a 66 year young guy like me. So I had the cement delivered first. Because the job would take so long just to pour cement, including sidewalks, I waited to order pavers until this phase was done. So the first step was to move all the cement bags from the driveway to the backyard.

Here’s how things turned out with a lot of advanced planning.
The edge of the new patio floor extends about 12 inches beyond the patio roof, so rain hits the patio surface, not the grass.
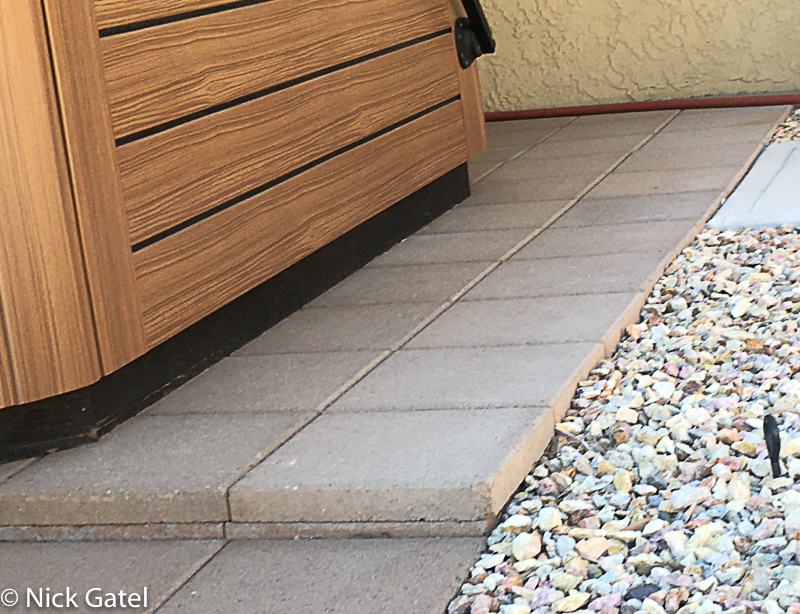
Because I laid pavers on top of the cement slab, things worked out really well at the patio door. Usually the threshold of patio doors can be a trip hazard, but not with this project.
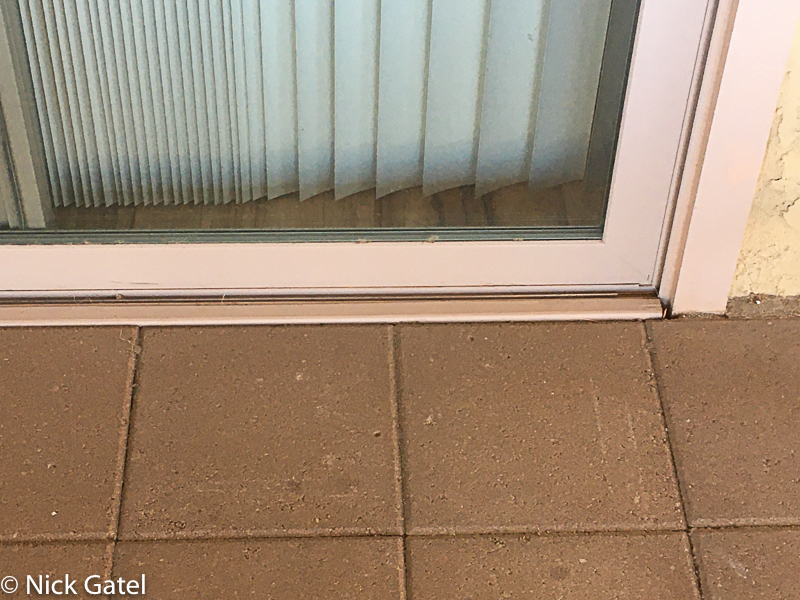
Instead of butting the pavers against the threshold, I laid in a painted piece of wood (matched to the door trim). The reason for this, is to give me easy access to the threshold should I ever need to make repairs. To the right of the door, is the outside wall of house. Being finished with rough stucco, the wall is kinda wavy, not true. So I filled the gap with mortar I colored a brownish tint.
Platforms for the Hot Tub and Fire Pit
These had to be level versus the slope of the slab. I used color matched cinder blocks for the outer edges of the platform, to make things match. The I poured the level slab, to include filling the cavities of the cinder blocks with cement.


Same process for the fire pit…
Nice and level!
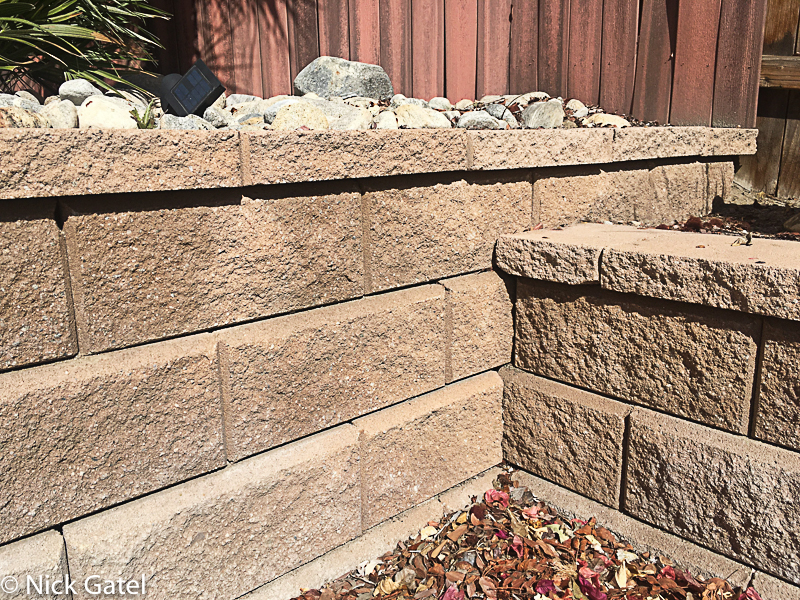
Retaining Wall Corners
Much time was spent planning this out.
Time
As mentioned earlier, time can be your enemy if you set unrealistic goals for completion. It took four years to finish our house remodel. In the beginning Joyce would get really frustrated with me. She would want to know when a segment of the work would be done, and she hated my answer to her question, “When will it be done?”
It will be done, when it is done.
Even more frustrating was my “attitude.” If she wanted to invite friends or relatives over, I would not let her push me to finish a project, telling her that if people don’t like the condition of our house, don’t invite them.
Sometimes, when facing a particularly difficult solution to a problem, I would spend a day or two figuring out how to solve it. Time well spent.
Then over time, when we would visit friends and relatives who had paid to have work done or did the work themselves, she could see how well our project was coming along, even compared to professionals. She would even tell pushy spouses not to put pressure on their husbands to “Get-R-Done.”
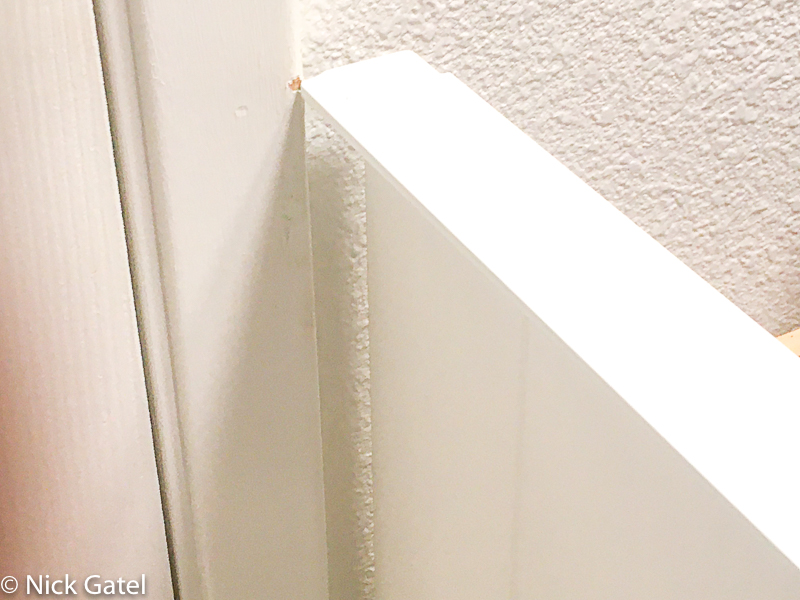
Not everything I have worked on has come out perfect. In fact, on almost every single job, I can see little imperfections. But then, no one else can see them. Here is one that bugs me every day, that no one sees – except me!
… and Oopps!!
The drawer hits the door moulding – it is 1/8″ too close to the wall. Instead of opening all the way to 12 inches, I can only open it 10.5 inches.
No easy fix for this to make it perfect, so I just live with it.
This website may be compensated for linking to other sites or for sales of products. As an Amazon Associate I earn a small fee from qualifying purchases at no additional cost to the purchaser.