
I have often written that a piece of gear ought to be tested for at least 10 years before doing an in-depth product review. Unfortunately a lot of gear these days is discontinued in just a few years, so there might not be a compelling reason to discuss gear that is no longer made. The Svea has been produced since 1955 and is still sold today.
The Svea 123 is probably the most reliable backpacking stove ever made. It is by far my favorite stove. It doesn’t do any one thing particularly well, but it ALWAYS works. Mine has worked flawlessly for 48 years.
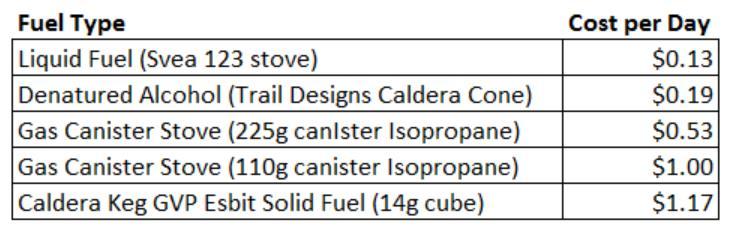
From around 2009 until 2016, I moved away from liquid gas stoves like the Svea 123 and my MSR WhisperLite, going to much lighter stoves, such as a Snow Peak GigaPower canister stove, alcohol and Esbit stoves. Being retired and cutting back all kinds of expenses, I did a dollar cost average analysis of backpacking fuels.
Since then I have mostly been using liquid gas stoves (White Gas) and Denatured Alcohol stoves. Although I am slowing using up my remaining inventory of canister fuel.
The stove I have been using almost exclusively the past four years has been my ancient Svea 123.
In 1971 (or maybe 1972) I bought my first Svea 123 stove and a Sigg Tourist nesting pot set.
Shortly after this, I bought a Gerry/Hank Roberts canister stove. The canister stove was okay… it didn’t thrill me.
When I saw a Sigg Tourist pot set with an integrated windscreen with an included Svea 123 (my friend owned it) I decided to get that integrated pot set. Lucky for me, my friend had to have the Gerry/Hank Roberts butane canister stove I had recently bought and offered to trade his Svea and Tourist set for the stove, because the Gerry/Hank Roberts could not be easily found at the time. The first Svea was my main stove until around 2009.
The Gerry stove brings up a good point. It was a canister stove. Unlike most canister stoves today that feed the gas vapor that sits above the liquid in the canister, the Gerry stove had a tube inside it which fed liquid butane to the stove. There are a few modern canister stoves that can feed liquid fuel, but they are heavy and complicated affairs. The important point here is the Gerry/Hank Robert canisters are obsolete. As are the canisters for my old Optimus 721 stove, Gaz Globetrotter stove, and Bluet 200 stove. When canisters become obsolete the stoves become obsolete too, unless one is willing to fabricate adapters, which of course add weight and complexity. Liquid gas stoves, like the Svea 123, run on White Gas and similar fuels that are readily available and much cheaper than canister fuels.


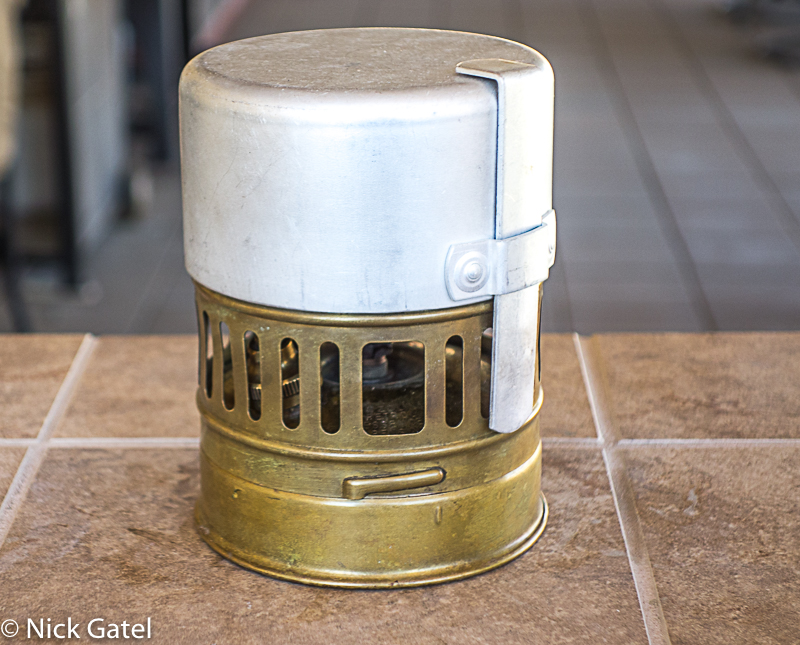
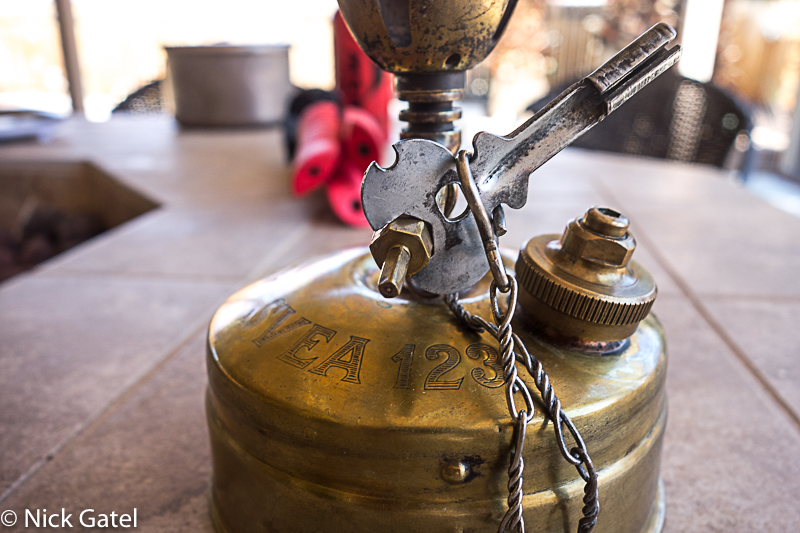
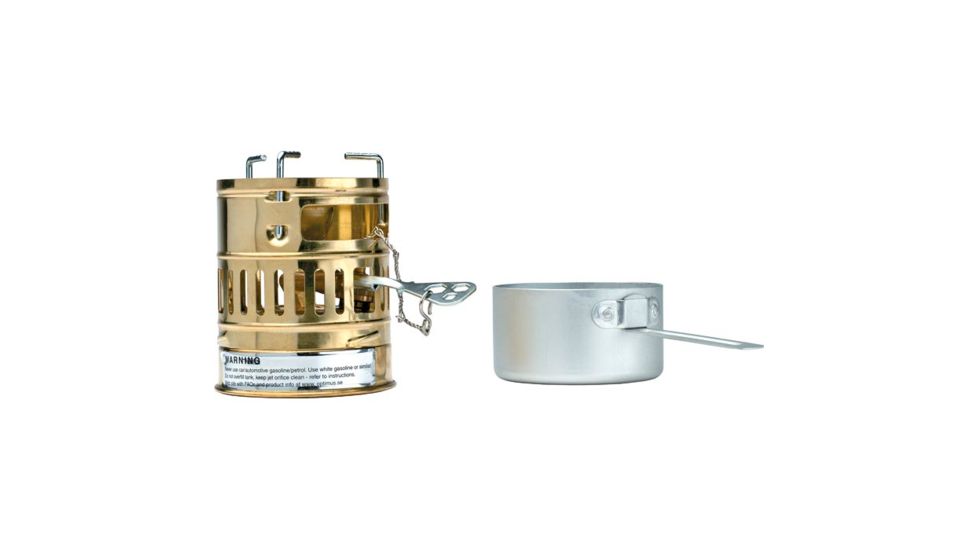
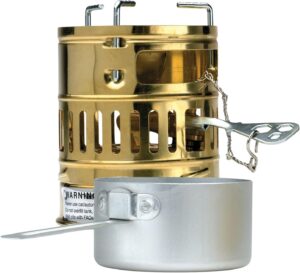
Svea 123 Stove Overview


In the picture above, I have replaced the chain that permanently secured the control key to the stove. I have found it easer to keep the key separate, but at the same time increases the danger of losing the key in the field. I’ll explain later why I have done this.

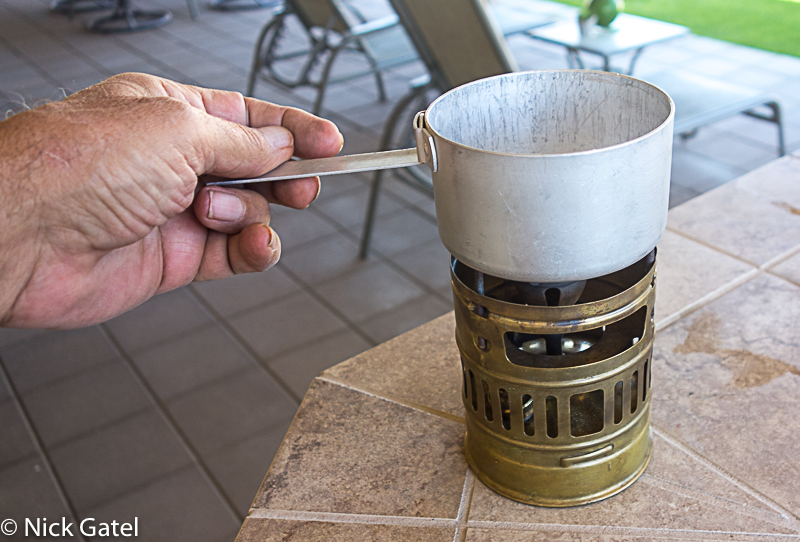
The Included Cup/Pot
I almost always leave this cover/pot/cup at home. The exception is when I go for an all day long hike in colder weather, where I bring it with the stove to make a cup of soup or coffee if I get the urge. For backpacking trips it is too small (about 12 ounces) to cook a meal) and inconvenient to use as a drinking cup.

When I bring a cup, it is usually a MSR Titan Cup. Same volume as the Svea, easier to drink out of, and it is a little lighter.
Way back in the ’70s I used a Sierra Cup instead. Then in the ’80s until around 2009 I used a Rocky Cup. 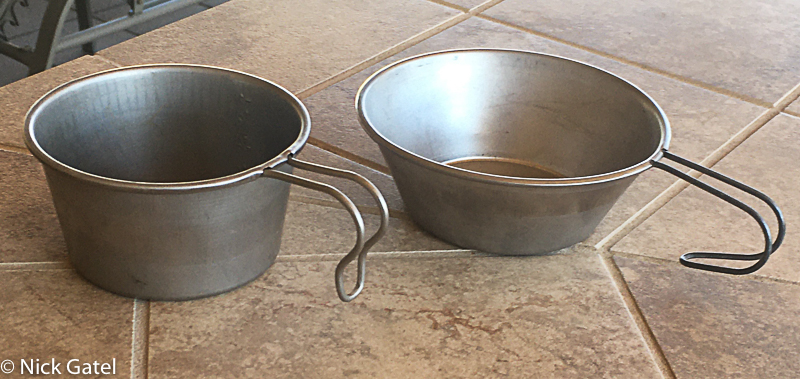 Rocky Cup (L) and Sierra Cup (R).
I have a feeling my younger readers have never heard of a Sierra Cup. It was really a lightweight and innovative design. But it was too shallow and wide (easy to tip over), The handle was more for clipping onto a belt than holding to drink, and cheap knock-offs would burn your lips. The Rocky Cup improved on these deficiencies. The handle was easy to hold, it had a nice deep design, and 1/4 cup markings on the side up to 1 cup.
Sierra Cups were extremely popular in the ’60s – to the point they were status symbols. Probably mostly popularized by the famous backpacking author Colin Fletcher. In those days we thought it was safe to drink directly from mountain streams, so keeping the cup on a belt made that easier to do.
The MSR Titan Cup holds 12 ounces as does the Svea 123 cup. The Rocky Cup and Sierra Cup both hold 8 ounces. Weights:
- Svea 123 Cup = 3 ounces (85g)
- Sierra Cup = 2 7/8 ounces (82g)
- Rocky Cup = 2 3/4 ounces (78g)
- MSR Titan Cup = 1 7/8 ounces (54g)
Okay, enough of the cup history lesson!
Svea 123 History
The Svea 123 was first produced in 1955. In 1969 Optimus bought the company and soon replaced the 123 with the 123R, which had a self-cleaning needle included in the design. You can tell the difference because the original 123 control shaft points down at approximately a 45 degree angle, also the key has a cutout on the end to loosen the packing nut on the housing. 123Rs shafts are parallel to the horizontal. People who have used both models say the older ones work better, but I have never used the R series.


On my stoves, cleaning the jet requires the use of the pricker. To clean the Svea 123R, the flame adjusting key is turned all the way counter-clockwise, to push the cleaning needle into the jet.
Today the Svea 123R is still sold by Optimus. They are no longer produced in Sweden and some users report they are not as well made as the original Swedish made units. Seems those who buy the newer models, and have never used the old Swedish made units, are happy with them. Today these stoves cost around $100. I think I bought my first one for about $12.95, maybe less. I do know for sure, via Colin Fletcher’s The Complete Walker, published in 1969, the list price was $8.95 when the book was released.
You can also buy a maintenance/repair kit for the newer model Svea 123R, although I have never needed any repairs, other than replacing the fuel tank cap/pressure relief valve gasket.
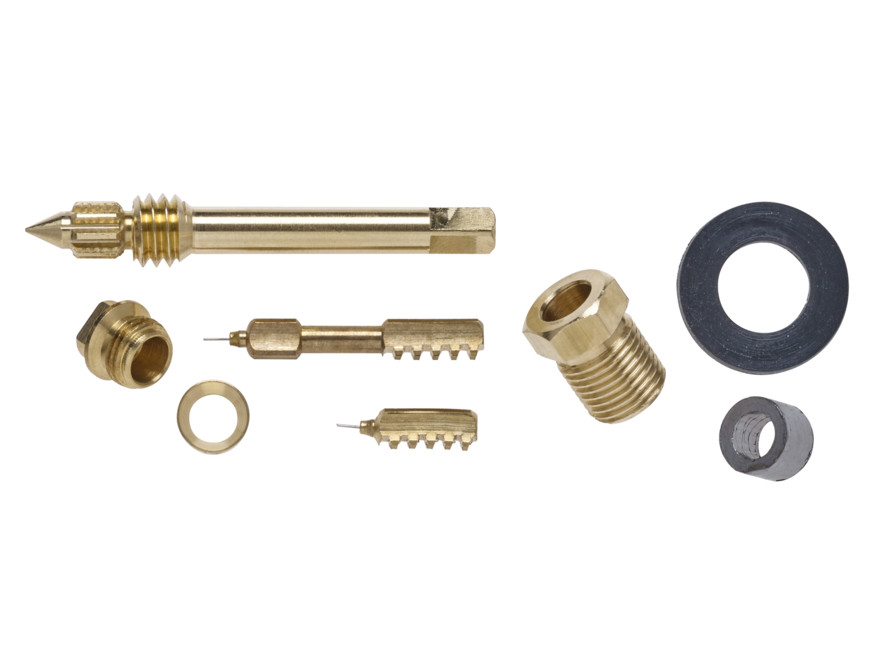
Keep in mind this parts kit will not work with an original Svea 123 stove. Will it work on a ’70s version of the sea 123R? I don’t know, perhaps it will.

A few years ago, on the 40th anniversary of my first Svea 123, I disassembled both stoves to clean and polish them. No problems found except one of the wicks was deteriorating. I think that was due to being stored without fuel in the tank. Now I store both stoves with a full tank of gas (about 4 ounces). Every few years I replace the fuel tank cap gasket. The cap also acts as a pressure relief valve, which is why it is a bad idea to use a windscreen close to the stove, other than the integrated windscreen/pot holder that comes with the stove. An exception is the Integrated Sigg Tourist cook set, which I’ll review a little later.
If you have an old Svea 123 or a Svea 123R, I found this part kit on eBay, which looks really good.

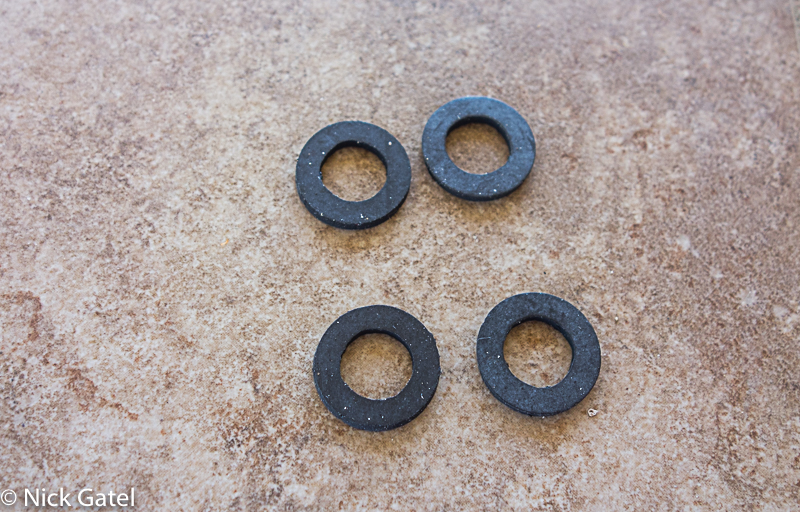
I think I’ll buy one myself, since it includes the impossible to find graphite packing for the stove stem (which I have never needed to replace). Years ago, I measured the cap gasket (can’t remember the size) and bought some Viton gaskets to fit. Viton material won’t degrade with White Gas or gasoline, and is able to handle the pressure the stove creates to operated. Below are some pictures of the cap and gaskets.


Operating a Svea 123/123R
Once the stove burner is lit, the heat from the burner and connected fuel stem keeps the tank warm, which pressurizes the tank to continuously feed fuel to the burner. But before this can happen, the stove needs to be “primed,” that is, the tank needs to be heated before it can start delivering fuel to the burner.
The Svea instructions say to prime the stove with the windscreen in place. I find this difficult because you really need to use a wooden match to get to the priming bowl. When there is a breeze, or worse, it is truly windy, it is difficult to keep a match lit. Plus I prefer to use a BIC lighter to prime the stove. So here are several methods that work for me, and be aware I am not following the instructions, which may be dangerous to you health, life, or even lead to imprisonment or a hefty fine 😉
The priming bowl needs to be filled with fuel and then lit to warm the fuel tank. You can use the gas in the tank, a flammable fuel in a separate contain (such as alcohol), a solid fuel paste or something else.

Method One
The best method for me is to use the gas already in the tank. The method recommended in the stove’s instruction manual is to cup the fuel tank in your hands and warm the tank. Then open the fuel valve allowing fuel to dribble out of the fuel stem and fill the priming bowl. Close the valve and light the fuel.
Now this method of warming the tank with your hands works when the ambient temperature is moderate, say around 70F. Most other times it doesn’t work.
Once the fuel is almost burned out, and you time it perfectly, open the fuel valve and the fuel will feed into the jet and ignite. At this point the stove isn’t ready to use — it will take 15 or 30 seconds to heat up the fuel tank and deliver the correct amount of fuel.

Next I will show you how I almost always prime the stove, with all the steps included.
Method Two
Use a straw to transfer fuel from the tank to the priming bowl. First of all, you need a straw that won’t melt on contact with the fuel. I have one that works, although it is rather narrow and takes about three transfers. A better option would be a section of thin copper tubing – I just thought of this, and will try it once the coronavirus “stay-in-place’ decree is lifted where I live.
Place the straw into the fuel tank, then place your finger over the open end of the straw. This will capture a bit of fuel in the straw.
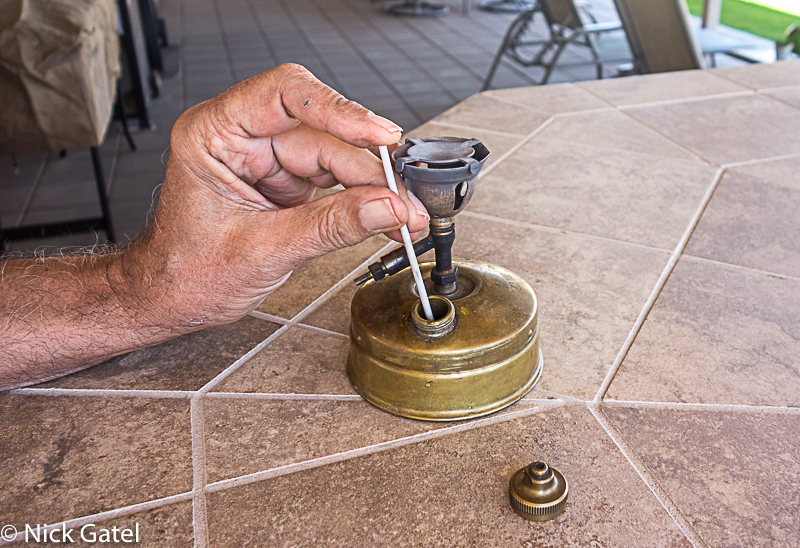
Next place the bottom of the straw over the priming bowl and release your finger. Depending upon the diameter of your straw, this may take several transfers. Be careful to just fill the priming bowl. If you slop the fuel around and let it cover the tank and the ground below, you are going to end up with a huge fireball!

Instead of a straw, some people use an eye dropper to transfer fuel from the tank to the priming bowl. In the ’70s this wasn’t a good solution for me because the eye dropper tubes were made of glass and I would always break them after a period of time. I suspect some eye droppers today have plastic tubes. I haven’t checked, because the straw method works for me.
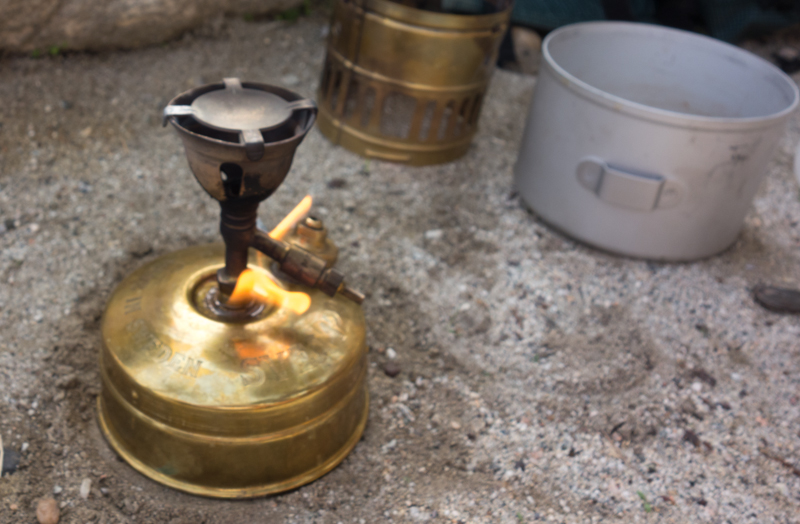
Once the priming bowl is full, light it.

Keep an eye on the flame. Just before the flame extinguishes itself, open the fuel valve with the key. If you do this at the right moment, the fuel above the jet will ignite.
If it doesn’t immediately ignite, light the fuel above the jet with a match or lighter. You need to do this QUICKLY, or else you are going to have a huge fire!!
If you have followed the above steps correctly, the stove will start to operate and build tank pressure. WARNING: Do not leave the key attached. It will get too hot to touch. Remove the key each time you adjust flame.
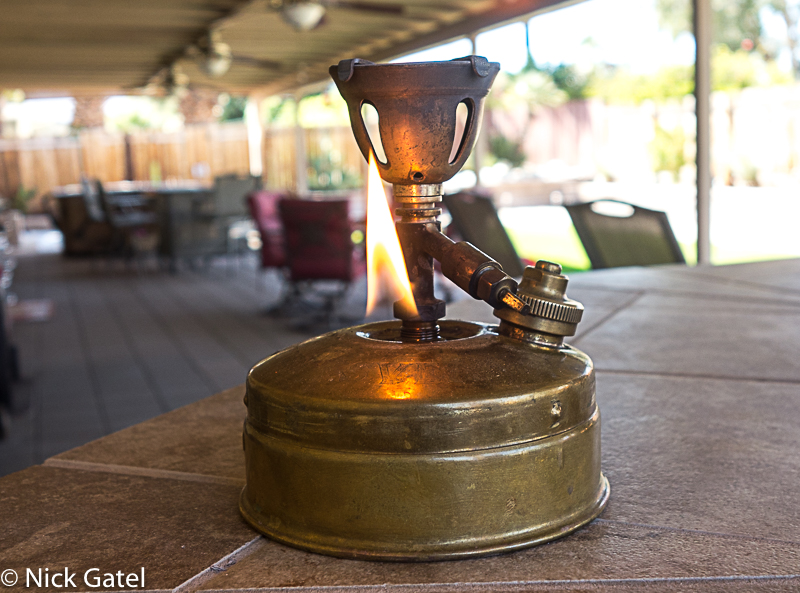
If you have let too much fuel out the jet before lighting, you will get a huge flame.

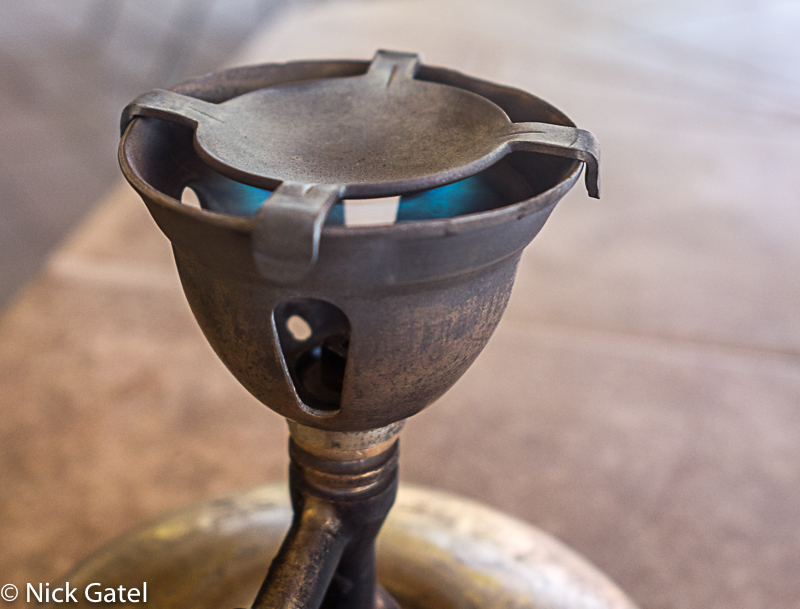
After 15 or 30 seconds, the flame will stabilize under the flame spreader and you will have a nice blue flame, just like your gas stove at home.
Carefully place the windscreen/pot holder over the stove, twisting the windscreen to lock it on the tabs on the fuel tank. It is important you lock it in place, otherwise you will not be able to attach the key to the control valve.

Now you can place your pot on the stove and adjust the flame for cooking or boiling water.
It doesn’t take long to bring water to a rolling boil.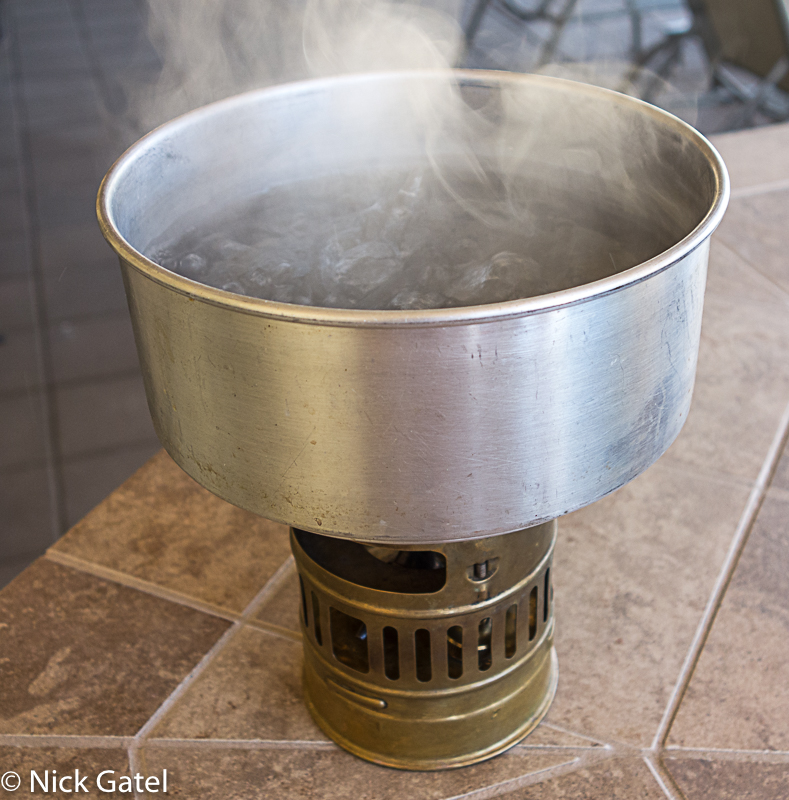
Method Three
Hold a flame under the fuel tank (MAKER SURE THE CAP IS TIGHT AND THERE ARE NO LEAKS!). Holding a BIC lighter under it for a few seconds will work. But why waste lighter fuel. Most of use have scraps of trash we need to take back home, which can be used to heat the tank for priming.
Clear an area and place scraps of paper or small twigs on the ground and light the small pile.
Hold the stove over the flame.
When you feel the stove getting a warm, place it on the ground, extinguishing the small fire.
Open the valve to fill the priming bowl and light it, as in the detailed instructions in Method Two above.
Place the windscreen on the stove once the flame has stabilized, put your pot on the stove, re-adjust the flame as needed, and cook your meal or boil water.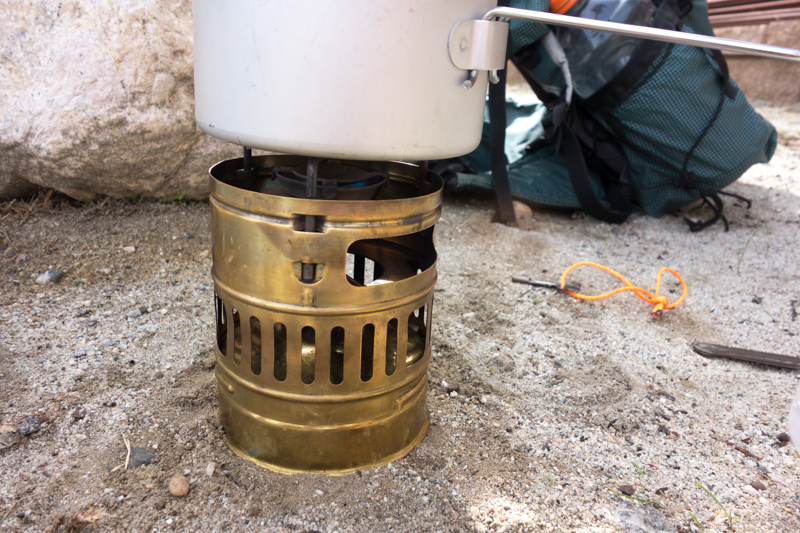
Method Four
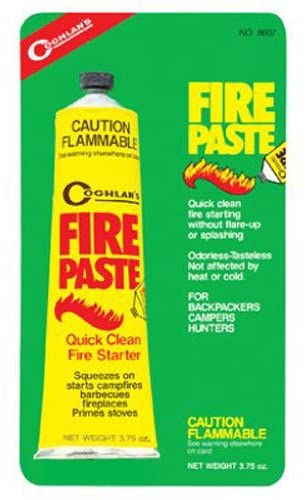
Many people use fire paste to prime their Svea stove. I have never tried this four two reasons. First, Method Two always works well for me. Secondly, it is extra weight to haul around. But if you are just learning to use your stove, it might be an option.
Instead of fuel paste, some folks bring a small container of denatured alcohol and fill the priming bowl with this. Again, it is extra weight to carry.
Cooking Utensils
Because the pot holder tabs are adjustable, you can use itty bitty pots or large pots. Just adjust the tabs as needed.

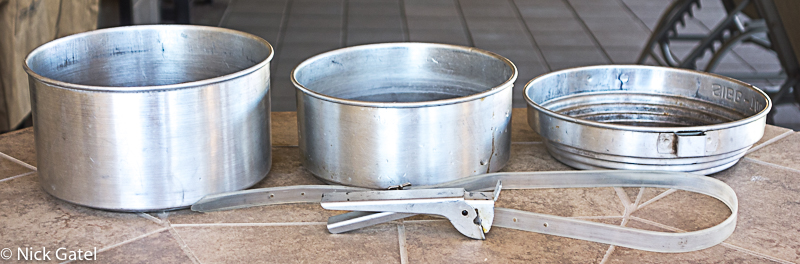
Sigg Tourist Cook Set
When I bought my first Svea 123, I also bought a Sigg Tourist Cook Set of nesting pots (a 2.5 quart pot, a 3.5 quart pot, lid, pot holder, and strap to secure everything into a nice secure package. The cost was something like $9.95 in 1971. These are high quality, Swedish made spun aluminum pots.
Soon after, I traded my Gerry canister stove for a Svea 123 stove and another Sigg Tourist set with an integrated windscreen. Given that I paid under $10 for the Gerry stove, this was a fabulous trade for me.

Anticipating Obsolescence
Often, when I own a product that works well, the manufacturer decides to discontinue it. So over the decades, whenever I find a great product, I buy a spare. When Sigg discontinued their cooke set (in the ’80s ?), I bought one at REI on sale. Well, the original sets are still in great shape, and I have never used the “spare” set. And no, it is not for sale 😉
By today’s standards, the pots are heavy and larger than what I normally need, aside from melting snow in winter. But the set is lighter than what one might think at first sight, which can be an excellent option for a small group of backpackers where common gear can be shared. Although Sigg hasn’t made this set in a long, long time, I suspect they can be had on eBay. Check out the weights and capacities:
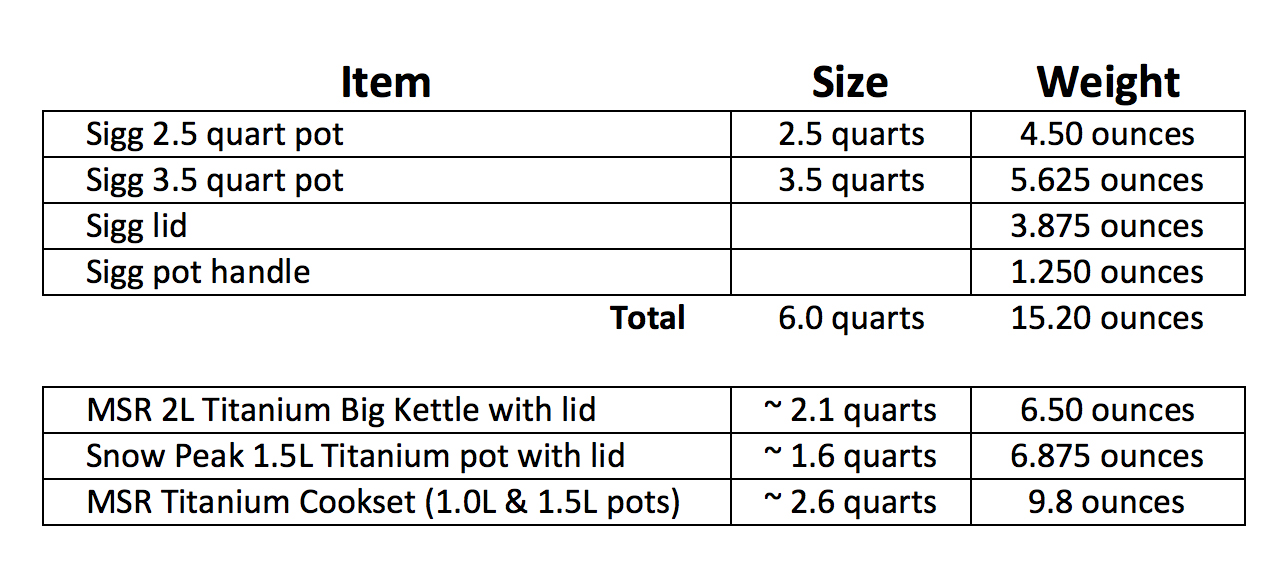
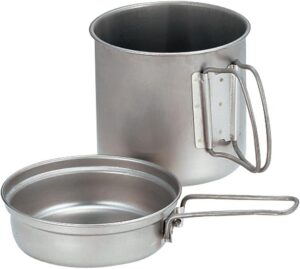
MSR Titanium Cook Set
Svea 123 Packed in the Sigg Tourist Cook Set Horizontally

Svea 123 Packed Vertically along with Some other Kitchen Necessities

Sigg Tourist Cook Set with Integrated Windscreen
This is definitely not a cook set for the “lightweight” backpacker. But for car camping, it is simply downright awesome. Years ago, before I bought a camper, I used my two Svea stoves and the two Sigg cook sets for my camp kitchen. The pictures below will give you an idea of what can be done. The pots and lids are identical for both sets. The only difference between the two is the effective wind screen for the stove, meaning the standard windscreen that comes with the Svea 123 is not needed when used with this set.
The base of the windscreen has an indent and rivets to hold the stove securely.
Stove set into the base.
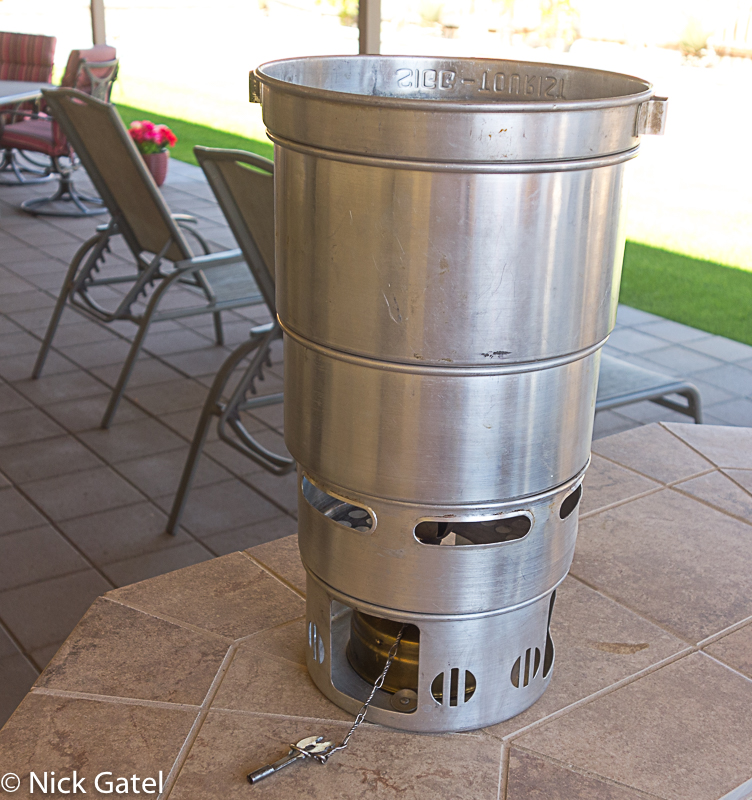
Top section of windscreen attached
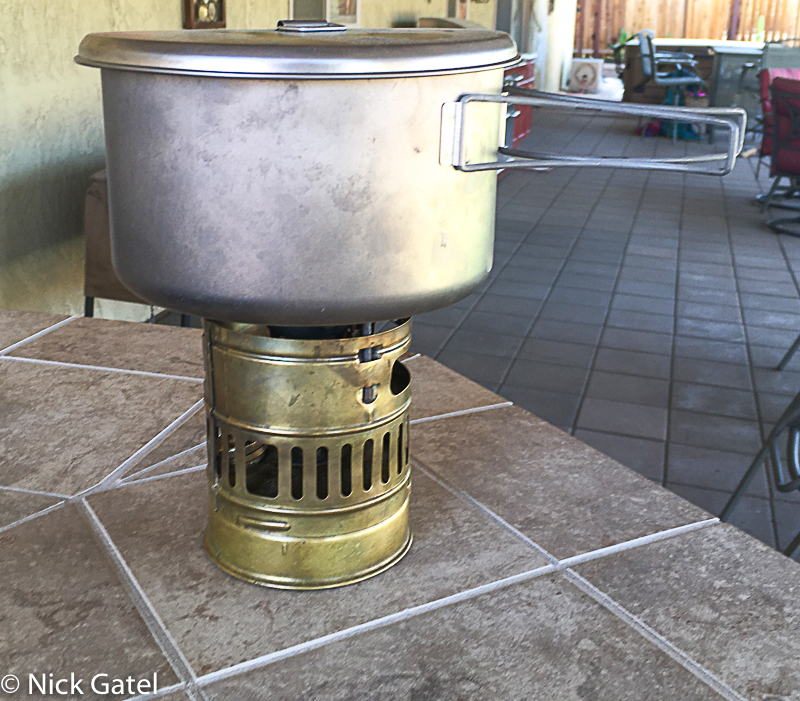
3.5 quart pot on stove
The lid, which secures the kit for transport, also doubles as a pot lid.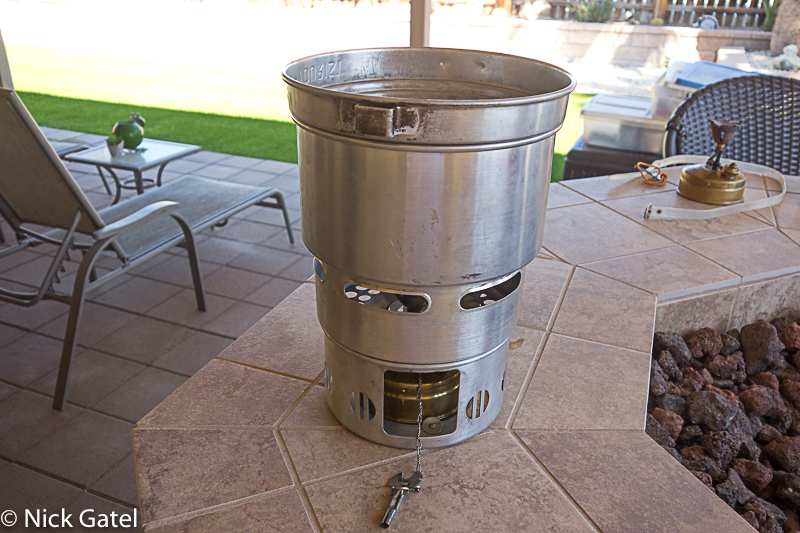
The lid has a stepped construction allowing it to be used as a secure lid on both the 2.5 quart and the 3.5 quart pots.
Lid on the 2.5 quart pot.
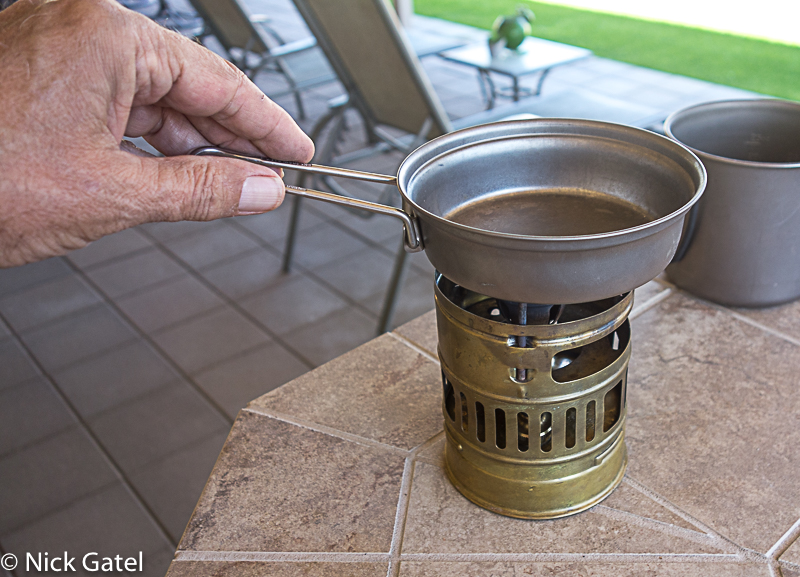
The lid can also be used as a skillet.
Gourmet cooking in camp? You bet! How about a double boiler for exotic sauces and stuff without burning them in an uncoated aluminum pot!
How I Use the Svea 123 Most of the Time these Days
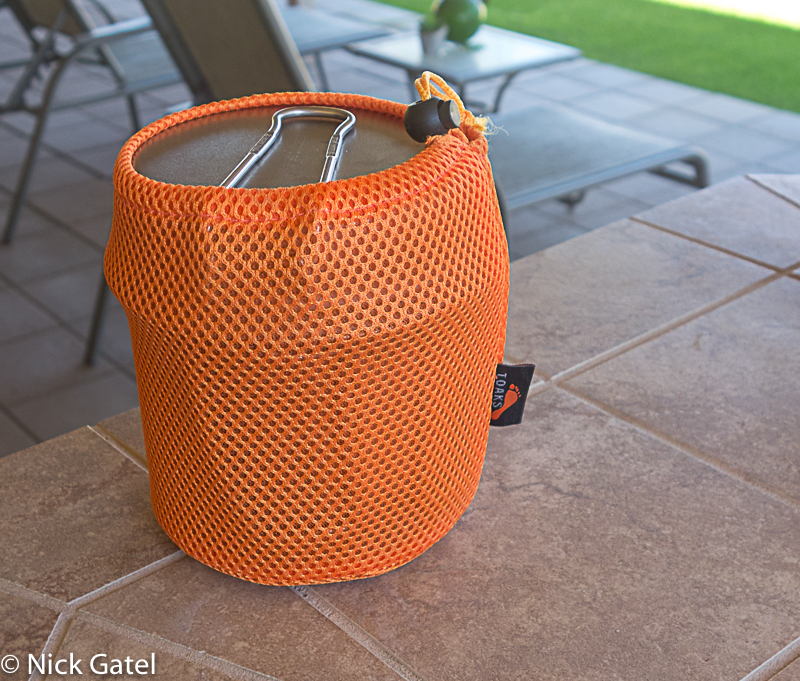
Toaks 850 ml Titanium Pot
On most of my shorter trips, I use my McHale Bump backpack. A small volume backpack demands compact gear. Reducing the physical bulk becomes more important than reducing weight, although lower bulk usually reduces weight too. The Svea fits perfectly into a Toaks 850 ml pot – actually I bought this pot specifically to use with this stove.


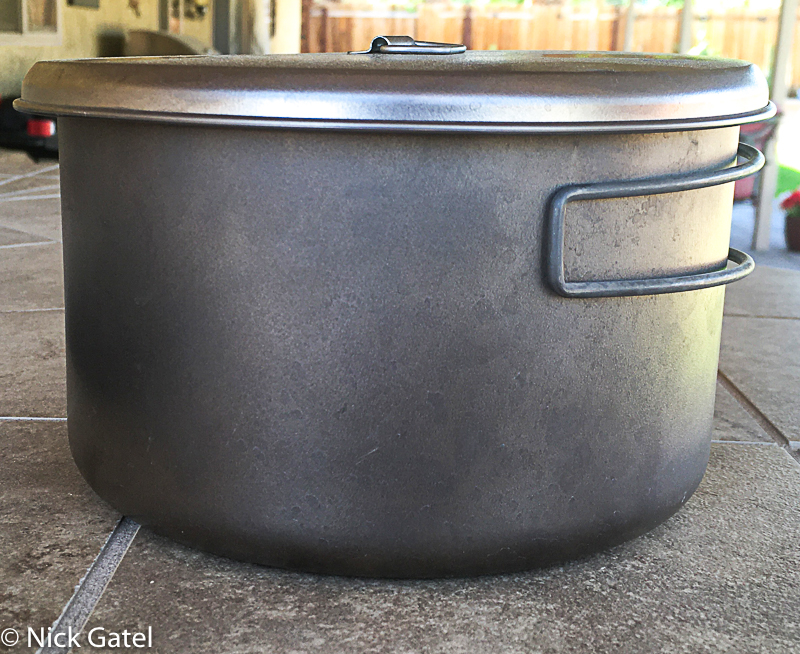
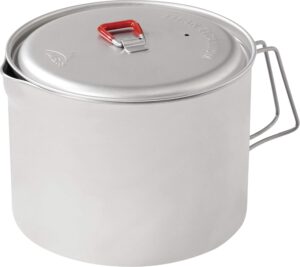
Snow Peak 1.5L Titanium Pot
On longer trips I need a larger backpack because I am carrying more food and often a little more clothing to meet any severe changes in weather. On these trips I bring my McHale LBP36, which gives me extra room to carry a larger pot at the same time. The larger pot costs me about 1.5 ounces in additional weight, but gives me more latitude in cooking.

This website may be compensated for linking to other sites or for sales of products. As an Amazon Associate I earn a small fee from qualifying purchases at no additional cost to the purchaser.
Optimus Svea White Gas Stove
![]()
Snow Peak Trek Series Backpacking/Camping Cookware Sets, Trek 900 Pot & Pan
![]()
MSR Big Titan Ultralight Titanium Backpacking Kettle 2.0 Liter
![]()
June 12, 2020 note: I have made some edits from the original post to clarify some points and to present additional information.