
Mini review posted. Click to read.
The Caldera Cone Stove System by Trail Designs (http://www.traildesigns.com) is probably the most used system by backpackers looking for the lightest, most efficient cooking kit. Trail Designs offers many systems for various pots and fuels.
I bought my first Caldera Cone in 2008. Since then I have used a Caldera Cone on almost every backpacking trip over the past 4 plus years.
I will review two different Caldera Cones I have used:
The cone system is really designed to boil water. Many backpackers prepare instant meals that just require adding water to their food (instant, dehydrated, or freeze dried). Some folks have actually cooked in their cone systems, but I have never tried to do this. What I do is place my meal in a freezer bag or microwave bag and then add the boiling water to the bag. The meal is usually cooked and ready in 10 minutes. Doesn’t get any simpler than this.


Esbit is light wight (one cube weighs about 14 grams or .49 ounces) and can easily boil 16 ounces of water. You can’t spill it. It does leave a sticky residue on the pot and smells like fish. However it is my favorite fuel for most trips. It can be difficult to find in small towns.
Denatured Alcohol is readily available in hardware stores and other outlets. 1 fluid ounce easily boils 16 ounces of water. However the flame is difficult to see in daylight and if the stove is tipped over it can cause a fire. Make sure you purchase denatured, not rubbing alcohol!
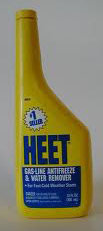
HEET brand gasoline anti-freeze (in the yellow bottle, not orange) can be found in most automotive supply stores. Most backpackers report that its performance is about the same as denatured alcohol. My use of both verifies this.
Trail Designs includes two stoves with each cone. One is an alcohol stove recycled from 12 ounce soft drink cans. These stoves are designed especially to match and work best with their Caldera Cone. You can’t just use any alcohol stove with their cones.
The second stove is called a Graham Cracker and is designed to be used with Esbit tabs or other similar solid fuel.


Above: Soda Can Stove (left); Esbit Graham Cracker (right)
The cone is used as a combination pot support and windscreen.


Above: (left) the cone is rolled for storage. Each edge has a dovetail joint that allows the quick connection to create the cone shape (left).
Cook Pot
You can purchase a cone with a matching pot, or Trail Designs sells a cone kit without a pot to match many popular pots available today. But the cone must be ordered to match your specific pot; every cone is different. Cones are available for popular pots in the .5 to 1.3 liter capacity. Normally you will get the best performance from a short wide pot. Trail Designs also sells cone systems with Heineken or Foster beer cans that are used as a pot.
My first two Caldera Cones were the basic model. One was sized to match my Snow Peak Mini-solo cook set, and the second was a complete system with a Fosters beer can that is used as a pot. Both systems work fantastic, but the cone was taller than both pots, so it could not be fitted completely inside the pot, which could cause damage to the cone when carried in my pack. It is crucial that the dovetail joint that is used to set-up the cone does not get bent or damaged. To solve this problem, Trail Designs includes a food grade plastic caddy to protect the cone and can be used as a cup or bowl. Unfortunately the caddy weighs more than the cook-set.

Above: (left) Snow Peak Mini-solo. I only used the top part of the caddy to save weight. (right) Complete caddy with a Fosters Cone kit. Note that the rolled up cone is taller than the Fosters can.

Above: The complete package. Note that the bottom is the plastic caddy.

Above: Everything is stored in the cone.

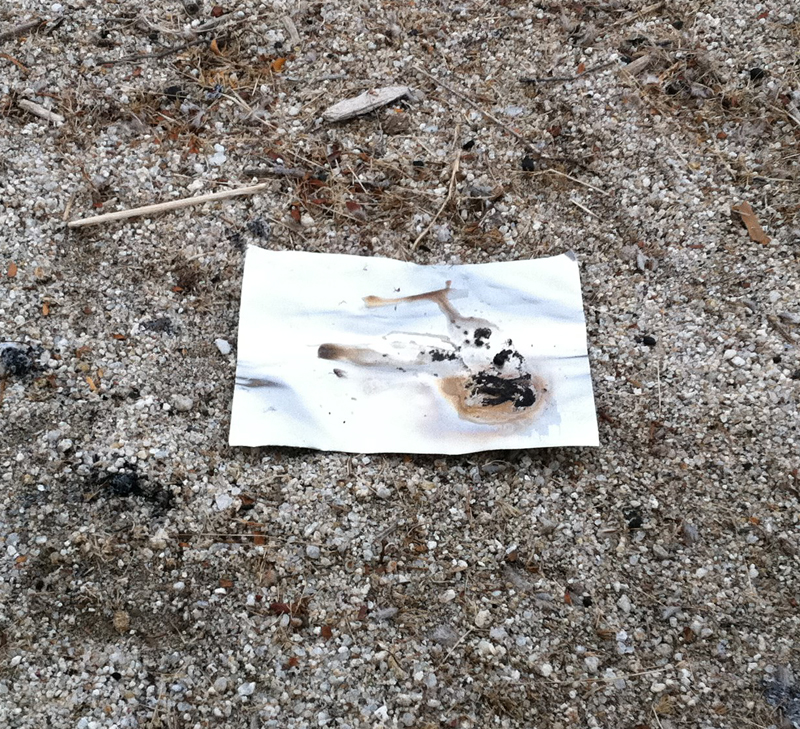
Above: Cook-set components. Instead of using the Snow Peak’s pot lid, I use a piece of aluminum foil to save weight.
Above: Soda can alcohol stove.

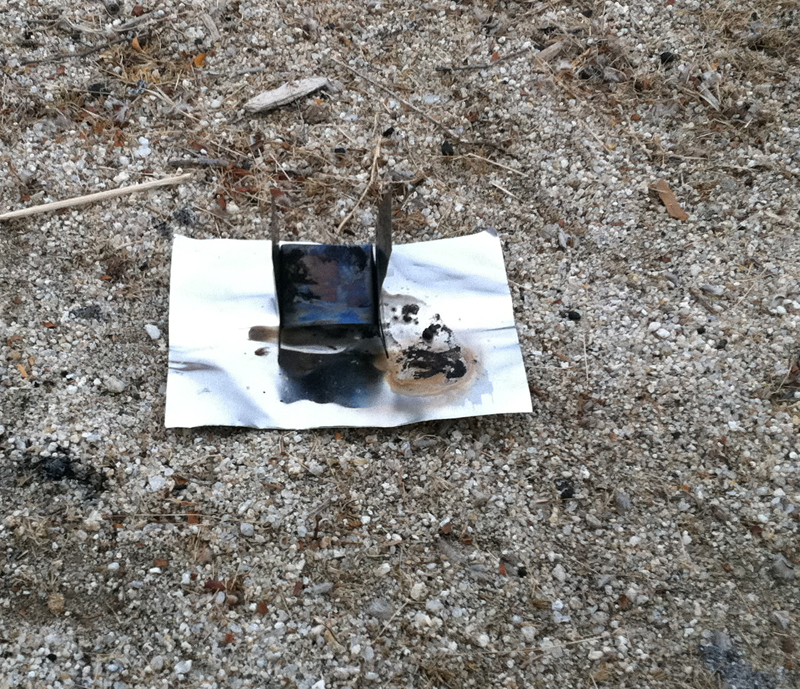
Above: Light the stove, place the cone (windscreen and pot support) over the stove, insert pot into the cone.

Above: Waiting for the water to boil. Took about 6 minutes or so.
This is a great set-up. A Fosters can for a pot and the cone fits completely inside the pot. It comes with a caddy, but I never used it. Everything fits neatly into a super light cuben fiber stuff sack. I have cooked hundreds of meals in this system, always using the Esbit option. Total weight is only 3.08 ounces! Below is the kit.

Above: Caldera Cone GVP next to a 12 ounce Pepsi can. This has the Esbit Graham Cracker set-up with a total weight of 3.08 ounces for stove, ground sheet, cone, lid, and cuben stuff sack.
Step 1 Above: Place the base on the ground (to protect the ground)
Step 2 Above: Place the Graham Cracker on the base.
Step 3 Above: Place Esbit on Graham Cracker and light it.

Step 4 Above: Place the Cone over the stove.
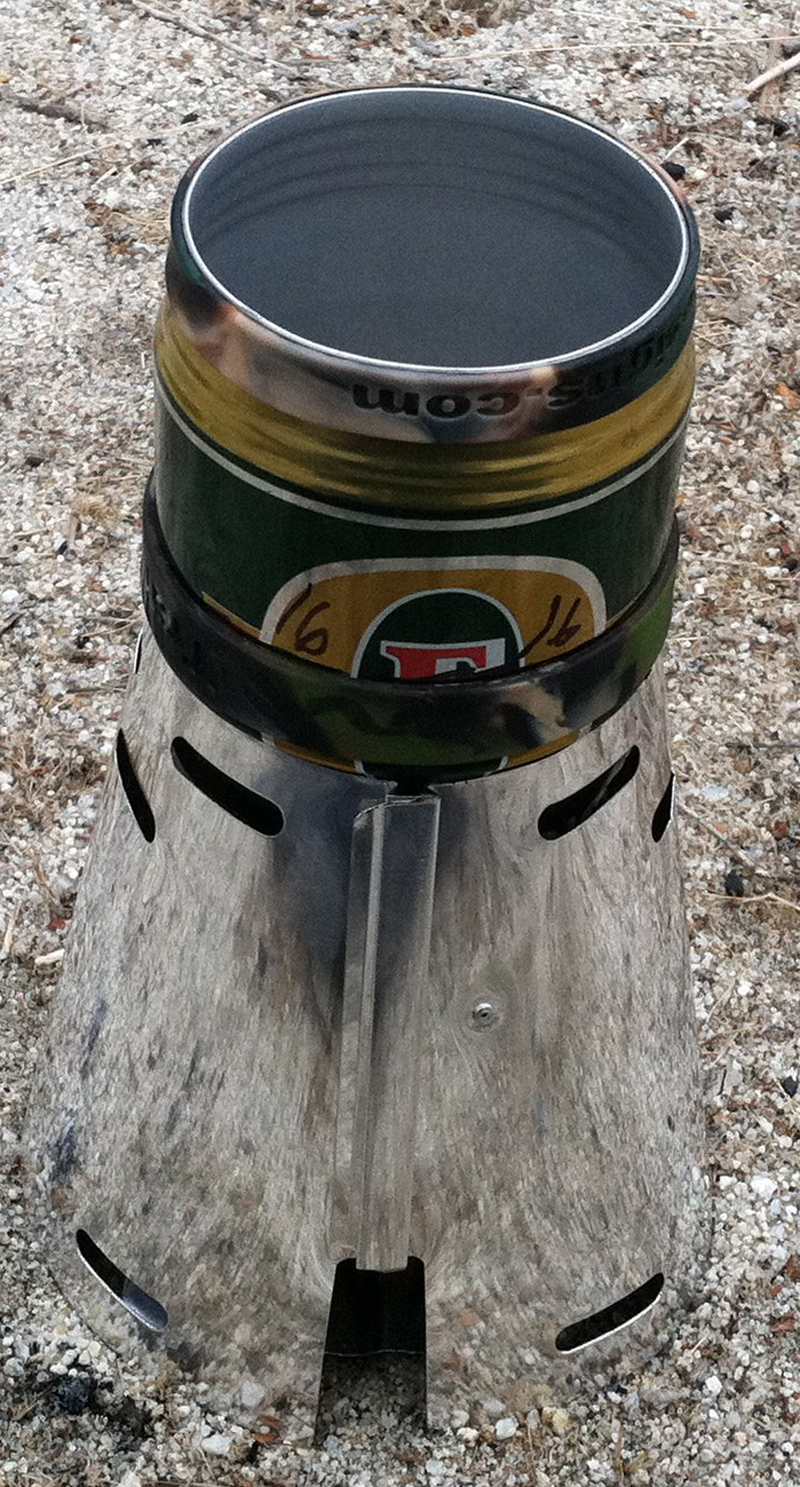
Step 5 Above: Insert the Fosters can into the cone. Wait about 6 minutes to boil 16 ounces of water.

Step 6 Above: Add instant coffee or hot chocolate for a tasting drink. Drink right out of the pot. No extra drinking cup or mug needs to be carried. Notice the bottom of the pot is discolored from hundreds of boils.
Last Thursday night I arrived home at the airport just before midnight. At the exit booth to pay my parking fee, I rolled down the window to the sound of grinding noise. The window motor was dead, and the window was stuck in the down position.
First thing Friday morning I took it to the shop. Later in the day the shop called and said it could not be repaired until Saturday. That eliminated any hiking for the weekend. Earlier in the week my friend, Ojas, had contacted me about doing some hiking in the next few weeks. After the bad news about the vehicle repair, Ojas inquired about us going hiking this weekend. Told him I would have to bow out – Joyce was gone for the weekend and I needed to stay at home and retrieve the vehicle when it was ready.
Saturday morning; 9 AM. Shop calls and says the vehicle is ready. Good news indeed – there would be time for a weekend backpacking trip. Since Ojas had probably already made plans, I decided to put a loop together that would include a trip to Carey’s Castle in Joshua Tree National Park. It has been over 30 years since I had visited the castle.
When I first located Carey’s Castle, I wasn’t looking for it. I had never heard of it.
I was spending some time near a spring in the vicinity observing a herd of Big Horn Sheep. When it was time to move on, I continued on my trip looking for a well, I found on my topographical map. As I trudged up a sandy wash, I came to an ancient road track that veered away from my planned route. Being sure it probably led to an old mine, I followed it for a few miles where it made a sharp turn in front of a small hill. To the left of this turn was Carey’s Castle – I almost missed it. Very little is known about Carey. During my visit I found many, many of Carey’s artifacts inside and around the vicinity. Also found some Native American artifacts. Of course, I left everything in place.
Curious about the house built under a boulder, I drove to the main ranger station and inquired. I was told it was Carey’s Castle, and the NPS discourages people from divulging information as they did not have the resources to protect it. Good enough for me. I have never told anyone how to get there.
Just like my trip last year to Chuckawalla Bill’s rock house, I decided to take the same gear I used when I hiked to Carey’s Castle in 1981. The only exception is that I no longer have the sleeping bag, and I used Aqua Mira tablets instead of iodine. Since I have extensively explored the area where the castle is located, for this trip I wanted to put together a two day loop, with the availability of water along my route. A quick look at some maps showed I could do a loop of around 30 miles and find water along the way. Perfect. There were a couple sections along my route I had not hiked before, so that would add some interest
Many of us who hike in this area are hesitant to share information, especially for sites of historical value. So I have no map to share with you. If you are diligent you could probably create the same trip. There is enough information on the Web to point you to the castle. That ticks me off. A place that was protected for decades by the hiking community has been over-run by the Internet hoodlums.
Here is an interesting quote from a twit who posted information on how to find it,
“Carey’s Castle is not the sort of site that needs to be hidden from the public. It’s not an especially sensitive environmental area (not a bighorn birthing place, for example), not especially dangerous (no crashed WW2 aircraft leaking fuel, for example), and it’s not private property. The hike in is hard enough it should serve well enough to screen out the casual, beer-swilling, fire-starting idiot.”
Really? Well… I think the author might be the idiot. What about all the artifacts that used to be there? I can now confirm that most are gone, probably snagged by souvenir hunters. And what about all the trash I picked up along the popular section of this route? Oh, Mr. Author, your Internet posting helped create this carnage! Luckily most of the rest of the route I hiked had little damage, so I shall not share that either.
Now to the next idiot – I shall not publish his name, because I do not anyone to buy his book and line his pockets with money. He is the same moron who published a hike to Chuckawalla’s rock house. Oh, and he could not find that hike, this hike, or the Desert Skyline trail on his own. He asked local hikers to take him, without revealing that he was going to publish a trail guide. And those folks who were tricked by him, have publicly stated they would not have shown him these hikes had they know he was going to publish them.
If you want to hike to Carey’s, see if you can construct a loop. I find traveling over the same real estate twice (out and back) to be boring. Go do the hike for the hiking opportunities, not some check box on a bucket list.
Usual disclaimer: Be prepared for earthquakes, boulder avalanches, landslides, flash floods, freezing temperatures, triple-digit temperatures, rabid rodents and mammals, poisonous snakes, poisonous insects and spiders, predatory packs of coyotes, man-eating tarantulas, nasty large biting lizards, no marked trails, probably no water, and GPS failures from activities at nearby Twenty-nine Palms Marine base.
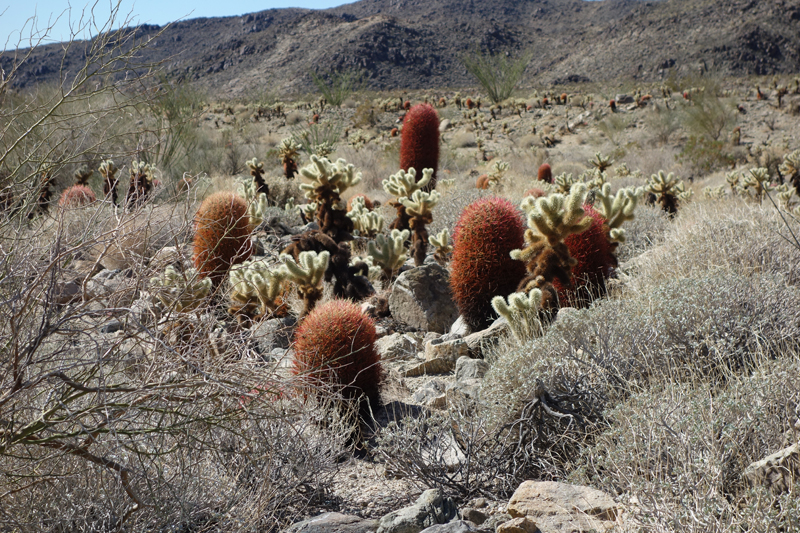
Include maneuvering through boulder fields in the canyons to your hike route. You cannot avoid them unless you create a route north of Carey’s Castle, and no one that I know of has posted anything like that on the Web – but that is what I did in 1981.
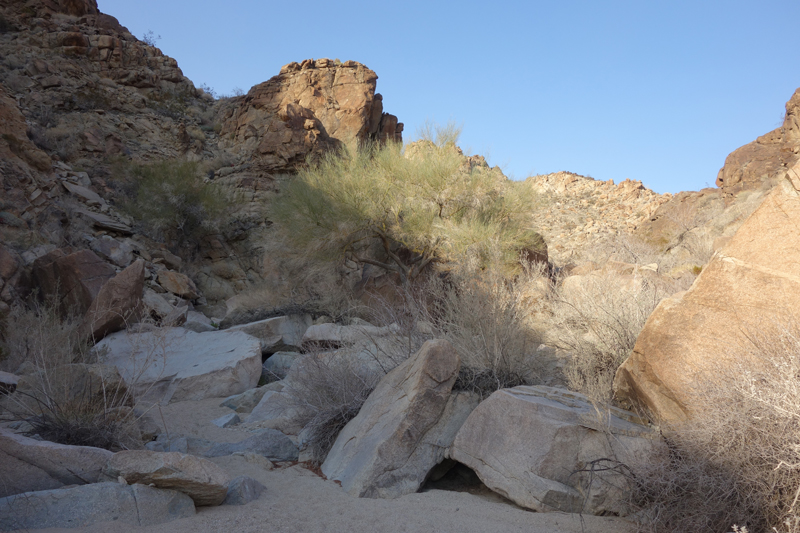
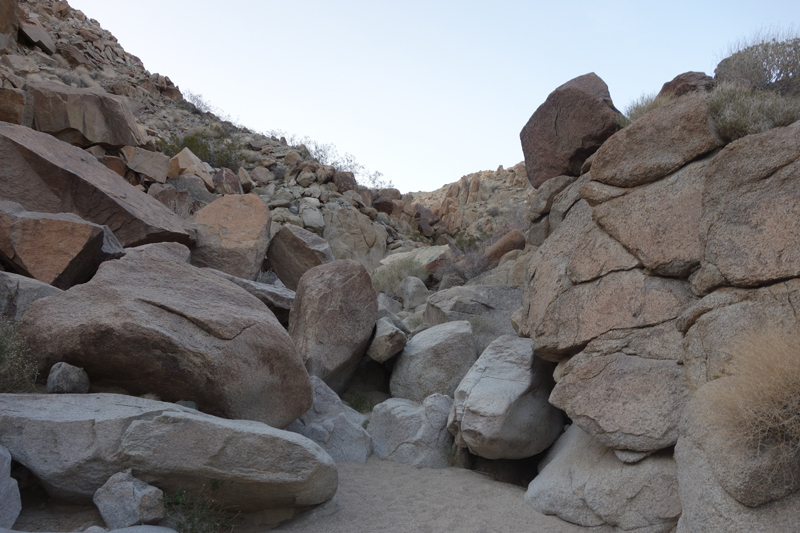
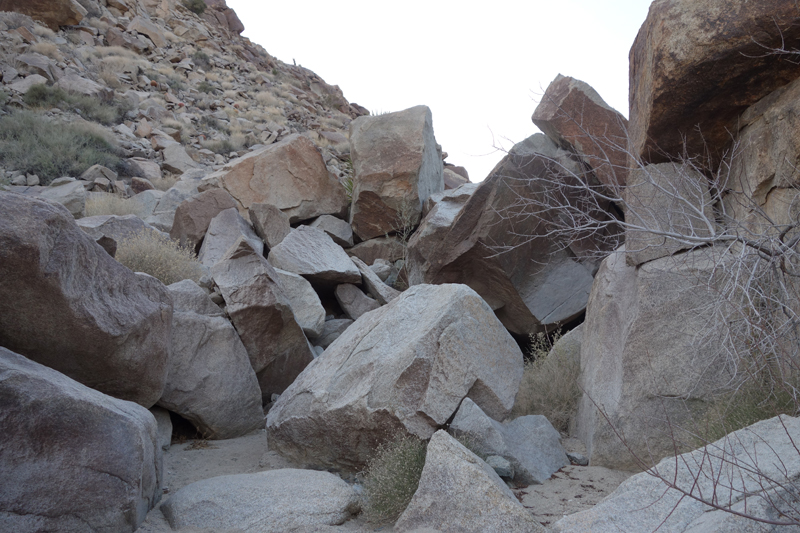
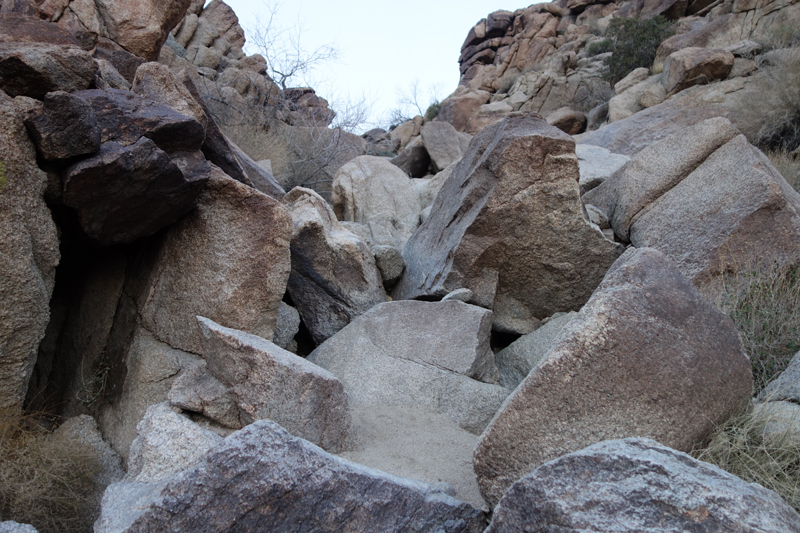
The bouldering above was a little more difficult than it needed to be, since I was using an external frame pack. Would have been much easier with an internal frame pack.
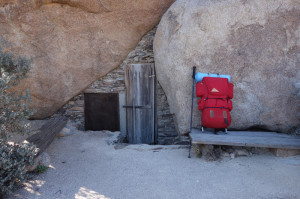
Carey’s Castle
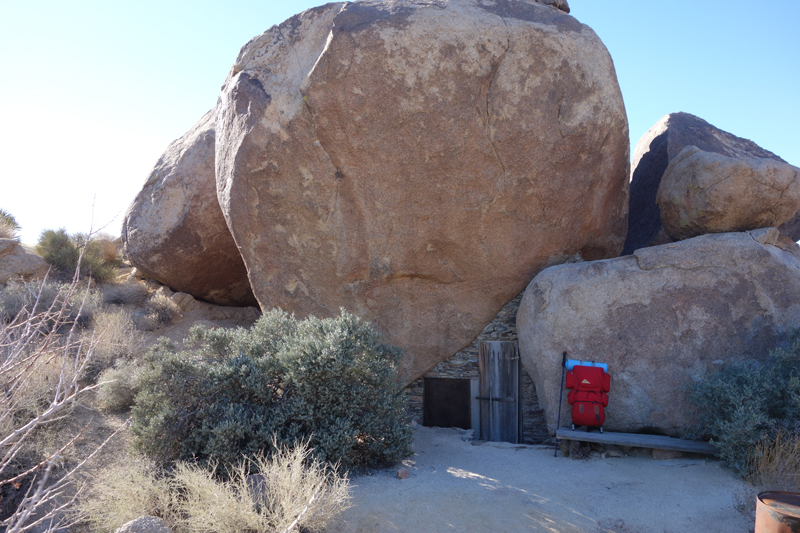
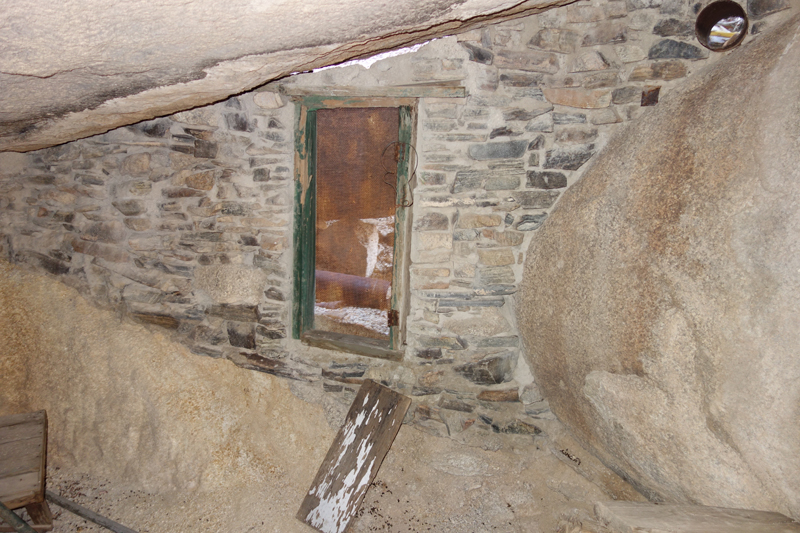
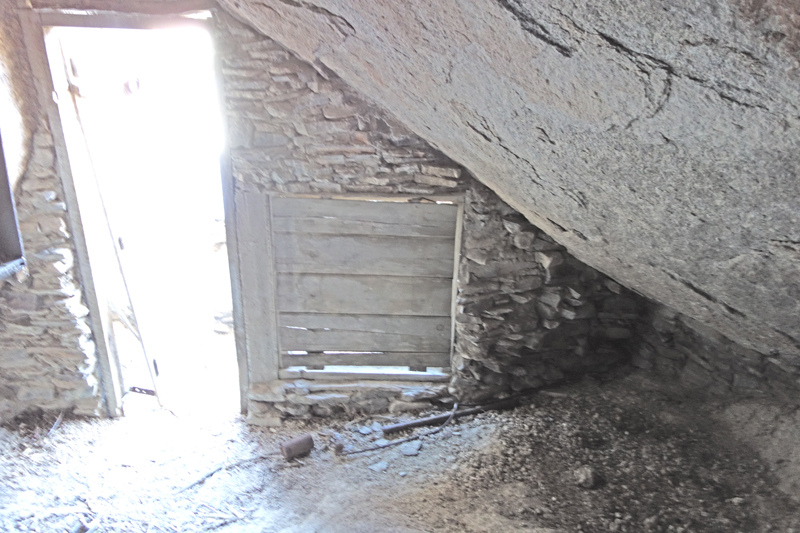
 There is an ammo box with a couple journals dating back to 2005 on the lower shelf. Amazing how many people said it took them 2 or 3 tries to find the place. Lots of artifacts are now missing.

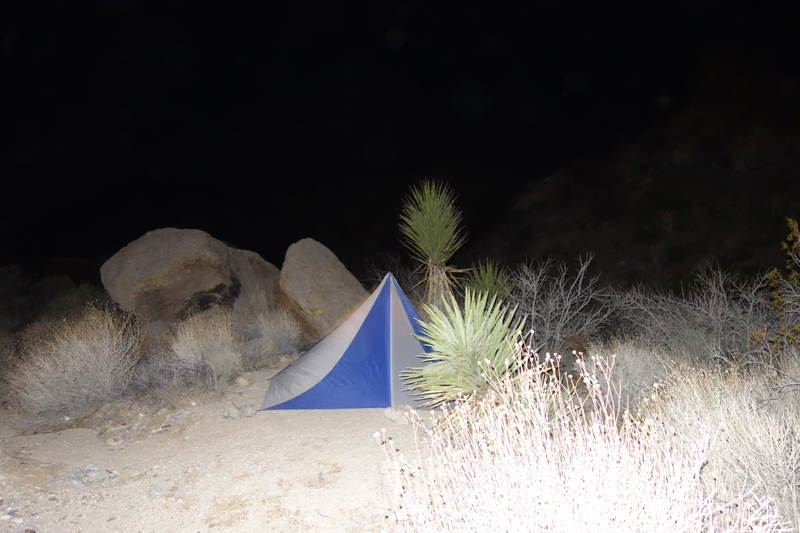
I was glad I brought this pyramid tent; it shed the high winds that blew most of the night.
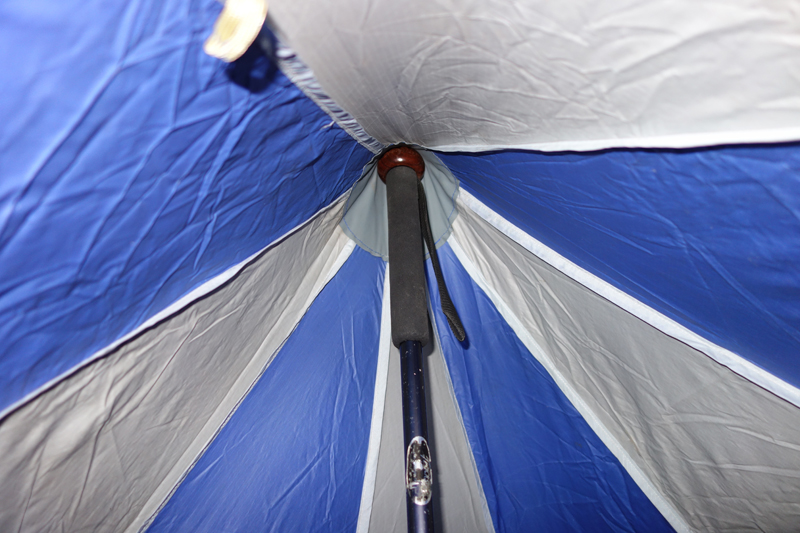 Hiking staff doubles as tent pole.
The tent is large. Ample space to cook inside (vent tent of course).
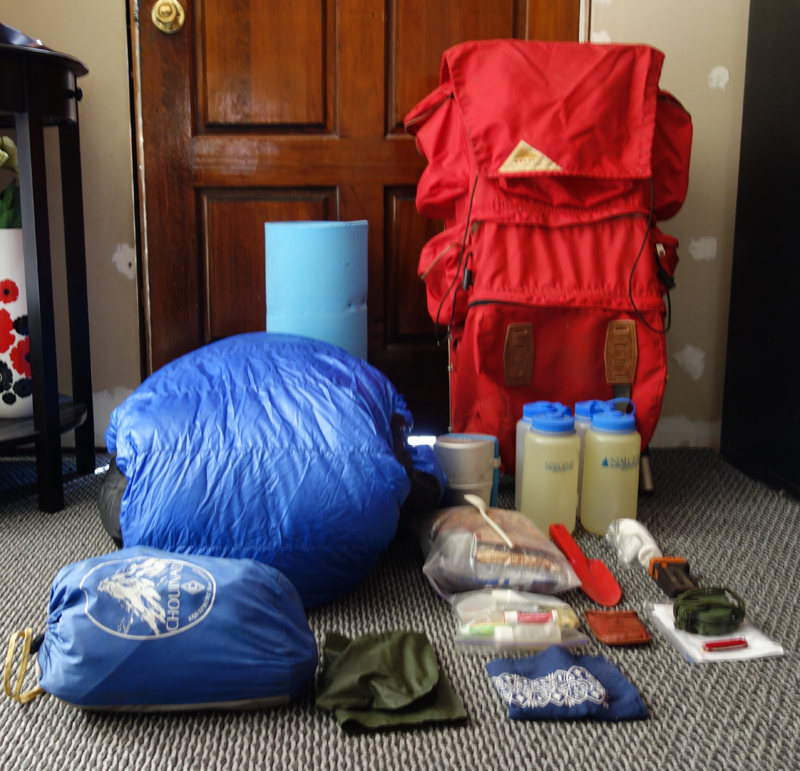 Left to right, top to bottom (sort of):
Traditional blue foam pad
Kelty Serac backpack with Mountaineering frame
Western Mountaineering Ultralite
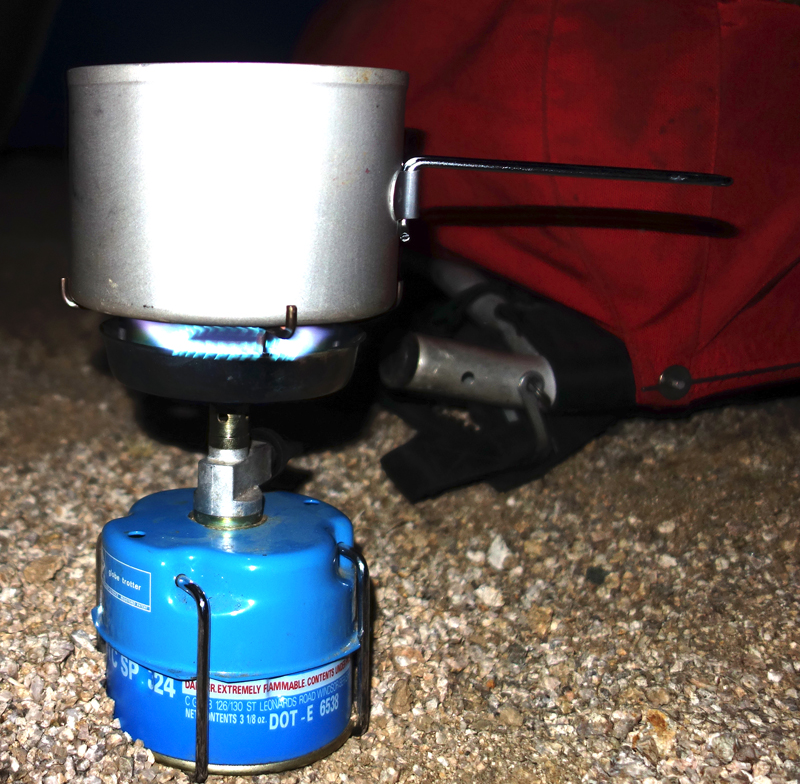
Gaz Globe Trotter Stove kit
(4) Nalgene 1 quart bottles
Food with spoon on top, plastic trowel, toilet paper, Duracell Durabeam flashlight
Chouinard Pyramid Tent
Stuff sack for down jackets
First Aid Kit and Personnel Care items in Zip Lock
Chouinard Expedition Sewing Kit
Compass and Knife on top of Topo Map
Clothing Carried in Pack
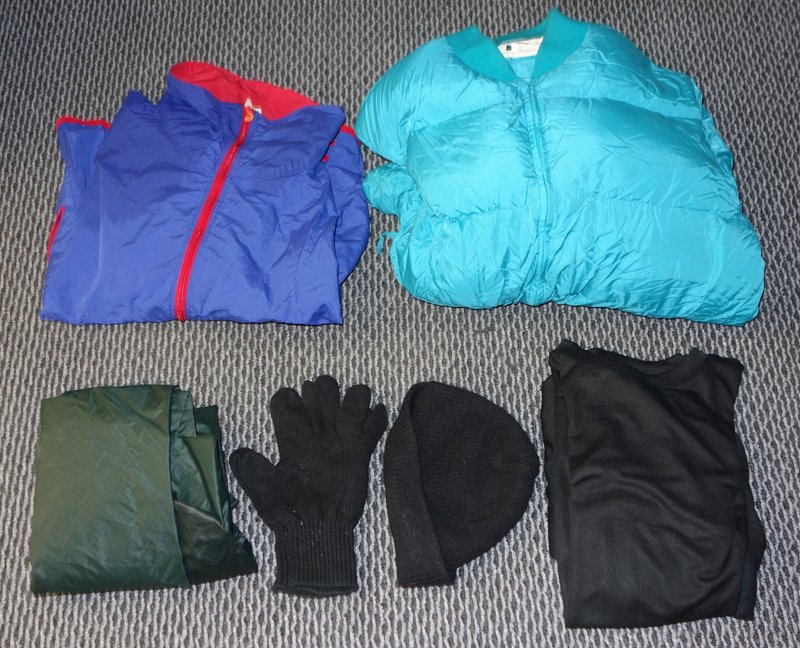 Sierra Designs Wind Jacket, REI Down Jacket
Poncho, military wool glove liners, military wool watch cap, polypro underwear
Worn
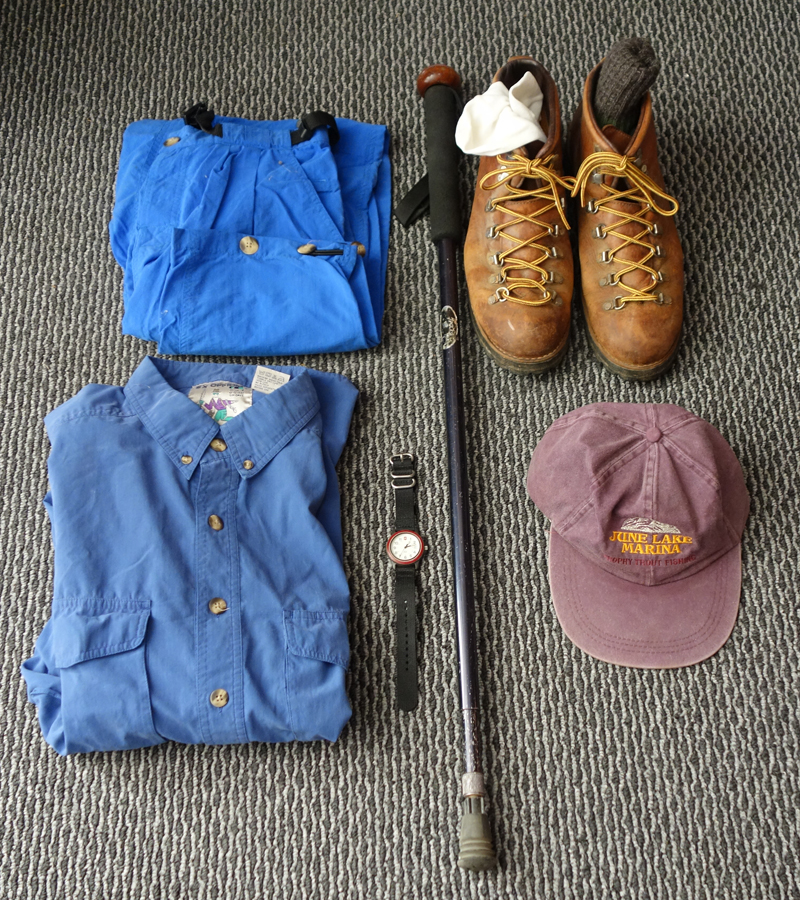
Ex Officio nylon trousers with built-in brief
Ex Officio long sleeve nylon shirt
Swiss Army Watch
Tracks Hiking Staff
Danner Mountain Light boots
Liner Socks
Wool Socks
Generic hat


 Let’s face it, most men don’t know how to buy or fit their trousers.
Properly fitted trousers will allow you to sit, stand, and walk without the material falling down, shifting, or becoming uncomfortable.
When purchasing ready-made off the rack trousers in a store, there are two measurements, the waist and the inseam.
It seems that many men don’t know where their waist is, or how to measure it.

A lot of buzz lately about Brian Frankle joining Six Moon Designs as the Director of Pack Designs (link to the website).
For those who don’t know, Brian is the founder of Ultralight Adventure Equipment (ULA). As an accomplished long distance hiker, Brian started designing and building is own packs for his own use and this eventually morphed into ULA.
After 9 years, Brian tired of the day-to-day operation of running his own company and sold ULA to Chris and Sally McMaster in 2009.