Click Here to view new gallery pictures of 2006 Niagara and Backpacking Gear.
Category Archives: Backpacking Gear
New Gear mini-reviews posted
Just uploaded some mini-reviews. Some are old and were originally posted on Backpackinglight.com
Click Here for All Backpacking Gear Reviews.
New posts include:
Winter Footwear
I hate cold. But every year I do one or more winter trips in the snow. I started doing this in the 1980’s. On those early trips I used heavy leather boots, always freshly covered in Snow Seal. Also I usually brought a pair of ancient Sherpa brand snow shoes, and crampons. Until a couple years ago, my crampons were Black Diamond Contact Crampons. All of this was heavy and bulky.
After I lightened my 3 season footwear, my thoughts turned to doing the same for my winter footwear. After reading a 3-part series on lightweight winter footwear, I decided to try it out, and am happy to report that is has worked out well. I have used this system for the past two years.
Basic Winter Footwear
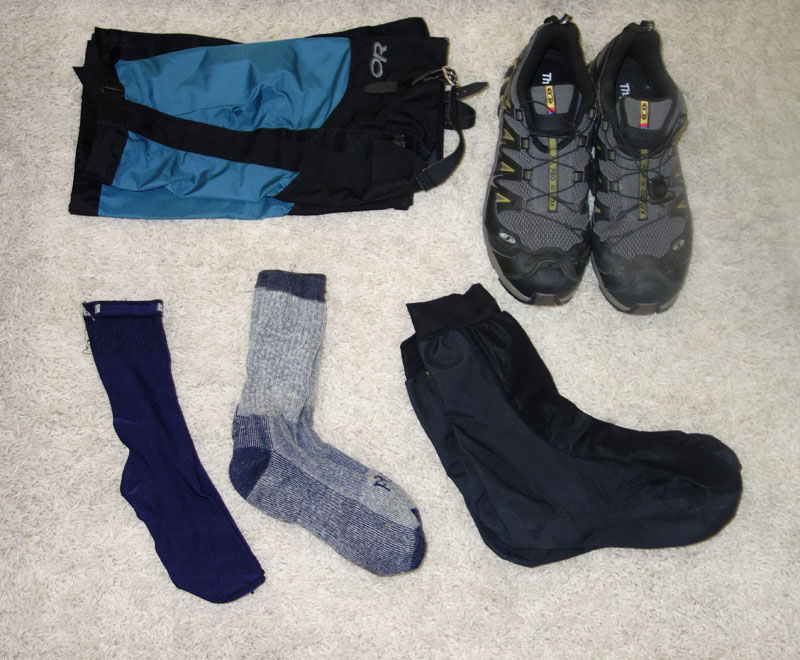
The trail running shoes are breathable, not waterproof. They are the same model I sometimes use for non-winter hiking, only 1.5 sizes large to accommodate the extra socks. More and more, I am wearing a pair of Salomon XA Pro 4D Comp Gore-Tex shoes in combination with the socks.
I wear the socks in this order:
- Liner Socks
- Wool Socks
- Rocky GoreTex Socks
The Rocky socks are hard to locate and tend to run small. Also there is a “right” and a “left” sock.
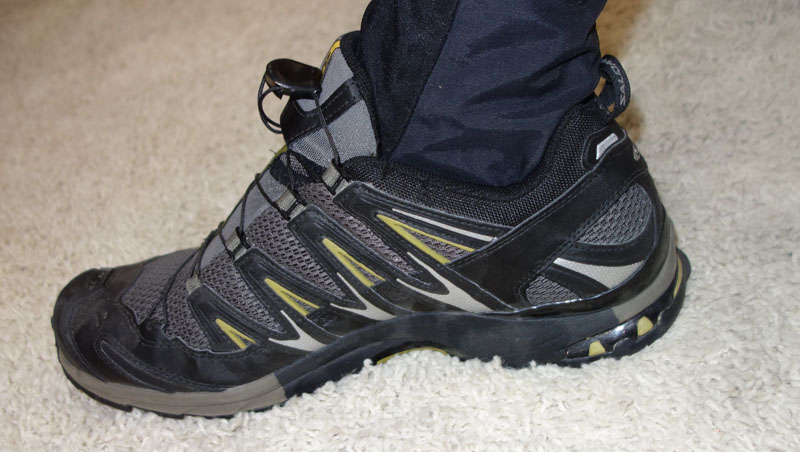
This system has worked well for daytime temperatures below freezing. I haven’t taken them below 25 degrees Fahrenheit. When I stop for rest breaks, my feet don’t get cold, although I do have to add a puffy jacket to keep my torso warm.
Accessories
When hiking in snow traction and/or flotation devices are needed. The 3 items I use are:
- Kahtoola Microspikes
- Kahtoola KTS Aluminum Crampons
- MSR Lightening Ascent Snowshoes
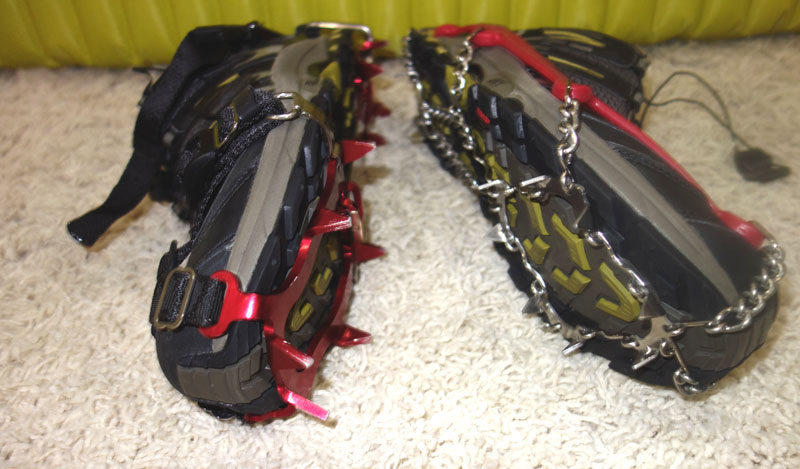
If I am sure I will need to deal with ice, I take the Crampons, they only weight 3.3 ounces each more than the microspikes, and there is no comparisons about how they work. The crampons are vastly superior. Aluminum crampons are subject to easy dulling of the points on rocks, so care must be taken. But they weight about 20 ounces less (pair) than my Black Diamond Contact Crampons. They also are easier to strap on, and they stay secure.
 Left: Kahtoola KTS Aluminum Crampons. Right: Kahtoola Microspikes. Note that the shoe on the left is a Salomon XA Pro 4D Comp Gore-Tex model and the right is a non-waterproof breathable Salomon XA Pro 3D Ultra Trail.

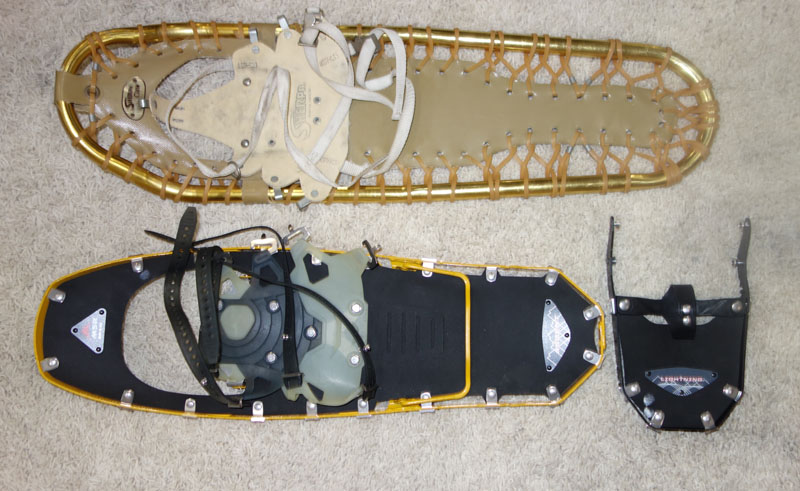
The MSR snowshoes are lighter than my old Sherpa’s (top) and work better too. I bought “tails” for additional flotation which would make them as long as the Sherpa shoes. But have not had to use them. Not the wire bar crossing the MSR shoe near the right hand side of the picture. These are called “Televators.” Flip them up and it increases traction going uphill and really reduce fatigue.
This website may be compensated for linking to other sites or for sales of products. As an Amazon Associate I earn a small fee from qualifying purchases at no additional cost to the purchaser.
Tarptent Scarp 1
Wednesday, January 23, 2012
I’ve owned this tent for over two years now. It works so well, I really don’t give it much thought. When I am backpacking in windy, wet, cold weather this is the tent I take. It isn’t super light at 3 lbs, plus another 12 ounces for the optional crossing poles. But when I am sleeping in wind-blown rain or snow, I am thankful I brought it. And it isn’t my go-to tent for 3 season use. It is my winter tent. It is made by a company named Tarptent.
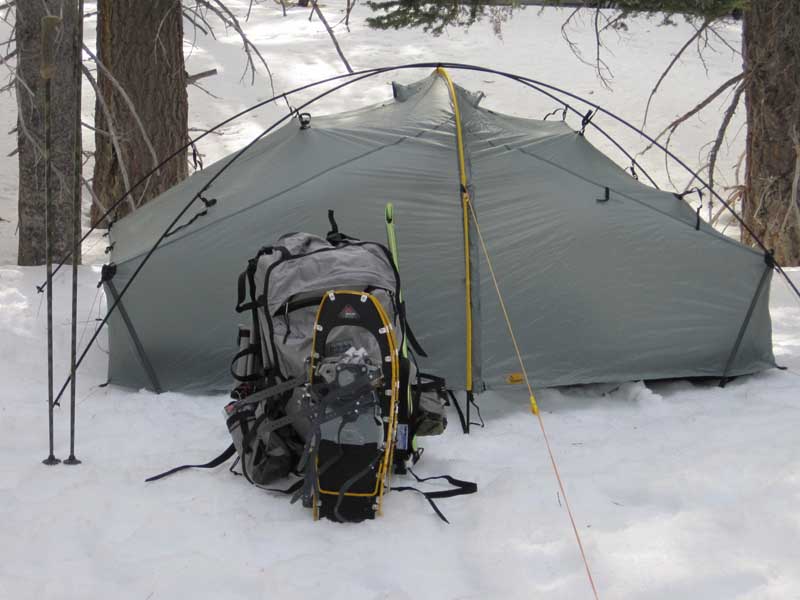
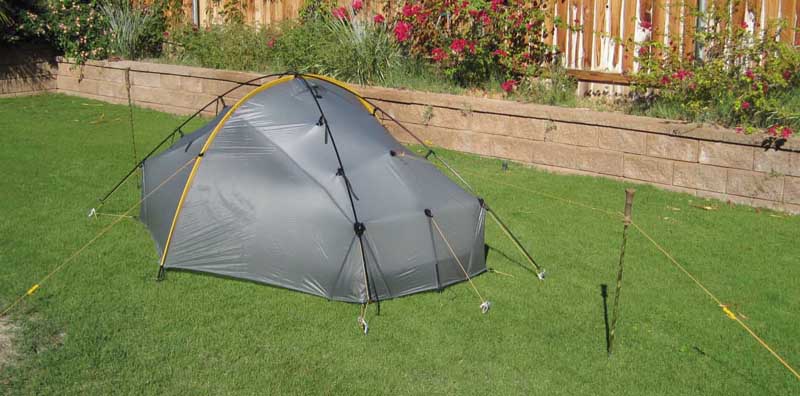
The optional crossing poles are meant for more severe weather. But, without the optional crossing poles, and adding to guy lines to the single crossing pole on each side of the tent, this shelter is super stable. I have pitched it this way in winds of approximately 30-40 mph.
Above is the Scarp 1 without the crossing poles, and side guy lines attached to the single hoop pole.
The Scarp 1 does a decent job shedding snow, so in moderate snow it is a 4 season tent. I wouldn’t want to be in it in a severe snow storm. There are more appropriate shelters available.
Tarptent lists it features as:
- Four season protection
- Double wall, dual entry, and dual vestibules
- Free-standing with optional 12-ounce pole set
- Separate living compartment clips up to fly and is completely removable.
- Interior never gets wet during entry, exit, setup or takedown in storms.
- Roomy with excellent gear storage space
- Small packed size
- Taut pitch with PitchLoc foldable corners
- Reflective spectra cord guylines
Specifications from the Tarptent website:

The pictures below were taken when I set-up the tent to seal the seams. The workmanship & material quality, and design elements are top notch. The tent is delivered with with the inner attached to the fly.
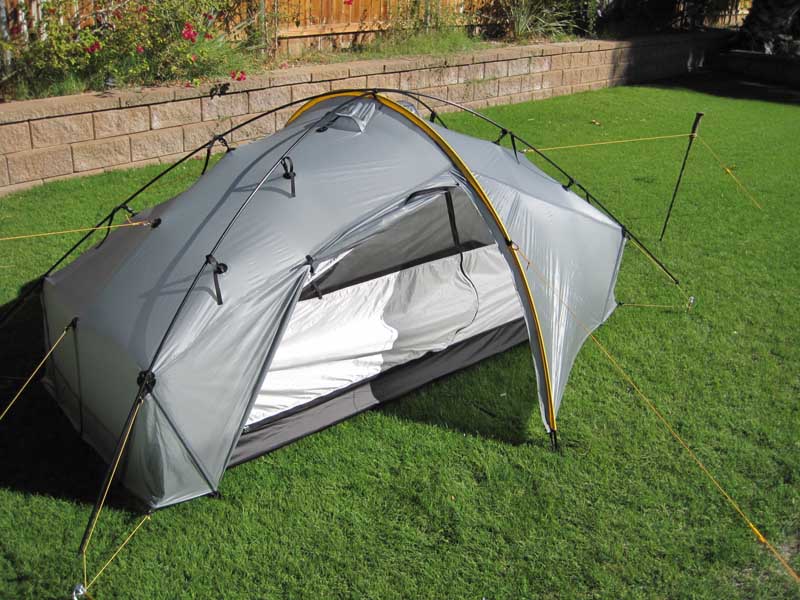
Here is the tent with everything. Optional crossing poles, tie outs on the main hoop and optional canopy support using trekking poles. The side tie outs really made the tent much more secure. I don’t think the optional canopy support with the trekking poles, might help during snow for snow load, but really does not help stabilize the tent.
Each corner has sewn in “V Struts” and each end an attached strut. Also all guy line attachments have an effective built-in tensioner.
Shown are the crossing poles and one of the two vents at the top. Vents can be adjusted from inside, or closed entirely with Velcro.
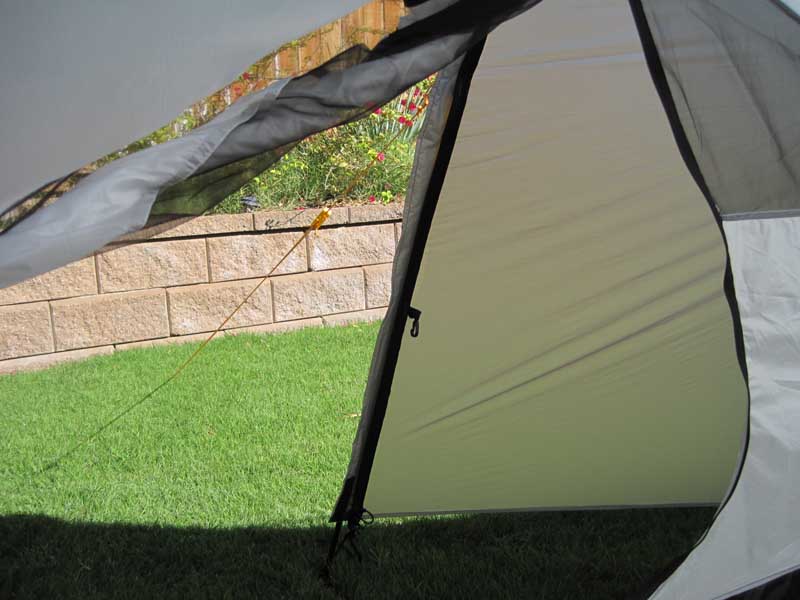
 Side view with rain fly door open. The bottom bathtub floor is the black stripe, center of the nest is nylon and the top section is mesh. As you can see, the vestibule is fairly large and there is one on each side. Normally I store gear on one side and cook on the other.
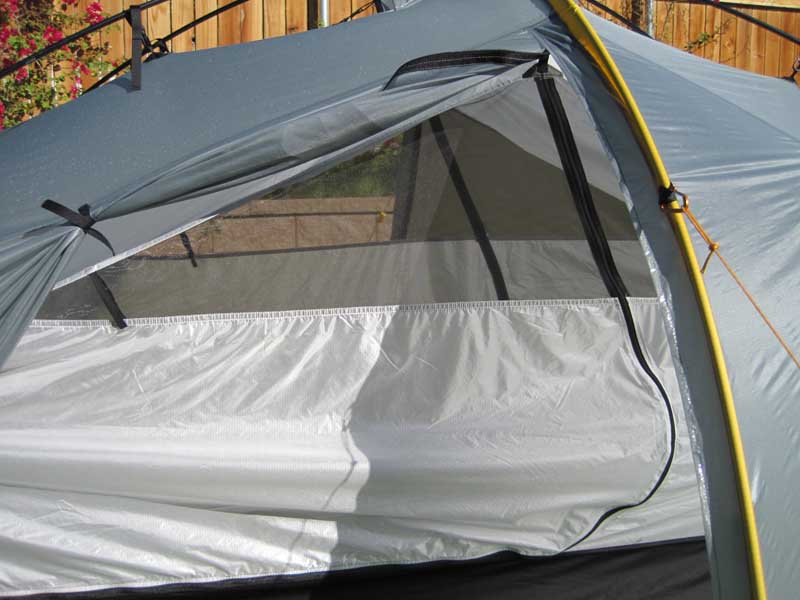 Side view with both rain fly door opened. The middle left of the picture shows the Velcro tie-back. Below that is the tie-back strap for the inner door to be rolled up. This strap is a piece of elastic, not Velcro At first I thought Velcro would be better, but it would stick to the mesh.
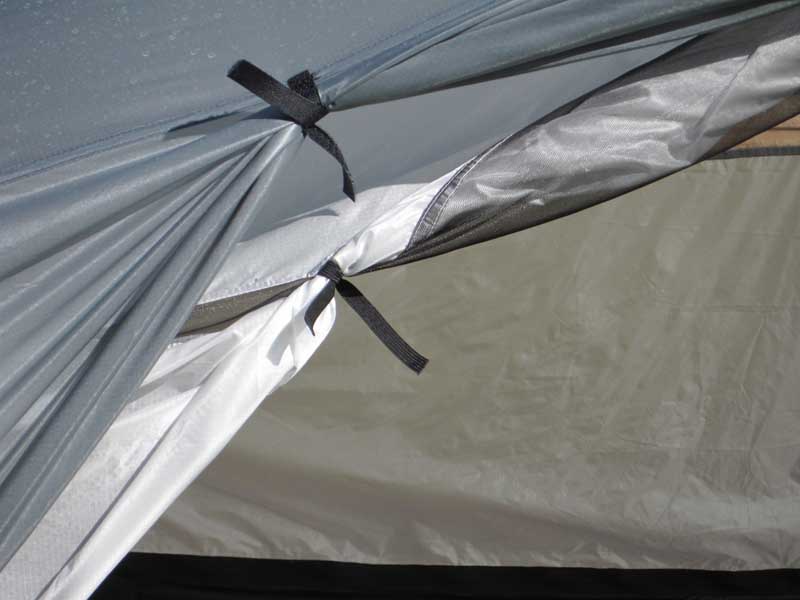
Fly and inner ties.
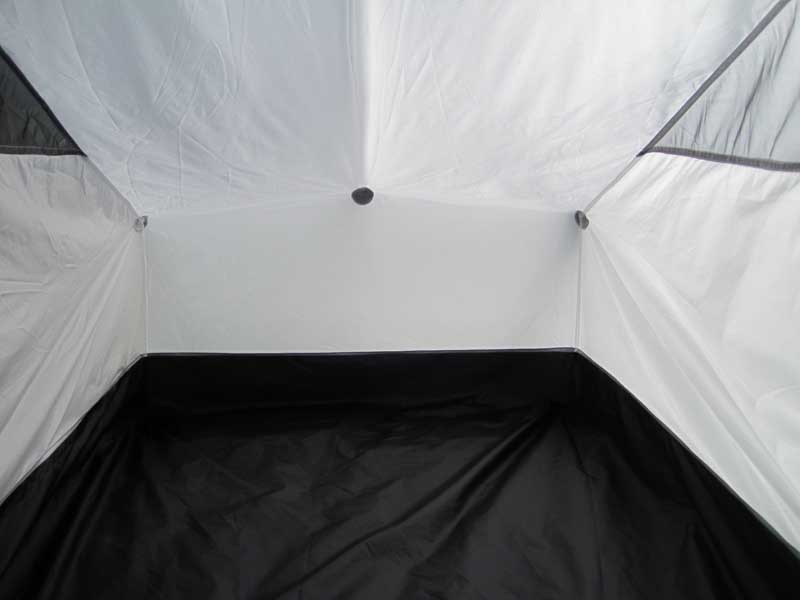 Interior view. Notice how the mesh goes all the way to the end of the inner. The 3 dots are patches that hold the inner clips for attaching to the fly. It is not easily visible, but the black bottom is the bathtub floor with extends up a few inches from the ground.
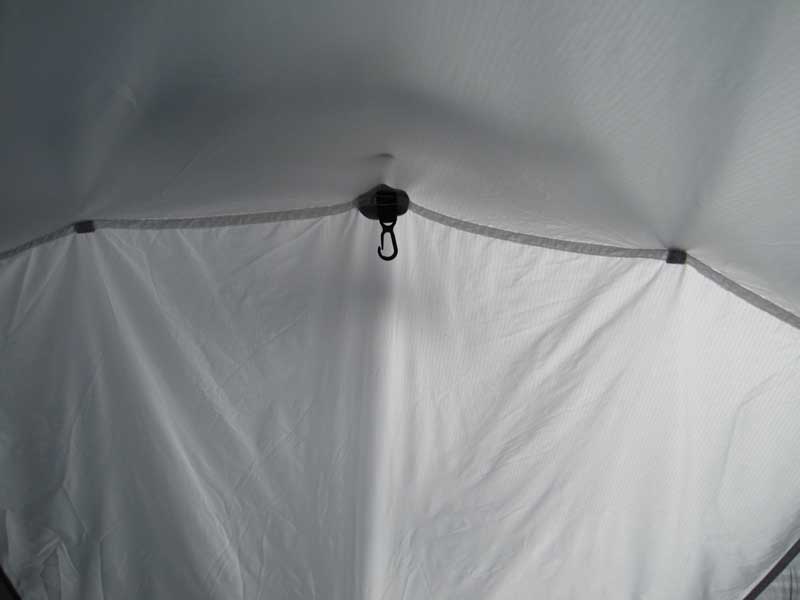
At the very center is a clip to hang something like a lamp.
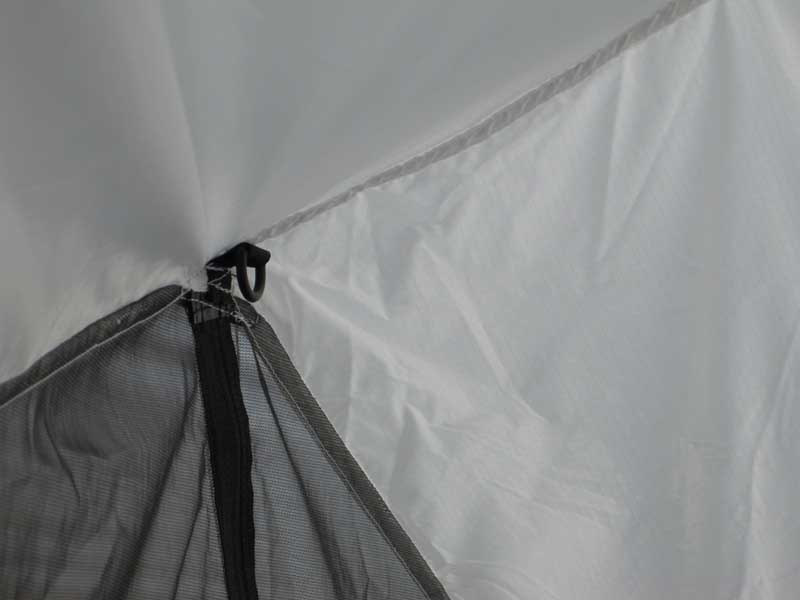
Along the same seam as the hanging clip is a hook on each side/top of the inner. You could run a length or cord across the top of the inner to hang something also.
Shown is the stationary part of the fly with the doors opened. In the center is a clip. Not sure what it is for.
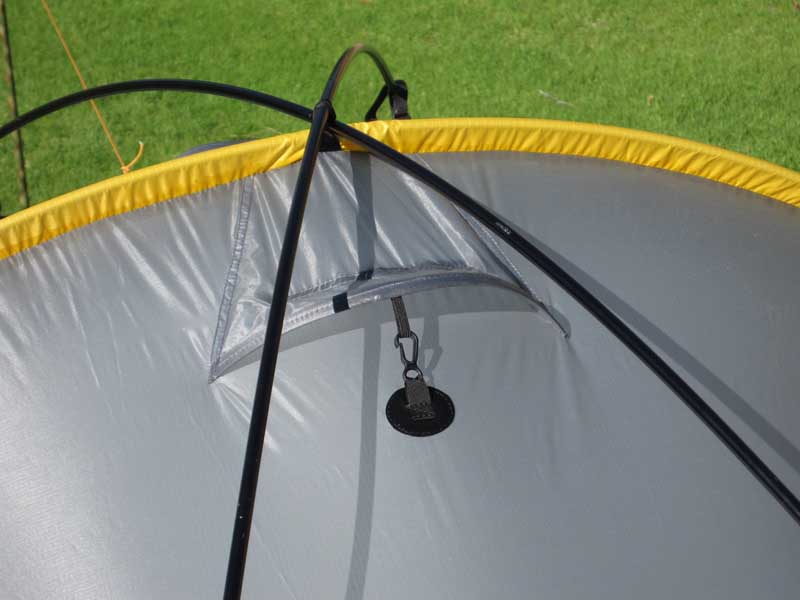
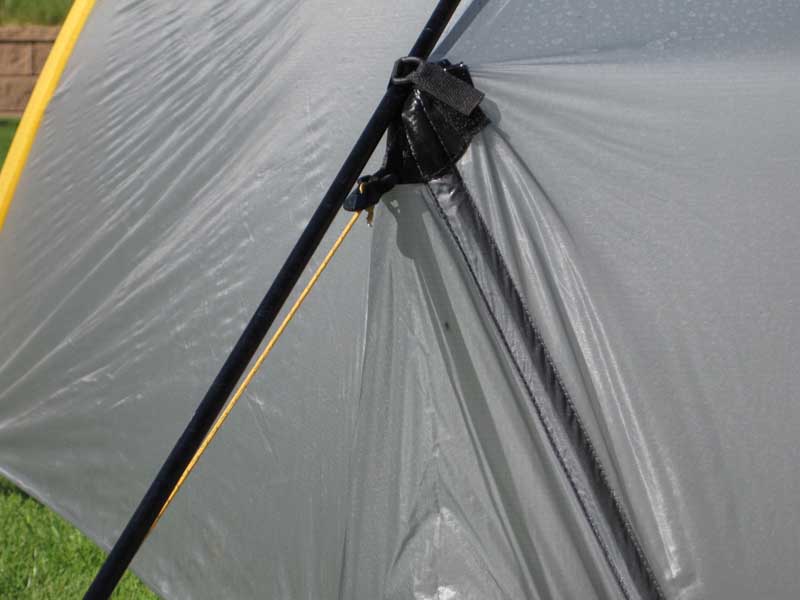
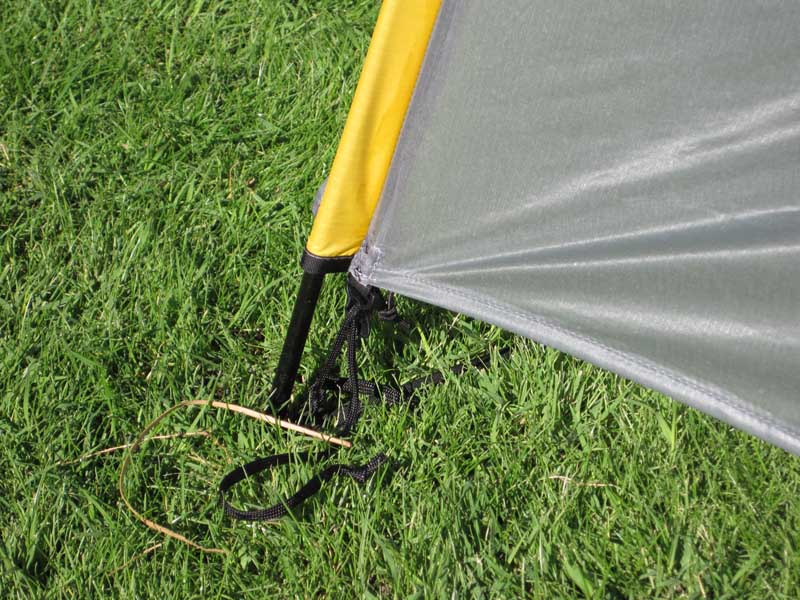 The yellow sleeve holds the hoop pole. The cord on the ground is a tensioner that pulls the sleeve taunt, otherwise it will bunch up an not be as low to the ground as need. Also there is a strap with connects the hoop on both sides of the tent and it runs underneath the nest.
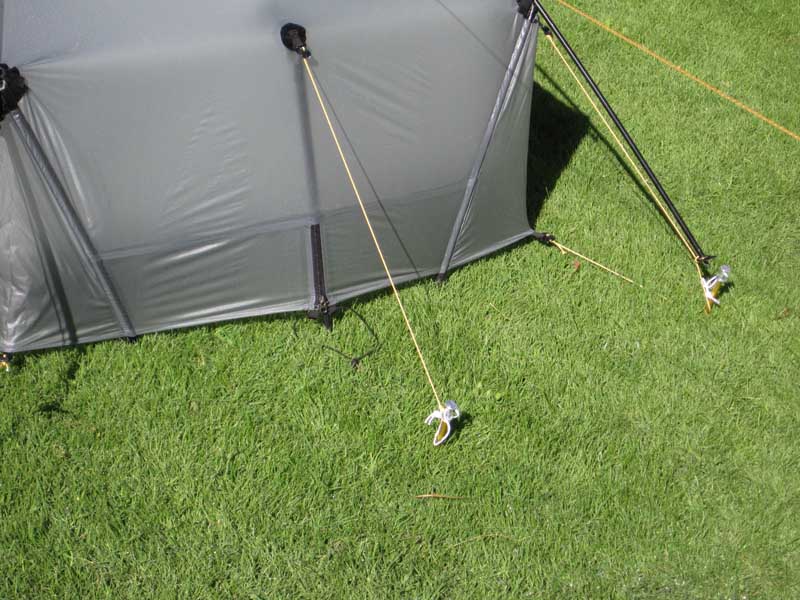
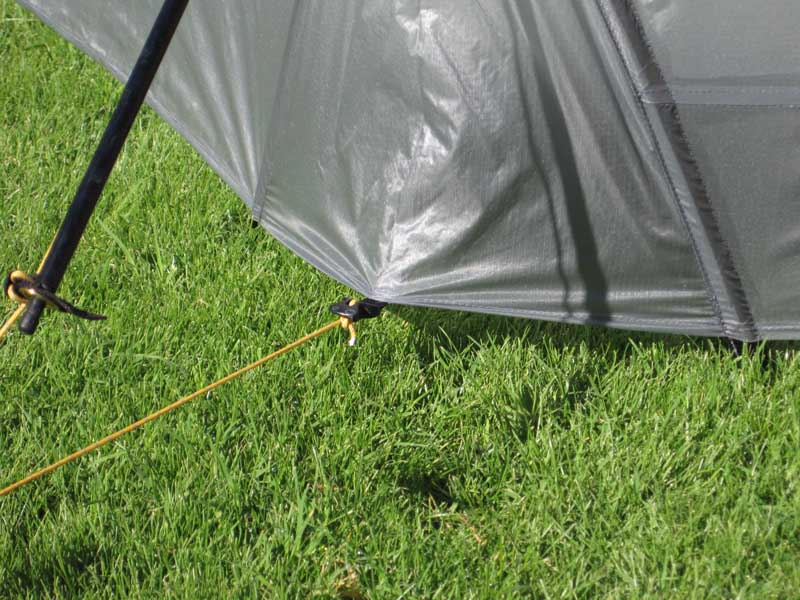
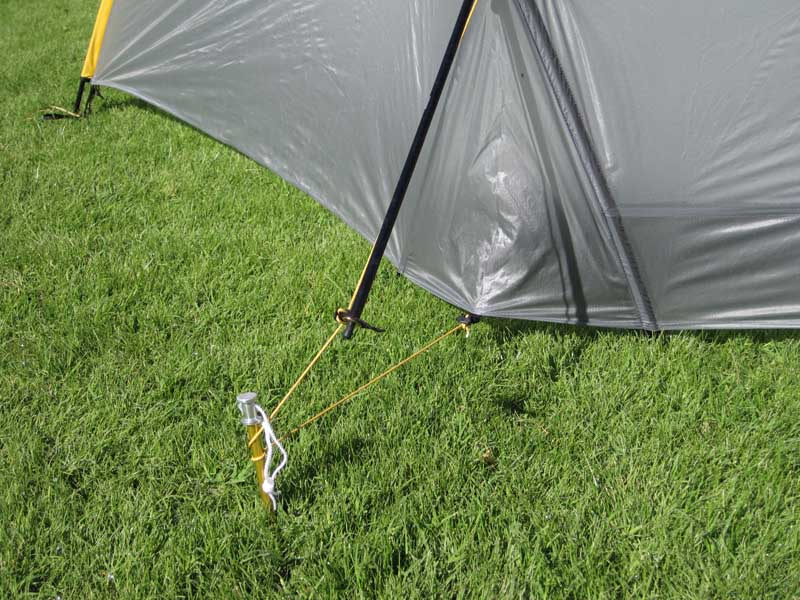 Corner tie-out. The cross pole connects to a grommet in the upper cord. Both the bottom cord and the upper cord have an adjuster sewn into the fly material. After using the tent several times without the crossing poles, I found the corner guys a little too short causing the corners to lift up. I have since installed longer pieces of cord.
This is where the cross-over poles are secured above the corner “V-strut.” It is a d-ring and Velcro strap. The yellow cord is the tie-out and you can see the built-in cord adjuster.
 Lower corner tie-out adjuster.
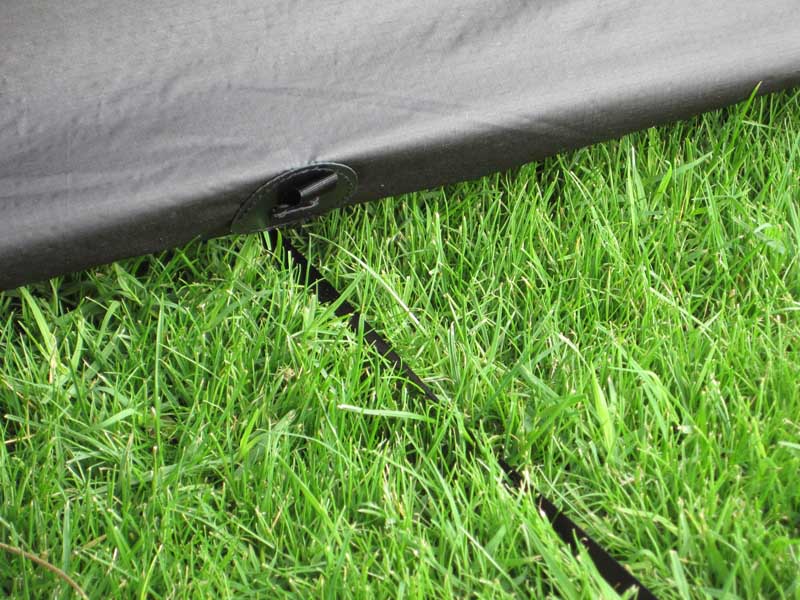
The black strap goes under the nest and connects to each end of the hoop pole. Also notice there is a loop on the bottom of the floor. I assume it is for a stake if you wanted to stake out the bottom of the nest.
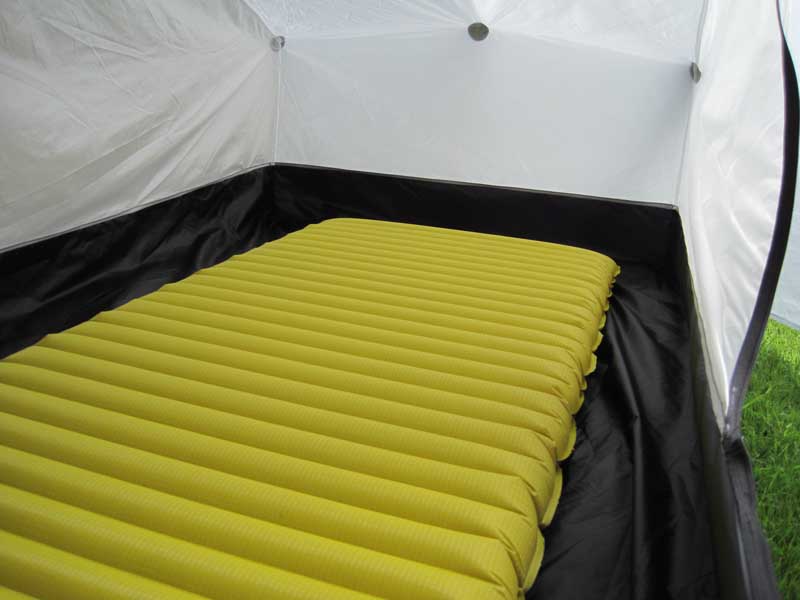 Regular size NeoAir inside. It is centered on the floor. Has about 6″ of space at the top and bottom and a little more on each side. I did not measure it, but there is plenty of interior room for the solo hiker. In use there is plenty of room for sleeping and keeping odds and ends inside the tent for easy access at night. Also, at 5’11” I find it easy to sit up inside, but I have to scoot a little bit towards the center.
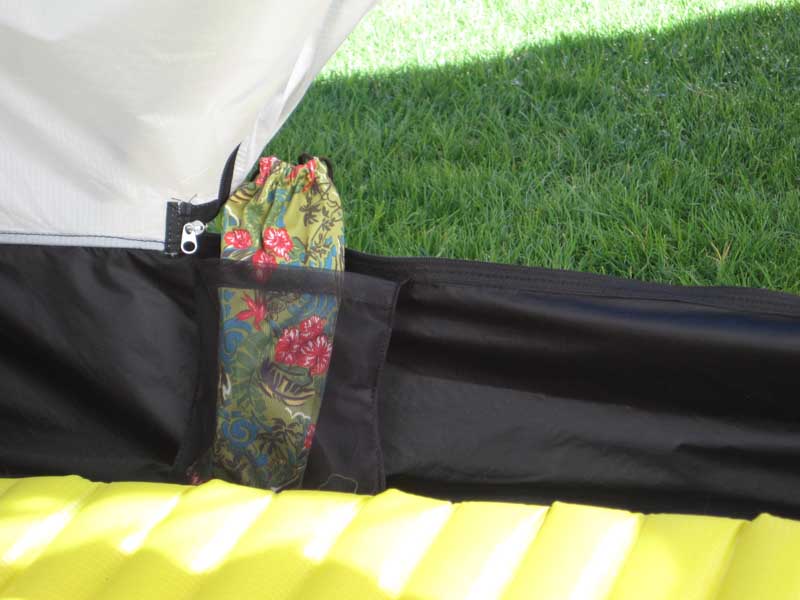 There is one small mesh pocket on each side of the tent. Here is a pair of sunglasses to give you an idea of the size.
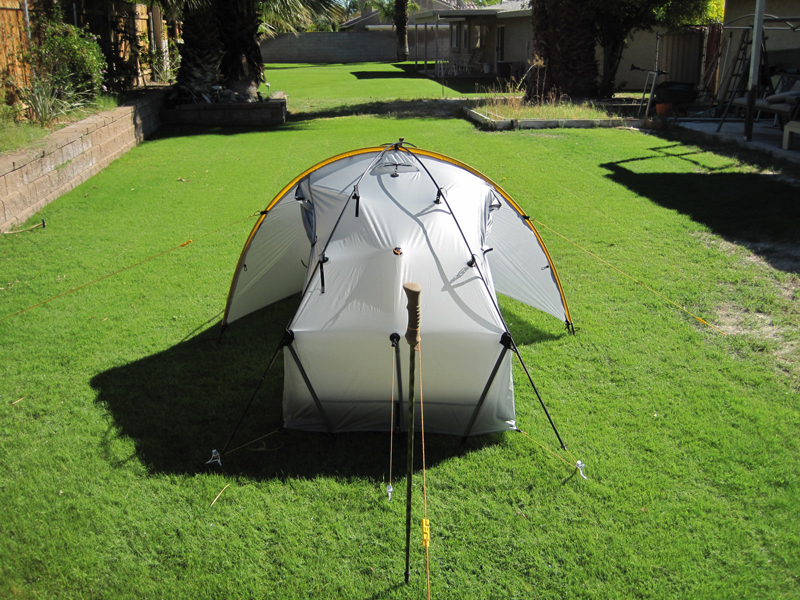 View from the “rear” of the tent show each of the vestibules (fly doors are rolled up).
 Some stuff in the vestibule. That is a 64oz Gatoraide bottle, a stuff sack, XC flats and a Caldera-F cone.
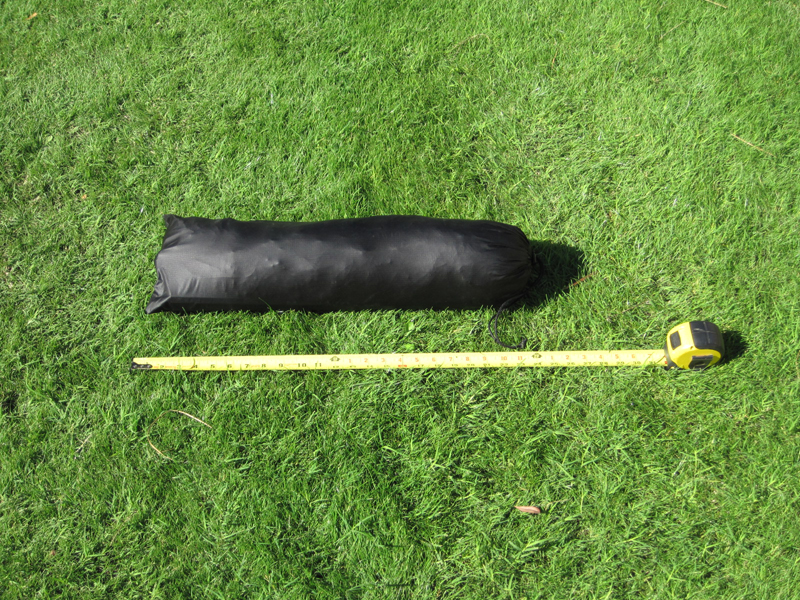 Everything stuffed into the sack. This includes the optional cross over poles, 2 extra stakes and two extra guy lines. Total weight after seam sealing is 4 lbs, O oz.
Anza Borrego (Feb 2009)

Butler and Coyote Canyon Loop
Feb 28 – Mar 01 2009
Note & Warning: this trip entails a lot of cross country travel. A good map, compass, and navigation skills are required, especially when traveling between Butler and Box Canyons.
The Plan
This was a 1-½ day, 1 night backpacking trip in the Anza Borrego Desert State Park. The loop is 20 miles. Day one would be around 15 miles, and a return to my vehicle at the trail head at around noon March 1, 2009.
Elevation ranged from 984 feet to 2,809 feet. In addition, I wanted to test several items of lightweight backpacking equipment. Of particular interest was a quilt, instead of using a traditional sleeping bag. The other was a ‘soda can’ alcohol stove.
The trip starts at the trail head taking a trail up to Alcoholic Pass. The trail ends at the pass, and the rest of the trip is cross country and washers in the canyons.
Coyote Mountain separates Clark Valley from Coyote Canyon. To the south of Coyote Canyon is the sleepy village of Borrego Springs. Alcolhlic Pass is the only easy way through Coyote Mountain. In the 1800’s cattlemen would hike through Alcoholic Pass to get to Borrego Springs to drink at the bars, and hence the name Alcoholic Pass.
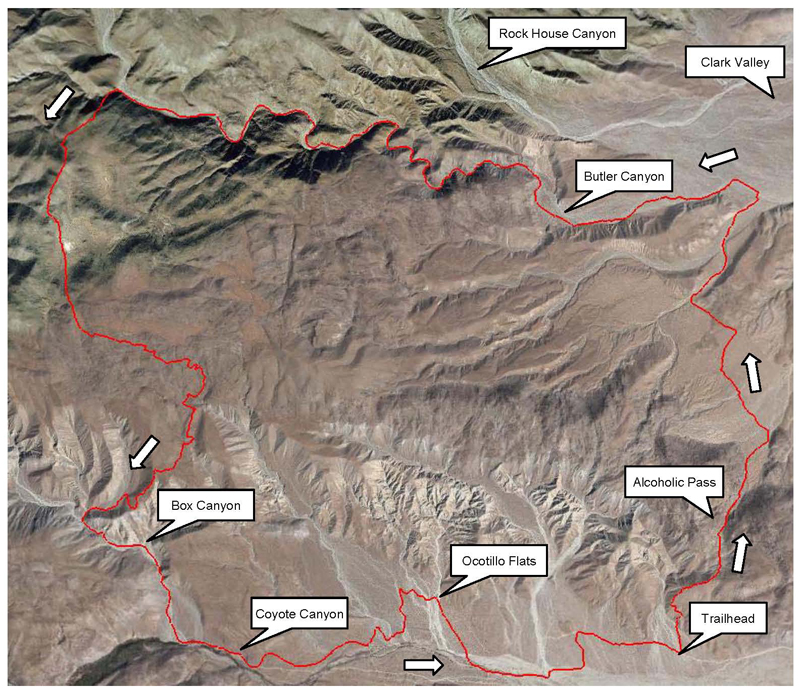
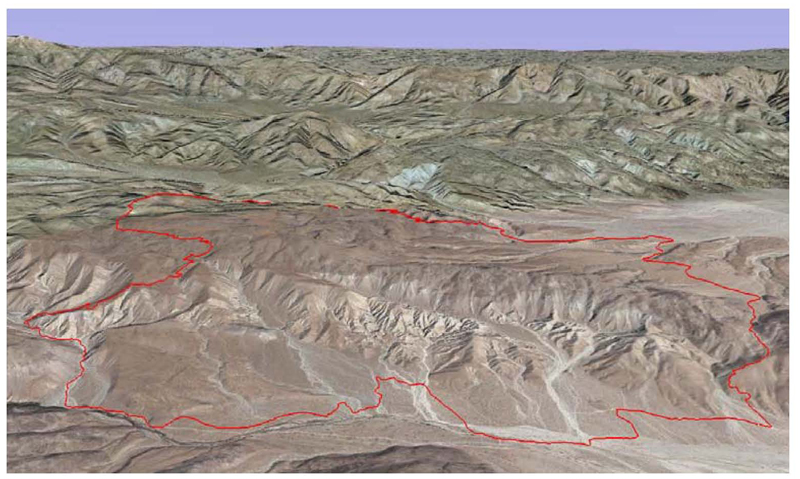
The picture above is a Google Earth picture of area, and the red line represents the route I hiked. Below is another Google Earth picture of the hike, but I turned it on its axis to provide a representation of the elevation of the hike. There is no water available on the loop, except for Coyote Creek, a perennial stream in Coyote Canyon. The water in this creek is hard to get to at the junction of the Box Canyon wash, due to thick reeds and is usually rather silty. It is best to hike up Coyote Creek, where the water quality improves. To avoid the extra mileage, I carried enough water to complete the hike, which was 3 liters.
Temperatures were in the mid 80’s during the day, and my camp at 2,300 feet got down to the high 40’s.
Flowers in the lower elevations where justing beginning their spring bloom. It will another month before things really bloom in the higher elevations, and it should be a good year for flowers, as there was quite a bit of rain and snow this winter. Joe and I experienced a lot of both in Butler Canyon last December.
Walking the Loop
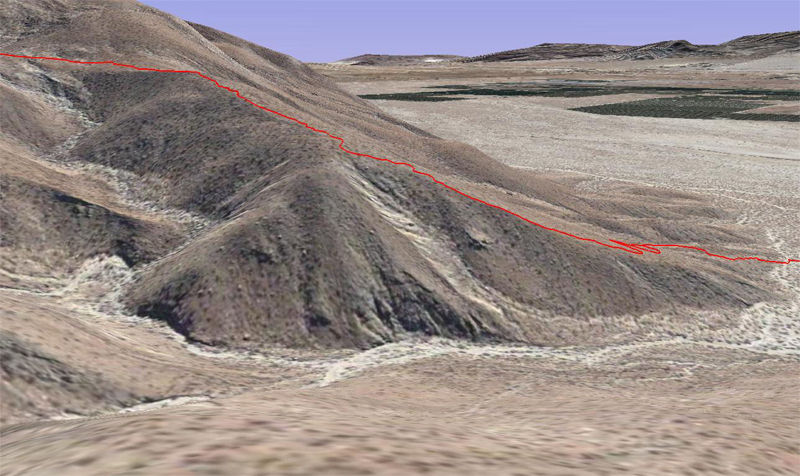
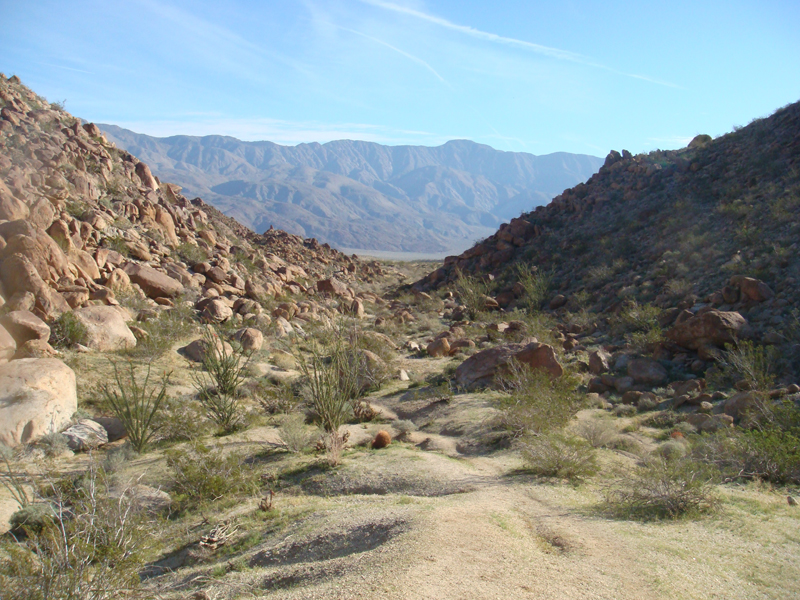
Starting at 8:00 am, the hike immediately begins with a route up the slope to Alcoholic Pass. It is a good way to get the blood flowing and keep warm. The trail follows a rocky ridge with a quick gain of 600 feet. The Google Earth photos below provide a perspective of the elevation gain.
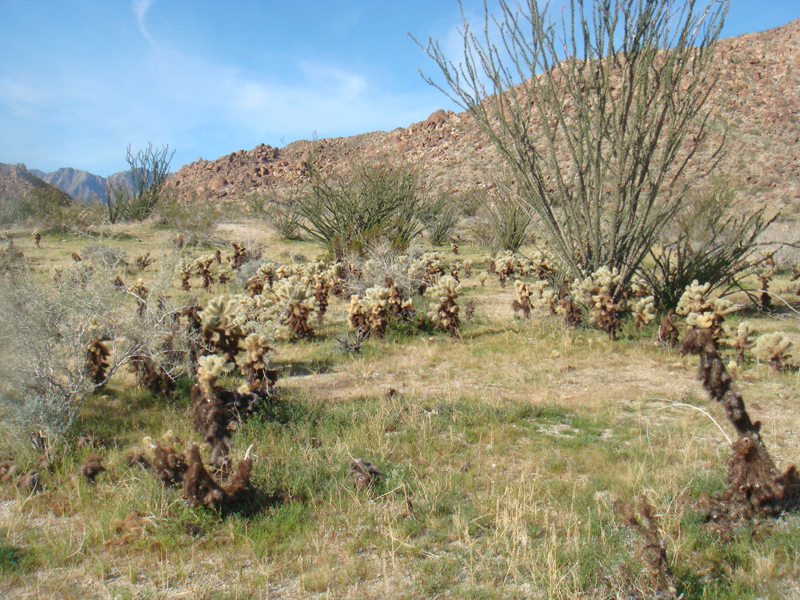
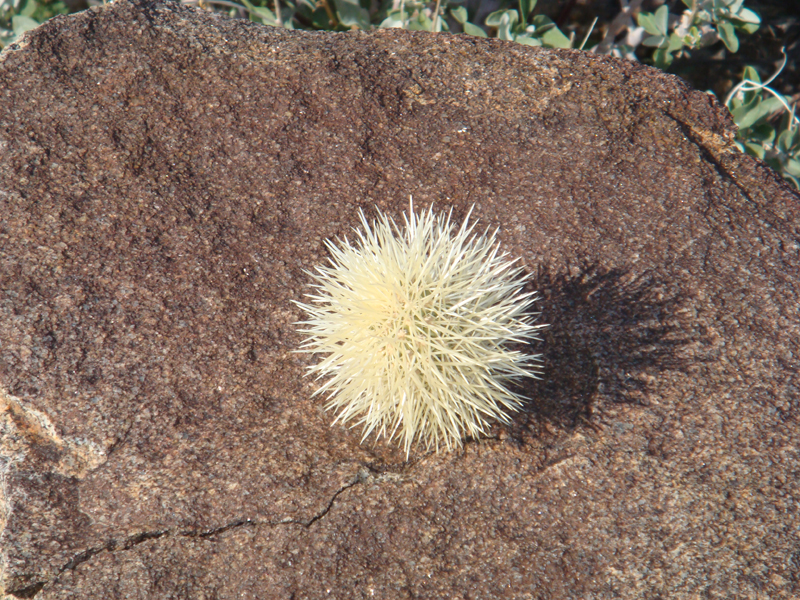
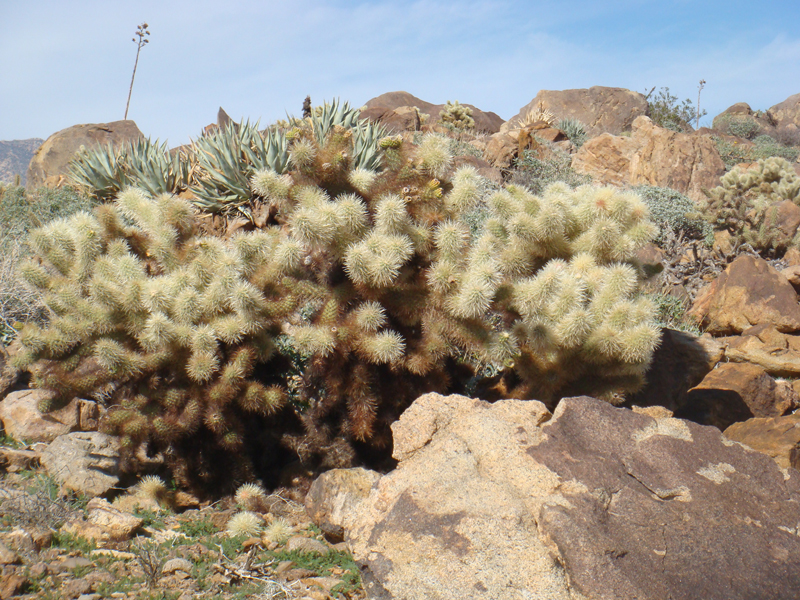
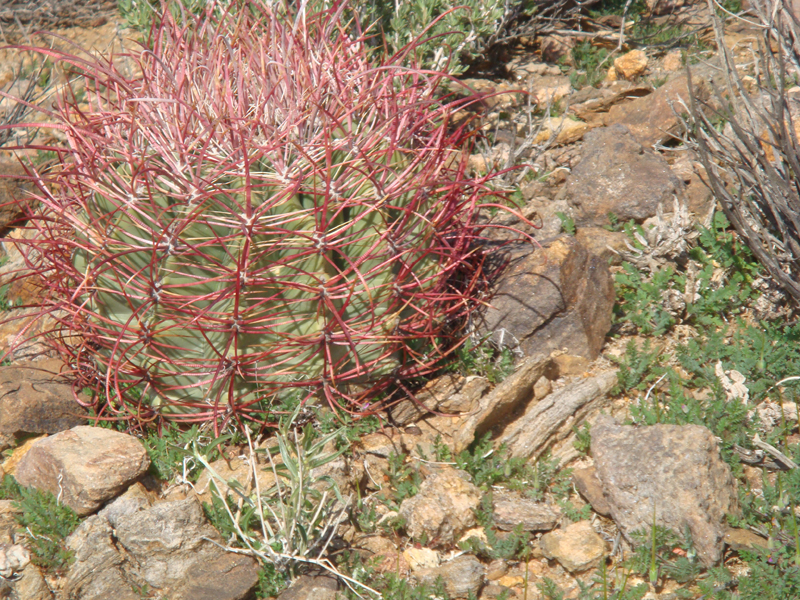
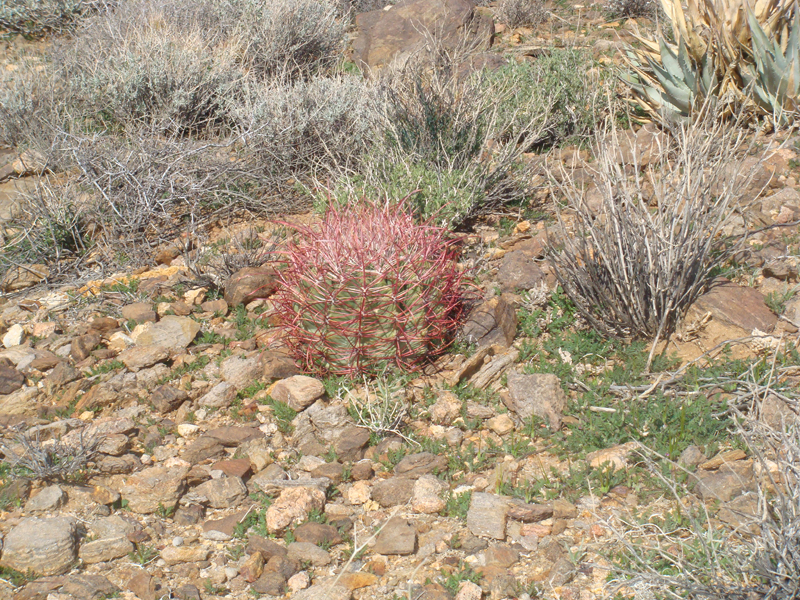
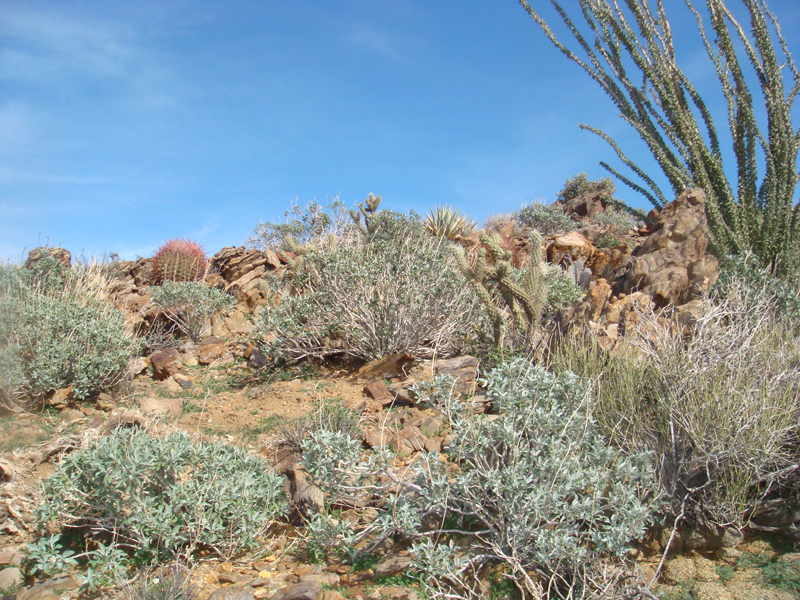
‘Real’ pictures of the flora and fauna at the start of the trail provide a realistic feel of the hike. Keep in mind that Google Earth is not a live feed of the earth, but archived satellite pictures. This accounts for the differences in color. Spring in the desert is often green, unlike the Google pictures. Also the satellite pictures look straight down at the earth’s surface from space, the the visual representations of terrain are computer generated models.
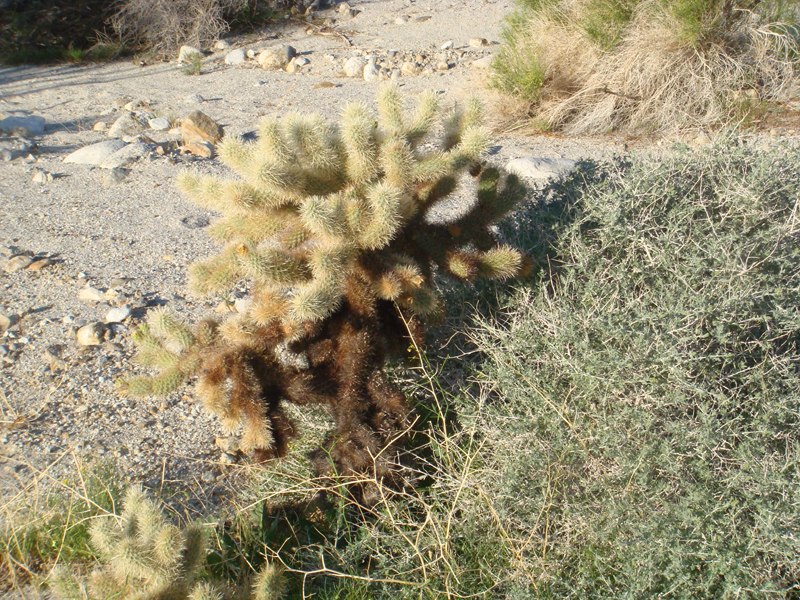
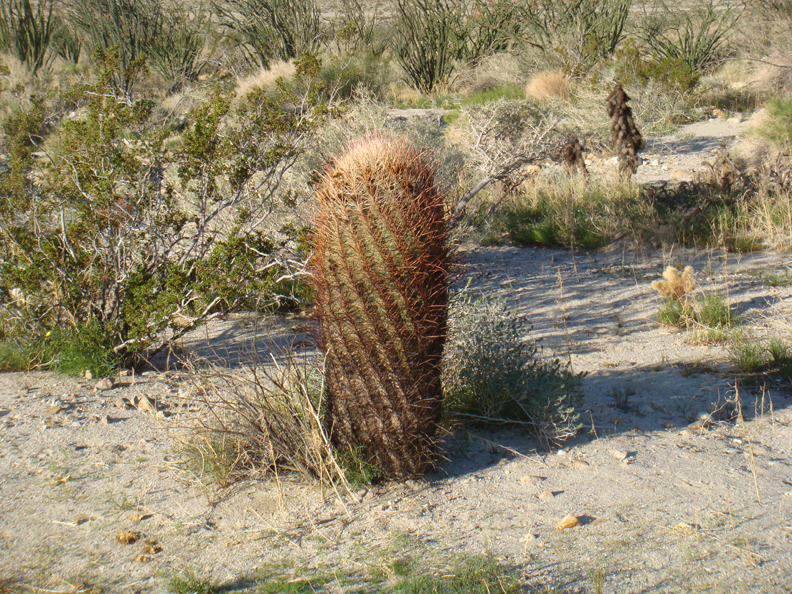
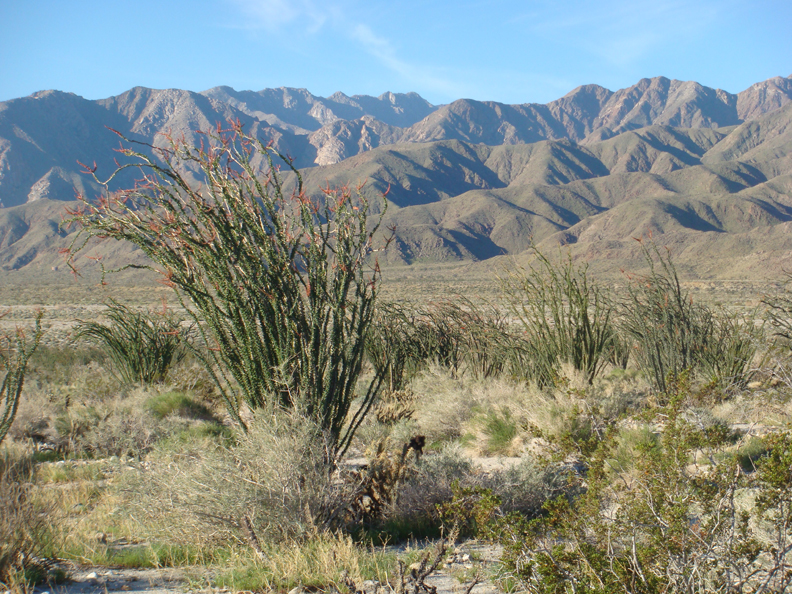
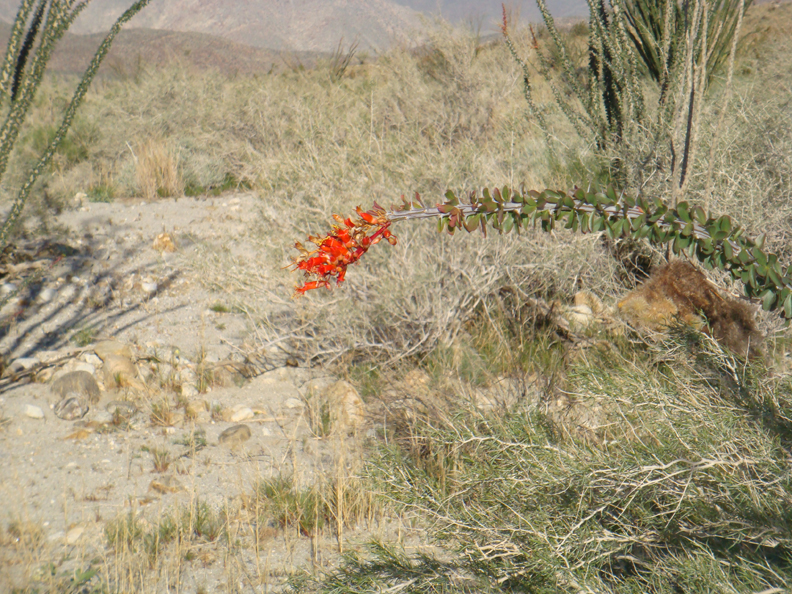
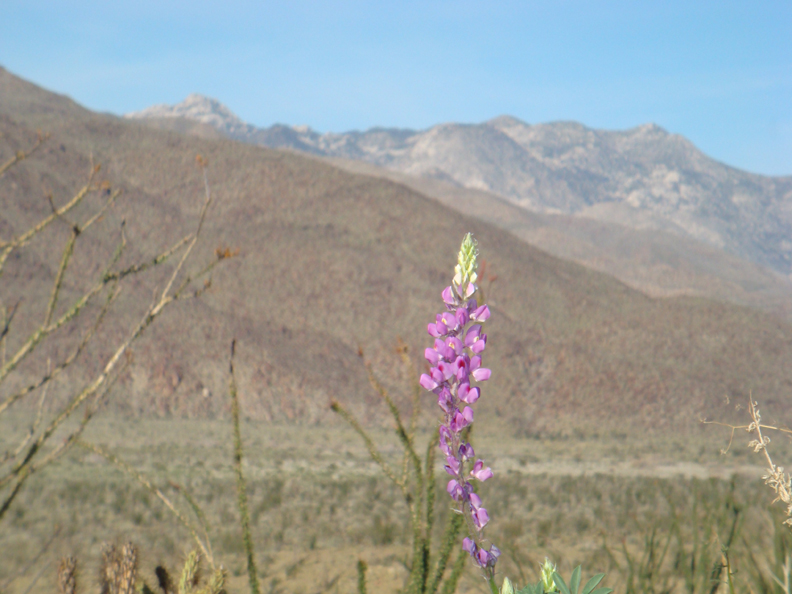
Above (top to bottom) Cholla cactus, Red Barrel cactus, Ocotillo, Ocotillo bloom, Arizona Lupine.
Alcoholic Pass
The pass connects Coyote Canyon to Clark Valley. It is the only easy way to cross Coyote Mountain. Originally, the Cahuilla Indians who traveled from the canyon to Clark Valley to harvest beans from Mesquite trees in the valley, which was a staple food item, used this trail.
In the 1800’s ranch hands would take the trail to Borrego Springs, which was shorter than traveling south through Clark Valley and around Coyote Mountain. Obviously, their activities in Borrego Springs were reflected in the naming of this trail.
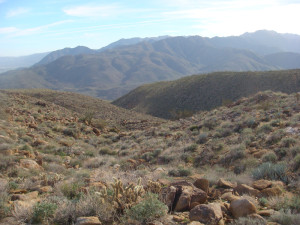
Today Alcoholic Pass is all about the views.
Above: View of Clark Valley from Alcoholic Pass (top) and a cactus garden in Alcoholic Pass (bottom).
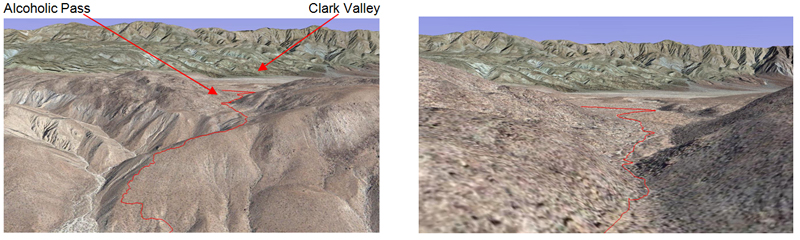
Google Earth pictures of Alcoholic Pass.
Clark Valley to Butler Canyon
Descending Alcoholic pass into Clark Valley the hike becomes a leisurely cross-country walk down the western slope heading northeast. Eventually I took a wash down to the floor of Clark Valley and then turned left behind a small ridge which would lead to the mouth of Butler Canyon.
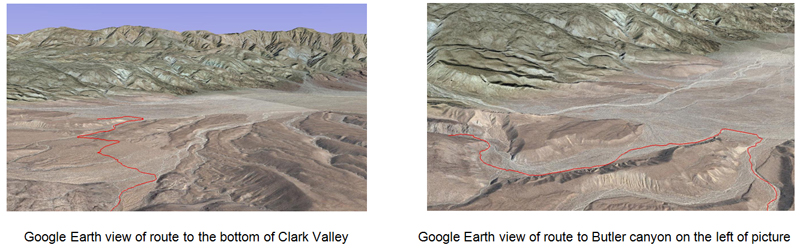
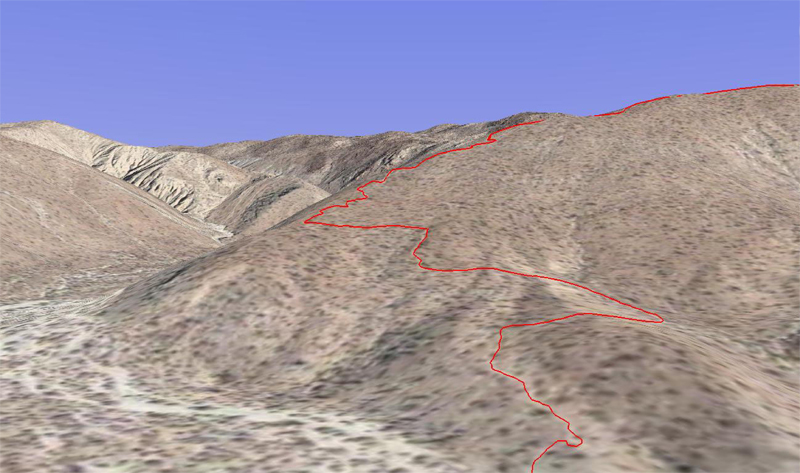
Google Earth view of route to the bottom of Clark Valley Google Earth view of route to Butler canyon on the left of picture.
Some of the wild flowers on this section of the hike:
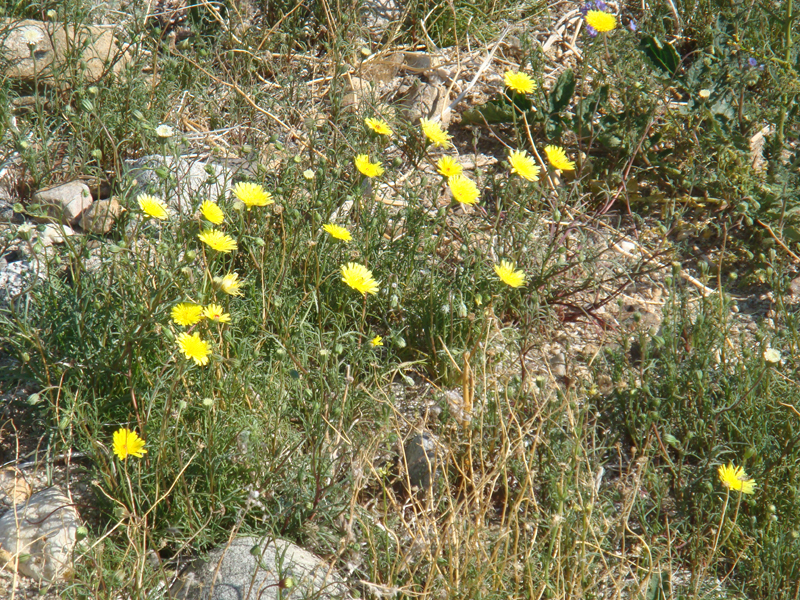
Desert Dandelion
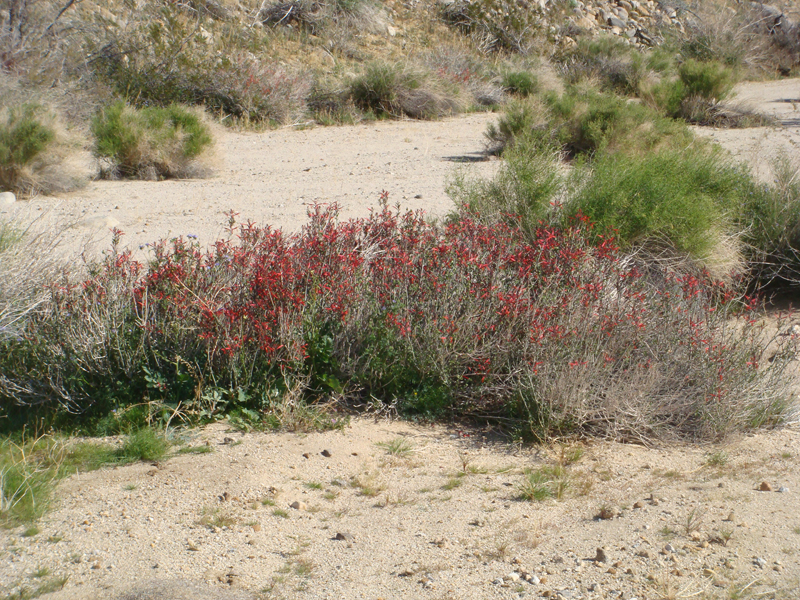
Chuperosa
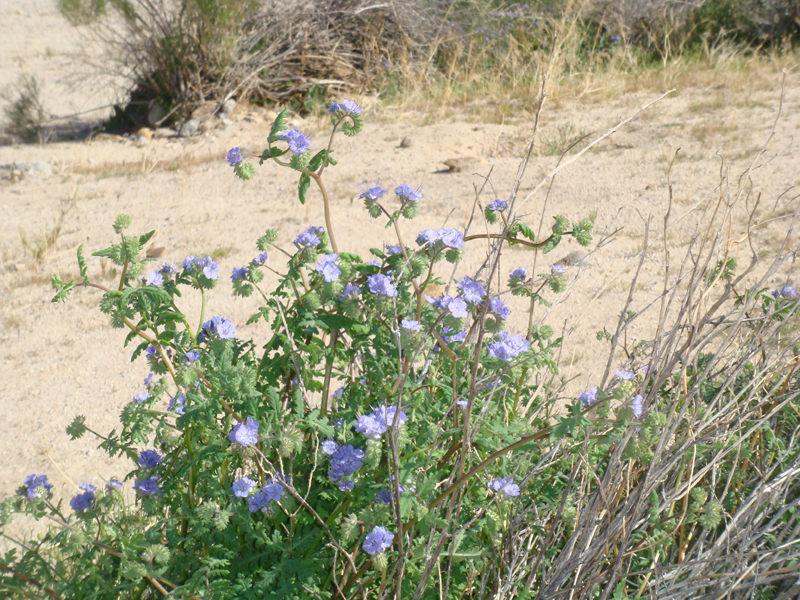
Forget-me-nots
Butler Canyon
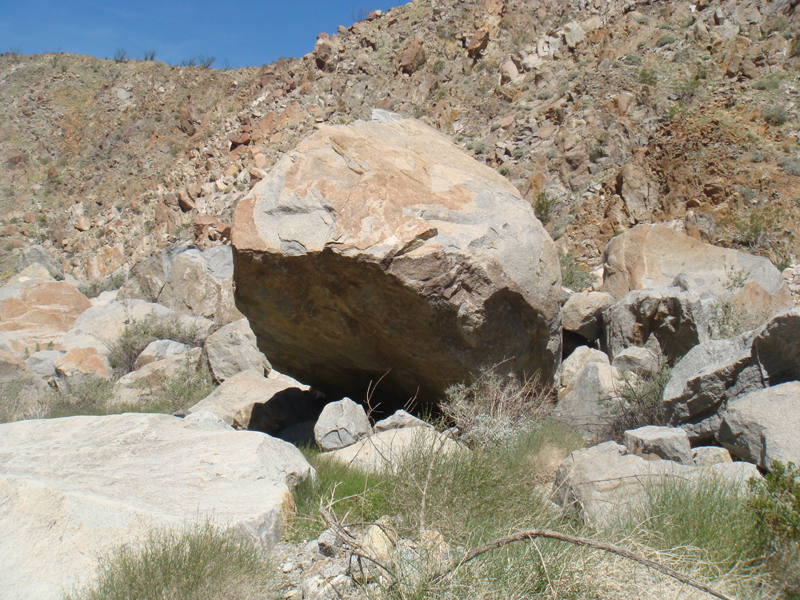
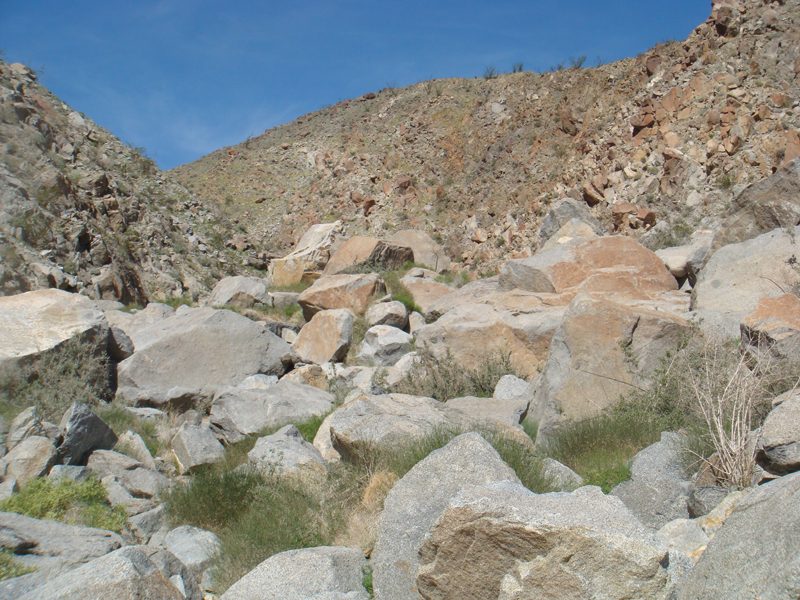
This section provided the only challenges of the trip. First was navigating the boulder fields at the beginning of the canyon, the second was finding a relatively easy route to the playa above the canyon. Both were of little concern.
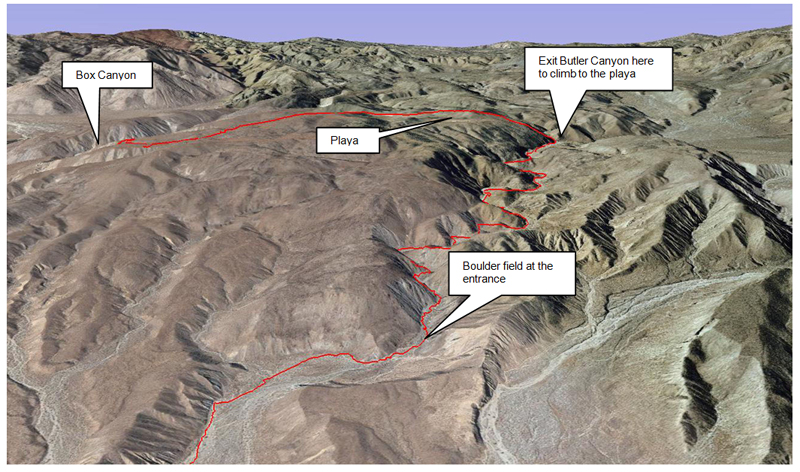
Google Earth view of Butler Canyon and the Playa.
The mouth of the canyon requires some boulder hopping, but soon it is easy hiking.

The Playa
Hiking through Butler Canyon, I needed to locate way to climb out and over the side to a plateau that separated Butler and the Box Canyon watershed. The canyon walls are steep with loose rocks and talus. Finally, a possibility was spotted. A small side canyon with a reasonable slope would bring me just north of the playa. I was able to hike diagonally across the left slope of this side canyon, and slowly work my way around a small hill, which overlooked the plateau. It would be an easy walk down the hill to the plateau and the playa.
A playa is a dry lake bed. During the rainy season, they are wet and soggy or even become a small lake. It is uncommon to find a playa in a mountainous area like this one.
Descriptions of above pictures (top to bottom):
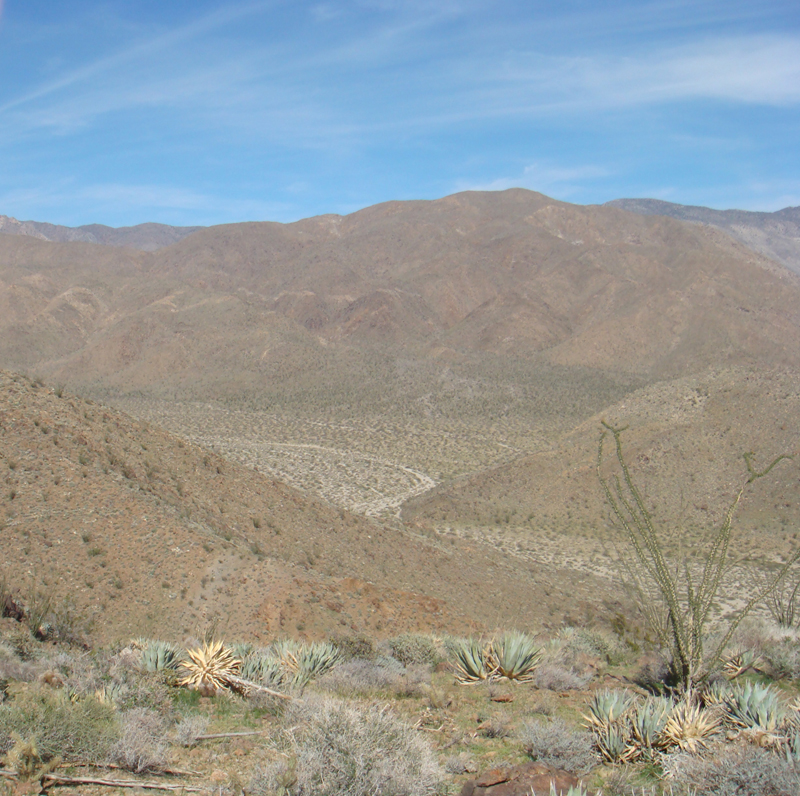
(1) This is the side canyon that would lead out of Butler canyon. I did not travel this canyon, but immediately headed up the slope on the left. Gradually, I worked my way up and around the slope to a hill, which overlooked the completed portion of the route and the plateau.
(2) Butler Canyon. Straight below the Ocotillo is the spot where the side canyon intersects Butler. The large open area in the center of the picture is Jackass Flat.
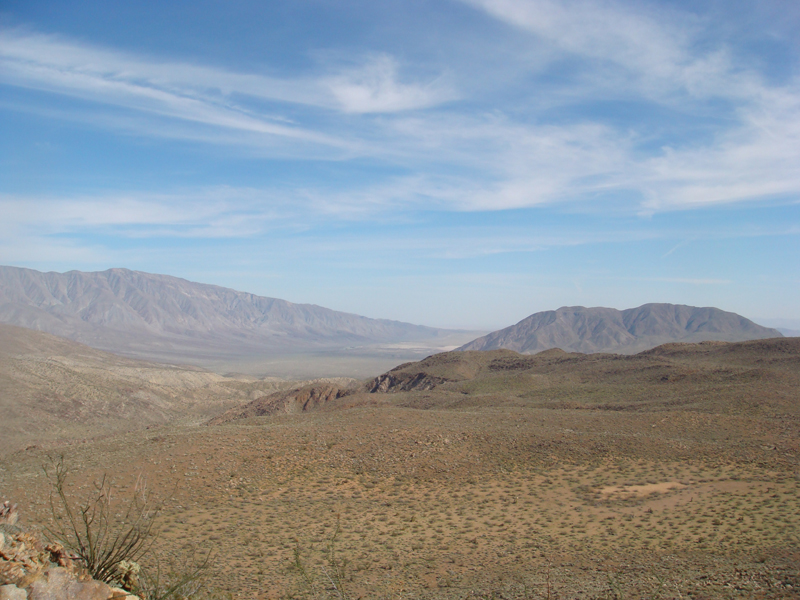
(3) View of the plateau with Clark Valley in the background. I had already passed through that area.
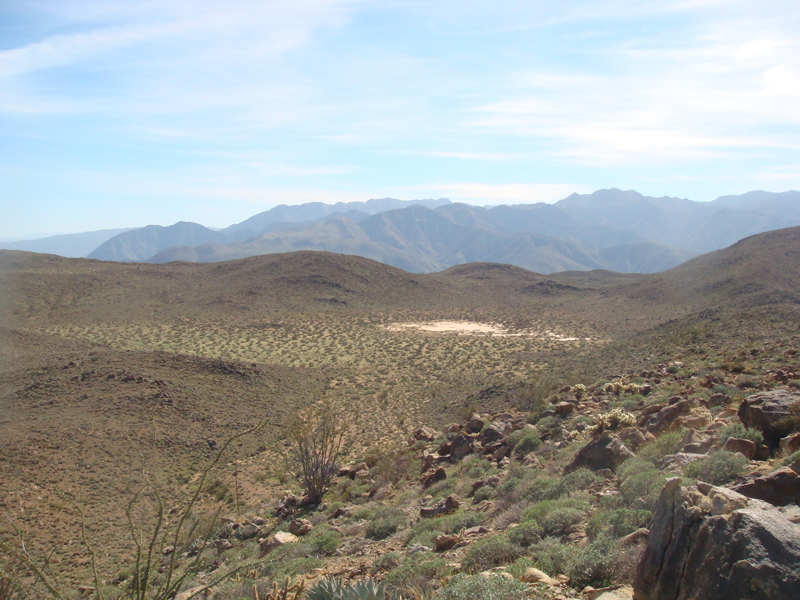
(4) View the playa in the center, with the San Ysidro Mountains in the background. The hike would continue between the two small peaks beyond the playa, into the Coyote Creek watershed and the ridge I would follow which runs parallel to Box Canyon.
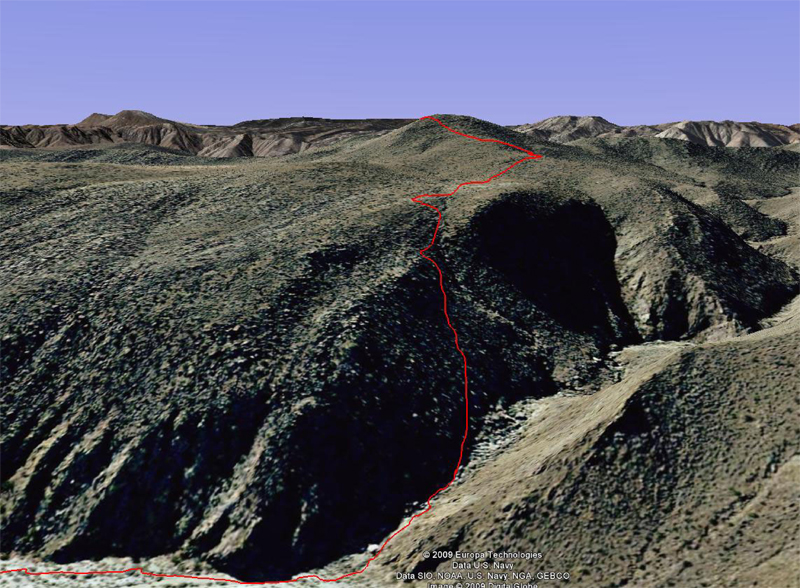
Above: route out of Butler Canyon to the top of the hill.
Plateau Plants

Above Box Canyon and Night Camp
 After leaving walking through the playa and entering the Coyote Canyon watershed above Box Canyon, one must stay on the ridges above the canyon, until your are close to the mouth of the canyon. There are remnants of an ancient Native American trail, but it is more work to try to find the trail, than just hiking cross-country. As the picture shows, the area is rolling and rocky. However, I made excellent time, and before 3:00PM, I had already hiked around 15 miles. I decided to head away from the ridge of Box Canyon and locate a campsite with a view. About one mile south of the canyon, I found this spot. It would provide me ample time to test a couple pieces of new gear.
Trekking Poles
I have walked for decades using a single hiking staff, which weighs close to a pound. Today trekking poles have become popular, and a couple friends convinced me to try them. Supposedly, they help climb the steepest hills, are useful on descents, and steam crossings. What interested me the most were the multiple uses for setting up a shelter and hiking. I found a pair made from carbon fiber that weighed less than 4 ounces each. I suppose the jury is still out on their usefulness in hiking, but then 40 years of hiking with a single staff is a hard habit to break.
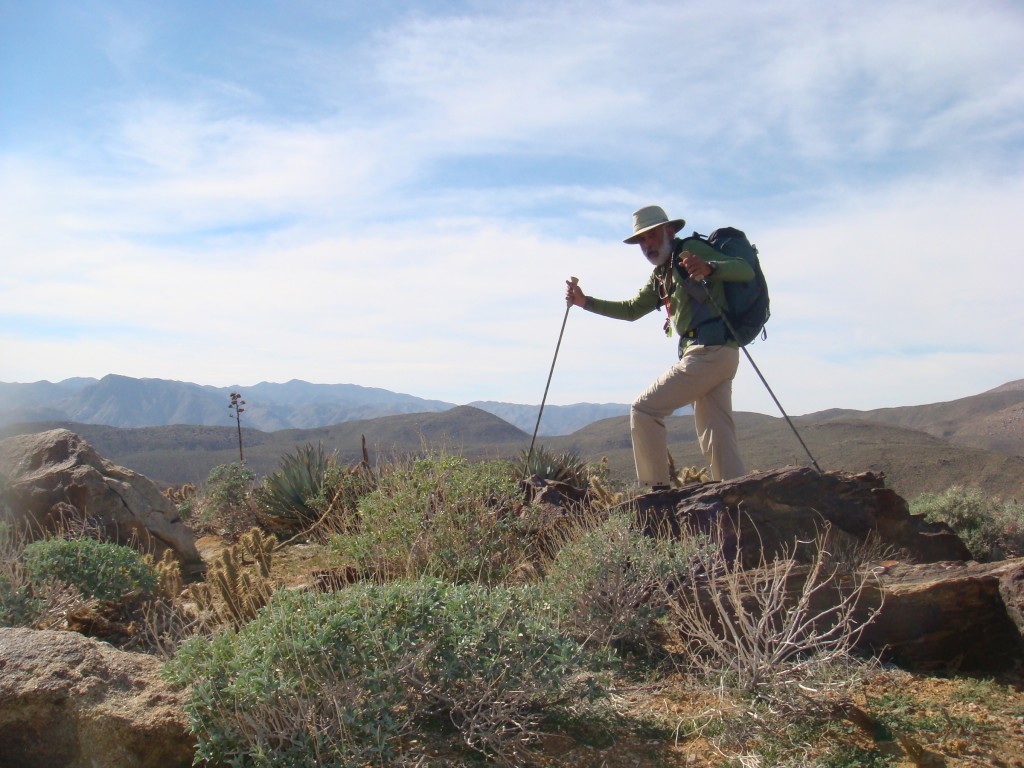
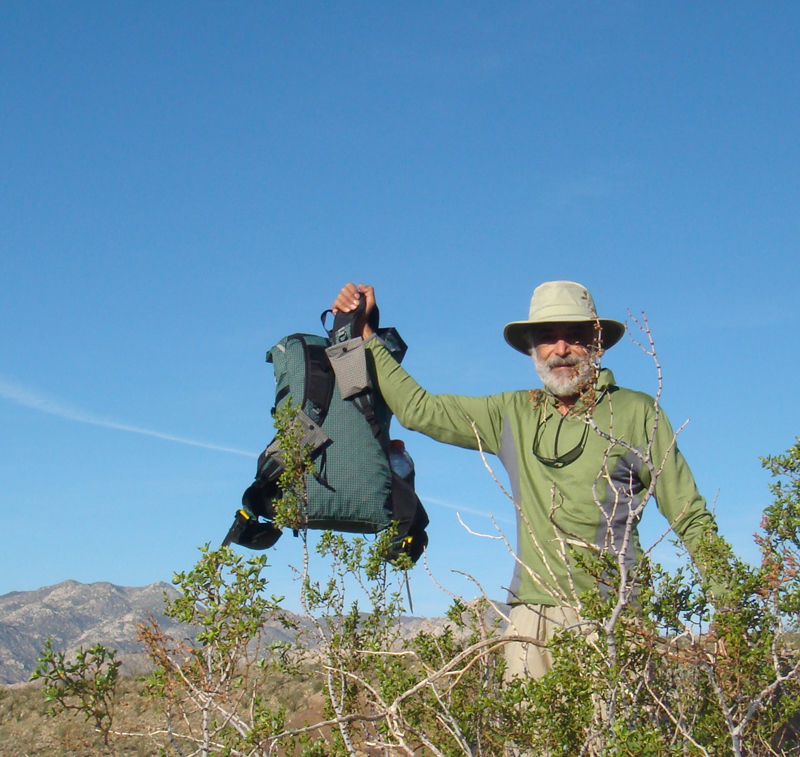
Self-portrait with the trekking poles.

Trekking poles used as tent poles for my poncho.
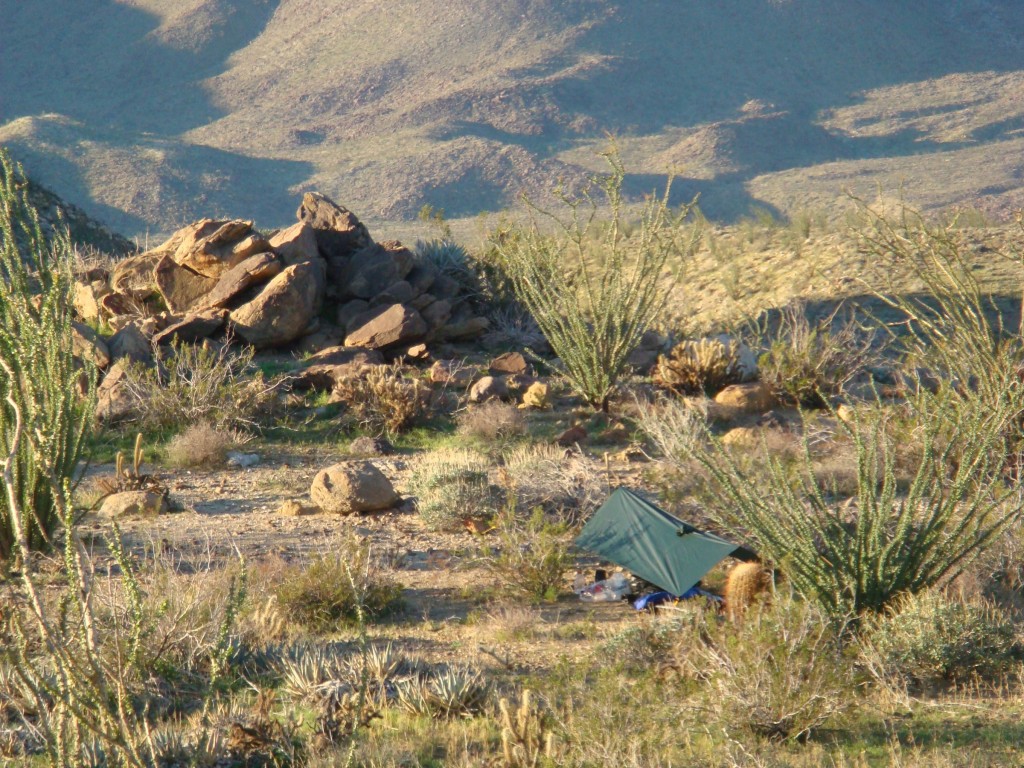
Camp.
Cola Can Stove Kit
My friend John Oldford, who works at MSX, suggested I try an alcohol stove made from a cat food or cola can. John has a lot of ultralight backpacking experience, as he hiked the entire 2,600+ miles of the Pacific Crest Trail in 2003. Extremely light and they use just about any kind of alcohol, but denatured alcohol works best. This set up will boil 16 ounces of water in less than 7 minutes. A nifty windscreen, called a Caldera Cone helps the efficiency of the can stove.
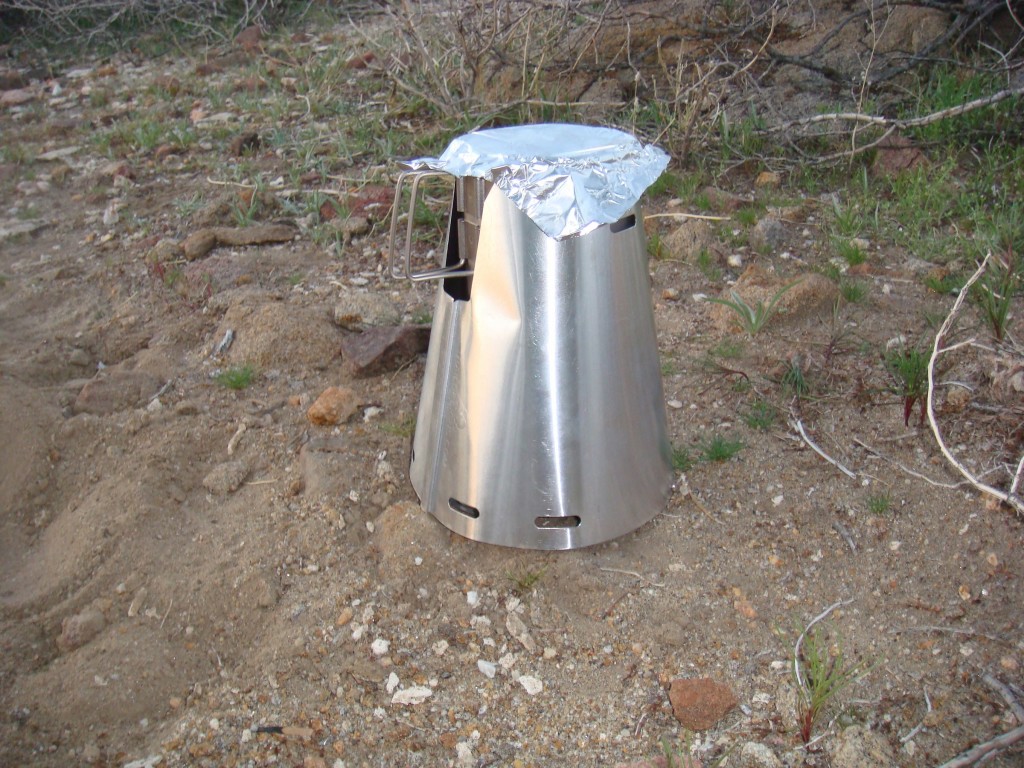
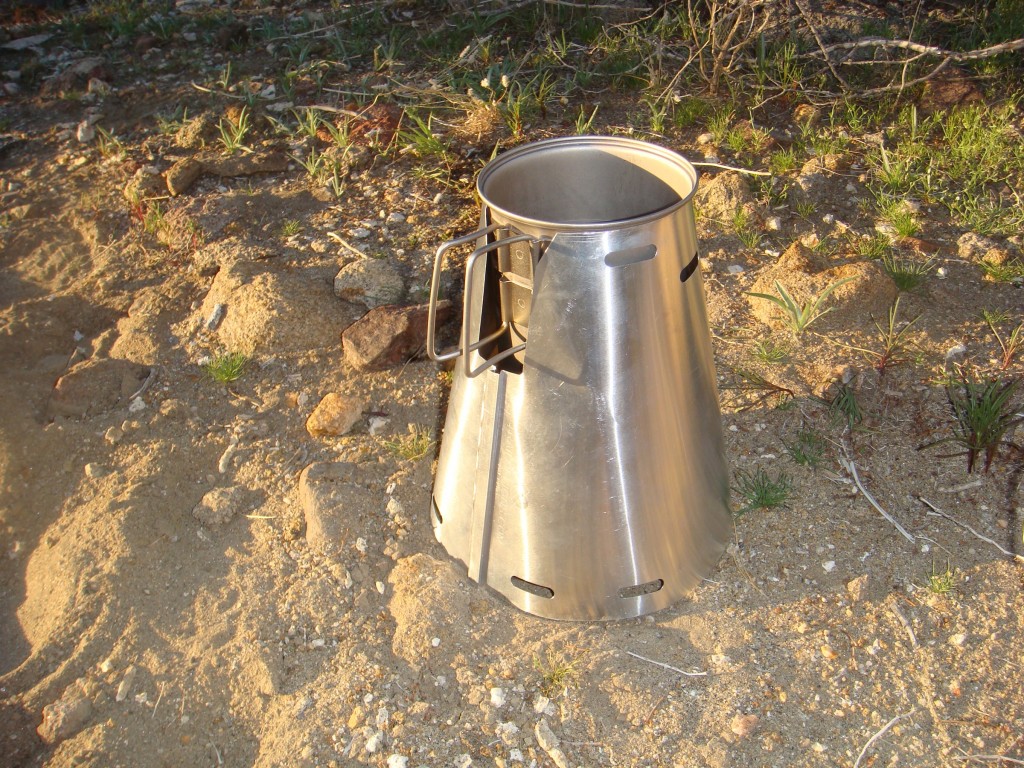
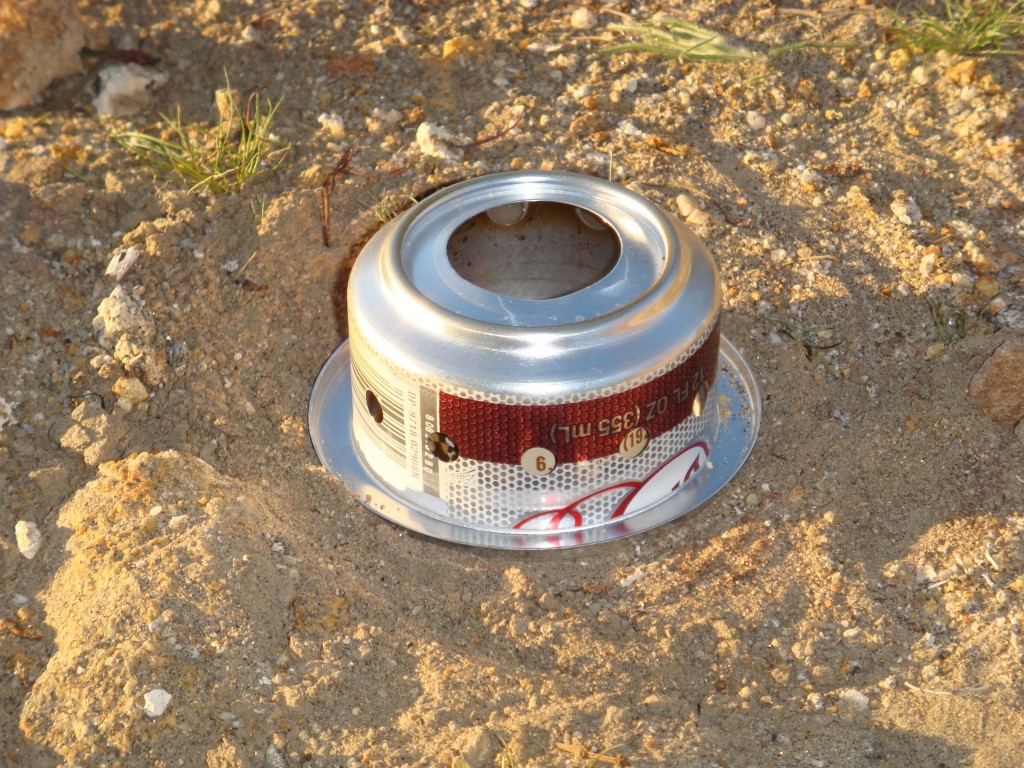
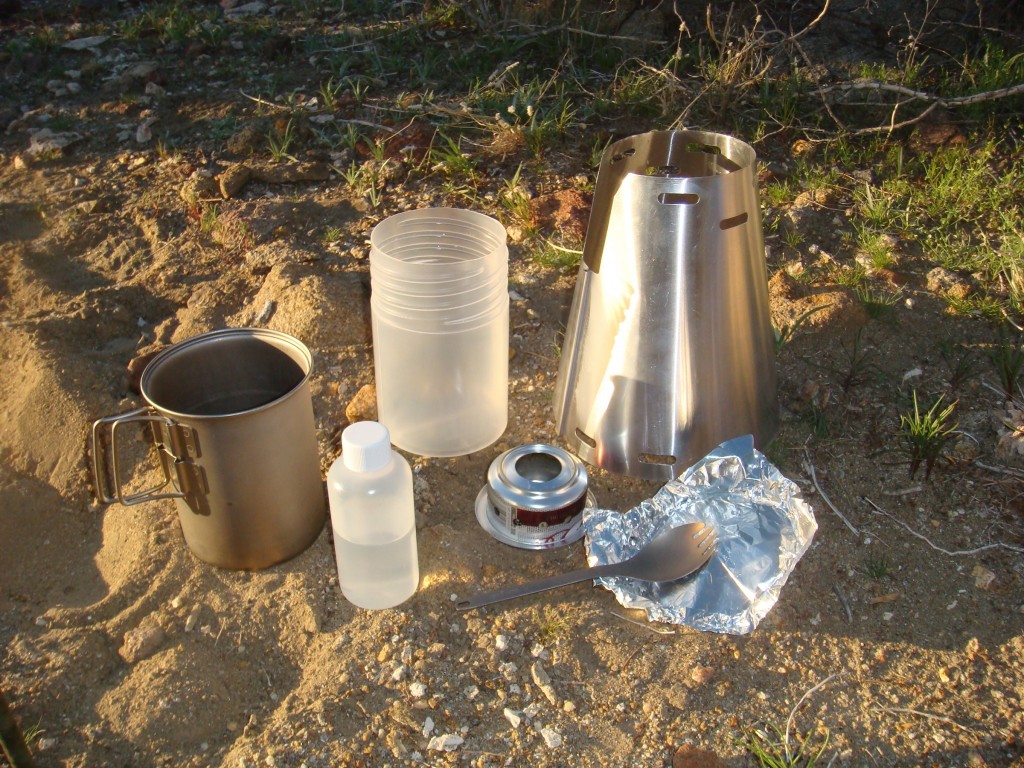
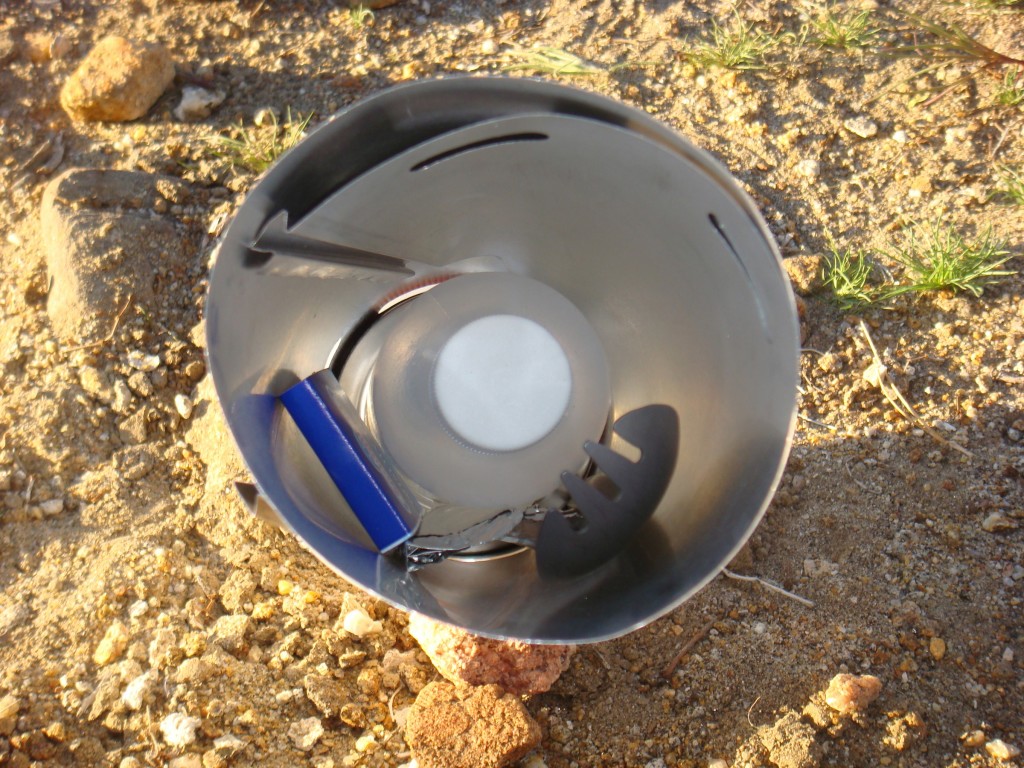
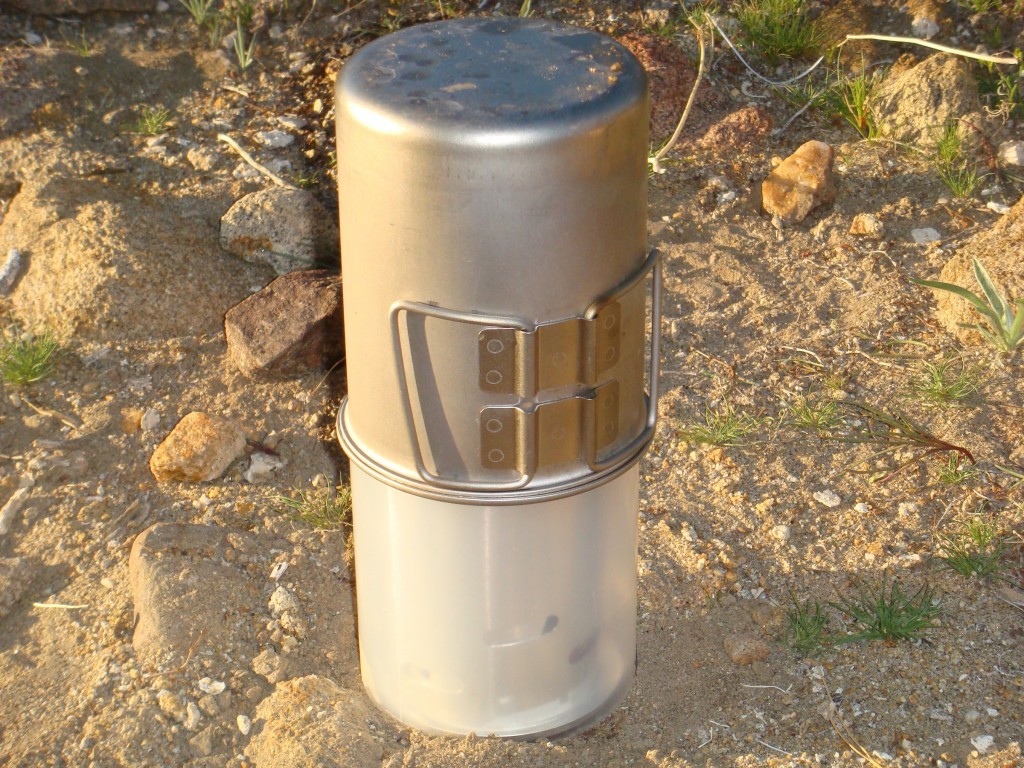
Above: Stove kit in sack; Stove Kit; Titanium pot/mug, alcohol fuel
bottle, stove, cone, titanium spoon, foil; close up of my Dr. Pepper can stove; Stove is in the cone and the pot slides in; and Tin foil pot cover, to save weight.
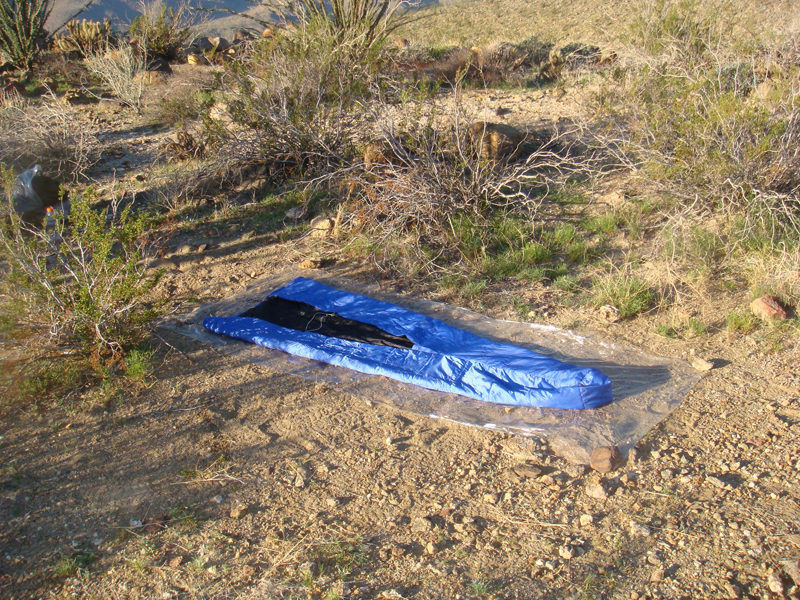
Ultralight Sleeping Set-up
I bought a light polycro piece of plastic to use as a groundsheet. Wanted to see how it would hold up, and it did well. Only weighs 1.7 ounce. The sleeping pad is folded into thirds, and it becomes the ‘frame’ and back rest when in my pack. I also used a light quilt for this trip, instead of a sleeping bag. The quilt is open on the bottom to save weight, and the sleeping pad provides insulation where the quilt is open. Last is the bivy to protect from any moisture that gets past the poncho, should it rain or snow. The bivy weighs 7.9 ounces.
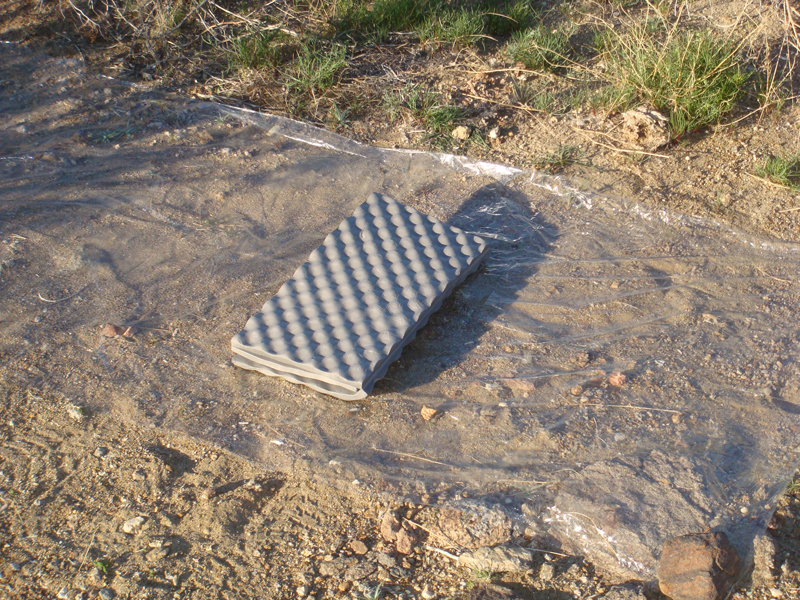
Folded pad on the polycro sheet.
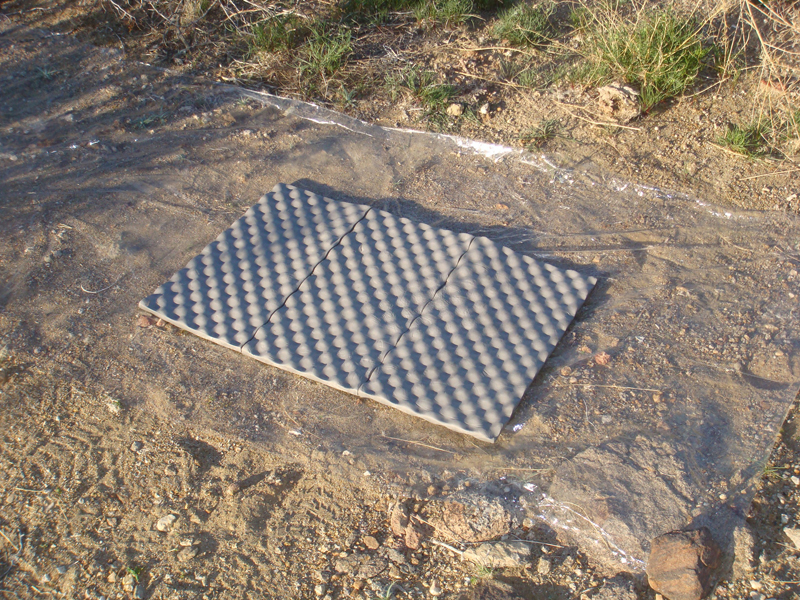
The pad is only 30” long, to fit under my torso. I put my Pack under my legs for insulation/padding.
Here the quilt is upside down, to show the construction.
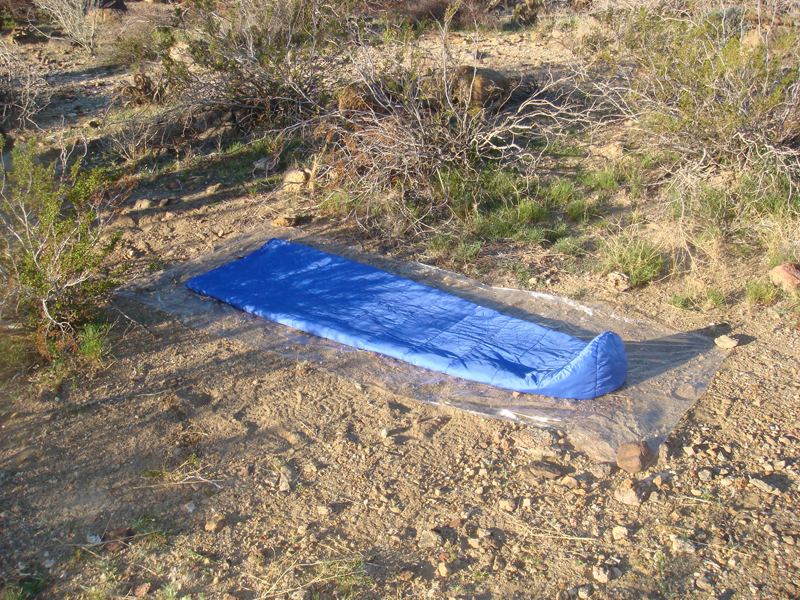
Quilt in sleep mode.
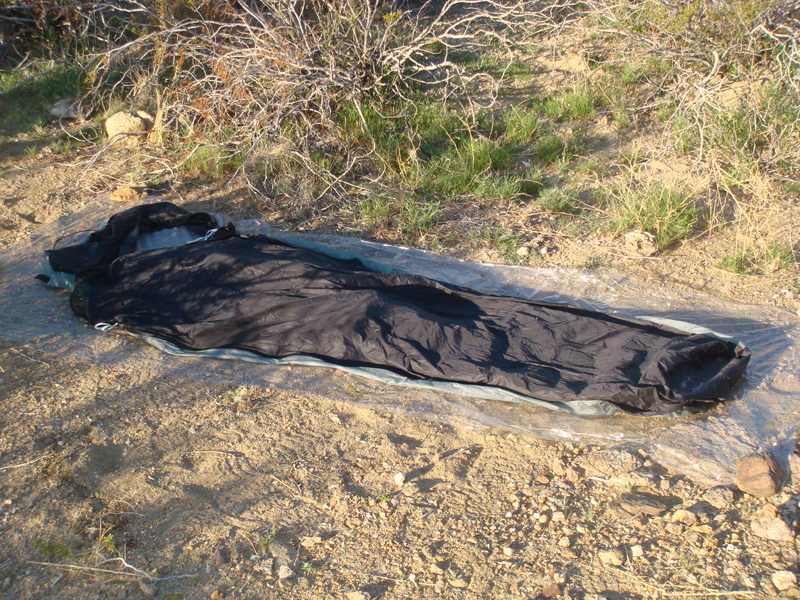
Finished set-up, with the quilt and pad in the bivy.
The Rest of the Gear
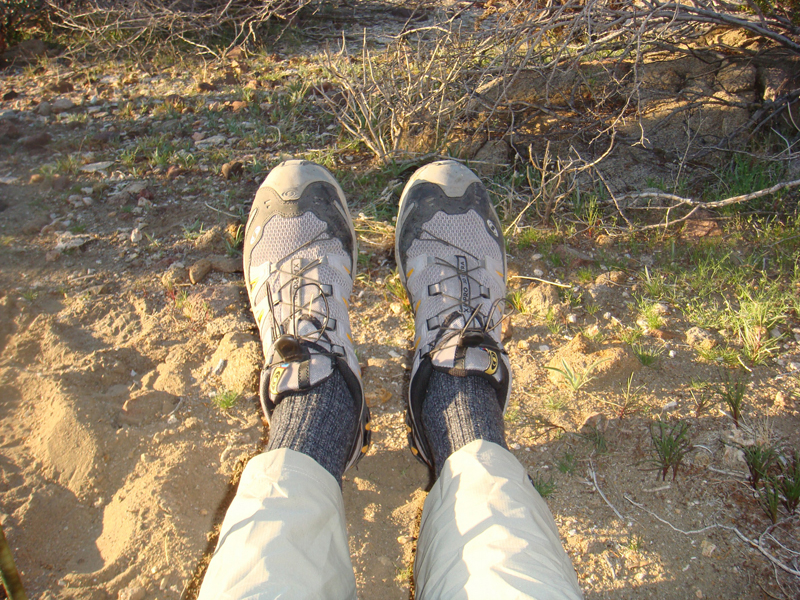
These are a pair of Solomon trail running shoes, which weigh 29.4 ounces.
Total weight of pack and gear was just over 6 pounds.
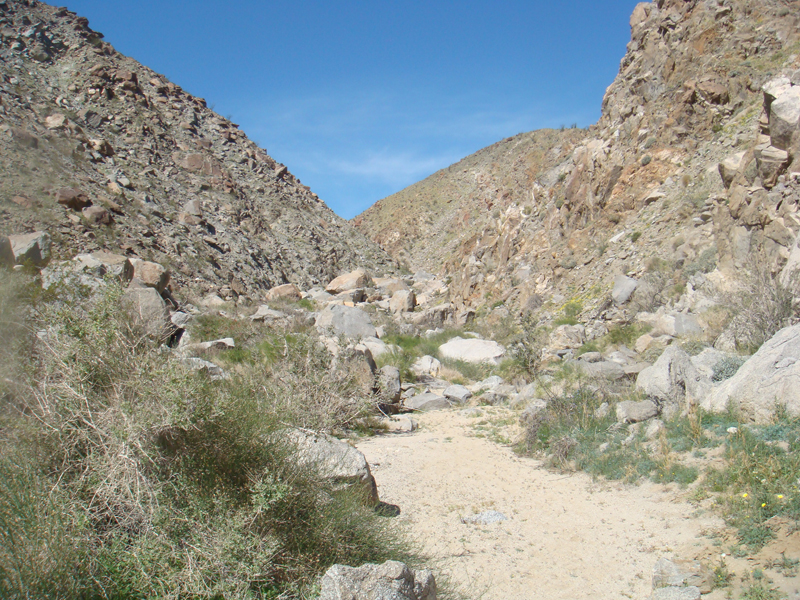
Box Canyon
Last day of trip. I headed down a side canyon into Box Canyon, which drains into Coyote Creek. From there, it was a pleasant walk along the creek, up to Ocotillo Flats and then to my truck. Finished the hike at noon, and then drove to the Salton Sea to get a well-deserved beer!
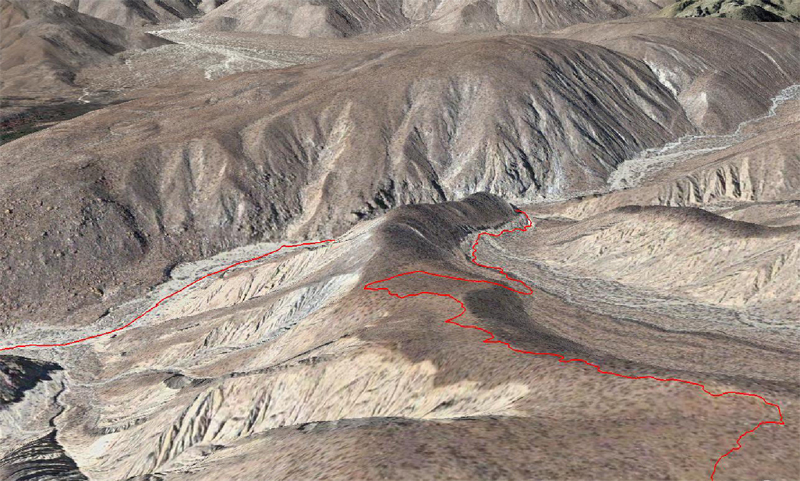
Google Earth picture of the hike down into Canyon. You can see where I zig-zagged on that flat spot. I was following an old Indian path, and the map does not show the obstacles, which needed to be circled.
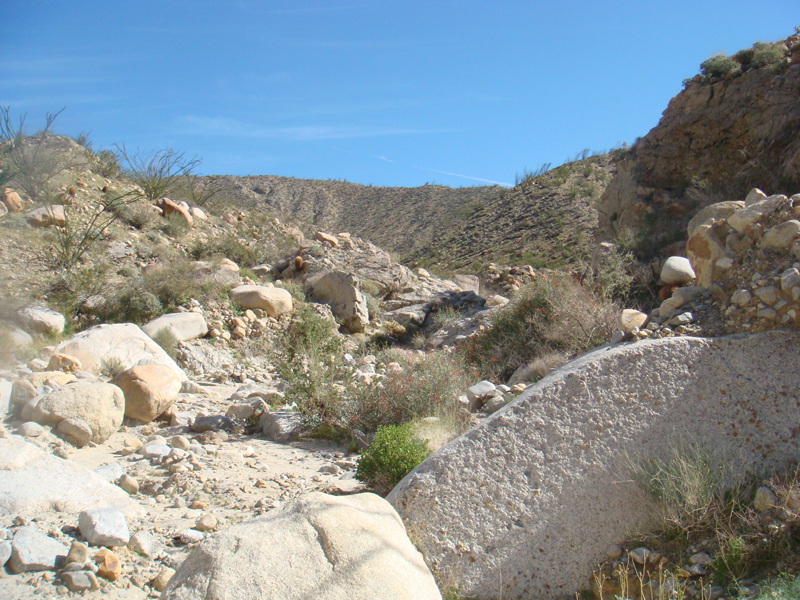
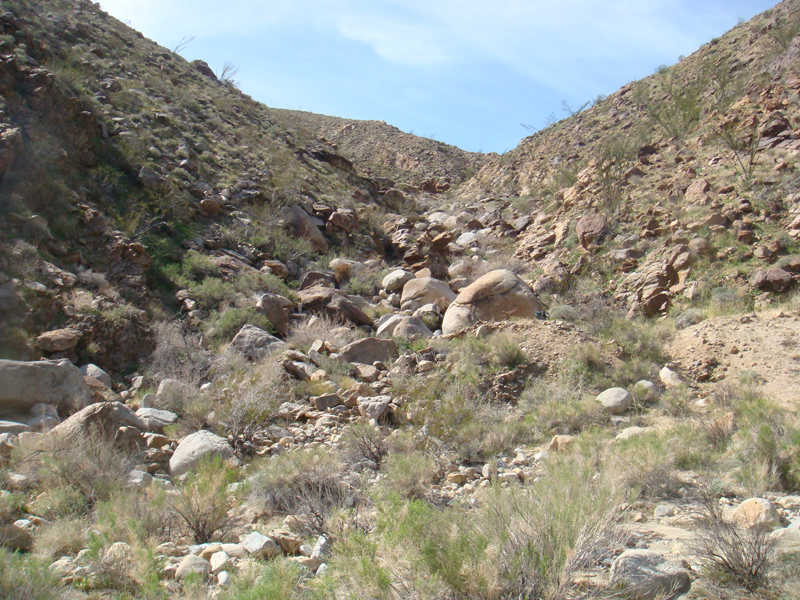
Junction of the side canyon and Box Canyon. The top of the picture shows the ridgeline above the canyon.
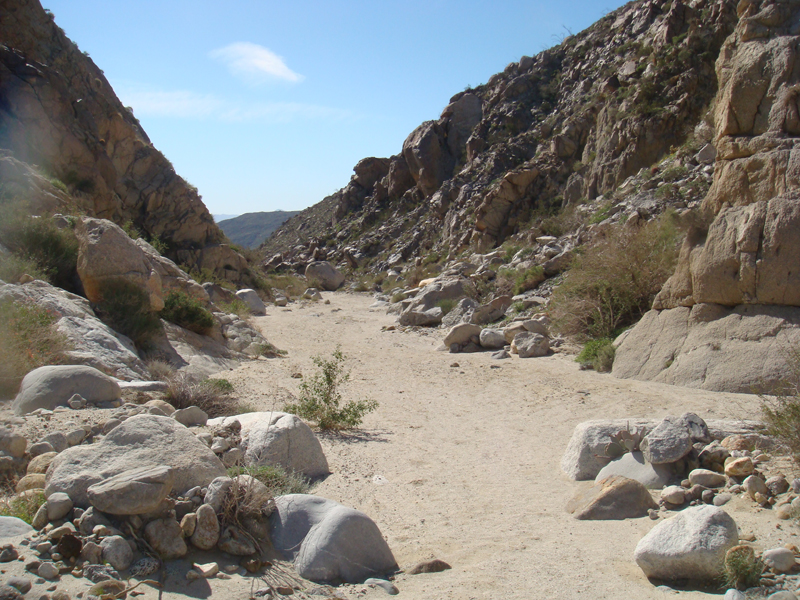
From junction, looking down Box Canyon.
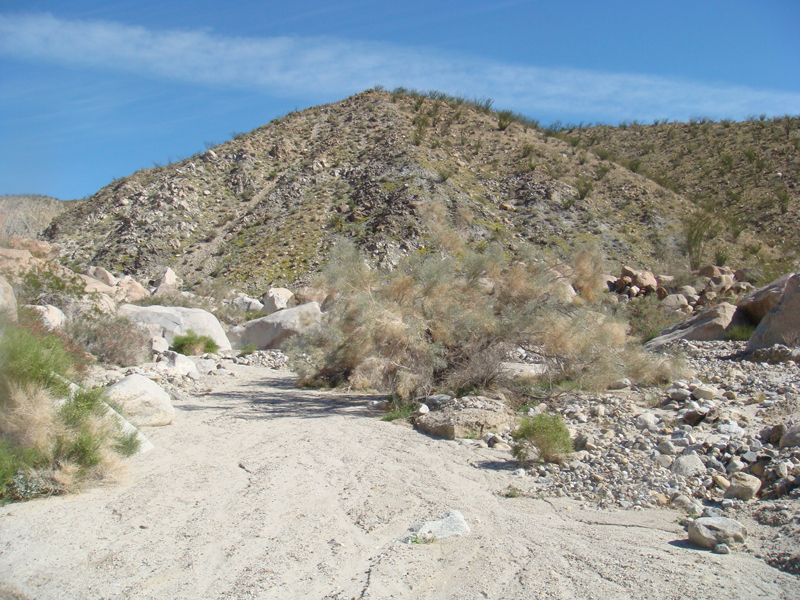
Looking back after exiting Box Canyon.
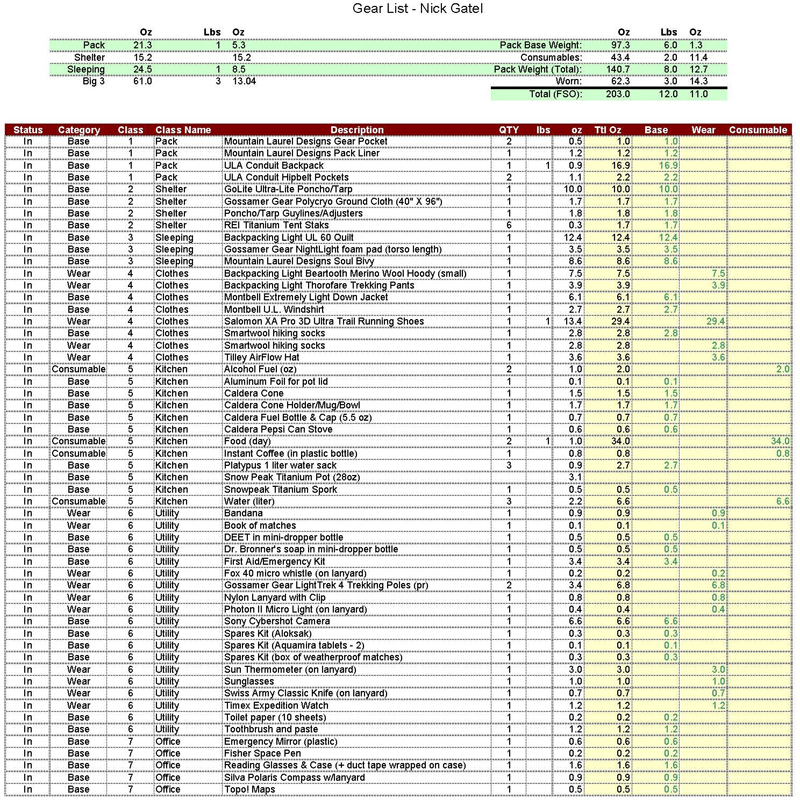
Gear List