Category Archives: Backpacking Gear

Hike to a Secret Place March 2012

INTRODUCTION

This probably going to be one of the strangest trip reports you have ever read. First, I am not going to tell you where I went, and secondly, many of the descriptions and normal logistics will be purposely camouflaged. The area of this hike is rich in Native American Petroglyphs, and sections have been heavily vandalized in the past – over 150 years worth of vandalism.

The area is in a designated Wilderness Area, and the government agencies charged with protecting these lands have limited enforcement resources. The good news is that the Wilderness Designation has significantly reduced travel in the area, by making the use of motorized and non-motorized vehicles illegal. I visited the two agencies that are responsible for managing the area a got little information. Either the employees just did not know anything, or it is policy not to divulge information. I did get all the information I needed for traveling in the area and what the rules are.

SECRET PLACES

I often avoid places that are well publicized on the Internet or which have been included in a published Trail Guide. Some of these publicized places have gems of solitude and beauty if one travels off the recommended “beaten path.” But to me, the absolute best places to go are areas that no one goes to visit – places without trails, without roads, without mention on the Internet, and without Trail Guide recommendations. These places offer solitude. They feature little or no trash, and often no footprints, not to mention a lack of people.

So how does one find a Secret Place?

First step is to get a big map. A State Road Atlas is excellent. Look at places that have few roads or cities around them. From there, go online and look at the USGS Topographical Maps (they are free), or better yet BLM maps (where available) are excellent at only $3.00 each. These maps are 1:100,000 scale. While they won’t tell you where the most exciting places are, over time you will learn to find them. Over the years, using this methodology, I have visited most of the mountains south of Death Valley to Mexico, and West of the Colorado River to the Pacific Ocean. There are dozens and dozens of mountain ranges in this vast area. Some so small you can circumnavigate them in a day and others so large it takes months to truly know them. Some of these mountains I have traveled extensively and intimately; visiting every side canyon, ridgeline and high peak. Others I have just scratched the surface, and placed on my “To Do” list. I do not have a checklist of places to go, but often just head to a place I have never been before.

This trip was my second time in this particular mountain range. I remember the first time distinctly. It was soon after my daughter, Nicole, was born; 1985. On that trip I had crested a desert pass, and below me lay a large “bajada.” A bajada is an alluvial fan of sand, rocks and debris that turns into a fairly flat plain. This bajada was formed by two small mountain ranges and I would be traveling through this to my next water source, which was between 20 and 30 miles away. But I was running short of water. I would either need to rest during the day and travel at night, or find water in either of these two mountain ranges. My map only showed a “dry spring” in one of the ranges. Most would say it was hardly worth the extra time and effort to check it out with little expectation of water. As I traveled down the gentle slope of the bajada, I eventually was directly opposite of the dry spring, and my binoculars showed an abundance of greenery in the area of the spring. To me it was worth the two mile round trip to find out, plus if water was not available it looked like a cool place to rest in the heat of the day. Not only did I find water, but found hundreds, if not thousands, of Petroglyphs. Since I had a time schedule to keep, I could only place a note in my mind that this was a place to come back and explore further. In the early 1990’s this area was designated an official Wilderness Area, giving me hope that it would not be harmed for future generations.

THE PURPOSE OF THIS TRIP

This trip had several purposes

  1. To walk around the entire mountain range, a hike that would take most people 3 or 4 days.
  2. Spend time exploring and photographing petroglyphs.
  3. A shakedown cruise for my new McHale Bump 32 backpack.

LOGISTICS AND PREPARATION

To get to my starting point of the hike, I would need to travel about 20 miles on dirt roads. Not knowing the condition of the roads, and knowing the dangers of this kind of back country driving, I loaded the

Tools for the truck.

back of my SUV with 8 foot boards to be used a sand ramps in deep soft sand, several platforms for emergency work, 14 gallons of emergency water, air compressor, shovels, and extra tools. I got stuck in sand only one time, and two of the platforms got the vehicle moving in a few minutes.

WATER

This is the limiting factor in most deserts. The way I planned the route, I would need to find water in the “dry spring.” If the spring was dry, I would need enough water to hike back to the SUV; I would not have enough to complete the loop. So I left the truck with 2.5 gallons of water in my pack, which weighed 22 lbs alone. I also brought 4 lbs of food, meaning 26 lbs of consumables, which I felt would be a good test for the Bump backpack. I also brought two items I rarely use, Dirty Girl Gaiters and a hiking staff. Knowing that I would be traveling in areas with small pebbles and stones in abundance, the gaiters would help keep the debris out of my shoes. In sandy conditions, I usually don’t use gaiters because sand will pass through the mesh of my shoes anyway. The hiking staff would be helpful in moving rattlesnakes out of my way since early March can mean plenty of snakes, but I did not have to use it. I didn’t see a single snake on this trip. Temperatures would reach a high of mid 80’s and the lows in the 40’s. No rain was in the forecast, but a chance of nighttime winds with gusts up to 50 mph was a concern, so I brought a zPacks Hexamid for my shelter. Instead of the ultralight titanium tent stakes I usually use, I brought 4 Easton 9” nail spikes and 4 SMC snow stakes. They would be able to handle the kind of soil found in deserts. And as it turned out, winds were mild at night with no need to set up the shelter, but there was no wind during the day to help cool things off either.

THE TRIP

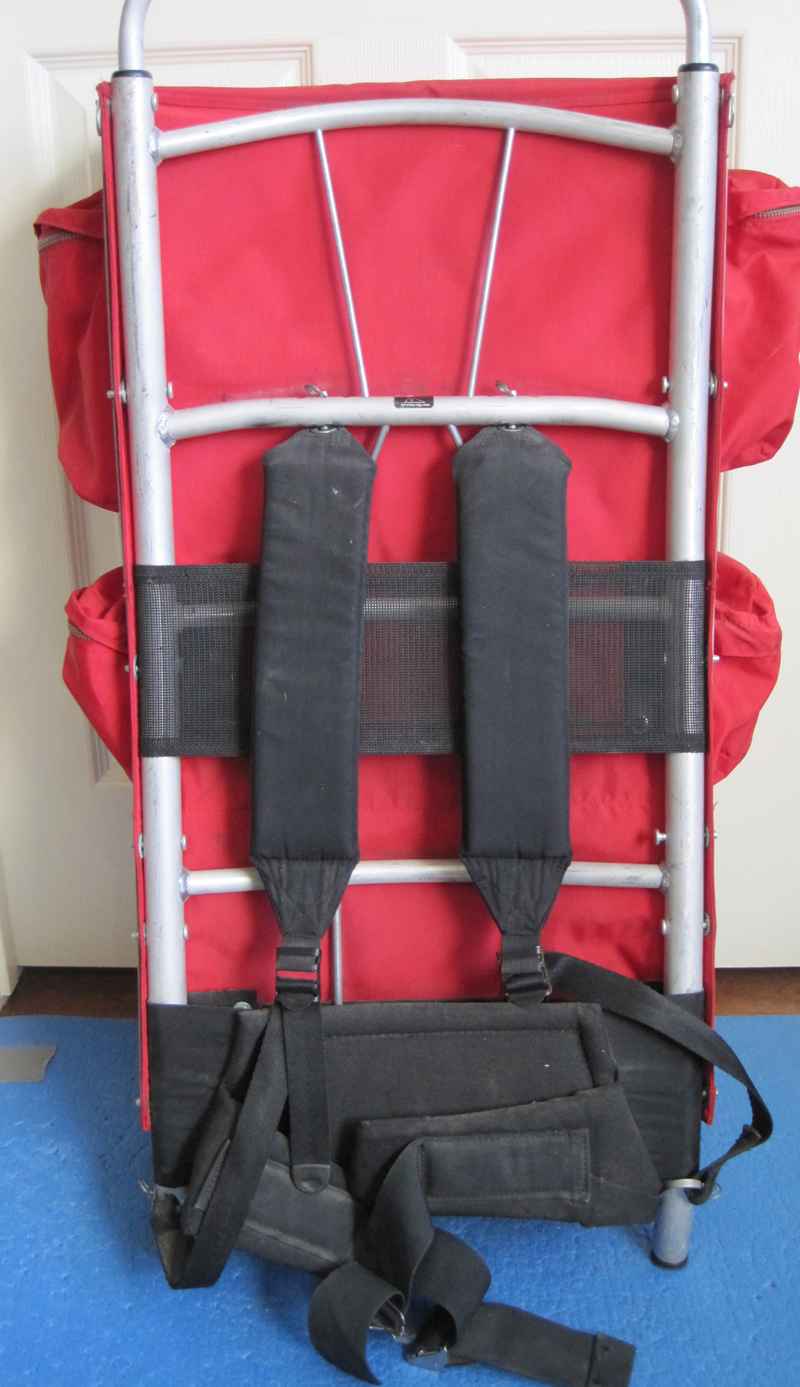
Total weight of pack was 35+ pounds. The volume of the main bag is 33 liters. The stays are bent to contour my back, keeping it close to my body, with no weight bearing on my shoulders, effectively transferring all the weight to the double-buckle hip belt.

The only map I brought was the BLM map, as it would take too many 7.5 minute maps. I had studied the more detailed maps in advance, so they were not needed. However, the dozens of washes originating in the mountains were often 10 to 20 feet deep making travel slow and difficult. Such travel was forcing me to consume too much water, so I moved away from the mountain and traveled in the bajada, after exploring to small canyons. Also the terrain between the washes was covered with “moon” rocks, a toe-stubbing, ankle-twisting gauntlet.

Typical wash.
“Moonscape”

The winter had seen little rain in the desert and large blooms normally don’t occur until mid-April. But there was some flowers and plant life that encouraged time out for viewing and picture taking.

Yellow Flowers
Barrel Cacti

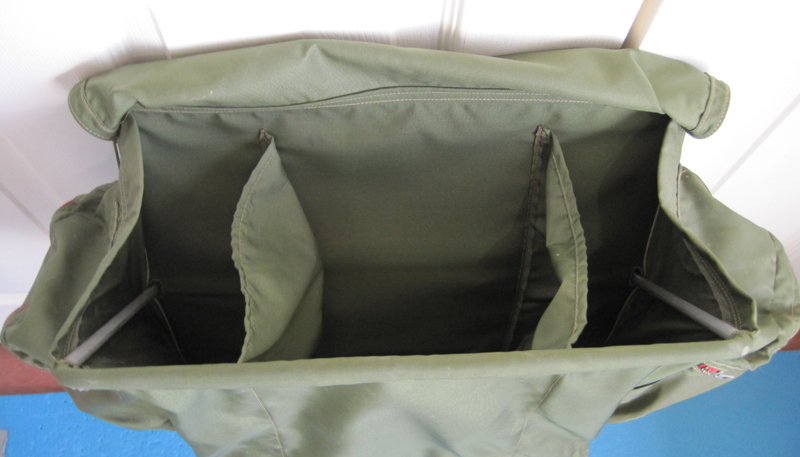
McHale Pack. The small volume of the pack bag was perfect at 33 liters. The optional water pocket can each hold a 64 oz Gatorade bottle. I placed the 6 one-litter Platypus bottles in the main sack, much easier to pack than two-liter ones. I also attached the optional hip pockets, shoulder strap pocket and top lid.


Picture of the McHale Top Lid. The top lid is a new design this year from Dan McHale. It is small but extremely functional. There is a second pocket inside made that is very handy for those small items that get lost easily. Normally I strip my packs down for short hikes, but I will probably take this lid on all my trips with this pack… it worked so well and is very convenient.

Patagonia Houdini Windshirt

Every evening the wind picked up, and a wind shirt and beanie kept me warm enough for hanging around camp and doing chores.


The best tent is no tent where the sky is your canopy. So the difficulty is finding a level spot, soft enough ground to keep from puncturing your air mattress, and a wind break from the wind. Trees and shrubs work well to break the wind, but one must be far enough away so nocturnal creatures don’t feel they have an open invitation to your camp. This site offered wonderful 360 degree views, shelter from wind, and early morning sun. What else could one ask for?

People tell me they don’t like to hike alone; they get lonely with no one to talk to. They also tell me they get bored at night, needing reading material or music to keep them company. I don’t understand it. So here is my recipe for a wonderful evening and peaceful sleep…


Red Rock. Watch the setting sun play with your surroundings. Here the normally black mountains are bright red.

Sunset. Watch the sun set. Observe colors and shadows.

Moon. Learn of the night sky. My camp was oriented with the rising moon behind me. When nightfall arrived, I watched Venus and Jupiter play with the horizon. Once they set below the horizon, I observed a nearly full moon and at times looked at it with my binoculars. Soon I dozed off. Awakening in the early morning around 3 AM, the moon was setting and I watched the winter sky, especially the Orion constellation. Next thing I knew it was daylight and I was awakening from a glorious night’s sleep. Pretty simple stuff.

At home, I am not a big breakfast eater, but on the trail it is my favorite meal. Sleeping under the stars means there is little to do when packing up camp, so a leisurely breakfast is always in order, weather permitting. Umm, umm good!

PETROGLYPHS

Vandalism. Here is an example of vandalism, and why I am trying to hide this Secret Place. Although with a little research you can find it. But it is not easy to get to. The petroglyphs that have been damaged in this picture are over 5,000 years old. Scientists can determine the age based on the amount of “desert varnish” that covers them.

The petroglyphs below have remained undamaged for centuries.

I did find water in the spring and was able to complete the loop. Here is my reflection.


Sand Dunes. Many people think of vast mileage of sand when they think of deserts. And sometimes it in abundance. But I walked on very little sand. However in the distance is a dry lake and the wind has created a haze from the blowing sand. Probably hard to see, there are 3 large dust devils several hundred feet tall. But it is relatively calm where I am standing.


Desert Pavement. Desert pavement is the surface that is covered with packed rather rounded rocks. It is so hard that you can drive a vehicle across it at high speeds. Also, allows one to walk quickly!

Desert Pavement

More Desert Pavement.

GEAR FAILURE

I had two minor failures.


The first was a pinhole in my Foster’s can. The can does double duty as my cook pot and drinking cup. My stove, cup and utensils only weigh a total of around 4 ounces. A small pinhole developed right at the middle fold. I have “babied” this can and it has been on many, many trips as you can see from the discoloring. To be honest, I am tired of arranging my pack to put it in a spot where it will not get crushed. So I will probably switch to a titanium pot system. I would much rather put the pot where it makes sense packing-wise and stop worrying about crushing it.


When I was putting away my quilt, I saw some feathers floating in the air. On closer inspection I noticed this tear at the top of the foot box. Since I always put the quilt in the stuff sack, and never have the top of the foot box on the ground, I first thought it might just be material fatigue, but I probably punctured it with a finger nail. The material is made from very thin CubenTech cloth. CubenTech is used to make sails for the America’ Cup racing yachts, light and strong for that application, but somewhat fragile in the thickness for my quilt. The quilt only weighs 12 ounces and is warm to just below freezing.


I also noticed that one of cord loops is pulling away from the cuben. These are the perils of truly UL equipment.

GEAR

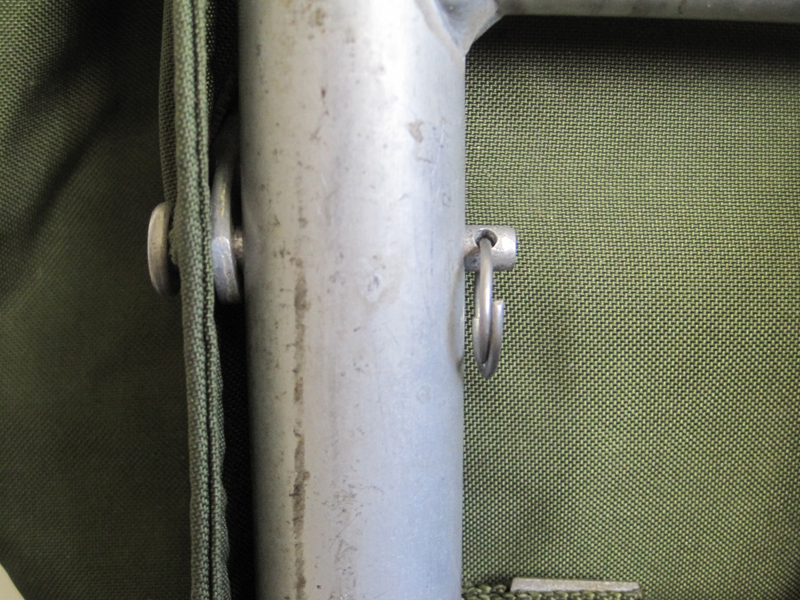
The McHale Bump pack thoroughly exceeded my expectations. Handles 35 lbs with ease, and the internal aluminum stays inside the pack are used as the frame, keeping the pack close to my center of gravity. This was an expense that was well worth the investment. The only difficulty through the entire purchase process was figuring out what material to make it from. Dan McHale wanted to make it from CubenTech fabric. I am leery of Cuben for the long term (as you can see in the pictures of my quilt above, as I expect this pack to last for at least a couple decades, and no one has used cuben for that long in a pack to report on its durability. The Cuben that Dan uses is a hybrid with a polyester laminate and he has tested it thoroughly. So I opted for Dyneema X Grid. The fabric Dan uses has the Dyneema threads spaced at 3/16” of an inch, versus the ¼” most of the UL manufacturers use. So his has about 25% more Dyneema thread in it. The pack has a full Dyneema bottom and the back of the straps is also made from full Dyneema. Dyneema is the strongest material known, and has replaced Aramid as the preferred material used to make military bullet-proof vests. The front of the pack has a mesh panel to help with sweat.

Specs on the pack

  • Main Bag Volume (excludes any accessories) ~ 2,000 cu in or 33 L.
  • Main Bag Volume (including the 11” roll top) ~ 3,000 cu in or 49 L.
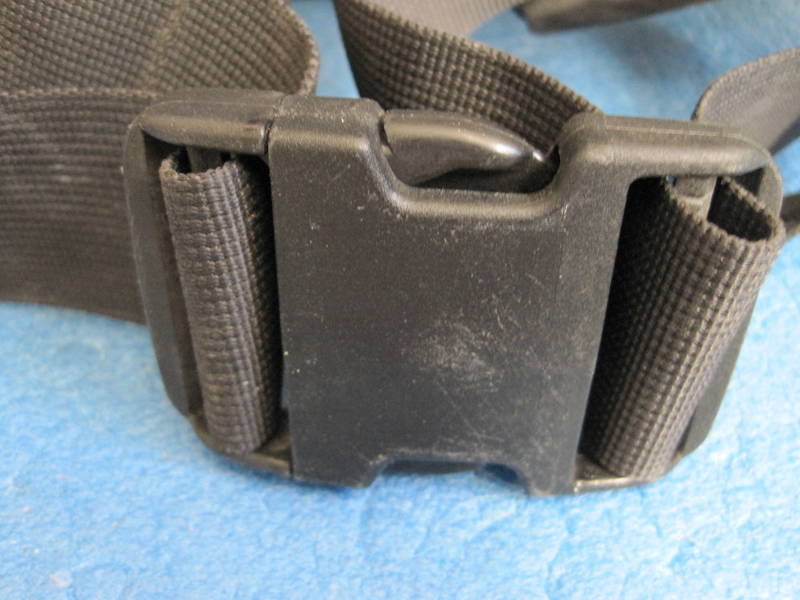
  • The stays and internal pad are removable. The padded double buckle hip belt is removable.

Options included

  • Top Lid
  • Water Bottle Pockets (easily hold 2 Liter water bottle); 2 each
  • Hip Belt Pockets; 2 each
  • Shoulder Strap Pocket; 1 each

Weights

  • Stripped down without Stays, Pad, or hip belt = 25.15 oz (1lb 9.15 oz)
  • Note: stripped down you can add a simple web belt.
  • All Options Included = 51.92 oz (3lb 4.92 oz)

Gear Summary

McCoy Mountains gearlist 03-04-2012 2

Anza Borrego (Nov 2011)

Dad’s 61st Birthday Extreme Ultra Light Walk-About

Dear Nicole and Joe,

Thank you so much for the birthday gift. I will put it to good use and maybe even learn something.

It dawned on me that I had not written a backpacking story for you in almost a year, so here is what I did to celebrate my birthday. Hope you enjoy it, I sure did.

Love,
Dad

The “Why”

The stated purpose of this trip was (1) tell myself I am not old yet, and (2) try and hike in various weather conditions with a total weight of gear (carried and worn) under 5 pounds. This does not include the weight for food, water, and stove fuel.

Continue reading Anza Borrego (Nov 2011)

Kelty Backpacks

In the 1960’s my first pack was a Boy Scout pack I bought at a swap meet. I think it was an Antelope brand. That pack is long gone. From 1971 until 2008 my main pack was a Kelty D4. I had several other special packs, but this D4 was probably used over 90% of the time.

Note of interest: In January 2012 I decided to take a trip with my old Kelty D4 pack and noticed that the seam in the divider between the upper and lower compartment had separated along most of its length. I contacted Kelty to see if they could repair it, expecting to pay for the repair. They emailed me a form to fill out and attach to the pack bag. Three weeks later I got it back and it had been expertly repaired at no charge. The form said it was covered under warranty – 41 years after I bought it.

During the 60’s and 70’s Kelty packs were the dominant pack in the market. Seemed like everyone had a Kelty. So I thought I would start out with a little Kelty history.

KELTY

Kelty History (from the Kelty Website)

1952:
Dick Kelty hand forms and welds packframes in his garage, while wife Nena sews each pack bag. First packs to use aircraft-aluminum contoured frames, padded shoulder straps, waist belts, clevis-pins, nylon pack cloth, sell 29 packs for $24 each

1953: sales triple to 90 back packs

1954: sales now more than double to 220 packs in this year

1956:
Dick Kelty quits his carpentry business to focus on Kelty Packs full-time. Opens first retail store and “factory” in an old barber shop in Glendale, California.

1962: retail and mail-order divisions are moved to a larger building on Victory Blvd.

1965: backpack rain covers are introduced.

1966: Kelty packs are used on the National Geographic Antarctica expedition.

1968: production facility is moved to a new factory in Sun Valley, California.

1969: new BB5 pack is introduced in red with a large main compartment and five outside pockets.

1970: Dick Kelty designs and produces the first stainless steel, quick-release waist belt buckle used on a back pack.

1972: Boston-based CML, Inc. purchases Kelty, and Dick remains chairman through CML’s six years of ownership.

1973: introduces the Tioga and Serac packs, the first new designs since the early 1950’s.

The following information I gathered from some receipts and old brochures. I think it is fairly accurate.

In the early 1960’s Kelty offered two external frames and three pack bags. You ordered the frame and bags separately.

Kelty Price List from 1960s

The Backpacker frame had 4 cross members and Mountaineer frame had 5 cross members.

Kelty FramesAbove: (Left) Mountaineer Frame, (Right) Backpacker Frame.

Pack bag options were:
Models A, B, and C. Model C was not kept in stock and was a special order item. I have never seen one.

Kelty Brochure Bag Model Description

In 1973 the Serac was introduced. This came on the Mountaineer frame only with an extension crossbar, was a full length bag, with a separate bottom compartment meant for a sleeping bag. The extension bar could be extended higher. It came with 4 external side pockets, a front pocket under the flap, attachment patches and an ice ax loop.

Sometime in the 80’s a larger Serac was introduced. I think it was called the Serac Expedition, but am not sure.

My Experiences with Kelty

Prior to 1971 I knew nothing about Kelty packs, except I had seen a quite a few on the trail. When I got out of the service, I flew into LAX, close to my parents’ home, landing in the evening. I really didn’t know what I wanted to do with my life, but had saved enough money to live for a year without working. I had around $2,000. So I went to the ticket counter and asked where the next flight out was going. Fresno. Well I had been to Fresno before, so I took the plane. I got a hotel room and wandered around Fresno for a day or too. Then I decided to go backpacking for a few months. I found a mountaineering store and as chance would have it, purchased a Kelty pack and a down sleeping bag, along with a few odds and ends. I bought some additional gear at an Army surplus store, kept some of the things I had in my luggage, threw most the rest of the luggage and contents away, sent a few things home, and sat down to plan a trip. As it turns out, the winter of 1971 had one of the biggest Sierra snowfalls in history and there was no way I could enter the Sierras from Fresno. So I hitch-hiked to Kernville and spent the the 2nd half of April, May, and June hiking around the southwest part of the Sierras. As the snow melted I headed north almost to Yosemite Valley, didn’t like the crowds, turned around and hiked back to Kernville. By now it was mid September or so, and I went home.

I did another big trip in 1972 with pretty much the same gear, except for a white gas stove. When I returned in late ’72 I got a full time job. But I still hiked whenever possible.

Around ’73 I bought a Serac model. This was meant only to be used on trips where I needed more capacity, such as in winter snow. Sometime during the mid seventies I found out that Kelty had been sold to another company, and worried that they would discontinue the line of packs, I purchased an early Kelty Model B with the optional two external pockets, mounted on a Mountaineer frame, from the original owner. This pack was brand new, never used. Since my fears about the D4 wearing out or would break never happened, this 50 year old pack has never been used.

In 1977 I bought a used Kelty A model for my first wife. The original owner had used it once, on a 3 day trip. My wife used it only once, on a 7 day trip and decided backpacking was not for her. I used it a few times also. So this Model A pack is in almost new condition too and around 50 years old.

Sometime in the mid 80’s I wanted an even bigger pack to haul water in the desert and for winter trips, mostly in the San Jacinto and San Bernardino Mountains. Also kids were on the “to do list” and I anticipated family backpacking trips, so I bought the Serac Expedition. That pack has been used quite a bit, but the original 1971 D4 was the work horse until I switched to internal frame packs in 2005.

Identifying the Age of Kelty Packs

I don’t know what kind of logos Kelty use in the 50’s, but from the early 60’s until 1973 Kelty used a triangular logo patch with mountain in the in the background and an arrow behind the Kelty name. Until 1963 or so, it also included “Glendale 1, CALIF” under the Kelty name. Around 1963 the Zip Code was added after Calif. In 1968 when Kelty moved the manufacturing to Sun Valley, the logo was “SUN VALLEY, CALIF 91352.” The logo was changed again in 1972 after Dick Kelty sold the company with a more modern background and no city or state.

Kelty Logo early Model B
Above: Logo on the never used Model B pack. Notice that everything still looks factory fresh. There is no Zip Code, so the pack was probably manufactured before 1963.
Kelty Logo early Model A
Above: Logo from the Model A pack, it also looks brand new. There is no Zip Code, so the pack was probably manufactured before 1963.
Sun Valley Logo
Above: Logo from the 1971 D4 pack. Notice that in has Sun Valley on it.
Kelty Logo 1973
Above: Logo introduced in the early ‘70s.

Model B Bag

Kelty B Front
Above: Front view of the still new Model B pack. I am showing this first because it has all the original equipment on it. It has a mountaineering frame.
Kelty B Mdel B Back
Above: This is the back of the Model B. Notice the two plain nylon back bands on the frame. The belt is made from a canvas/nlyon material with a jaw clamp type of buckle.
Kelty Early Belt Model B
Above: Close up picture of the early belt and buckle.

Model A Bag

Kelty Model A Front
Above: This is the front of the Model A pack. It has a Backpacker frame. Notice it only has two external pockets.
Kelty Model A Back
Above: This is the back of the A Model pack. Notice that the lower band is different from the band shown earlier on the B Model. This is not the original back band. It came off the D4 pack I bought in 1971. You will see why later. Also you can see there is no cross member at the top of the frame like the one in the Model A shown earlier.
Kelty Model A Top
Above: A unique feature of the A Model bag was the divided top compartment. Not very practical, except it made you select gear very carefully, no stuffing large items in it.

Model D4 Bag

Kelty D4 Front
Above: Front of the 1971 D4 pack.
Kelty D4 Back
Above: Back of the 1971 D4 pack.

Those are not the original pack straps, the originals wore out many years ago, probably around 1977. Note the wrap-around hip belt. This was a Kelty option, and I think it may have been introduced in the early 60’s sometime. The belt buckle is the famous Kelty Cam-lock buckle. It worked so well that many owners of other brands of packs switch to these. They were sold in many stores, such as R.E.I. The original lower band is now on the Model A pack shown earlier. Also the original belt on this pack was made from nylon instead of canvas and had a metal quick release buckle. Notice that the top back band is now made from a nylon mesh material instead of solid nylon.

Kelty Cam-lock buckle
Above: Picture of 1971 D4 optional belt with Cam-lock buckle.
Kelty Belts
Above: The top belt is the early canvas/nylon belt an buckle. In 1970 Kelty came out with the metal quick release buckle and a wider nylon belt (bottom). This is the original belt from the 1971 D4 pack that I never used. The quick release belt is different than the cam lock. The quick release is tighten by pulling the belt through the metal hardware, the cam-buckle is similar to early car seat belts.

One thing that I did not show was the optional cross-over frame extension that was later standard on the Serac models. I added one to the D4 when I purchased the pack, allowing me to carry additional gear on the top of the pack. When I later bought my first Serac, I removed the bar from the D4.

Kelty Brochure Front cropped
Since Models A, B, and D were ¾ length bags, they could be re-positioned on the frame. I never did this, but here is a picture from an early brochure. (Above)
Early Kelty Wrap Around belt
Above: Detail of early Kelty wrap-around belt with metal cam-lock buckle.


Kelty Key Wire Top of B Model
Above: One of the weak points of the early Keltys was the Key Wire that was used to secure the bag to the frame and clevis pins. Top of Key Wire shown.
Kelty Key Wire Bottom of B Model
Above: Bottom of Key Wire. Clevis pins were also used to secure the hip belt and shoulder pads, but a circular wire was used to secure them.

Kelty Clevis no Key Wire

On one trip I mangled and bent the key wire on some brush, so I removed the Key Wire and used circular wire to hold the clevis pins securely (above). I had intended to get new Key Wires, but never got around to buying them. Remember, in those days there were few retail outlets or Internet, so most things I purchased were via mail order. The Key Wires are no longer available from Kelty. Securing the bag clevis pins with a wire hook shown.

Clevis Pin Loop 1
Above. A nifty item was this little loop that could be attached to the clevis pin, for attaching light weight accessories such as binocular or camera straps. I don’t think they were offered by Kelty; probably A16, REI, or Campmor.

Serac Model introduced in 1973

Kelty Serac Front
Above: Front view of Kelty Serac. This is a full length bag with 4 external side pockets and a front pocket under the flap. It was somewhat difficult to stuff a sleeping back into the lower compartment with just a horizontal zipper. This bag had 3 compartments for the main bag. You can see the zipper flap for the middle compartment just below the flap. The bottom section is constructed from Cordura nylon.
Kelty Serac Rear
Above: Kelty Serac (back view). Notice it has a wrap around belt and a cam-lock buckle.
Kelty Cam-lock buckle Serac
Above: Serac cam-lock buckle. The release is made from plastic unlike the earlier metal ones.

Serac Expedition

Kelty Serac Expedition Front
Above: Kelty Serac Expedition Front. This pack is huge! 5 external side pockets (one very long), a pocket under the flap, and a pocket on the front of the flap. The bottom section now has a U-shaped zipper. The bag only has two compartments in the main bag (unlike 3 in earlier Seracs), and the divider can be unzipped to convert into a cavernously large bag.
Kelty Serac Rear
Above: Kelty Serac Expedition Rear. When I bought this pack, I knew I did not want the stock shoulder straps. Notice the upgraded straps include a haul loop, sternum straps and webbing to attach external items. This is not a Kelty option. I think it was made by A-16, and I bought it at their El Cajon store.
Kelty Serac Expedition Buckle
Above: The wrap around belt was still standard, but notice the plastic belt buckle. Somewhere I have a couple extra metal Cam-lock buckles but never got around to replacing the plastic ones, since they have surprisingly has held up.
Kelty Serac Expedition Belt Stabilizer
Above: This belt also had a lifter/stabilizer strap connected to the frame.
Kelty Trio
Above: Kelty Trio (L-R) D4, Serac, Serac Expedition.

Hope you liked this little walk through history.

zPacks Poncho/Groundsheet

zPacks Poncho/Groundsheet on the Appalachian Trail.

The design of the zPacks Poncho/Groundsheet is ingenious. Most poncho/tarps are too big as a poncho and minimal in size as a shelter. Because the poncho/groundsheet only needs to fit inside a zPacks Hexamid shelter, it is much smaller than most ponchos, and is not susceptible to all the hazards of the typical poncho (i.e. blowing around in the wind and catching on brush).

Mine is made from .71 Cuben Tech fiber and weighs 3.4 ounces (96 grams).

Continue reading zPacks Poncho/Groundsheet