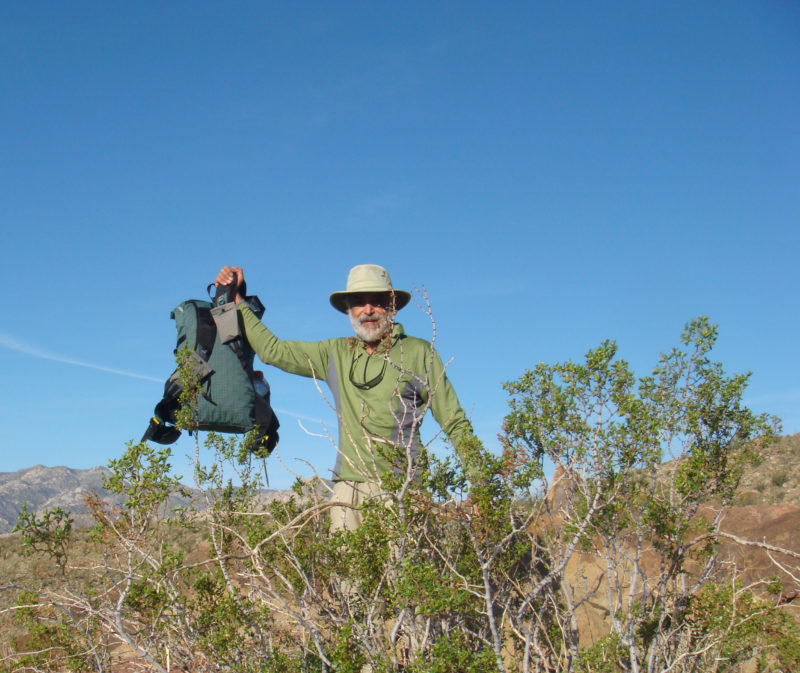
I am not a trekking pole advocate. Folks may counter this by saying I do not know how to properly use them, and this may be true. If a hiker has a physical limitation, they may be of benefit. Additionally if a hiker is expert in their use and maintains a natural walking motion and stride, and correct posture trekking poles maybe advantageous.
Category Archives: Backpacking
The Death of Ultralight Backpacking
I first began a draft of this post this summer. Lately there have been quite a few comments from the Internet backpacking community about the death of ultralight backpacking.
All of this started with a blog post by Andrew Skurka this summer titled, Stupid Light. That post stirred up quite a bit of controversy. I suppose using the word, “stupid” was the catalyst. The gist of the post is that one should choose their gear based on the conditions of the trip, the skill and experience of the hiker. Continue reading The Death of Ultralight Backpacking
Lake Mead Walk-about (2011)
Dad’s Christmas Vacation 2011
FOR NICOLE AND JOE
Backpacking Lake Mead Recreation Area
My Christmas present from Joyce was a “kitchen pass” to go backpacking between Christmas and New Year’s. The week before this we were camping at Lake Mead in the tent trailer.
Usually I hike this time of year in the Lake Mead area of Nevada. But this year I decided to hike into Arizona; into and near several canyons near the Colorado River. Since this is all desert, I would replenish my water every two days working back and forth from the river.
Preparation for the trip was just loading my backpack. Once I got to Nevada, I planned on stopping at the Lake Mead Visitor’s center for the maps I would need. I have been there before and they have a good selection of USGS Topographic maps. Maps are critical, since I would be hiking in the backcountry where there are almost no trails and few people venture to some of the places I would be in. Also, there is no cell phone coverage. The Visitor Center had closed down 18 months ago for remodeling, so I assumed (silly me) that it would be open. Well, it was closed. Still under construction; Amazing! It took 3 years to build Hoover Dam, and the government cannot remodel a small building in 18 months. So I drove to the district office in Boulder City, and they could not sell me any maps because they are in storage and no one knows where. But I could buy plenty of souvenirs. Made a few phone calls, and no maps anywhere. Okay, plan B – I loaded maps onto my iPhone. Kind of risky, because dead batteries or breaking it could be a bad thing. Biggest worry was dead batteries. The morning of the trip, I double-checked all my equipment and NO camera. I forgot it. Well, I could use the iPhone as a camera and risk more chances of a dead battery or breaking it, or drive to Las Vegas and buy a new camera. I decided to risk it.
The start of the hike started from the campground. I hiked through 4 old railroad tunnels cut into the mountains above Hoover dam that were used to bring supplies and construction materials to the dam site. From here I worked my way down to the Dam, walked across it and then walked several miles to a plateau high above the Colorado River, so I could determine where I wanted to go.
Starting point of hike is behind the hill on the left.
I would be walking another mile or so from the vantage point I took the picture of the bridge (above), to get a view of the Colorado River and confirm possible routes to water.The trip started from behind the mountain on the left of this picture. The bridge is the Highway 93 by-pass that diverts thru-traffic away from Hoover Dam, in response to concerns for Terrorist attacks on the dam, as a result of 9-11.
The bridge took 8 years to build, in contrast to Hoover Dam, which took only 5 years to complete. Progress!!
Scouting for a route down to the Colorado River
One thousand feet above the river and no easy way down from here. However, in the left center of the picture is a long canyon that looks like it has easy access, and the phone map confirms it. This means I am going to have to loop around to get to it. So I head east and what do I see?Fortification Hill
This! The map says it is Fortification Hill, but no trails are marked on the map. But it is just sitting there waiting for me to climb it. It is going to be a two day hike there and back to a water source. Not a smart idea to do when one is hiking solo, but then who said I was smart? Later I would find out that this huge plateau was formed by an extinct volcano and parts of the crater are still visible, but filled with rock and dirt.
It looks like the right side can be climbed, but the top looks vertical. Only one way to find out!
A three mile hike takes me to a dirt road that travels to left of Fortification Hill and eventually to the shore of Lake Mead. I plan on following the road for a couple of miles. Once on the dirt road, I find that is not the way to go, because there are a few people driving on the road. Aside from the dust their vehicles create, they keep stopping and ask me unbelievable questions.
Tourist #1: Is this the way to the Dam?
“No. Hoover Dam was built 75 years ago. Don’t you think they would have built an asphalt road by now? Go back a few miles and turn right when you see the sign, Hoover Dam, with an arrow pointing right.”
Tourist #2: You aren’t going to sleep out there are you?
“No, I am walking non-stop to Phoenix. It is only 250 miles away.”
Tourist #3: You aren’t hiking alone are you?
“Of course not. Can’t you see Harvey my pet rabbit?
Tourist #4: Is there water ahead?
“Yes. Drive about 3 miles down the road. You will find 3.8 trillion gallons of water at the end of the road.
Tourist #5: Hey! Can my Civic make it down the road?
“No, the sign back a couple miles ago said high clearance 4WD vehicles only. You have neither.
Tourist #6: Is your pack heavy?
“No, it is filled with a secret formula of gases. 79% nitrogen, 21% oxygen, and a few trace gases make it completely weightless.
I couldn’t take it any longer, so I headed cross country which meant climbing in and out of 3 small canyons to get to the base of Fortification Hill. By now it was getting dark, so I laid out my groundsheet and quilt, and cooked dinner. Temperature would get down just below freezing each night this week.
In the morning it was chilly, so I took my time with breakfast waiting for the sun to hit me. As I sat sipping my coffee, I saw 7 young male Big Horn Sheep practicing head-butting on a ridge. Since it was too far to capture on my phone, I got up and moved closer. They sensed my movements and just stood and watched me. I would see two more of these magnificent animals later in the day.
Big Horn Rams practicing head-butting
By now I needed to get going. I still had not seen a route up the hill, and then it would be over 12 miles to loop back down to the river. Packed up my gear and followed a wash around the south end of the hill. Soon I came to a side canyon that was flowing down from the hill with a sign that said, “Trail Not Maintained. Hike At Your Own Risk.” Perfect, my kind of trail. I followed a faint trail up the canyon, which disappeared in about 800 meters. But it must have been a trail to the top. So I climbed a small ridge that ran parallel to the canyon and found a steep trail that zip-zagged up to the rock face near the top.
Approach to Fortification Hill from the ridge-line
It only took a few minutes to get to the vertical cliff past those huge boulders on the previous page, and I found a route that entailed relatively easy climbing, other than a slip that would turn things into a bad day. Once on the top, I found a relatively flat mesa about ½ mile wide and over a mile long. About a mile ahead was a small summit with a well marked trail in the volcanic rock. For the most part the entire plateau was all volcanic rock with a few plants growing here and there.
This moonscape looking rock formation is what the entire mesa looked like, only most of the rocks were much smaller.It only took a few minutes to get to the vertical cliff past those huge boulders on the previous page, and I found a route that entailed relatively easy climbing, other than a slip that would turn things into a bad day. Once on the top, I found a relatively flat mesa about ½ mile wide and over a mile long. About a mile ahead was a small summit with a well marked trail in the volcanic rock. For the most part the entire plateau was all volcanic rock with a few plants growing here and there.
Here are some views from my vantage point on Fortification Hill
Las Vegas
Hyw 93 Bridge & Hoover Dam using the zoom in my iPhone – sure wish I had brought my camera!
Looking west towards the Colorado River from Fortification Hill
After taking pictures I headed back down to the mouth of the canyon and ate lunch. It was now 12:30 PM and I needed to get to the river before dark, which was 12 miles in 4 hours or so. Ten of those miles were easy downhill ones, in a large sandy wash. I got to the river just before 5 at dusk, with about a half a cup of water to spare. So I had averaged 3 miles per hours, pretty good… but then most of it was downhill. The last 2 miles of this section was fabulous – a long slot canyon with walls several hundred feet tall. Pictures below:
Since it was almost dark when I got to the River, I did not really know what my campsite selection looked like until I awoke in the morning. It was nice, if I don’t say so myself!
So this is the beginning of Day 3, which would turn out to be the most unusual day of all.
The first order of business for Day 3 was to get out of the Colorado River gorge. The gorge got smaller as I went south, but there was no way out of my present spot unless I retraced my steps, swam down river, or found a way to hike out a canyon about ½ mile south of my night camp. So I chose, door #3. A little rock scrambling got me to where I thought the canyon should start, but I could not find the mouth of the canyon. Then I found a small seep of water and followed it. There were a few sections I had to climb some small “run-over’s” and then there was a 20 foot waterfall – dead end; except that someone had placed a ladder against the vertical rock. How convenient. So up I went. And then, here I found two small pools fed by a hot spring. Water temperature was at least 100F. So, it seemed like a good time to take a Jacuzzi!
Stream coming down the steep canyon
It was now around noon, my shoes were dry, so I decided to take a lunch break, clean the sand out of my shoes and put my socks back on. It had now been almost two full days since I had seen another person. So here I am sitting on a big rock and I hear footsteps. Look up and this guy, older than me, is coming down the wash. He was wearing water shoes and carrying a small day pack. That’s it. No clothes, completely naked. He said, “Hi,” and kept walking. I was going to take a picture of him walking away, but then I figured, how would I explain this to Joyce? Since I was hiking in shorts, I took off my shirt and socks, and wore my shoes sock-less. Really nice way to start the day. After a 30 minute soak, I put on my shirt, hoisted the backpack and headed up the canyon. Had to climb up a few small sections of slip-rock, and then it was easy going in a sandy wash, with a few sections of slot canyon work.
The rest of the trip was uneventful compared to the first three days, so here are a few pictures.
Love,
Dad.
P.S. Happy New Year!
Hike to a Secret Place March 2012
INTRODUCTION
This probably going to be one of the strangest trip reports you have ever read. First, I am not going to tell you where I went, and secondly, many of the descriptions and normal logistics will be purposely camouflaged. The area of this hike is rich in Native American Petroglyphs, and sections have been heavily vandalized in the past – over 150 years worth of vandalism.
The area is in a designated Wilderness Area, and the government agencies charged with protecting these lands have limited enforcement resources. The good news is that the Wilderness Designation has significantly reduced travel in the area, by making the use of motorized and non-motorized vehicles illegal. I visited the two agencies that are responsible for managing the area a got little information. Either the employees just did not know anything, or it is policy not to divulge information. I did get all the information I needed for traveling in the area and what the rules are.
SECRET PLACES
I often avoid places that are well publicized on the Internet or which have been included in a published Trail Guide. Some of these publicized places have gems of solitude and beauty if one travels off the recommended “beaten path.” But to me, the absolute best places to go are areas that no one goes to visit – places without trails, without roads, without mention on the Internet, and without Trail Guide recommendations. These places offer solitude. They feature little or no trash, and often no footprints, not to mention a lack of people.
So how does one find a Secret Place?
First step is to get a big map. A State Road Atlas is excellent. Look at places that have few roads or cities around them. From there, go online and look at the USGS Topographical Maps (they are free), or better yet BLM maps (where available) are excellent at only $3.00 each. These maps are 1:100,000 scale. While they won’t tell you where the most exciting places are, over time you will learn to find them. Over the years, using this methodology, I have visited most of the mountains south of Death Valley to Mexico, and West of the Colorado River to the Pacific Ocean. There are dozens and dozens of mountain ranges in this vast area. Some so small you can circumnavigate them in a day and others so large it takes months to truly know them. Some of these mountains I have traveled extensively and intimately; visiting every side canyon, ridgeline and high peak. Others I have just scratched the surface, and placed on my “To Do” list. I do not have a checklist of places to go, but often just head to a place I have never been before.
This trip was my second time in this particular mountain range. I remember the first time distinctly. It was soon after my daughter, Nicole, was born; 1985. On that trip I had crested a desert pass, and below me lay a large “bajada.” A bajada is an alluvial fan of sand, rocks and debris that turns into a fairly flat plain. This bajada was formed by two small mountain ranges and I would be traveling through this to my next water source, which was between 20 and 30 miles away. But I was running short of water. I would either need to rest during the day and travel at night, or find water in either of these two mountain ranges. My map only showed a “dry spring” in one of the ranges. Most would say it was hardly worth the extra time and effort to check it out with little expectation of water. As I traveled down the gentle slope of the bajada, I eventually was directly opposite of the dry spring, and my binoculars showed an abundance of greenery in the area of the spring. To me it was worth the two mile round trip to find out, plus if water was not available it looked like a cool place to rest in the heat of the day. Not only did I find water, but found hundreds, if not thousands, of Petroglyphs. Since I had a time schedule to keep, I could only place a note in my mind that this was a place to come back and explore further. In the early 1990’s this area was designated an official Wilderness Area, giving me hope that it would not be harmed for future generations.
THE PURPOSE OF THIS TRIP
This trip had several purposes
- To walk around the entire mountain range, a hike that would take most people 3 or 4 days.
- Spend time exploring and photographing petroglyphs.
- A shakedown cruise for my new McHale Bump 32 backpack.
LOGISTICS AND PREPARATION
To get to my starting point of the hike, I would need to travel about 20 miles on dirt roads. Not knowing the condition of the roads, and knowing the dangers of this kind of back country driving, I loaded the
back of my SUV with 8 foot boards to be used a sand ramps in deep soft sand, several platforms for emergency work, 14 gallons of emergency water, air compressor, shovels, and extra tools. I got stuck in sand only one time, and two of the platforms got the vehicle moving in a few minutes.
WATER
This is the limiting factor in most deserts. The way I planned the route, I would need to find water in the “dry spring.” If the spring was dry, I would need enough water to hike back to the SUV; I would not have enough to complete the loop. So I left the truck with 2.5 gallons of water in my pack, which weighed 22 lbs alone. I also brought 4 lbs of food, meaning 26 lbs of consumables, which I felt would be a good test for the Bump backpack. I also brought two items I rarely use, Dirty Girl Gaiters and a hiking staff. Knowing that I would be traveling in areas with small pebbles and stones in abundance, the gaiters would help keep the debris out of my shoes. In sandy conditions, I usually don’t use gaiters because sand will pass through the mesh of my shoes anyway. The hiking staff would be helpful in moving rattlesnakes out of my way since early March can mean plenty of snakes, but I did not have to use it. I didn’t see a single snake on this trip. Temperatures would reach a high of mid 80’s and the lows in the 40’s. No rain was in the forecast, but a chance of nighttime winds with gusts up to 50 mph was a concern, so I brought a zPacks Hexamid for my shelter. Instead of the ultralight titanium tent stakes I usually use, I brought 4 Easton 9” nail spikes and 4 SMC snow stakes. They would be able to handle the kind of soil found in deserts. And as it turned out, winds were mild at night with no need to set up the shelter, but there was no wind during the day to help cool things off either.
THE TRIP
Total weight of pack was 35+ pounds. The volume of the main bag is 33 liters. The stays are bent to contour my back, keeping it close to my body, with no weight bearing on my shoulders, effectively transferring all the weight to the double-buckle hip belt.
The only map I brought was the BLM map, as it would take too many 7.5 minute maps. I had studied the more detailed maps in advance, so they were not needed. However, the dozens of washes originating in the mountains were often 10 to 20 feet deep making travel slow and difficult. Such travel was forcing me to consume too much water, so I moved away from the mountain and traveled in the bajada, after exploring to small canyons. Also the terrain between the washes was covered with “moon” rocks, a toe-stubbing, ankle-twisting gauntlet.
The winter had seen little rain in the desert and large blooms normally don’t occur until mid-April. But there was some flowers and plant life that encouraged time out for viewing and picture taking.
McHale Pack. The small volume of the pack bag was perfect at 33 liters. The optional water pocket can each hold a 64 oz Gatorade bottle. I placed the 6 one-litter Platypus bottles in the main sack, much easier to pack than two-liter ones. I also attached the optional hip pockets, shoulder strap pocket and top lid.
Picture of the McHale Top Lid. The top lid is a new design this year from Dan McHale. It is small but extremely functional. There is a second pocket inside made that is very handy for those small items that get lost easily. Normally I strip my packs down for short hikes, but I will probably take this lid on all my trips with this pack… it worked so well and is very convenient.
Every evening the wind picked up, and a wind shirt and beanie kept me warm enough for hanging around camp and doing chores.
The best tent is no tent where the sky is your canopy. So the difficulty is finding a level spot, soft enough ground to keep from puncturing your air mattress, and a wind break from the wind. Trees and shrubs work well to break the wind, but one must be far enough away so nocturnal creatures don’t feel they have an open invitation to your camp. This site offered wonderful 360 degree views, shelter from wind, and early morning sun. What else could one ask for?
People tell me they don’t like to hike alone; they get lonely with no one to talk to. They also tell me they get bored at night, needing reading material or music to keep them company. I don’t understand it. So here is my recipe for a wonderful evening and peaceful sleep…
Red Rock. Watch the setting sun play with your surroundings. Here the normally black mountains are bright red.
Sunset. Watch the sun set. Observe colors and shadows.
Moon. Learn of the night sky. My camp was oriented with the rising moon behind me. When nightfall arrived, I watched Venus and Jupiter play with the horizon. Once they set below the horizon, I observed a nearly full moon and at times looked at it with my binoculars. Soon I dozed off. Awakening in the early morning around 3 AM, the moon was setting and I watched the winter sky, especially the Orion constellation. Next thing I knew it was daylight and I was awakening from a glorious night’s sleep. Pretty simple stuff.
At home, I am not a big breakfast eater, but on the trail it is my favorite meal. Sleeping under the stars means there is little to do when packing up camp, so a leisurely breakfast is always in order, weather permitting. Umm, umm good!
PETROGLYPHS
Vandalism. Here is an example of vandalism, and why I am trying to hide this Secret Place. Although with a little research you can find it. But it is not easy to get to. The petroglyphs that have been damaged in this picture are over 5,000 years old. Scientists can determine the age based on the amount of “desert varnish” that covers them.
The petroglyphs below have remained undamaged for centuries.
I did find water in the spring and was able to complete the loop. Here is my reflection.
Sand Dunes. Many people think of vast mileage of sand when they think of deserts. And sometimes it in abundance. But I walked on very little sand. However in the distance is a dry lake and the wind has created a haze from the blowing sand. Probably hard to see, there are 3 large dust devils several hundred feet tall. But it is relatively calm where I am standing.
Desert Pavement. Desert pavement is the surface that is covered with packed rather rounded rocks. It is so hard that you can drive a vehicle across it at high speeds. Also, allows one to walk quickly!
Desert Pavement
More Desert Pavement.
GEAR FAILURE
I had two minor failures.
The first was a pinhole in my Foster’s can. The can does double duty as my cook pot and drinking cup. My stove, cup and utensils only weigh a total of around 4 ounces. A small pinhole developed right at the middle fold. I have “babied” this can and it has been on many, many trips as you can see from the discoloring. To be honest, I am tired of arranging my pack to put it in a spot where it will not get crushed. So I will probably switch to a titanium pot system. I would much rather put the pot where it makes sense packing-wise and stop worrying about crushing it.
When I was putting away my quilt, I saw some feathers floating in the air. On closer inspection I noticed this tear at the top of the foot box. Since I always put the quilt in the stuff sack, and never have the top of the foot box on the ground, I first thought it might just be material fatigue, but I probably punctured it with a finger nail. The material is made from very thin CubenTech cloth. CubenTech is used to make sails for the America’ Cup racing yachts, light and strong for that application, but somewhat fragile in the thickness for my quilt. The quilt only weighs 12 ounces and is warm to just below freezing.
I also noticed that one of cord loops is pulling away from the cuben. These are the perils of truly UL equipment.
GEAR
The McHale Bump pack thoroughly exceeded my expectations. Handles 35 lbs with ease, and the internal aluminum stays inside the pack are used as the frame, keeping the pack close to my center of gravity. This was an expense that was well worth the investment. The only difficulty through the entire purchase process was figuring out what material to make it from. Dan McHale wanted to make it from CubenTech fabric. I am leery of Cuben for the long term (as you can see in the pictures of my quilt above, as I expect this pack to last for at least a couple decades, and no one has used cuben for that long in a pack to report on its durability. The Cuben that Dan uses is a hybrid with a polyester laminate and he has tested it thoroughly. So I opted for Dyneema X Grid. The fabric Dan uses has the Dyneema threads spaced at 3/16” of an inch, versus the ¼” most of the UL manufacturers use. So his has about 25% more Dyneema thread in it. The pack has a full Dyneema bottom and the back of the straps is also made from full Dyneema. Dyneema is the strongest material known, and has replaced Aramid as the preferred material used to make military bullet-proof vests. The front of the pack has a mesh panel to help with sweat.
Specs on the pack
- Main Bag Volume (excludes any accessories) ~ 2,000 cu in or 33 L.
- Main Bag Volume (including the 11” roll top) ~ 3,000 cu in or 49 L.
- The stays and internal pad are removable. The padded double buckle hip belt is removable.
Options included
- Top Lid
- Water Bottle Pockets (easily hold 2 Liter water bottle); 2 each
- Hip Belt Pockets; 2 each
- Shoulder Strap Pocket; 1 each
Weights
- Stripped down without Stays, Pad, or hip belt = 25.15 oz (1lb 9.15 oz)
- Note: stripped down you can add a simple web belt.
- All Options Included = 51.92 oz (3lb 4.92 oz)
Gear Summary
Anza Borrego (Nov 2011)
Dad’s 61st Birthday Extreme Ultra Light Walk-About
Dear Nicole and Joe,
Thank you so much for the birthday gift. I will put it to good use and maybe even learn something.
It dawned on me that I had not written a backpacking story for you in almost a year, so here is what I did to celebrate my birthday. Hope you enjoy it, I sure did.
Love,
Dad
The “Why”
The stated purpose of this trip was (1) tell myself I am not old yet, and (2) try and hike in various weather conditions with a total weight of gear (carried and worn) under 5 pounds. This does not include the weight for food, water, and stove fuel.
Lake Mead Walk-about (2009)
Dad’s Christmas Vacation 2009
For Nicole and Joe
Backpacking Lake Mead Recreation Area
Planning
This year’s Christmas Backpacking Trip was full of variables. First order of business was when. Originally I was scheduled to take vacation the two weeks before Christmas. This changed at the beginning of December, as I had a couple of special projects that needed to be completed prior to Christmas. So vacation was changed to the last two weeks of the year.
As with any trip, the biggest item is where to go. This year rolled out two options. The Spring Mountains above Las Vegas, including a trip to the summit of Mt Charleston (elevation 11,916 feet) was option one. A loop somewhere in the Lake Mead Recreational Area was the other. I would not make the decision until after Christmas, so I brought an assortment of equipment to meet either option.
We decided to spend the entire two weeks of vacation in Las Vegas. Actually we would camp at Lake Mead and visit relatives in Las Vegas, which is about 30 miles from the campsite. At $10 per night to camp, it sure beats staying in a hotel. Solar power allows us to stay for extended periods without staying at an improved campground. Our tent trailer’s amenities include forced air heating, shower, bathroom, stove, and an oven among others.
We recently added a second solar panel, bringing our total rated capacity to 250 watts. We also upgraded our battery bank, installing two 6-volt golf cart batteries, which are wired in series to provide 12 volts to the camper and a usable reserve of 205 amp hours.
During the past few years, I have embraced Ultralight Backpacking techniques. My Christmas wish list included a pair of MSR Denali EVO snowshoes, which weigh less than 4 pounds. Much lighter than the twenty-plus year old Sherpa snowshoes in my gear closet at around 5 pounds. It is estimated that one pound of weight on the foot is equivalent to 5 pounds on the pack in energy expended. In addition, the MSR’s are better suited for terrain found in mountains. Unfortunately, it appears that this year Santa invested all his resources in making iPods and iPhones, and Joyce could not find a pair of Denali EVOs anywhere. No snowshoes eliminated the Mt Charleston trip. So it was time to plan a loop in the Lake Mead Area.
This is my methodology for putting a trip together. If interested in an area, start with a large map to identify a potential route. From there, obtain more detailed maps to research/plan the trip. Generally, I try to avoid areas with any people, which normally means traveling cross-country.
Lake Mead topographic (often called “topo”) maps can be downloaded free from http://topomaps.usgs.gov. I started with a 1:100,000 map. I roughed out a 4-day/3-night loop. I would travel through north through the Bowl of Fire, east and then south through Bitter Spring Valley, west through Pinto Valley, west along the shore of Lake Mead, and then north along Callville Wash back to my starting point. Since the route only requires two 7.5 Quad maps, I purchased them (Callville Bay and Boulder Canyon). I like these maps best, if not too many are required for a trip. The trip would cover around 50 miles in 4 days. Actually it would turn out to be 3 full days of hiking. 1/2 day each on days 1 and 4.
Here is the first rough sketch of this trip (above). Numbers indicate the approximate location for each night’s camp. The day prior to departure, the Internet predicted zero percent chance of precipitation for the next 10 days. A good sign. However, lows would be close to freezing, and probably colder the first night. And I don’t trust the weatherman. So I brought a shelter.
Housekeeping & Other Matters
The goal of this trip was solitude with no people, and an enjoyable 4 days. Should you decide to make this trip or a similar one, there are a few things to remember:
- Give someone your itinerary.
- Make sure you come back to the planned check-in spot ON TIME.
- The ground in deserts is often rocky or sand and gravel. So, plan your ground insulation appropriately.
- Water is sparse. Do not plan to find water in any spring, unless you can verify availability. In addition, wild burros spoil springs in many parts of Nevada. They can be a real mess. I started out with 6 liters of water. I am well tuned to my water needs. Given the time of year, the terrain, and length to be traveled, I knew this would be ample for two-plus days. However, other times of the year, I would need at least 6 liters a day to hike in the kind of heat that occurs here.
- Traveling in washes is often necessary. Washes can be dangerous due to flash floods. Flash floods can happen even if it is not raining where you are traveling. The water can originate in areas far from your location.
Day 1
Joyce dropped me off in the late morning on Northshore Drive (Nevada HWY 167) where Callville wash crosses under the road. I gave her a copy of my itinerary, should I not return on time in four days. We agreed that she would pick me up between 3 – 4 pm on Wednesday December 30th.
The air was brisk; perfect hiking weather. Blue skies with a couple wisps of clouds indicated good weather for the coming days. The route started northeast along Callville wash towards the Bowl of Fire. Vehicles are permitted to travel in the wash, but nowhere else. At about 1.5 miles, a small wash intersects from the north and leads to the Bowl area.
The red rocks of the bowl can be seen from the wash in the background. This area is part of the Muddy Mountains Wilderness Area. Those rocks by the pack are actually light bluish, so the color is correct.
The rock formations are so enchanting; it is difficult to concentrate on hiking. This is where one must be careful. Keeping eyes on the ground when walking, and stop to admire the scenery or take pictures. Since there is no trail through the Bowl, it takes an effort to keep one’s eyes on the route ahead.
The formations here are sculpted sandstone… sculpted by eons of water and wind erosion. About 300 million years ago, this area was sediment at the bottom of a sea. And the pictures do not do the area justice. Close inspection of the formations reveals nature’s amazing skill at sculpture. One could spend days in the Bowl, put I had a schedule that had to be met. And it was not my first visit to the Bowl.
The route would travel north through the Bowl, then turn east towards Bitter Spring Valley. Although it looks flat on the map, Bitter Spring Valley contains numerous
rolling hills with hundreds of small washes dividing them into smaller parcels. It is not difficult walking, but not as easy as it looks on the map! Navigation is easy; just keep heading toward Echo Hills, which is prominent on the map. Eventually, I hit the east fork of Callville Wash again. After a mile or so, I found a side canyon with several “no motor vehicles” signs, so it looked like the perfect route to take. As I entered the mouth of the canyon, there was a huge chain blocking access to any kind of vehicles… just my kind of place. The wash gained elevation for about a mile or so, and I was soon on a large hard gravel plateau. The sun was setting, and it was getting cold fast. I laid out my bed, and cooked a gourmet meal of freeze-dried lasagna. While enjoying a couple of cups of hot chocolate, I watched the nearly-full moon for an hour or so, with my sleeping bag draped around me. Then I crawled into the bag and went to sleep. The temperature would eventually drop into the 20s F.
Day 2
In the morning, I woke to a gray and dismal sky and it was cold. It felt like rain or possible snow. So much for the weatherman. I gradually headed southeast in the general direction of Echo Hills. West of Echo Hills is a large wash that drains north from the pass above Pinto Valley. This wash would take me to Hwy 167, just below the pass into Pinto Valley. Crossing the road, I climbed about a mile until I could see Pinto Valley.
The wash flowing down from the pass was not easy hiking and I moved westward towards a large hill, where I found an old jeep trail that took me to the top of a hill looking down into Pinto Valley.
A pleasant surprise was the number of red sandstone formations at the east end of Pinto Valley. I was expecting dark volcanic rock that is typical in this part of the Black Mountains.
Pinto Valley is a long narrow valley. From the east end of Pinto Valley a wash heads downhill for a few miles to a junction with two other washes, which is located in the center of the valley. The largest wash is Boulder Wash, which flows down from the west end of Pinto Valley, and another (unnamed) wash, which flows from a pass leading down into the Rotary Cove watershed into Lake Mead. Once I got to the junction of the 3 washes, I would head up the unnamed wash.
However, the goal for Day 2 was to camp just before the junction of the three washes. It was still overcast and felt like rain, so locating a campsite on high ground above the wash I was descending was my primary focus as dusk approached.
About ½ mile from the junction, was a perfect spot; a small plateau about twenty feet above the wash. In addition, the plateau was one of the few areas along the entire length of the day’s hike that was not covered with rocks. It was getting windy, so I decided to set-up my tarp and cook dinner as soon a possible. I figured there was a good chance of rain, but the setting sun gave me hope for good weather the following day.
Dinner was freeze-dried Macaroni and Cheese. It was not as good as the previous night’s dinner. I ended up eating only about half of it. After dinner, I sipped a couple of cups of hot chocolate, while sitting in the comfort of my shelter, listening to the wind beating against the sides, and watching the occasional moon beam shooting down through a rare gap in the cloud cover.
Day 3
Although there was a steady wind during the night, I slept well. Surprisingly, there was no rain. The morning sky was blue with a few white clouds. I cooked my usual breakfast of two packets of instant oatmeal, along with a cup of instant coffee. It does not get much better that cooking over a tiny stove in the wilderness, as the sun rises. Well, okay… not cooking, but boiling water.
As the day progressed, the cloud cover would increase during mid morning and by late afternoon would become all blue with not a single cloud at all.
Today I would hike up no-name wash, from the three-way junction of washes in the center of Pinto Valley and then down into Rotary Cove on Lake Mead. From there, I would generally follow the shore of Lake Mead, west to Finger Cove. I had some concern about traveling from Rotary Cove westward, but more about that later. For now, I had to hike up to the pass. Actually, it was easy hiking along no-name wash, with some nice rock formations.
Moving downhill towards the lake, I got into a rhythm and moved steadily without an awareness of my surroundings. After a while, it dawned on me that I was traveling in a state that was oblivious to environment around me. So I stopped to take inventory of my surroundings. To my right was a small plateau overlooking the wash. I sensed something was watching me, and then it dawned on me why I backpack…
Why I Backpack…
Big Horn Sheep are elusive animals and are sensitive to any encroachment in their territory by man or other animals. They are infrequently seen, and they inhabit remote mountainous areas that normally feature cliffs and other inaccessible terrain. They graze on steep hillsides that are close to cliffs, which allows for quick escape. They obtain enough water from plants, so they only need to drink from permanent water sources every few days. They are amazing climbers, adept at traversing cliffs and traveling on ledges only inches wide.
After the rush of excitement the Big Horn herd gave me, I turned my attention back to the hike. It was easy-going. This picture shows a 200-foot tall sand dune (it is the white patch in the picture).
I would need to get to the dune, which is on the west of Rotary Cove; opposite the side of the cove, I would reach at the bottom of the wash. The Topo Map showed that during normal lake levels, it would be very difficult to get to the dune by traveling along the shore. Since the lake is at its lowest level in history, it might be possible. The Topo Map also shows the elevation lines of the area which is normally under water, and that was not very encouraging either. However, if I were to travel out of this canyon before reaching the lake; over to the next canyon, which drains into Rufus Cove then, I would be fine for the rest of the trip. There is a 60-foot dry waterfall in that canyon, so one needs to cross in front of the waterfall if possible. Otherwise, if the crossing is made above the waterfall, it will be necessary to cross into a second canyon and then descend down to Sandy Cove.
Below is the topo map showing Rotary Cove and the route options (green and blue lines). No matter which route I took, I needed to hike down to the lake to get water. Since I would hike past the optional route, the plan was to try to hike along the shore. If it proved too difficult, I would simply go back and take the easier route. Since I was hiking alone, I would not take any unnecessary chances.
The canyon begins to narrow as I approach Rotary Cove.
Since only had one liter of water left, and it takes 4 hours for water purification tablets to completely purify cold water, I needed to refill, no matter what route I was to take to move westward along the shore of the lake. It was just about noon anyway; so perfect timing for lunch and a little strategy session.
After lunch, I climbed a hill to scout my options. Here is the view from this hill, looking south across Lake Mead. You can see that the lake is down about 100 feet in elevation from its all-time high, and around 70 feet lower than the historic normal average. The shoreline at Rotary Cove is probably at least ¼ mile further out than average.
With the low water, Rotary Cove has several “fingers” in the water, which run back to a steep hill. In between each of these fingers, the lake fills the space. Although I could not see all the details of each finger, it looked promising to work my way up and over each finger, until I reached the sand dune. I would need to walk the ridge of each finger towards the lake, then descend down the side of the finger towards the back where it connected to the hill, walk around the edge of the water, and then climb up the next finger; working my way up and down; forward and backward on each finger. The hill connecting the fingers was too steep to climb. The other option was to hike back up the canyon and climb over to the next canyon above Rufus Cove. With hindsight, I recommend this route.
The route over the fingers went well until the last one. The last finger was just opposite the destination sand dune. As I descended this last finger, and worked by way back to the hill, I saw that back of the finger was a straight cliff into the water. No way to work around it. However, it looked like that back of this finger did not connect to the hill, but to another canyon. However, I could not get an angle to see for sure. In addition, I had moved far enough around the hill, that it looked like I might be able to climb up over into this little canyon, if it existed. I would need to climb up to a pinnacle above me to survey my options.
Here is a picture I took later. Above the white bathtub ring is a dark outcropping. I climbed up through the gap on the right side of the outcropping. Definitely Class 3 stuff. On the other side, was a canyon leading to the finger. However, I could not see how far back the lake reached into the canyon. If it was too far back, the canyon wall on the opposite side was too steep to climb. If it was not too far back, it would be an easy walk to the sand dune. Also, from the gap, it was too steep and loose to climb down into this new canyon without ropes. There was a sheep trail along the length of the outcropping on the backside. I would need to take this trail along the back just to see if I could get down into the canyon. Even if I descended into the canyon, I still would not know if I could get to the sand dune. I would have to climb down into the canyon and walk to the lake to see if I could continue around to the sand dune. So I took the trail to see if there was a route down to the canyon. I was now at the left side of the outcropping in the picture, but on the backside. There was nice chute going down. Once on the canyon floor, I walked back to the lake finger, and there was a clear shot on the other side to the sand dune. Knowing what I know now, I would have backtracked and climbed over to the Rufus Cove Canyon. Would have been quicker and easier.
While I was working my way around the outcropping, I noticed this fellow above me on the ridge across the canyon. He just stood there watching.
View from the Sand Dune looking back at Rotary Cove. I had traversed most of the bathtub ring in the picture below, from right to left.
View from the sand dune looking across the ridge down into Rotary Cove. Going right to left, I had traveled along most of the bath tub ring.
Turning 180 degrees from the point where the picture above was taken, the picture below shows the ridge connected to the tall sand dune and looking westward across Mead. From here, the route would be down this ridge to the shore of Lake Mead. I would then be traveling along the shore until Finger Cove.
Although the Topo Map shows most of the shoreline ahead to Finger Cove as sand, about 50% of it is rock. The shoreline along most of this route slopes down to the Lake. The easiest hiking is to travel about midway in the bathtub ring. The action of the lake over the years has actually created a terrace-like effect. The terraces can be up to two feet wide, and easy walking. When you come to a terrace that has been washed out, you can move up or down to the next level terrace. In addition, the terraces are not continuous, as washes or small canyons, which require hiking inland, across, and then back to the shoreline, frequently interrupt them. When you get to Fire Bowl Cove and Finger Cove, their slopes are very rocky and unstable. Not too difficult, but one needs to take their time to avoid slipping or injury.
Finger Cove
I arrived at Finger Cove around 4 PM. There is a small section that has a sandy shore, although somewhat sloped. However, it is terraced and very easy to find a level spot. I decided to sleep under the stars, since they sky had cleared and a full moon was rising.
Here is campsite for the night. Notice how is parallel to the shore, using the terrace to ensure a level bed. Even a slight incline leads to a restless night’s sleep for most people. It is important to choose your site carefully to account for terrain, weather and of course a view. Whenever possible, I sleep without any shelter so I can enjoy the night sky.
After setting up the night camp, another gourmet meal was prepared. Tonight would feature freeze-dried spaghetti in meat sauce. Again a couple of cups of hot chocolate would accompany the viewing of another glorious sunset. Wished I had brought some wine, but it would have added additional weight.
Day 4
Completing the Loop
This would be a leisurely day. I needed to return to the Junction of Callville Wash and Northshore Drive between 3-4 PM where Joyce would pick me up. The plan was to hike along the side of Finger Cove, until I could cross over to the ridge on the other side. The ridge also looks down on Callville Bay, and creates the eastern boundary of the bay. I would continue on the ridge until I was north of the high-level watermark of the bay, and then climb down a canyon. The picture above shows the route along this ridge. The trail shown is a Big Horn Sheep trail, not man-made. In fact, I did not find a singe shoe print anywhere. If you look at the left side of the picture, you can see a sliver of Finger Cover. The right side shows the terrain of Callville Bay, which is now exposed due to the low water level. It would be extremely tough to try to descend into this area. The bay does become flat further north, but I would not drop into the now dry section of the bay due to over growth of shrubs and such.
Hiking around the now dry part of Callville Bay is not easy, so I would travel along this ridge until a canyon would drop me beyond the point of the high water mark of the bay. From here, I would walk outside the high water boundary of the bay, until I reached Callville wash, which flows from the north. Once I got to the spot where Callville Wash flows into the bay, I would follow it to my starting point.
Most people never get to see a Big Horn. Here is what their droppings look like. Find a lot of this, and eventually you may see one. In an emergency you could probably use it as fuel, although I have never tried it. The ridge was covered with the stuff.
Callville Wash
The wash is mostly wide and flat. It is also open to 4WD drive vehicles. Although, there are a couple of spots that require skillful 4WD drivers to pass. Since it was Wednesday afternoon, I didn’t expect so see anyone in the wash… or perhaps it was just wishful thinking.
As I traveled up the wash, I found these gals watching me. If you look closely, you will see two Big Horn sheep on the ridge. Below these two, this fellow was also watching. Hard to see… look at the lower center of the picture below.
Further up the wash, I turned around a took a picture of the ridge the sheep were. I felt good about seeing them, as it is easy not to pay attention to your surroundings on this kind of hiking terrain.
And turning around looking up the wash (above), is where I am heading. The rose-colored peak in the far distance (top right) is just behind the spot I would met Joyce. I got there right at 2 PM, and she picked me up at 2:30. She was the first person I had seen in 4 days. All-in-all a great adventure!!
Ultralight Backpacking
Ultralight Backpacking is a process of evaluating equipment and using gear made from the lightest and most durable materials possible. It starts by evaluation of the “Big 3” weight items: pack, sleeping, and shelter. Most backpacks are heavy, because they are designed to carry heavy loads. As you lighten your equipment, you can use a lighter pack. And as you lighten your pack, you no longer need heavy hiking boots. I now hike in shoes designed for trail running or cross country racing.
For example, I used to carry my gear in a Gregory Whitney 95 (6lbs 9oz) or a Kelty Serac (7lbs 2oz) backpack.
My 3 season Sierra Designs Clip Flashlight 2 tent, weighs in at over 4lbs with the ground sheet.
And my older heavy down sleeping bag is close the 4 lbs also.
The total of these 3 items is 15lbs before adding any other gear. The total of all my gear (excluding consumables) for this trip was 7lbs 15.4 ounce, which is almost as much as my old packs empty! In addition, I carried several heavier items to handle the cold temperatures. Last spring on a 3-day trip, the total weight of all my gear was less than 4lbs.
Gear List for this Trip
Lake Mead Walk-about (2008)
Dad’s Christmas Vacation 2008
FOR NICOLE AND JOE
Backpacking Lake Mead Recreation Area
This trip report covers a 4 day hike I did at the end of December, 2008. At the time, it had never occurred to me to document one of my trips. I did bring a camera on the trip, but really didn’t plan on taking many pictures.
The reason I decided to document the trip, is because it was a turning point for me to truly go “ultralight” on every trip (winter snow trips excepted) from that point forward. On this trip my pack base weight was less than 18 pounds. Base weight is everything in your pack except consumables such as food, water and fuel. In the backpacking world that is categorized as “light.” I have always been a light backpacker, versus the traditional backpackers whose base weight is over 20 pounds, often over 30.
Prior to this trip I had done many trips in the “ultralight” range, which is a base weight under 10 pounds. The reason I carried more weight on this trip was due to the fact that I would be traveling alone and mostly off trail. The terrain would include lots of travel in, over, and out of canyons. Lots of rocky terrain, and there would most likely not be any water sources during the first two days. I would need to carry almost 17 pounds of water at the start of the hike.
Upon completing the trip, I was certain that and ultralight kit would be just as safe, maybe even safer – one is more sure-footed the lighter the pack. I would do a similar trip the next year in the same area and my gear was considerable lighter. (see Dad’s Christmas Vacation 2009)
The important fact about going ultralight is not about weight; it is about experience and skill. Reducing weight is about knowledge and applying that knowledge to everything you do. You no longer need to carry much gear “just in case” something happens, but you need gear based on the expected conditions. Additionally, the lighter you go, the faster and further you can travel in a day and that often means less water for to carry. Water can get heavy and boring quick!
Here is a comparison:
Trip Preparation
Joyce and had planned to spend the last two weeks of December at Lake Mead in our camper. I decided to take a 4 day backpacking trip and it would give Joyce a chance to visit her mother in Las Vegas. I didn’t have time at home to plan a route and decided to stop the the Lake Mead visitor center and get some maps. At the center I looked over a large map of the area and then bought some topographical maps for the areas that interested me. I then laid out a route while we were at the campground in our camper. This is what I came up with:
- Day 1 I would hike up a wash to what looked like a small slot canyon; or more precisely a “narrow.” Hopefully I would be able to hike through it, and not over. Once I got out of this slot, I would continue up the wash for a coupe miles. At this point I would head up and over a mountain and then descend into a red rock area called the Bowl of Fire. I would spend the night in the Bowl.
- Day 2 I would hike eastward and then enter the Pinto Valley. From here I would work my way down to Lake Mead, where I would need to get water. This would mean almost two full days without a water re-supply. I would spend the night near my water re-supply.
- Day 3 I would hike along the shore of Lake Mead and explore some side canyons. Again I would spend the night on the shore of the lake.
- Day 4 I would hike away from the Lake and meet Joyce at the designated pick-up point in the late afternoon.
Day 1
Joyce dropped me off about a mile away from the wash. We said our good-byes and I headed cross country for the wash. The temperature was probably in the 60’s and pleasant to hike in. In my pack was a down jacket and a 20F rated sleeping back, as the nighttime temperatures would dip into the 20s. Soon the wash narrowed and rock walls began to close in. I passed an old mine. Pictures below.
Slot Canyon
The rock walls got closer and I found myself at the mouth of the slot canyon. The slot was easy to navigate and there was quite a bit of standing water from a recent rain. Pictures below.
Exiting the Slot Canyon
Looking back at the slot canyon.
Exiting the narrows, I headed up the wash to the point I would climb up and over into the Bowl of Fire. Checking my map, the climb seemed much steeper that the map showed. I triple-checked the map and was certain I was at the right place. Slowly working my way up, the route was fairly difficult and took much longer than I anticipated. I finally got to the top and looking down into the Bowl of Fire, could not see any feasible way down. The slopes were much too steep and treacherous to try. I must be lost, I thought. I sat down and consulted my map, and it appeared I was in the right place, but there was no way I was willing to try and get down, seeing that I was hiking solo.
View down to the bowl of fire.
Another view of the Bowl of Fire.
The map was printed by the United States Geological Survey (USGS). The map scale was 1:24,000. I had been using these maps for almost 40 years. The elevation is marked by contour lines that are spaced at 40 foot intervals. The closer the intervals, the steeper the terrain. Everything look correct. I triangulated my position using my compass, and I was in the right spot. Then I figured out the problem.
Seems the map had been created by metric communist wacko. A note at the bottom of the map stated the contours were 20 meter intervals. That means they were more than 65 feet apart; meanig the contour spacings were 65% greater than a “real” map. Communist Bastards!
Now it was getting late, it was getting cold, and the breeze was picking up. I decided to make dinner and develop a new route. A new route is a cardinal sin. I have left my route with Joyce, and should I get injured or lost it would be difficult for anyone to find me. Oh, well… I never follow rules anyway. I finally decided to continue up the wash in the moring and then circle back to the Bowl of Fire. This would put be a day behind, so I would need to take another route to Lake Mead — needing to get there for water — I would be getting to the lake a day later than planned. Because I had found standing water in the slot, I knew I would be able to find small pools of water the next day.
Looking down the route I had climbed up. Returning was not going to be easy.
Tomorrow morning I would need to exit the gap in the background and then circle back to the Bowl of Fire.
Day 2
Climbing up the day before had been quite trying, and now I knew why… it was steeper than I had thought. Going up is always easier than going down, and I found the return to be rather frightening. A couple times I had to remove my pack and lower it with some spare cord I had brought. Not to mention some areas of slippery footing. Taking my time, I made it down to the wash without incident. The hike up the wash, then to the Bowl of Fire went without incident of difficulty. I spent the afternoon wandering around and collecting water. A great day of fun!!
A little barrier in the morning. Up and over!
A little bit of water. It is frozen, so that confirms my guess that it got well below freezing the previous night.
Rock formations in the Bowl of Fire.
Day 3
Originally the plan was to be at Lake Mead at the end of Day 2. Now I would need to hike to the lake and I knew that water would probably be difficult to find in this part of my hike. My plan was to enter the opposite end of Pinto Valley as planned, then turn out of the Valley to a pass that would drop me into the lake basin. Even with the communist map, it look fairly straight forward. And again, I was traveling where no one would look for me should I not return on time. Additionally, this area had no trails and few visitors. This must be the definition of adventure.
I filled up my water bottles here, figuring it would be the last available water until I got to Lake Mead. I was right.
The hike to the pass was straight forward, and a small portion even had a trail. Once I got to the pass, the route looked reasonable.
The pass is at the left of the long ridge at the top right of the picture.
This pass would drop down into Lake Mead.
Looking back at the Bowl of Fire from the pass. The large mountain on the right is where I spend the night on Day 1.
From the pass I would travel down a wash/canyon that ended up at the shore of Lake Meade. About half way down I got to a “pour-over” that was at least 30 feet vertical. There was no way to get around it, as there were steep walls on each side of the canyon. I hiked back about a half mile and then out of the canyon, working my way parallel to the lake, and descending to another wash. This required quite a bit a bushwacking, but soon I was in a wide gentle sloping wash that gradually dropped down to the lake. It had been a tiring day, but all ended well. I would need to get a good night’s sleep because I was much further from my pick-up point and I would need to hike 30 miles the next day to make sure I got to the pick-up point on time.
It was going to be a cold night with a chance of precipitation so I pitched my Wild Oasis shelter.
Sand dunes behind my lakeside campsite.
Day 4
Today’s hike would be easy in terms of terrain, just long. And I got to the pick-up point at 4:00 PM. Joyce had gotten stuck in traffic and arrived about an hour later. And this trip ended up being another excellent adventure. Because I had lost almost a full day getting to the Bowl of Fire, I was not able to travel through Pinto Valley, something I had been looking forward too. But I would do that the following December.