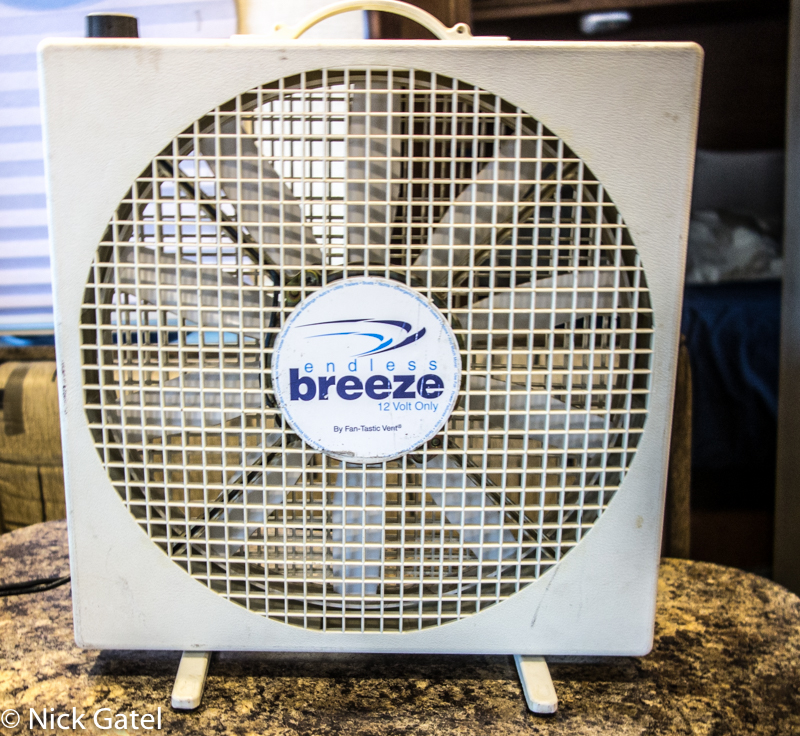
We’ve owned this fan for 19 years. It is reliable and durable as I mentioned back in 2017, which was a 14 year review.
But there has been one nagging inconvenience with it ever since we bought our 2014 Milan Travel Trailer. It isn’t a problem with the Endless Breeze. It’s a problem with our bedroom.
In this post I share how I fixed that inconvenience.
The Problem
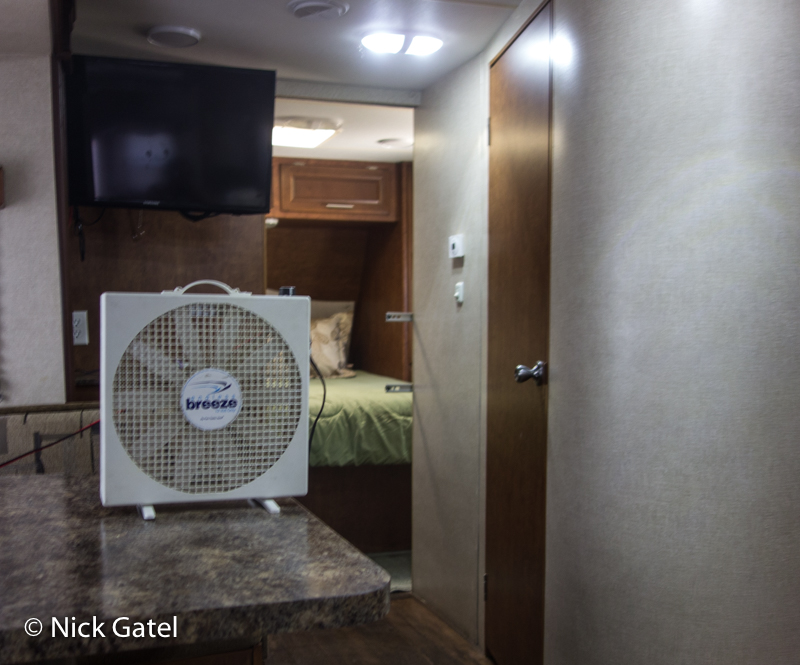
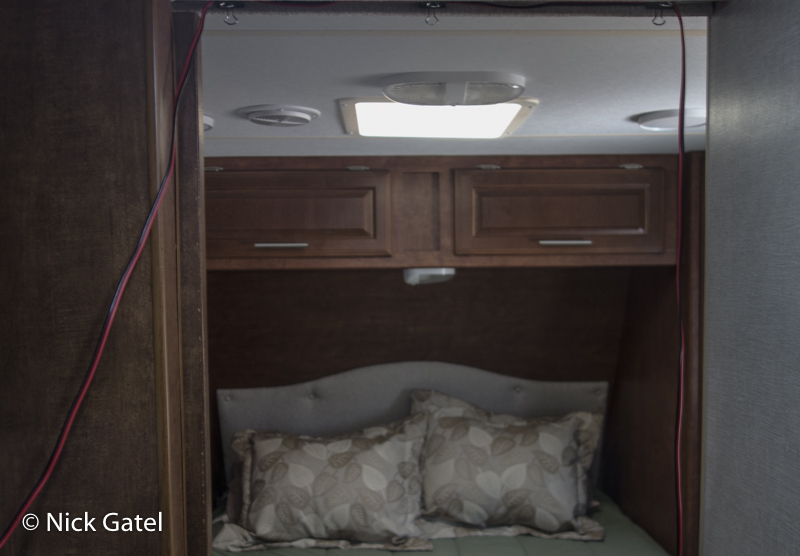
The Endless Breeze is a tabletop box fan that runs on 12 volts DC. Unfortunately there are no tables, nightstands, or shelves in our trailer’s bedroom. There is enough room in the bedroom to walk around the bed, but nowhere to set the fan.
We mostly use the fan on warm nights when we go to bed. An ideal spot for the fan at night would be in the doorway. But our tables are too short to be of use. I had resorted to hanging the fan from the sliding bedroom door track using a coat hanger, which was somewhat precarious. Luckily it never fell off.
Finally, after 8 years of fiddling, I spent some time devising a solution.
Drawer Slides to the Rescue
Yep, drawer slides. You know, the hardware used for drawers in kitchen cabinets and bathroom vanities.
Our Endless Breeze Fan is just over 14 inches wide. I figured 14 inch full extension slides would be hidden when our fan would be retracted. They would also be long enough to provide ample air flow. However, 16 inch slides would allow the fan to extend fully into the doorway.
https://www.amazon.com/HOMANDS-Drawer-Slides-Mounting-Screws/dp/B09WRVZHDG/ref=sr_1_1?crid=172WORS9VJXWC&keywords=B09WRVZHDG&qid=1704508170&s=hi&sprefix=b09wrvzhdg%2Ctools%2C279&sr=1-1&th=1
On the other hand, 16 inch slides would look kinda ugly when the fan was retracted.
I went with the 14 inch, Full Extension, Self Closing Cabinet Drawer Rails (think secure when traveling) .
Installation was Simple
Each drawer slide has two pieces. One is attached to the drawer (or in our case the fan box) and the other is attached to the inside of a cabinet (for us it is the wall).
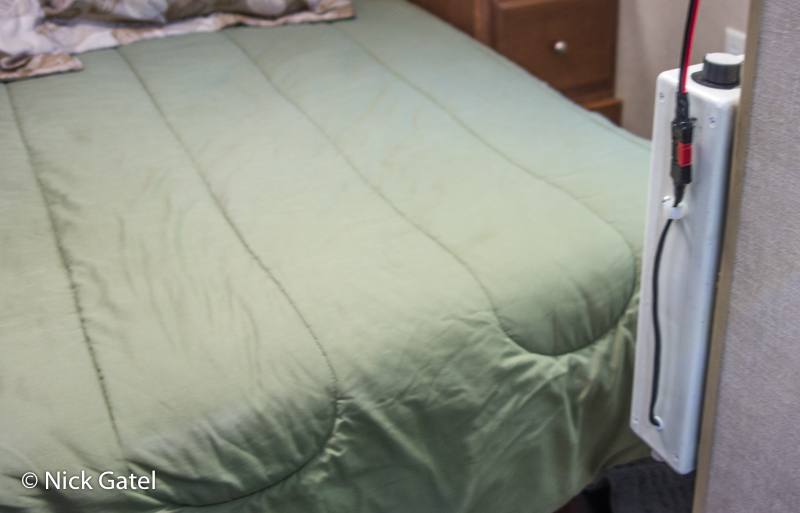
I wanted the fan to be located at a height just barely above the level of our bed.
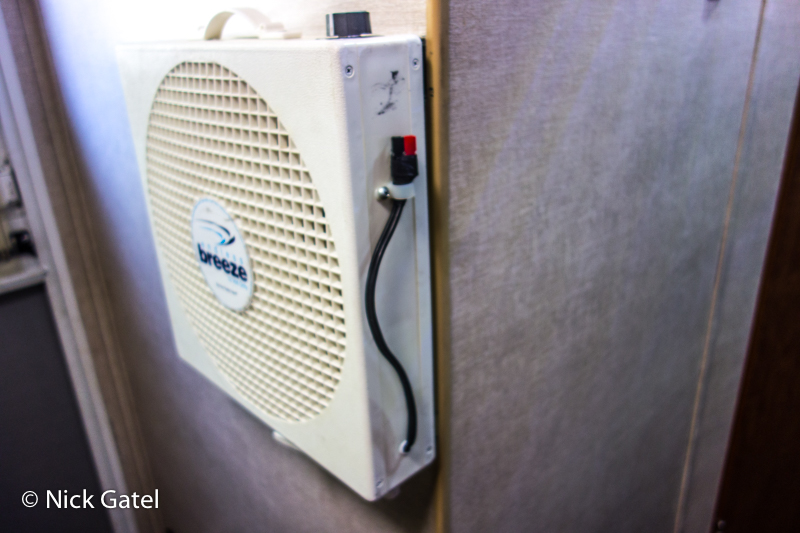
Attaching Drawer Slide to the Fan Box
- Separate the front and back halves of the box by removing the screws (if I remember correctly, there are four of them)
- Separate each drawer slide parts (one mounts on the fan, the other on the wall)
- There are several holes in the slides for mounting, and I used the ones that would not interfere with anything inside the fan (lay the drawer slide on top of the rear half of the box)
- Mark and drill holes
- Secure drawer slide with small machine screws, flat and lock washers, and nuts
- Reassemble the fan halves
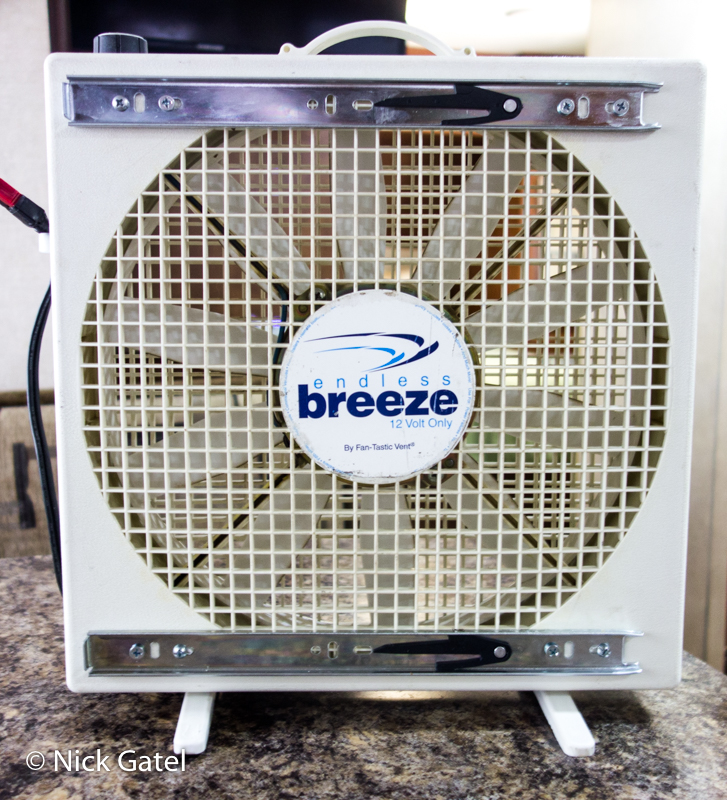
Rear of fan with one half of the drawer slide attached
Mount the Matching Sections of the Drawer Slides to the Wall
- Measure Twice
- Make sure there are not any wires, plumbing or other things behind the mounting surface that can be damaged
- Make sure the mounting surface can hold the weight of the fan and drawer slides
- Measure Twice, Drill Once!
- Attached the rails to the mounting surface
- Slide the matching rails and the fan into the wall mounted rails making sure the locks click into place
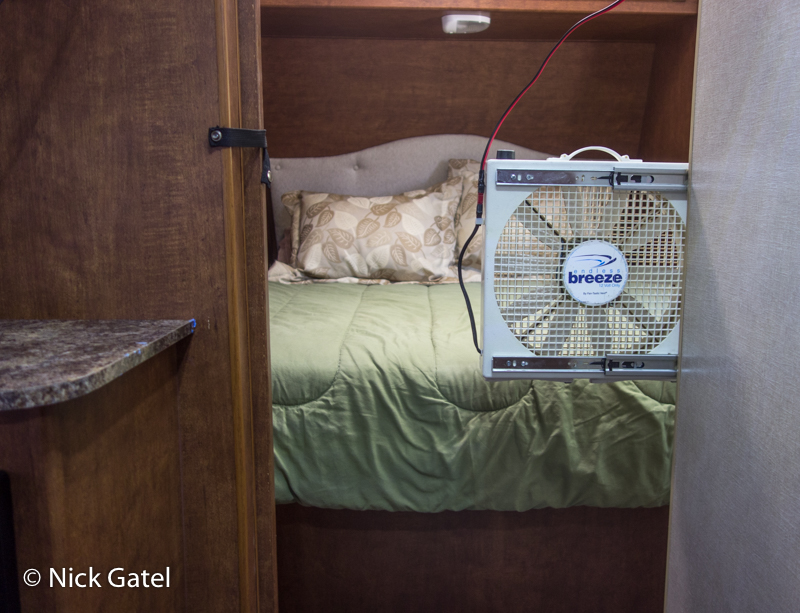
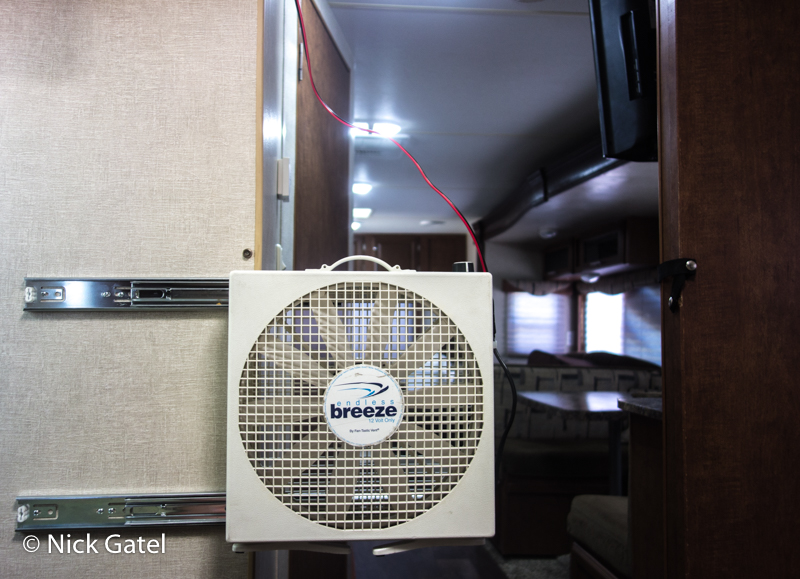 Fan in the extended position
As you can see (above) the fan blade just clear the wall. At night, to get through the entry, it is simple to push the fan into the retracted position.

If everything was installed correctly, pushing the fan should lock it into place. To extend the fan, just pull it out with a little bit of a tug — just like a drawer. The fan stays in the retracted lock position when towing the trailer.
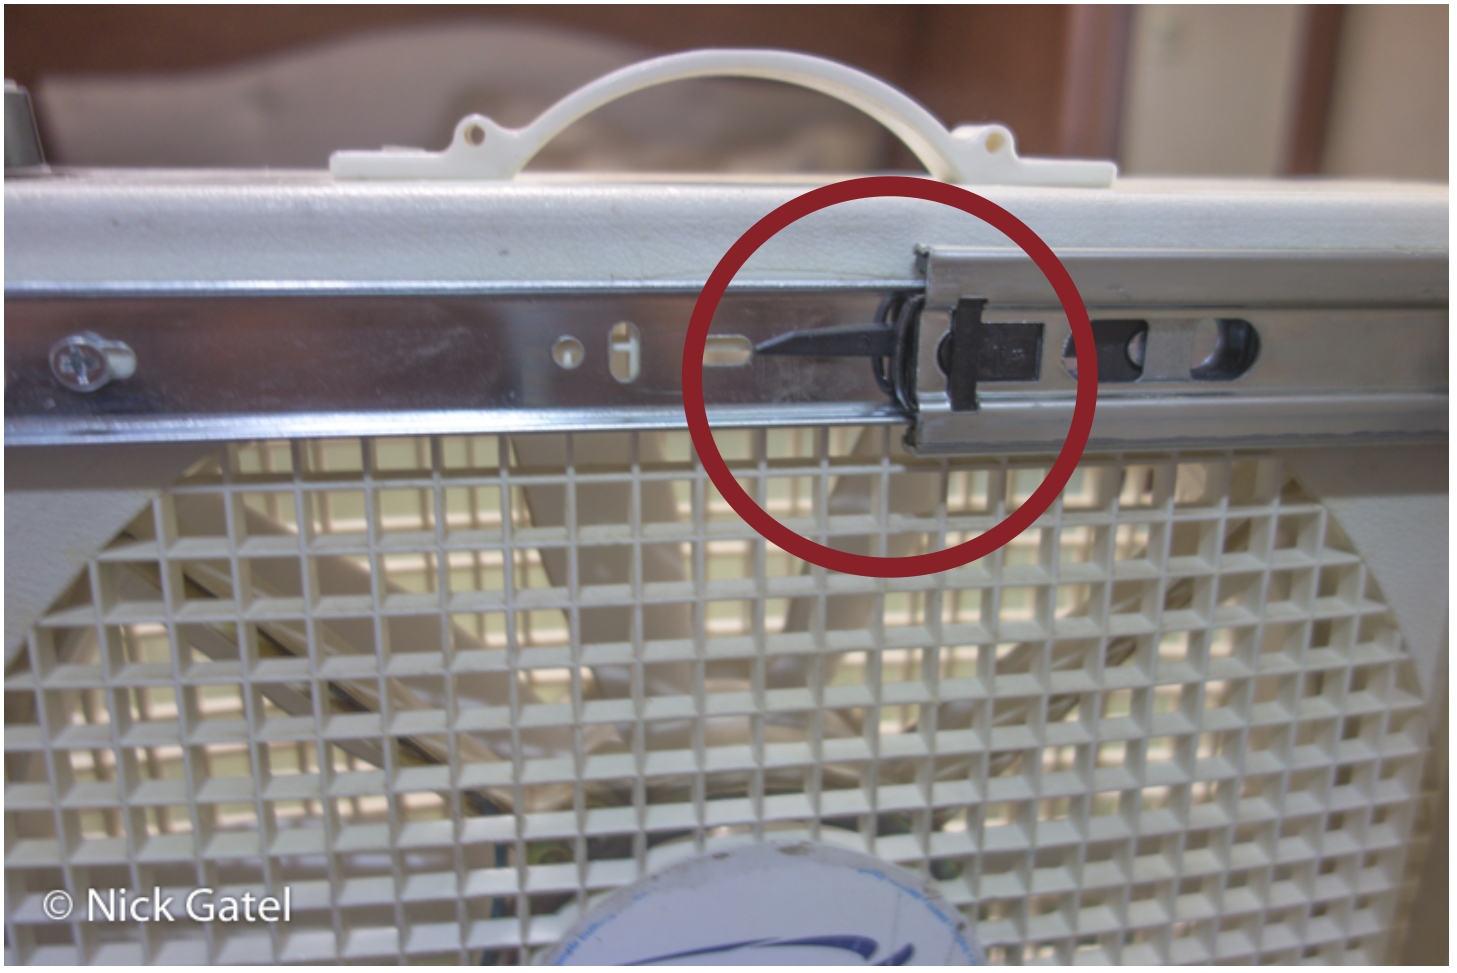
Removing the Fan for Tabletop Use
- Extend the fan drawer slides
- Push the locking tab on each slide mechanism (see image below)
- Pull the fan out of the wall mounted slide
The fan is ready to be moved to another place in the trailer, usually a table or counter top.
Don’t Trip!
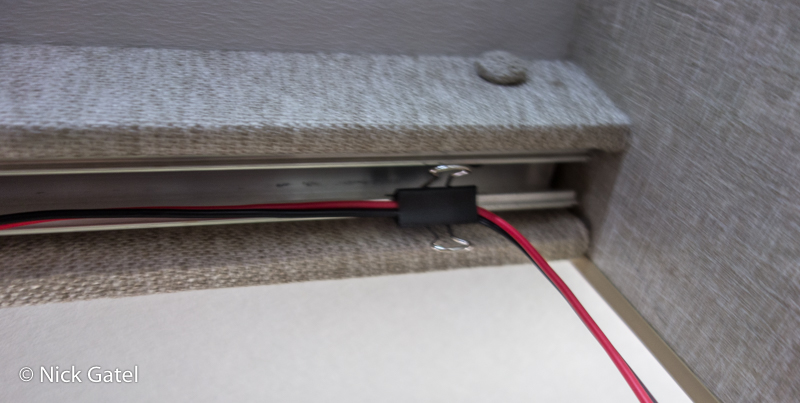
At night with the fan on the wall, the power cord crossed the threshold of the doorway. A potential tripping accident waiting to happen. So I cut out a section of the power cord and built an extension cord using much heavier wire (12AWG) to compensate for the longer wire run.
With the now longer power cord, I can route it so there is no chance of tripping. What I did, is run the wire along the top of the sliding door track, attaching the cord with binder clips that can be quickly removed.
Now for the Bad News 🙁
It seems, like all great products, the Endless Breeze 12 Volt fan has been discontinued. Or at least, I can’t find one in stock anywhere. Plus Dometic the manufacturer no longer lists it on their website.
Alternative 12 Volt Fans
Nothing out there I can recommend, since I need to do long-term testing to give something a positive okay. But here are some possible options on Amazon.
This website may be compensated for linking to other sites for sales of products. As an Amazon Associate I earn a small fee from qualifying purchases at no additional cost to the purchaser.