Senior Moments

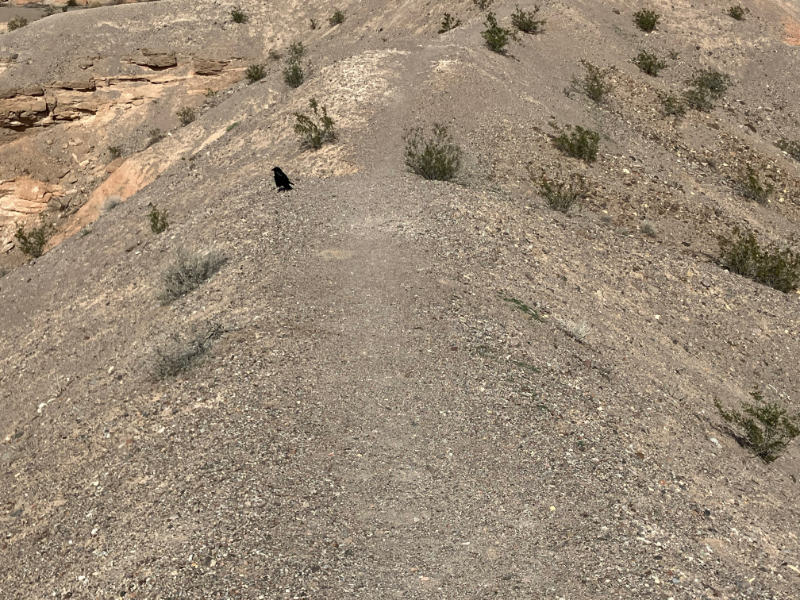
A common fall or slip for backpackers is on downhill trails similar to the one pictured above. These kinds of trails can be difficult for anyone, especially for us older folks whose reflexes aren’t as quick as they once were.
What is probably more important than the kind of footwear we wear is our hiking technique, although footwear can play an important part. Proper technique and footwear will minimize slips and falls.

Downhill Walking Technique
When hiking downhill our brain often tells us to stand upright to fight gravity.
Standing upright does two things we do not want. First it places our center of gravity over our rear leg. Second we tend to stride with the front leg completely extended, which will tire our muscles more quickly.
Combined, these two factors enhance the possibility of slipping and falling. For older folks, like myself, our reflexes aren’t as quick as they once were, and we are more likely to slip and fall by maintaining an upright posture. It doesn’t matter how old one is, hiking downhill in an upright stance is not the best way to hike.
A Better Method
If we keep our center of gravity at the center of our stride, meaning close to equal weight on each foot, it is much easier to recover from a potential slip. Instead of slipping and falling, we maintain our balance.
To accomplish this, we need to lean slightly forward at the hips and slightly bend each knee when taking steps. This keeps our center of gravity where it needs to be and our leg muscles will get less tired.
At the same time, we need to shorten our stride going downhill. All of this is pretty easy to get accustomed to with a little practice.
What About Trekking Poles?
I don’t use them. I did experiment with them a long time ago, so I cannot provide any useful help with technique, but I do know they should be adjusted a bit longer for downhill hiking.
Footwear
Footwear is the second component for avoiding slips and falls. Unfortunately there isn’t a perfect solution. Our footwear has to work for the other trail (or off-trail) conditions encountered on backpacking trips.
What We Can Learn from Rain Tires
When driving a car on wet pavement the vehicle can encounter hydroplaning. Hydroplaning (or aquaplaning) is when the tires lose contact with the road surface. Tire design plays a big part here. Tires designed to perform well in rain integrate tread patterns that have deep grooves and channels which move the water away from the contact surface between the tire and the road.
As the tire tread wears down the ability to shed water decreases. This is mostly because the depth of the rain grooves is decreased.
The same goes for footwear. Walking on hard packed surfaces with loose pebbles, sand, and debris creates the same challenges as driving a vehicle in the rain. Soles with deep lugs and large separations between the lugs can improve traction on these kinds of surfaces.
Hiking Shoe Soles and Traction
Hiking shoes and boot designs are varied, with each design targeted for different kinds of use and terrain. There is no sole design that is perfect for all conditions. The type of rubber, tread design, type of terrain, steepness of terrain, and weather are all factors to consider.
Rubber
Where the “rubber hits the trail” a play on the phrase “where the rubber hits the road.” Most hiking soles use rubber compounds for the soles. The compounds vary in hardness (softness). Softer compounds work better in wet and slippery conditions, but the material doesn’t last as long as harder material. Hard compounds work better in scree and hard-packed ground covered with pebbles, sand or other debris.
As you can see there is a trade-off on selecting the rubber compounds.
Tread Design
When we think of backpacking boots we may visualize the heavy leather boots that were fairly standard in the ‘60s and ‘70s among backpackers. Leather boots with aggressive soles. Many used the Vibram Montagna sole.

The lugs are well spaced and deep, which allows the sole to make contact with ground that is covered with scree, pebbles and other debris. It also has a tall heel to help with braking, especially on steep terrain.
Trail Running Shoes
Today the most common type of footwear used by backpackers is probably the trailing running shoe. Originally designed for running on trails or trail racing, over the past 15+ years they have become a staple for backpackers.
A very popular trailing running shoe, and typical of this genre, is the Salomon XA Pro 3D Pro. I have used this shoe (many pairs worn out) for over ten years. My review is below.
Long Term (10 year) Product Review: Salomon XA Pro 3D Trail Running Shoes
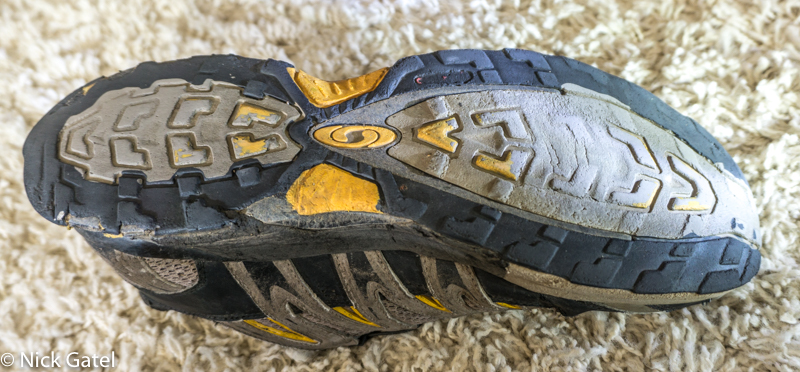
The tread design is fairly aggressive compared to other trailing running shoes and it lasts longer than many competitors, which makes it not the lightest in the category. After 500+ miles the sole is about worn out as in the image below.

Minimalist Shoes
For a long time I used cross country racing flats on many backpacking trips. These are incredibly light shoes (under 5 ounces each), but don’t have much tread. Visually it is telling to compare the tread of these shoes to the trail running shoes above.

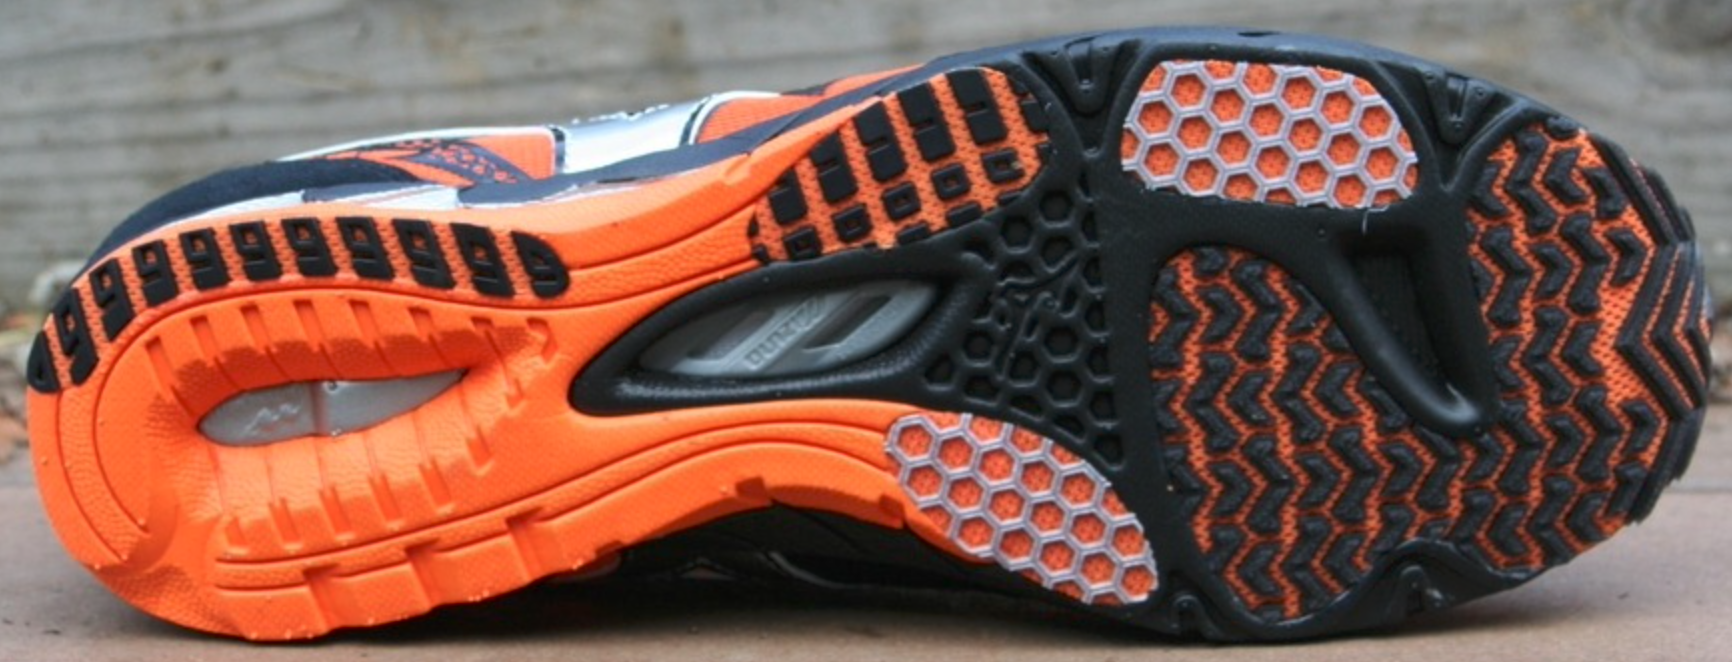
Cross country races are normally used on 8K to 10K courses and are not the kind of terrain we find in mountains or even deserts. Cross country runners only use these on race day, not every day practice mostly because the shoes don’t last long at all. For backpacking use one has to be careful of slips and even stepping on sharp stones that can injure the foot. I have mostly quit using them (I still have one pair left) because they’re expensive and short lived.
Lightweight Hiking Boots
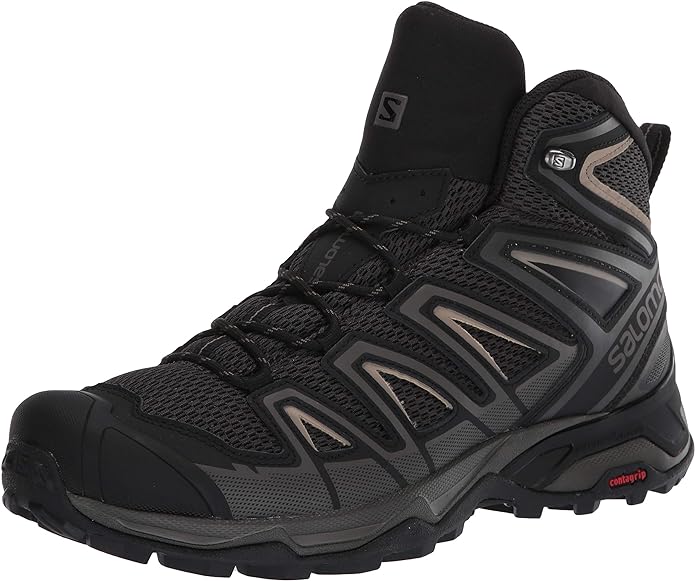
Lastly we come to the running shoe cousin, the lightweight hiking boot. I bought a pair of the Salomon X Ultra 3 Mid Aero Hiking Boots four years ago. Haven’t used them enough to comment in detail, as I have mostly been using my Salomon trail runners (I have 3 or 4 pairs in my gear closet just in case Salomon discontinues them). The Aero hiking boots do a fairly good job on the trails that are the subject of this post, although not as well as my old Danner Mountain Light boots. How long these will last is the question I have yet to answer.
Salomon has discontinued this model but current offerings are similar.

“Mountain” Boots
With all of these shoes/boots shown above, they have one downfall. When they wear out, you have to throw them away. The soles can’t be replaced. Even if they could be replaced, the tops are usually worn and torn. If you are concerned about filling our landfills with discarded shoes, then you may be interested in something more “conventional, like my Danner Mountain Lights.
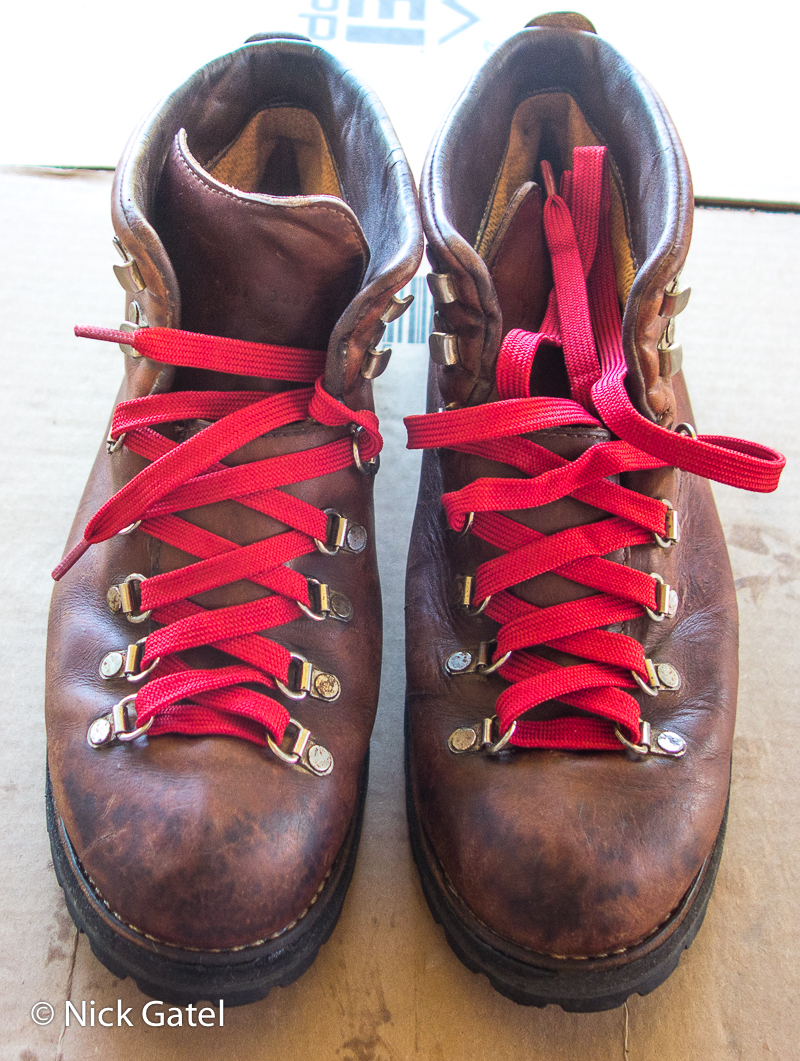
My Danner Lights are about about 40 years old and the soles have been replaced more than once. All components of the boots can replaced as long as you don’t abuse them. Danner does a robust business re-crafting their leather boots. I probably should do a gear review of them. I did write a post about boot maintenance on these boots a while back (the link to the review is below).
These boots use a Vibram Kletterlift sole that is aggressive and long lasting.
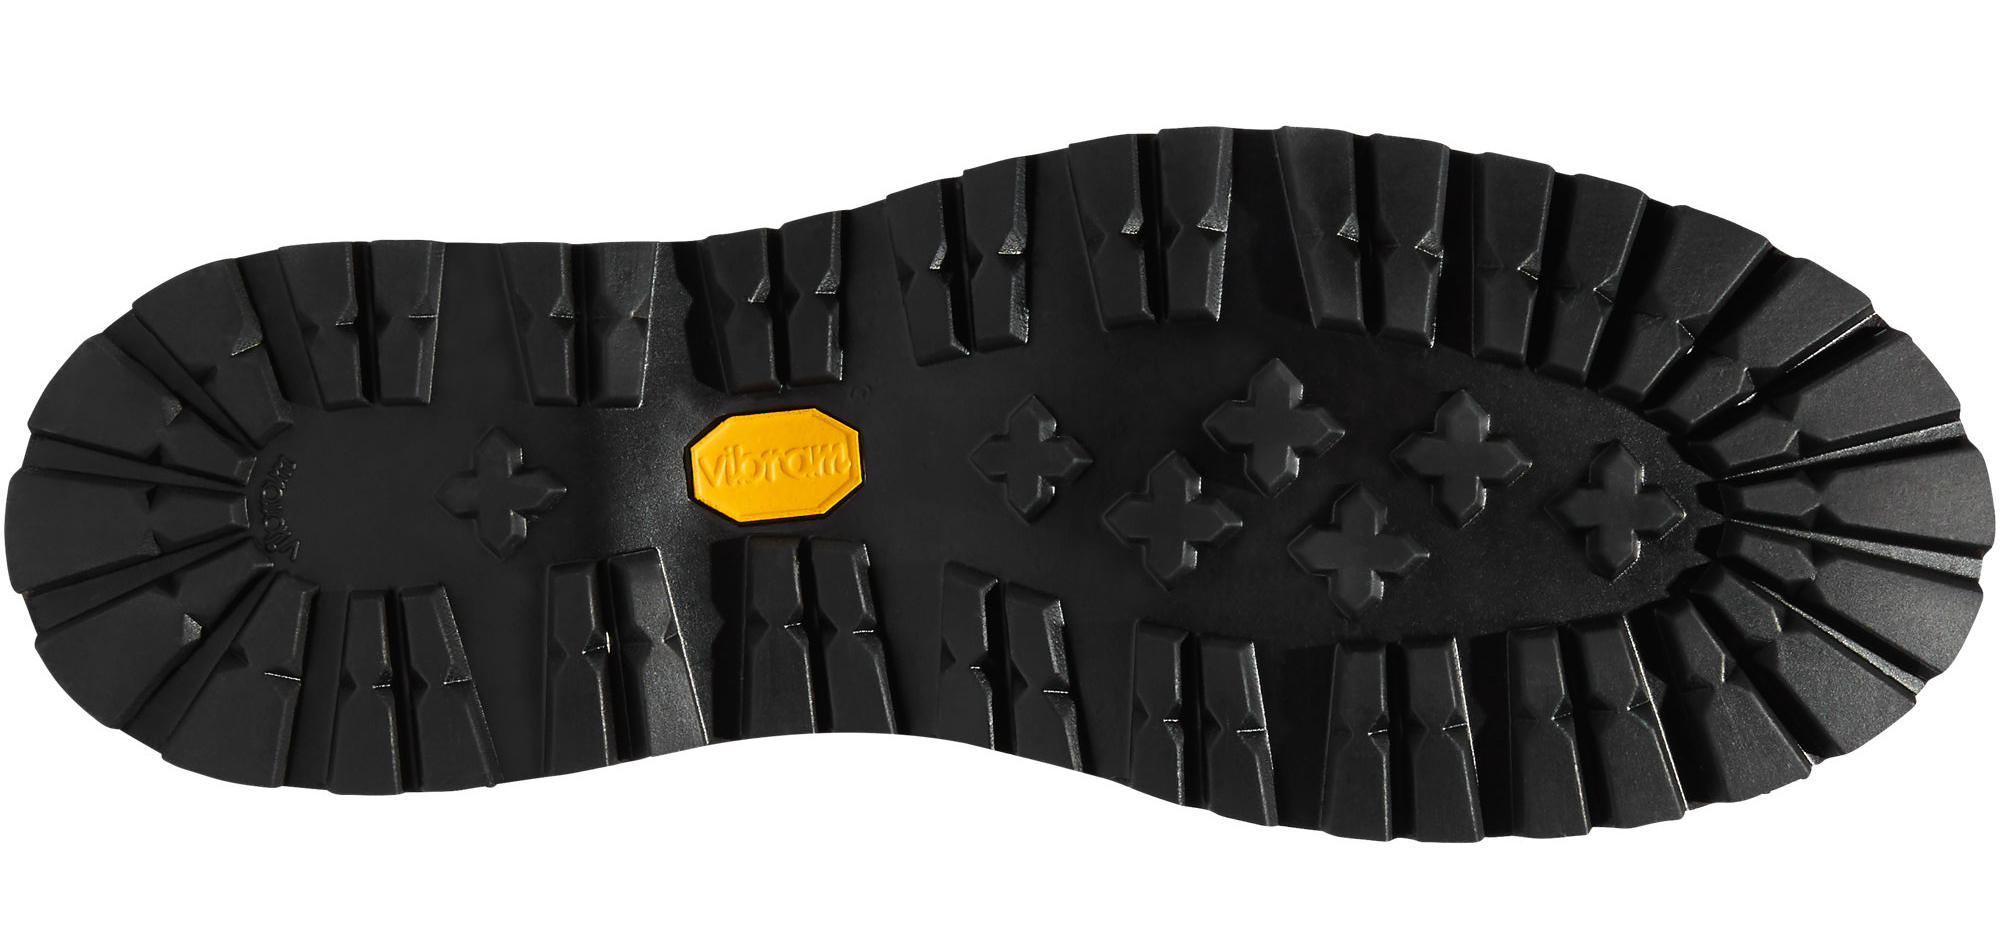
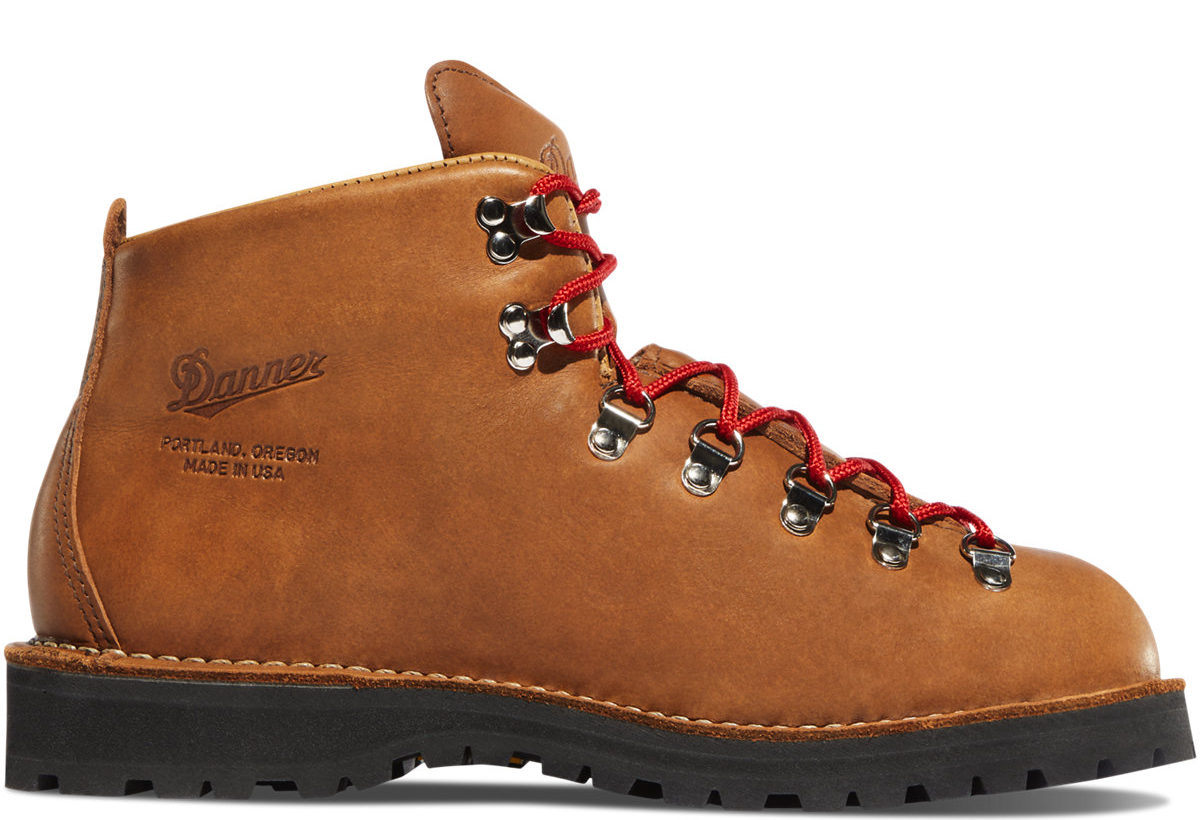
Similar to the Vibram Montagna, but the heel isn’t as aggressive. I don’t know of any boot manufacturers that still use the Montagna, although Vibram still sells the soles for replacement (Vibram sells over 1,000 different models of soles). I don’t pay attention to the current state of the market, so there may be new boots using the Montagna soles. Many companies will re-craft boots that came with these soles and it is probably possible to replace a different boot with these soles.
Another thing I like about the Mountain Lights is the boot is made from a single piece of leather so no need to worry about the stitching on seams.
Summary
Of consideration is the weight differences of all these footwear options. The more aggressive and longer lasting options weight more. The heavier the shoe or boot the greater the fatigue over a long hike. Plus heavier footwear will reduce reaction time. For us older hikers reflexes are already diminished due to age.
In case you are wondering, here are the weights of the three I am using most of the time:
- Salomon Trail Runners (pair) = 31.50 ounces
- Salomon Boots (pair) = 34.00 ounces
- Danner Mountain Light Leather Boots (pair) = 59.35 ounces
But more and more I am again using my Danner Mountain Lights along with my Salomon X Ultra 3 Mid Aero Hiking Boots. The Salomon boots are very comfortable and no break-in time was needed. Leather boots do require a break-in period. But over time the leather conforms to the shape of the foot and become very comfortable, assuming one has purchased the correct size.
This website may be compensated for linking to other sites for sales of products. As an Amazon Associate I earn a small fee from qualifying purchases at no additional cost to the purchaser.


