
Recreational vehicles need a lot of maintenance. Seems like after every trip there is some little thing that needs repair. Talking to other people, even the humongous motor homes and top of the line Airstream travel trailers suffer the same malady.
On our last trip our water heater started leaking (again see this post about some of the repairs I’ve had to do over the years, including a similar water heater leak).
Removing the cabinet access panel inside the trailer to get to the water heater, I could see water coming out of the hose connection fittings to the water heater. Knowing the needed parts are not available in most hardware stores, we just shut off the water pump when not using water. I would have to source the parts (and spares) once we got home. Something I should have done a long time ago.
Here’s the fix and the parts you should probably keep on hand.
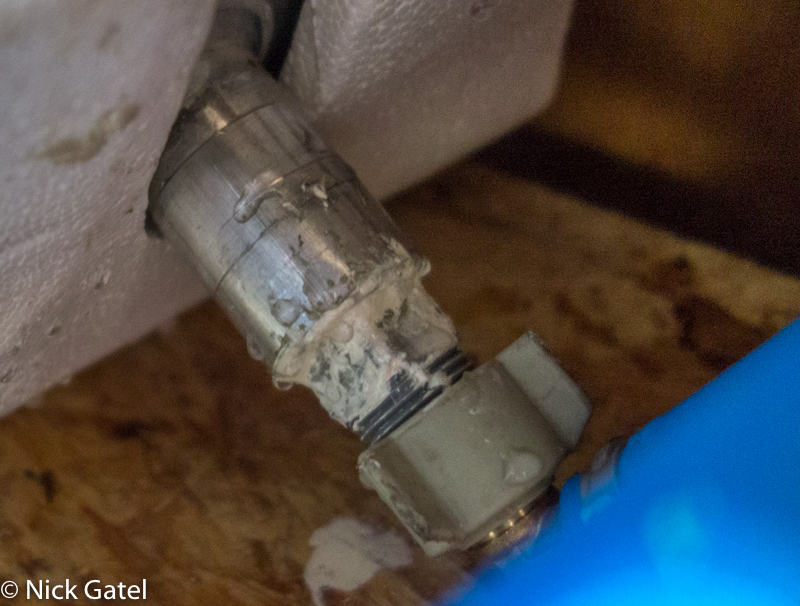
The above picture shows the hot water connection. The tank has an aluminum female fitting, a 1/2 National Pipe Thread (NPT) nipple is threaded into the tank fitting, and a PEX hose connection is connected to the nipple. Our heater is made by Atwood.
Years ago I installed a Suburban water heater in our 1992 Starcraft Meteorite and it had a similar setup. That is; a nipple is connected to the water tank, and the water hose fitting to the nipple. I would guess that almost every recreational vehicle with a water heater has either a Suburban or an Atwood brand water heater. And for the past 20+ years, most recreational vehicle manufacturers have been using PEX fittings to plumb the water systems.
Nipple Fittings
Our trailer came with plastic nipples for connecting the water lines to the water heater. At first thought plastic doesn’t appear to be a good choice.
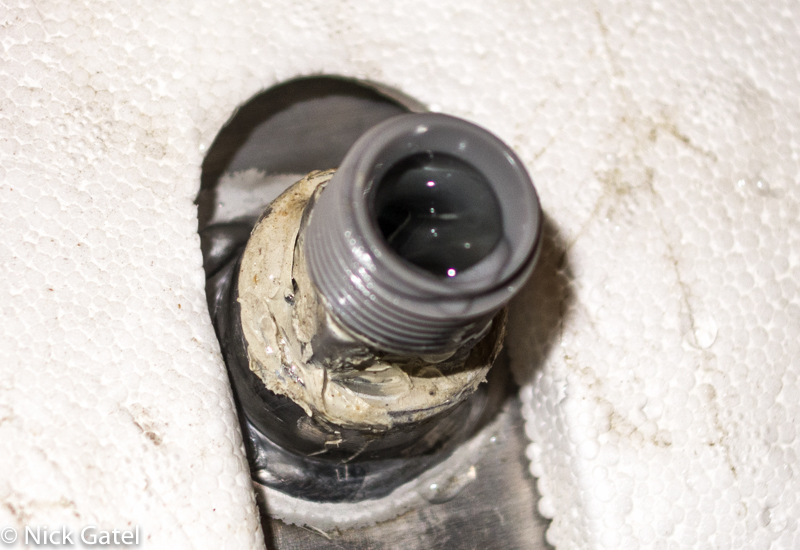
Perhaps brass or stainless steel would be better.
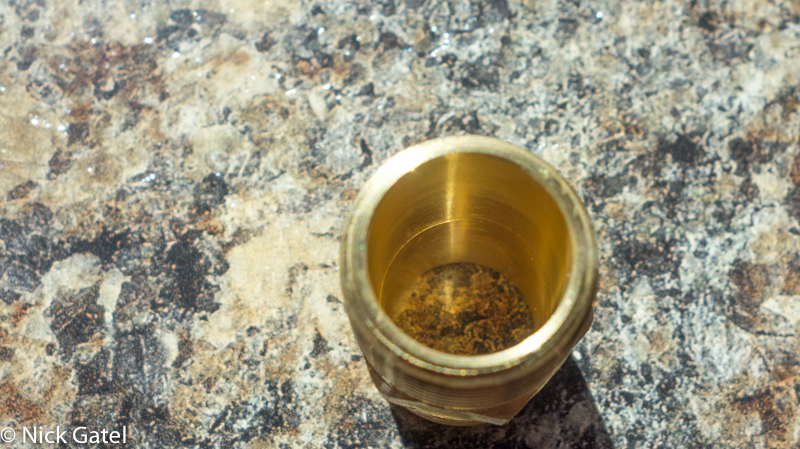
Another important consideration is the water tank is made of aluminum. Not only is aluminum soft (easy to damage the threads), but when connected to other types of metal such as brass, steel, etc. it quickly corrodes, especially in the presences of water.
So plastic makes sense.
Torque Specifications
All nuts, bolts, screws, and fittings have torque specifications. Even hose clamps have torque specs. In the US, the specs are usually stated in inch-pounds or foot-pounds and special tools are required to tighten to the required standard. If it is too loose to will not stay put, or in the case of fluid or gas connections you will have a leak. If it is too tight the threads will stretch and the same problems will arise.
Often such measurements as hand tight or snug are used. Hand tight and turn a 1/4 turn is something I often see. With our water heater I could not find a specification and if I could, there isn’t room to get a torque wrench into the cramped area where the water heater resides. Bottom line is tightening a leaky plastic nipple over and over isn’t going to solve the problem over a long period of time. You are better off to remove the leaking fitting, clean it, apply pipe thread sealant, and re-install.
I have a theory that over time, especially in the environment of a road-traveling recreational vehicle, plastic threads stretch over time even if they were not over-tightened when installed. So it is probably a good idea to keep a few spares on hand.
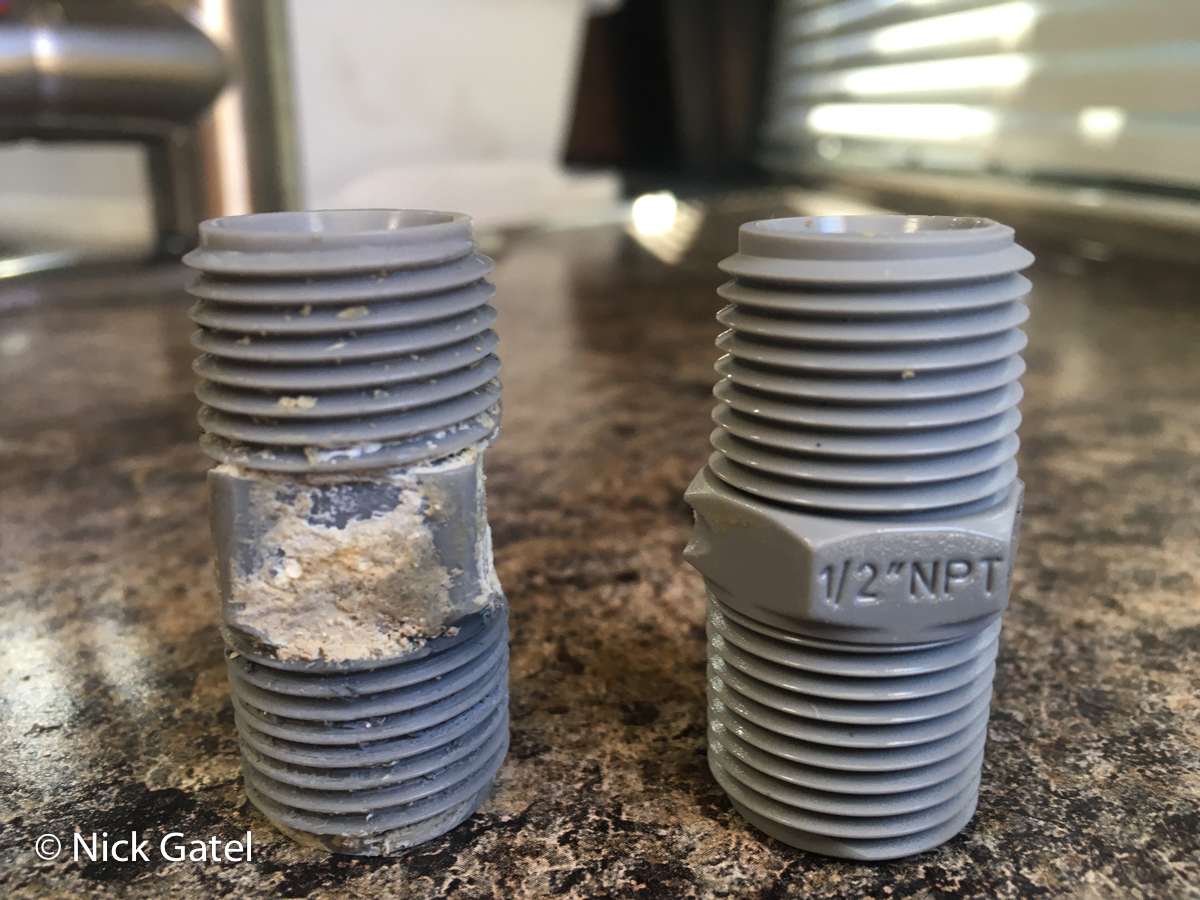
I could not find the correct plastic fitting at any hardware store. However, I found a package of 6 on Amazon for under $10.
You’ll need thread sealant for the part of the nipple that goes into the water heater. Do not use sealant on the other end that connects to the PEX hose fitting.
PEX Fitting Seals
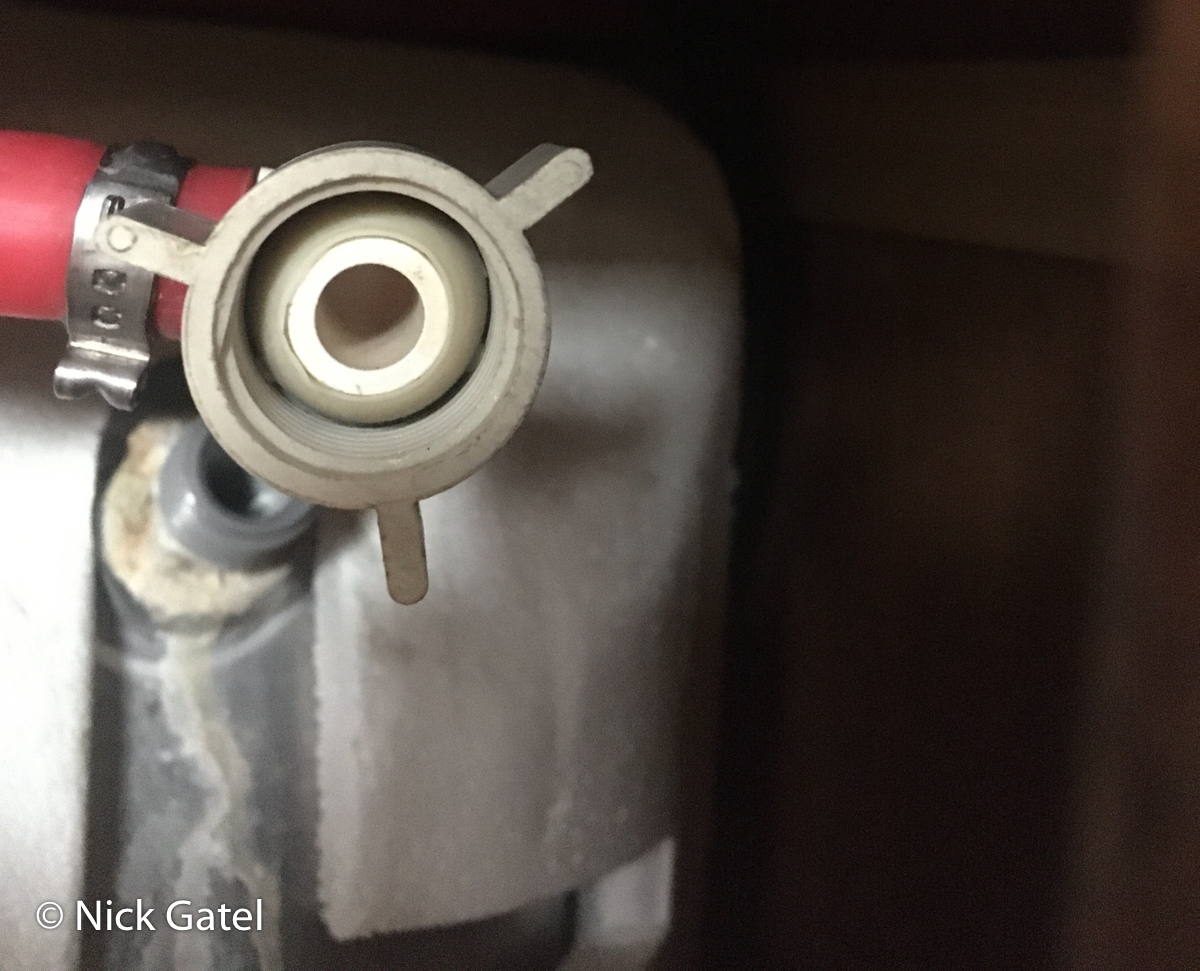
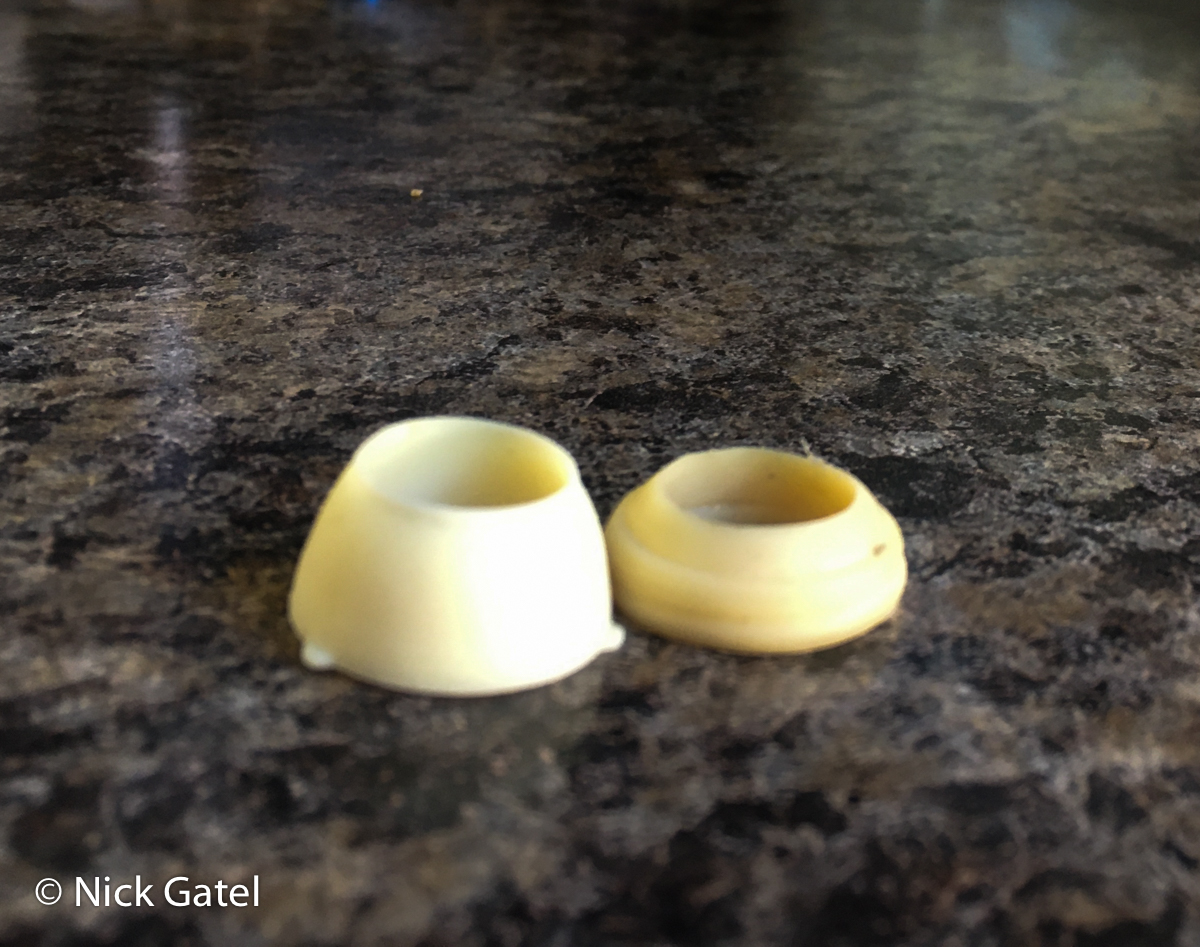
Inside the PEX fitting is a cone shape seal, similar to the seals used in hoses to connect a hose to a home faucet or toilet. But the seal is a little different size. Although nowadays most hardware stores carry PEX fittings, they don’t stock the seals. And replacing a PEX fitting requires specialized tools. So it makes sense to keep a few of these seals on hand, if you can find them. Of course, you can simply buy a package of 10 from Amazon.
Auto Amazon Links: No products found.
Once the new nipples and seals were delivered, it took about 10 minutes to change everything. Then I turned on the water pump to test for leaks — none — even after 48 hours.
Do yourself a favor and get some spare nipples and seals and keep them in your RV
This website may be compensated for linking to other sites for sales of products. As an Amazon Associate I earn a small fee from qualifying purchases at no additional cost to the purchaser.

