The biggest problem with travel trailers and RV’s is things rattle and move while traveling on the roads and things get worse if you are a person who is happy to drive on dirt roads to get to the best campsites. This vibration causes things to come loose and sometimes causes things to break. It is inevitable – not a question of probability, but when.
For the purpose of this post; RV, camper, or travel trailer are the same thing.
Maintenance
The best approach to RV repairs is to avoid repairs that are the result of a lack of maintenance. Talking to many RV owners online and in person, I would guess that less than 10% do all the recommended maintenance on their rigs. I remember an old commercial where an auto mechanic says this about maintenance, “You can pay me now, or you can pay me later.” Of course, later means a repair and repairs are always more inconvenient and more costly than maintenance.
Here’s a post about RV maintenance.
And this post is about RV roof maintenance.
Some Thoughts on RV Dealer Service Departments
My limited experience, since I can do most repairs myself, is absolutely awful service. Unlike a new car dealerships, most RV dealerships are booked weeks in advance, and once you drop of your RV it may take them weeks to do repairs. If you can do repairs yourself you will save tons of time and tons of money.
Repair Tip
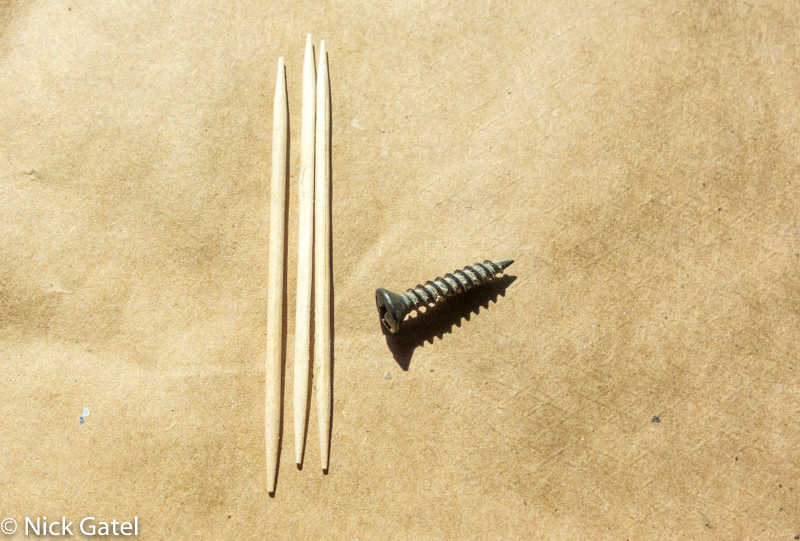
If you own a trailer or RV, you are probably used to finding loose wood screws on the floor when you arrive at your campground. This must be predestined by God. The screws vibrate and enlarge the screw hole, so it isn’t a matter of simply tightening the screw, which just guarantees the screw will work itself loose again – sooner than later! So you have two choices
- Replace the screw with a large one or
- Make the hole smaller
You probably don’t have an assortment of larger screws available onboard, and usually larger screws don’t match or align correctly with the fixture or equipment they hold in place. So the better option is to make the hole smaller.
Making a Hole Smaller?
Kinda sounds like a physical or philosophical impossibility!
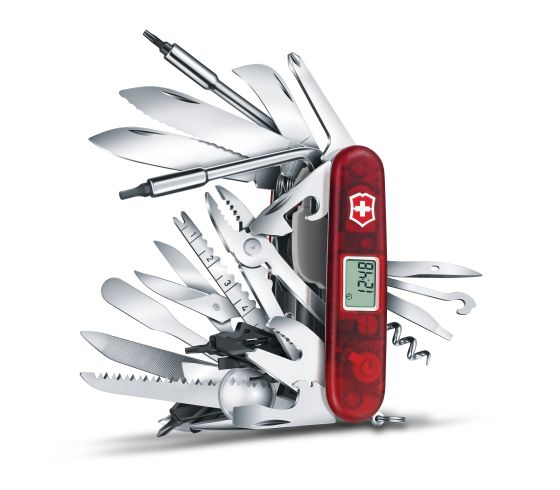
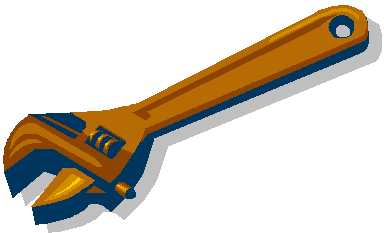
Making a hole smaller can entail some pretty sophisticated methods, material, and equipment. But we are campers, we improvise, and we want to be like MacGyver. So here’s a tip… insert a tooth pick or two into the hole, break-off the excess that extends out of the hole, and using a screw-driver or a Swiss Army Knife (MacGyver, you know) put the screw back in. Easy-Peasy.
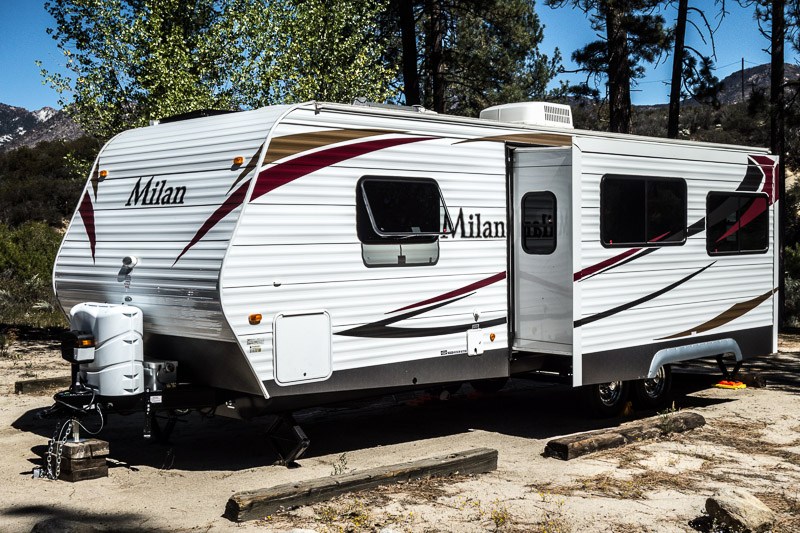
Milan 26RSL Repairs
Now that our trailer is over four years old, with hundreds of days camping, and over 13,000 miles of road miles on it here is what has needed repair or replacement. By the way, I know 13,000 miles doesn’t sound like a lot, but keep in mind that we live close to a plethora of camping spots and most of our camping trips entail about 100 miles round trip in travel. No, we aren’t lucky; we have done a good job in planning our life, which means living in an ideal location.
One thing to keep in mind about trailer repairs is that most of the components and appliances are not made by the trailer manufacturers, but are purchased from vendors. So that $500,000 RV will have many of the same components and appliances a $25,000 travel trailer has.
I already discussed the numerous loose screws and the fix. So let’s take a look at the rest.
Window Slide Lift and Lock
I didn’t take pictures of the repair, so hopefully I can clearly explain the problem and the repair. The picture below shows one of windows in the open position. We have two of these windows, one next to each of our chairs. Both of them had the same problem. In the center of the window you can see the top of the lower window section. The window is open and the black strip in the center of the window is the trim that lifts the window. When the window is closed (lowered) this trim also has a locking mechanism.
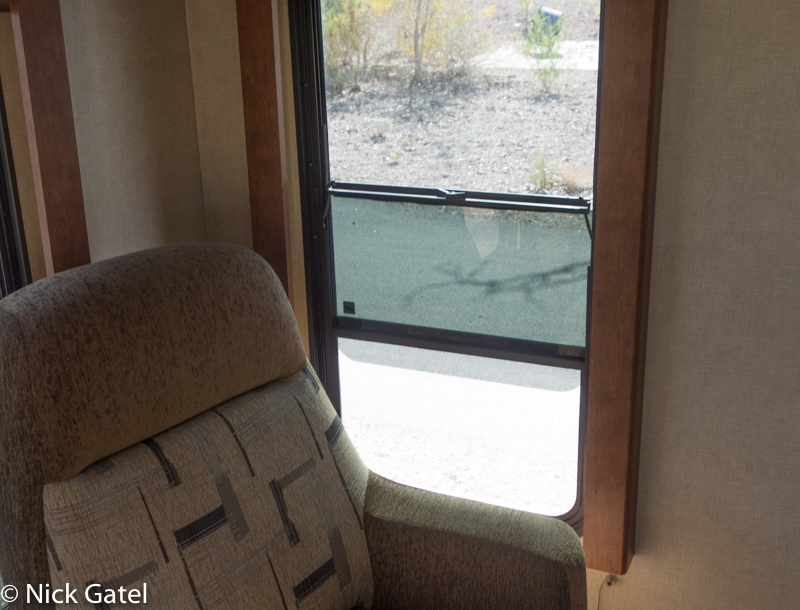
Below is another picture. You can also see two little arms that are attached to the outer window frame. These arms lock to the top window trim, when the window is opened, so the window stays in the opened position.
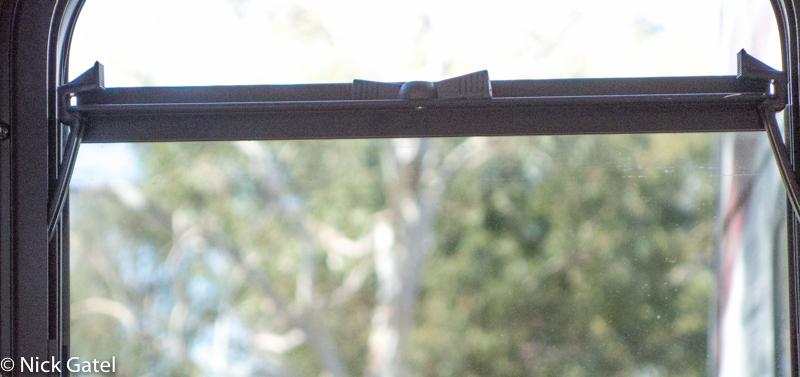
So what happened is the entire top trim piece came off the window pane, along with the rubber gasket underneath the trim. The gasket goes on top of the window pane (both sides), and the trim piece on top of the gasket (both sides).
Now the apparently easy repair would be to take the piece of glass off, place the gasket over the top of the glass, then slide the trim over the gasket. But, taking the window pane our would require taking out a window frame, which appeared to be a big job. So this is what I did.
- I opened the window (not real easy without the top trim attached) and placed a 2” X 4” cut to the width of the window opening.
- Then I lowered the window so the glass was resting on it. The reason for this was to soften any pressure when I attempted to reinstall the trip.
- Next I cleaned both the window at the top where the gasket and trim would be re-installed.
- Now I cleaned the rubber trim with soap and water and dried both.
- I placed the gasket over the top of the window.
- I sprayed some sprayed some silicone lubricant on a clean cloth and applied it to the outside of the gasket, being careful not to get any on the glass.
- Using a small screw driver, I slightly spread open the bottom of the trim piece so it would go over the rubber gasket.
- At this point, the trim was barely on the glass, and it needed to be pushed down at least another inch, but I couldn’t do it by pushing down.
- Using a small rubber mallet, I began tapping the top of the trim piece, tapping lightly several times as I moved from left to right.
- Each time I made a complete pass from left to right, the trim moved down a tiny bit. It probably took 10 or 12 passes for the trim to go all the way down. Patience and not to hard a blow with the mallet prevented the glass from breaking or cracking.
The repair has held for a couple of years so far.
Awning Pull-Down Strap
This is the strap that pulls the awning open when it is rolled up against the camper. I don’t have a picture of ours, but here is one I found on the internet.
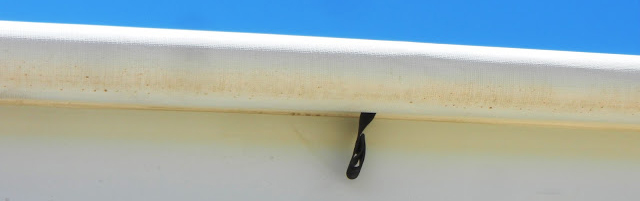
The first one broke due to a lot of use. So I bought two, one as a spare. Last summer, we were in a down-pour and the wind was picking up, so I decided to lower and retract the awning and the strap was blown by the wind, just as I was lowering it, into the side arms where is was pinched and torn. But I had a spare. These are really easy to replace, no tools needed at all! Plus if yours breaks you need to roll-up your awning or it will be very, very difficult to open it up.
Here’s the spare. You can buy them on Amazon for under $10 (as of the date of this post).
Wheel Leak (pin-hole leak)
About a year ago one of the trailer tires developed a slow leak. Took it to America’s Tire Company (also known as Discount Tire in every state except callyforneea) and they found the rim itself was leaking. I was unable get an exact replacement rim, so Joyce bought a complete set. She hates mis-matched stuff and I hated the idea that the original rims were all made in China. So we got a new set of four American made rims for $351.10 out the door.
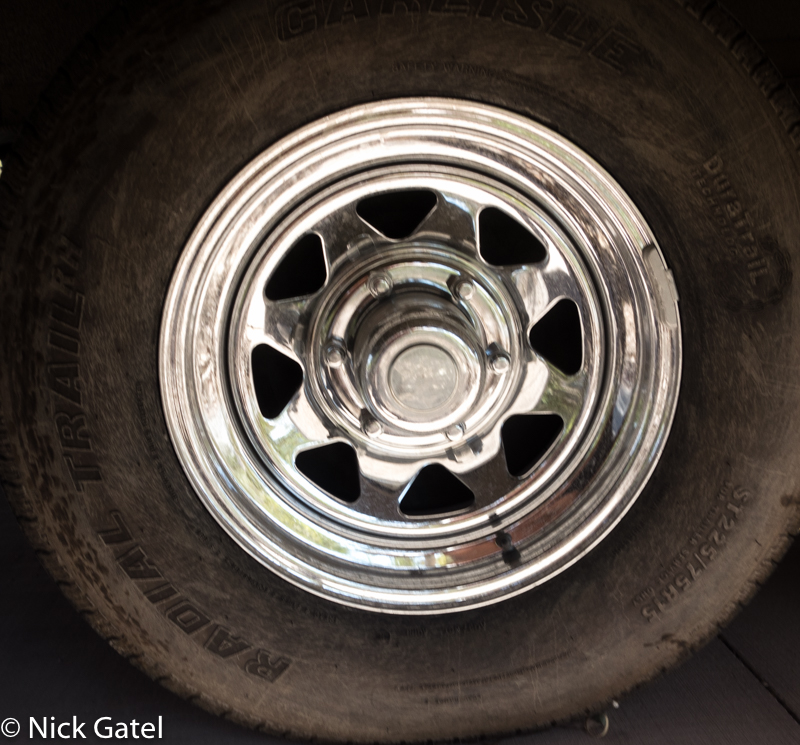
By the way, I spent almost 50 years in the automotive business and I cannot say enough good things about Discount Tire (America’s tire in California).
Water Heater Leak
Update November 13, 2025: After a while, the leak started again. Here is a detailed post on the repair that has lasted for more than four years.
Last summer we developed a water leak inside the camper. It appeared to be coming from under the kitchen sink. Once I did a thorough inspection I found it was coming from the one of the water heater fittings. It was a simple repair… but not so easy. So it might be a good thing for you to prepare for, if you have a similar heater. We have an Atwood brand heater. To be honest, it is almost to the Suburban brand heater we had on our two previous campers, so those could develop a similar problem.
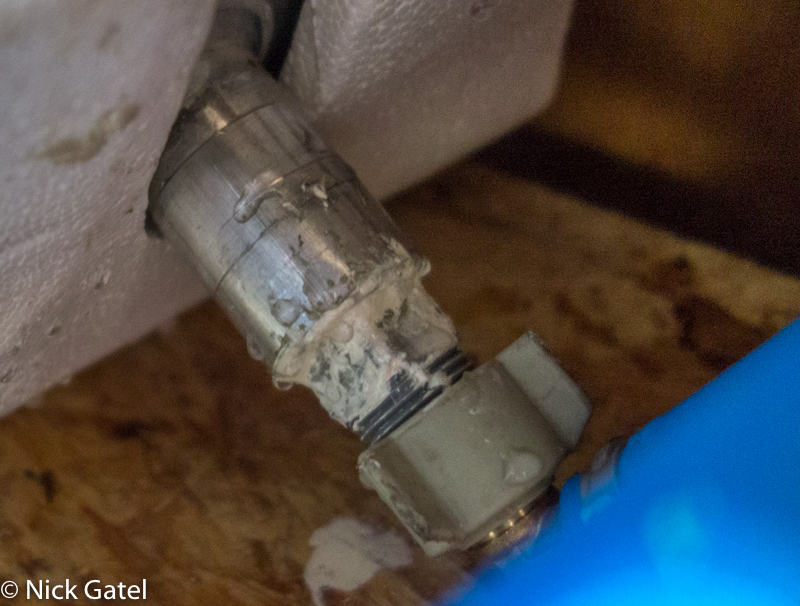
All that goop is thread sealant around the plastic fitting, which is screwed into the metal part of the water heater. When I saw this, I though was a messy job. So, off I went to our local Big Box hardware store to get a brass fitting… easy, peasy; right?
Wrong.
Three stores had the right size threads, and I already had a couple at home, but take a look.
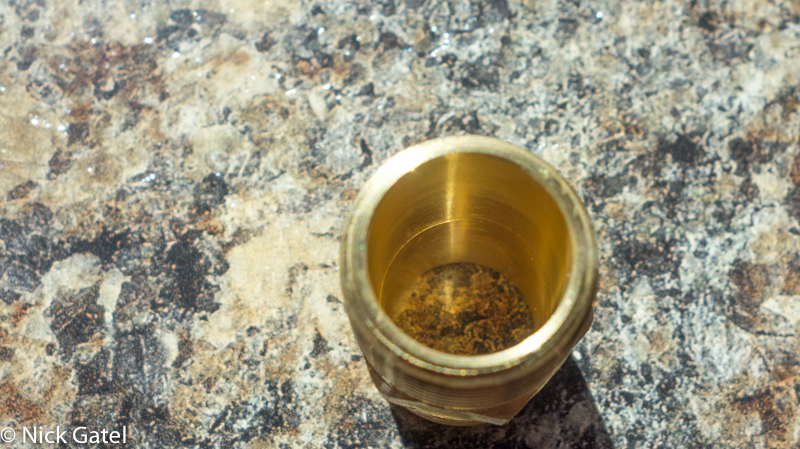
The top of the fitting is flat. Now take a see at the original one (below) and notice that the top is beveled from the top down.

This allows a better seal with the tapered seal (below) on the hose connection.
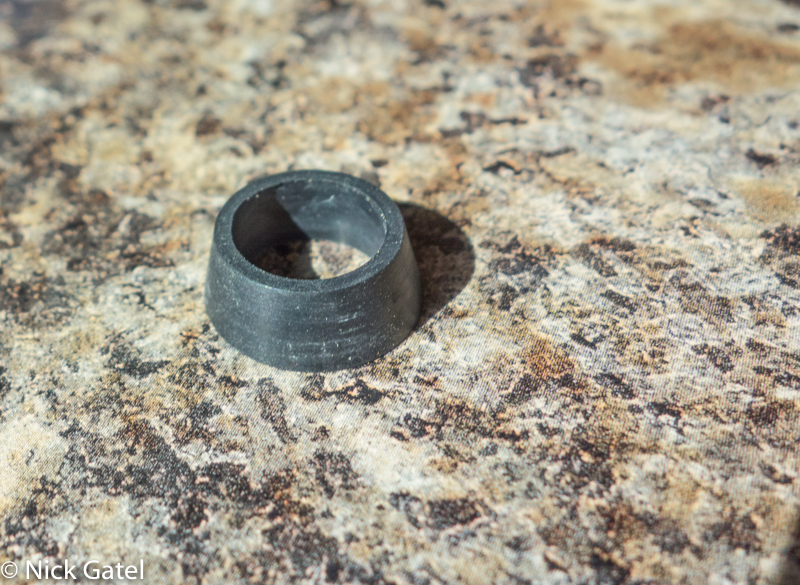
The brass fitting would work at home for a water hose connection, but on a trailer with all the movement and vibration, the seal would get damaged. So I decided to clean and re-do the original plastic fitting. Instead of pipe dope, I used plumber’s Teflon tape. And it leaked. I am pretty good at this kind of repair, so I took everything apart and re-did it. It still leaked. Thinking the plastic fitting must be damaged, although I couldn’t see any problem, I installed a brass fitting and re-tested. What the heck?
We were getting ready for a trip and I didn’t have time to order something online, so I installed the plastic fitting again, but used pipe dope this time.
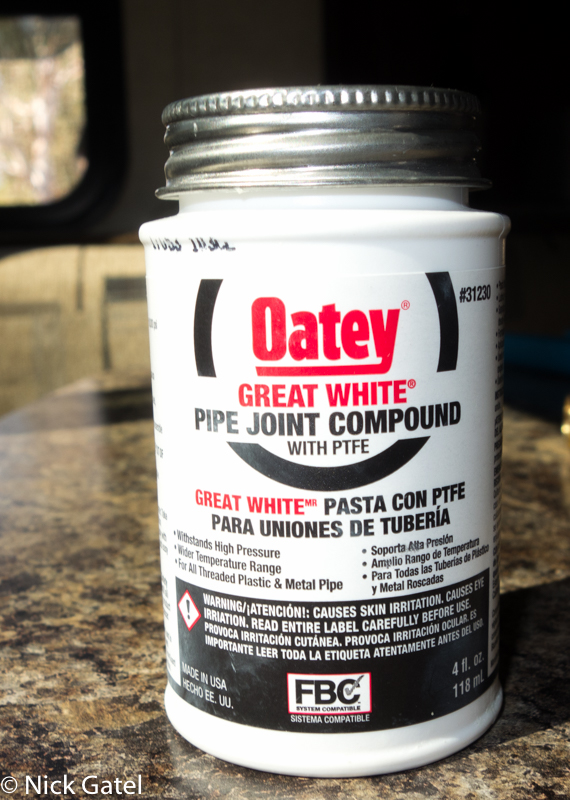
And I put it one really thick, just like the original messy job. No more leaks. But I wasn’t thrilled about this and did Google search. Seems a lot of people have the same problem and the fix is a large helping of pipe dope.
PEX Fittings
A discussion about the plastic PEX fittings and water hoses used today is a good subject if you own a camper. These are common in new home construction and have been used on campers for at least the past dozen years or so. (Our 2006 Fleetwood Niagara had them). If your camper has these fittings, you should probably get prepared for repairs, because a lot of people I know have had leaks in their campers with PEX plumbing.
Today the PEX fittings and hoses are readily available at hardware stores. Below is a spare fitting I bought a while back for our water heater and sink connections.
But to do repairs you have to have special tools. Some systems use hose clamps like these below:
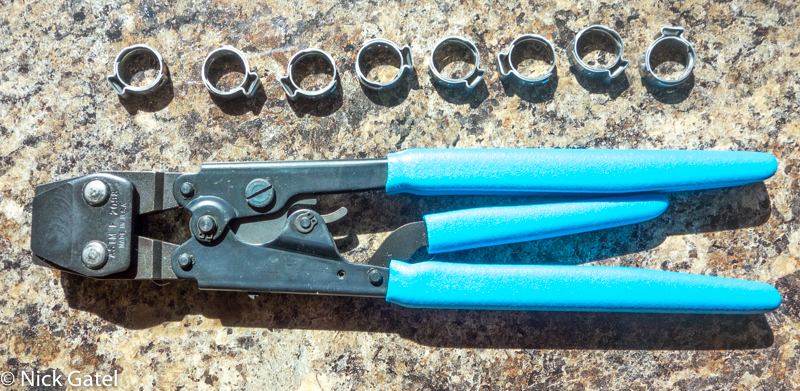
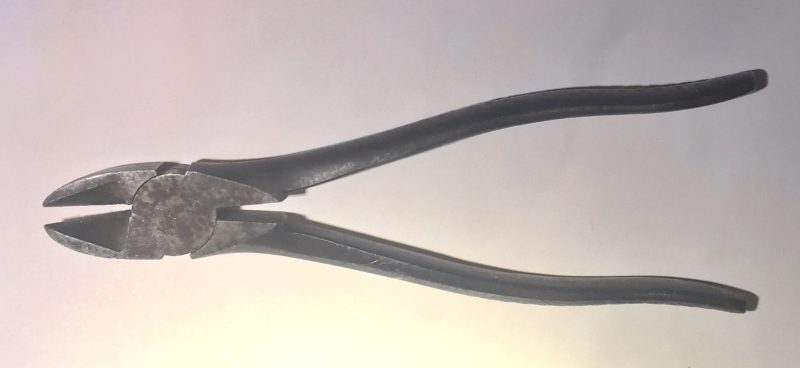
And you need a special pair of pliers, as shown above to install new clamps. If you have clamps like the ones above, they can be removed with a pair of side-cutters, sometimes called diagonal pliers.
If you don’t have clamps like the ones above, but have a solid band, you will need a special tool to remove the clamp and a different type of crimping tool to install new ones.
Wheel Well Trim
Our camper has ABS trim pieces above the wheel wells. These are beginning to crack (a common problem) and we’ll have to replace them soon.
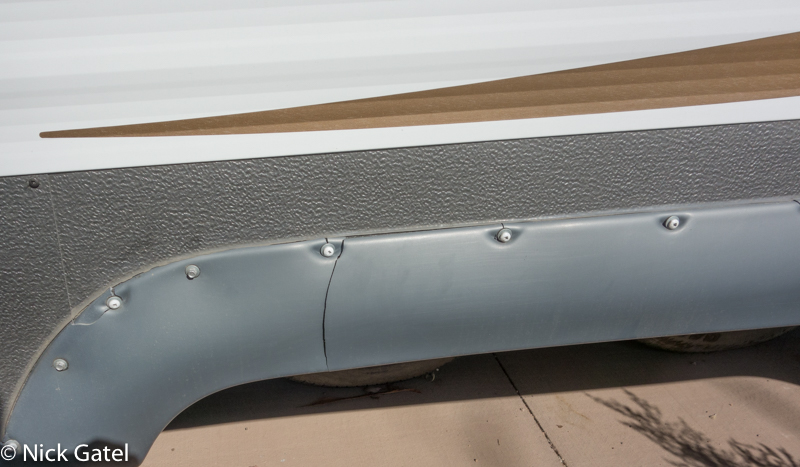
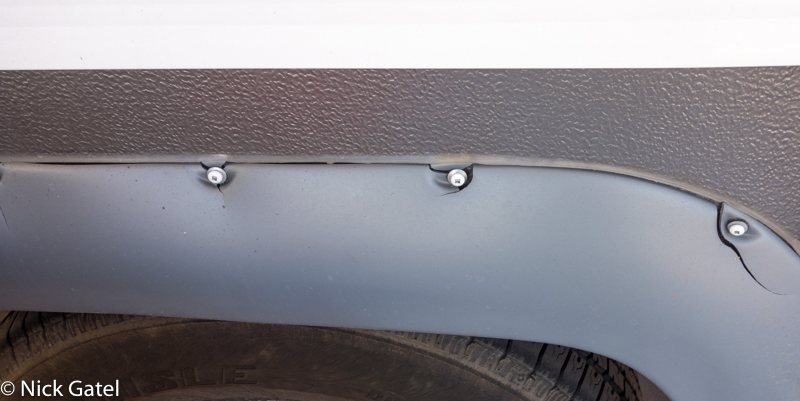
Update March 21, 2022: Link to our Fender skirt replacement
All-in-all these repairs have only been minor inconveniences, and we haven’t had the kinds of problems I read about. But there was one exception: a broken cable on our slide out room.
Broken Cable on Slide Out Room
This was a major nightmare because we didn’t have the spare parts or tools when it broke at the campground. If you have a cable operated slide, I highly recommend that your read this post and buy a couple spare cables and the needed tools!