
How to Set Up and Align a “Go To” Telescope
In this post I will discuss setting up a motor-driven, computerized Alt-Az Telescope Mount. In particular, my Celestron NexStar 8se.
This won’t be a detailed “how to” but rather a high level overview of what is entailed. The steps will be similar to how many mid “Go To” telescopes are set up.
If you haven’t read parts one and two of this series, here are the links:
What is a Go To Telescope?
Once a Go To telescope is set up, using the included hand controller, or optionally a laptop computer or tablet, the user can simply tell the telescope to go to an object in the sky.
For example, right now Mars is in opposition and has the best viewing in years. But where I live, I can’t view it from my back yard until around 10 PM because palm trees block the eastern sky. So I usually view Jupiter and Saturn for a while until Mars is visible.
After aligning the telescope, I select “Jupiter” and the telescope moves to it. Also, because the scope is motorized, as the earth rotates the telescope mount slowing moves, keeping Jupiter in view, without need for me to adjust anything on the scope other than focusing it if I change eyepieces.
If I decide to view Saturn next, I pick that from the hand controller and the mount slews to Saturn and it appears in the eyepiece. I have to make focus adjustments and then can view it for as long as I want without adjusting the telescope’s position.
When Mars finally becomes visible in the night sky, a push of a button puts the planet into view.
Why Discuss a Celestron NexStar 8se?
It’s the only Go To scope I own. I’m not advocating you should buy this telescope. It is one of the most popular mass-market scopes and the optics are good. Meade, Orion (Meade and Orion no longer exist), Sky-Watcher and other large companies have similar offerings at comparable price points. All are set up and aligned using the same techniques and methods.
The NexStar 8se is an Alt-Azimuth (Alt-Az) Mount. This article is appropriate to these Alt-Azimuth type of mounts.
Alt-Azimuth Mounts vs German Equatorial Mounts
Alt-Azimuth (Alt-Az) Mount
Moves in two simple directions: Altitude — up and down and Azimuth — left and right.
Alt-Az telescope mounts are good for visual observing, especially of the Moon, planets, and bright objects. They are know for beginner-friendly and quick setups — no polar alignment needed.
German Equatorial Mount (GEM)
A GEM telescope mount has two axes: Right Ascension (RA) that aligns with Earth’s rotational axis and Declination (Dec) that moves north/south in the sky. The RA axis must be polar-aligned (pointed toward the celestial pole) for accurate tracking.
GEMs are good for Astrophotography because unlike an Alt-Az mount, they track stars by moving only one axis (RA), reducing field rotation. They are great for long-exposure deep-sky imaging, high-precision tracking of celestial objects, and observing faint objects that require steady tracking.
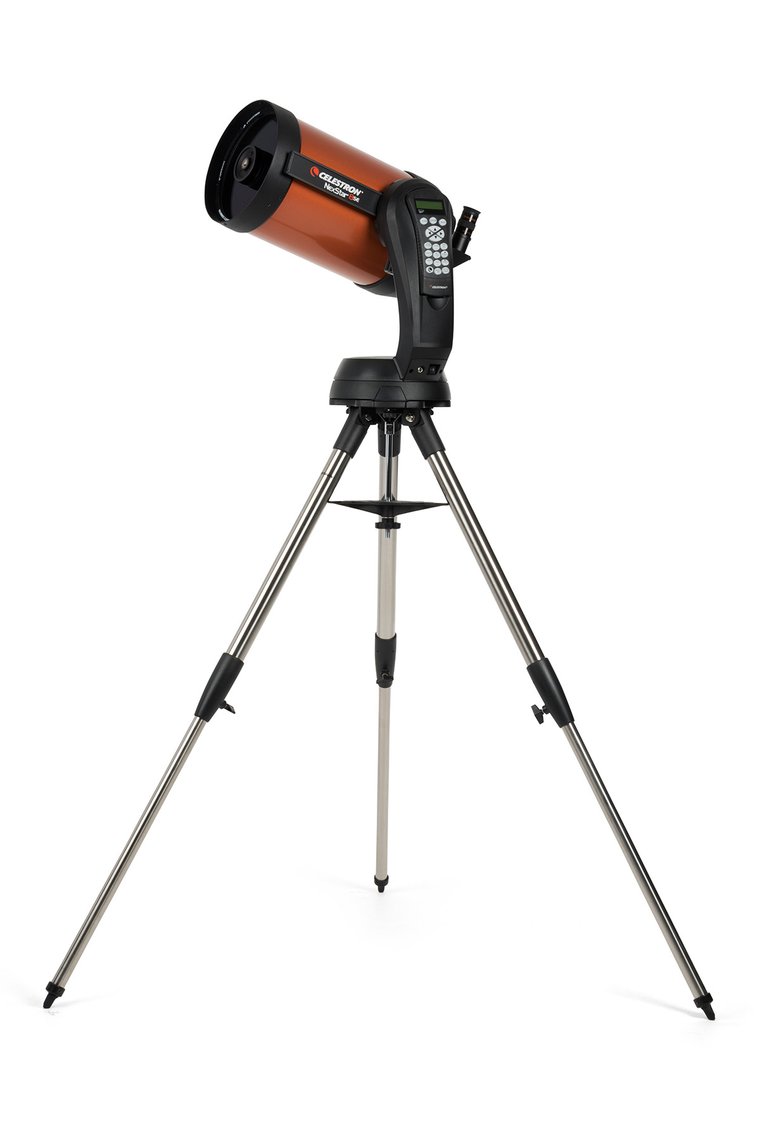
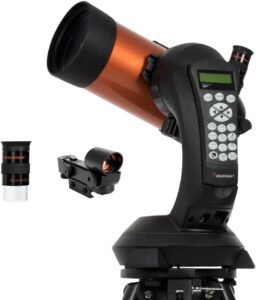
What’s Included with the Standard NexStar 8se?
Telescope
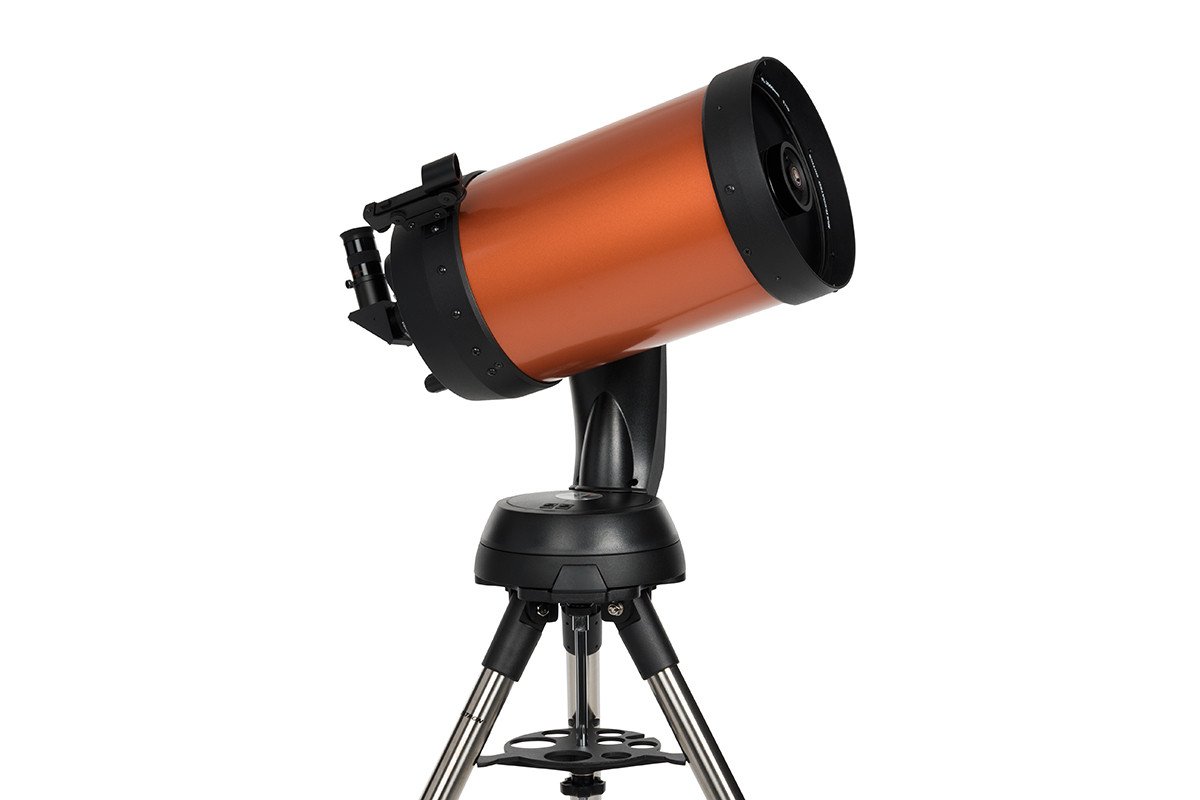
- 8-inch Schmidt-Cassegrain Optical Tube Assembly
- Computerized Alt-Az Telescope Mount
- NexStar+ computerized hand control
- Adjustable steel tripod
Accessories
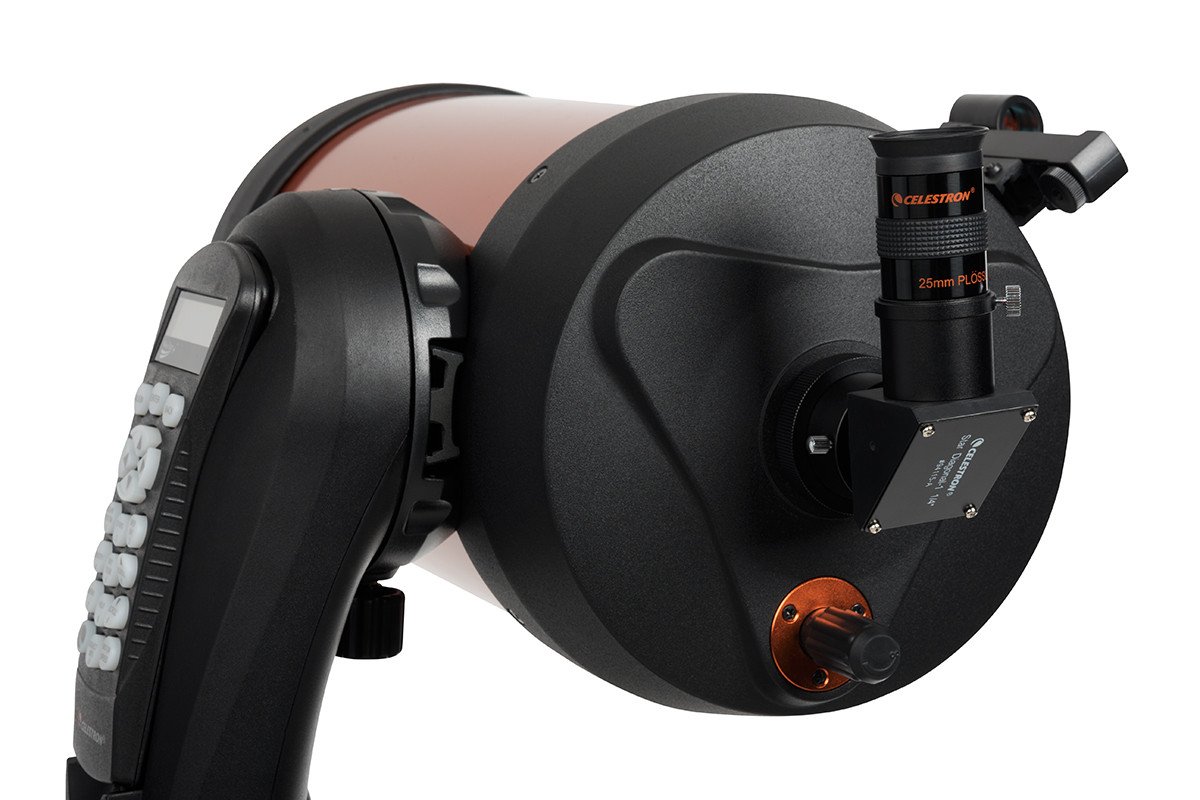
- 25mm eyepiece (1.25 inch barrel)
- Star diagonal – (1.25 inch barrel)
- StarPointer red dot finder scope
- 13mm open-end wrench for upper tripod leg tightening (if needed)
What’s included is just enough to get you going. It will soon be apparent that other eyepieces and accessories (this will be covered in future posts) will enhance the viewing experience. It is best to become familiar and competent with the basic components before exploring and purchasing other items.
Eyepiece
The 25mm eyepiece is a lower-end quality item and the magnification is good for general viewing. Eventually you will want to assemble a collection of different lenses for specific observing needs.
Star Diagonal
A star diagonal is 90-degree elbow with a special mirror to make it easy to view objects and change lens. It is a “must have” for this type of telescope. Again, an entry-level quality item, and an item many amateur astronomers upgrade.
Red-Dot Finder Scope
This is a laser that points to objects in the sky during the alignment process. Another item that most people upgrade.
Initial Set Up
Tripod
Start with the tripod. It comes with an “accessory tray” that can hold eyepieces, but it is more importantly a brace to stabilize the tripod legs. It must be used.
The legs are adjustable for the proper viewing height and using a level, the top of the tripod needs to be level. The adjustable legs make this easy.
Alt-Az Mount
Next the mount is secured to the tripod. A couple important points:
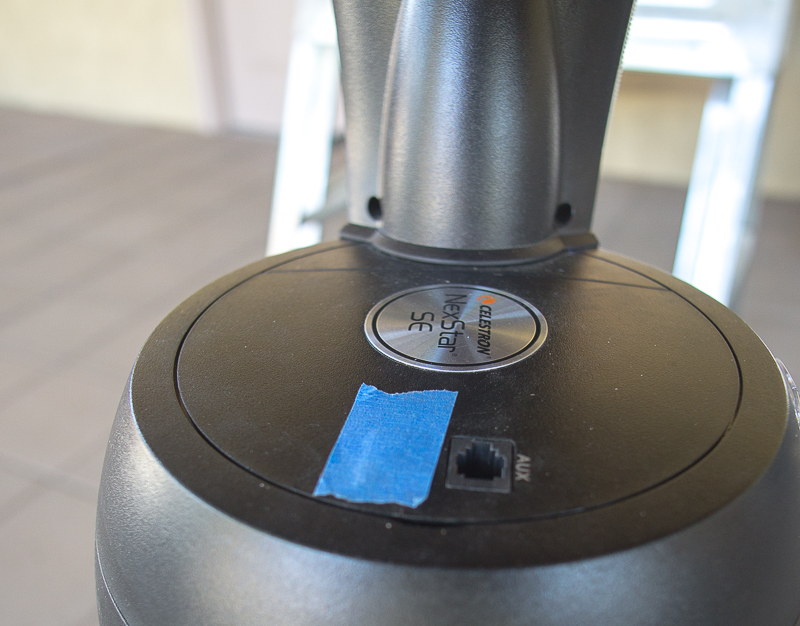
Mount Ports
There are two ports on the mount for connecting auxiliary accessories and also an auto guiding scope (or “off axis guider”). The ports have identical plugs, but plugging an accessory into the auto guide port can damage the electronics in the mount. Typically most people wouldn’t want an auto guider in an Alt-Az mount anyway. So I placed a piece of tape over the auto guide port so I don’t accidently plug something into it during nighttime observing sessions. See pictures below.

Batteries
8 AA batteries can power the NexStar 8se. The battery compartment is under the cover on the top of the base. Lift the base cover and insert the batteries.
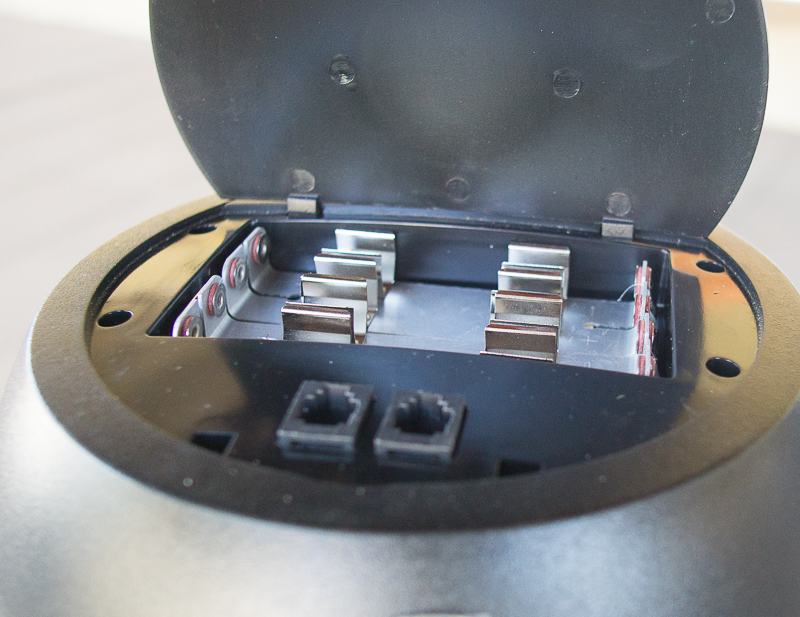

As you can imagine, the batteries don’t last very long when they have to power two motors and the internal electronics in the mount.
There is a connection point in the mount to attach a 120-volt adapter or an external 12-volt battery. Both are optional items to purchase. I’ll share some solutions for external power in Part 4 of the series.
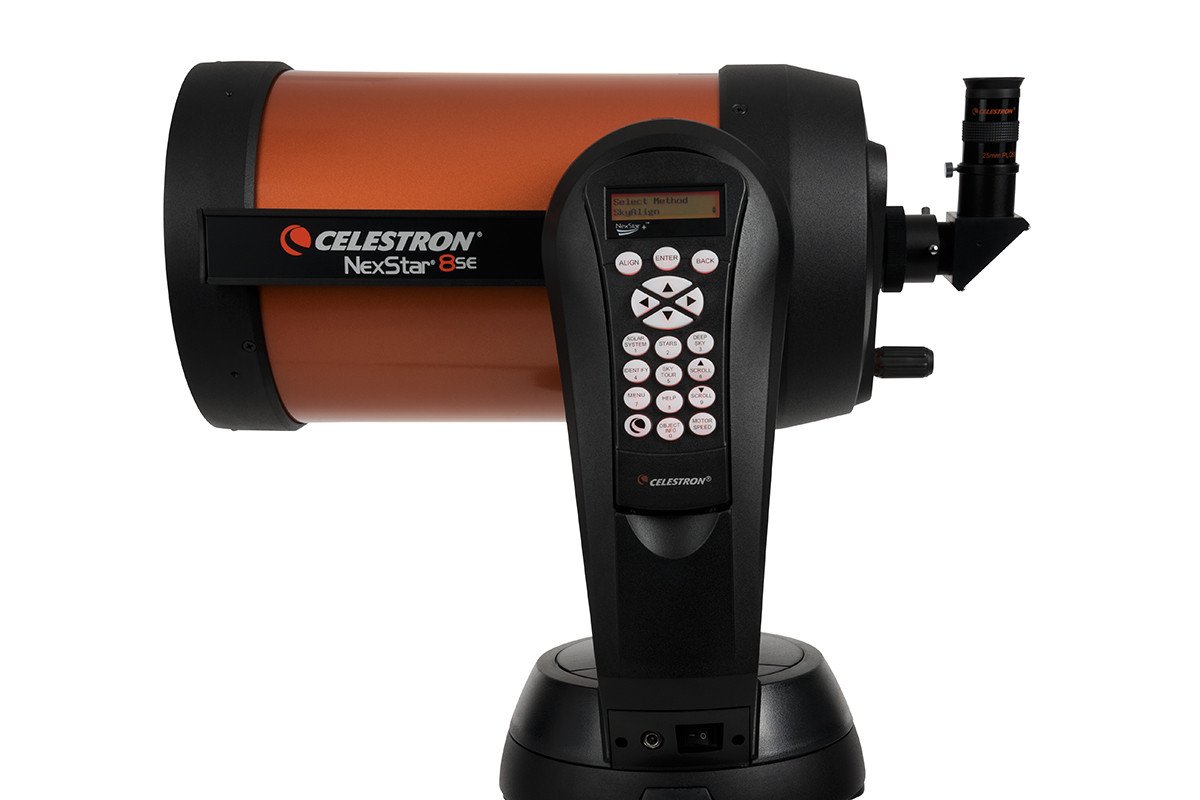
Optical Tube
Lastly, attached the optical tube to the mount. Below is the hand controller, which is cradled in the mount’s arm. The star diagonal and the eyepiece are at the very right side of the optical tube assembly. Next step is to align the telescope to the sky.
Alignment
There are several ways to align the telescope and all are done using the hand controller. Optionally a laptop or tablet can be used, but it is best to learn using just the hand control. Later in this series, I’ll share some remote control options.
Power Up the Mount
The On/Off switch for the telescope is located at the bottom of the mount arm. Note there is a point next to the switch for attaching external power sources.

Two Star Alignment
Alignment is done with the hand controller. You will need to enter the date and time, plus your location (latitude and longitude) into the hand controller. You can save your location for future use to avoid entering it every time.
The controller will now ask to point the telescope to a prominent star. This is where the red dot finder comes into play. Use the laser to pinpoint a star. The using the eyepiece and the direction buttons on the hand control (up, down, left, right) fine tune the star’s location to the middle of the eyepiece, following the prompts on the hand controller.
Once you have confirmed the star is centered, the hand controller will instruct you to move the telescope to a second star. Same steps are performed as with the first star. Once you have confirmed the second star, the telescope is aligned.
Every time you perform an alignment the telescope captures information and becomes more and more accurate over time.
Viewing
The hand controller has a database of 40,000 objects it can slew to. However, keep in mind that many you may not be able to see, based on your location (light pollution), weather, and “seeing” conditions.
The manual for the NexStar 6se and the NexStar8se can be found here, if you want to get a better idea of the how the scope works.
This website may be compensated for linking to other sites for sales of products. As an Amazon Associate I earn a small fee from qualifying purchases at no additional cost to the purchaser.
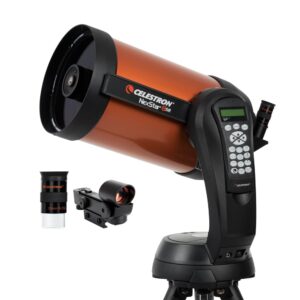
Celestron NexStar 8SE Computerized Telescope, 8-Inch Schmidt-Cassegrain Optical Tube
![]()
Celestron NexStar 6SE Computerized Telescope, 6-Inch Schmidt-Cassegrain Optical Tube
![]()
Celestron NexStar 4SE Computerized Telescope, 4-Inch Maksutov-Cassegrain Optical Tube
![]()
Back to Part 2 Forward to Part 3