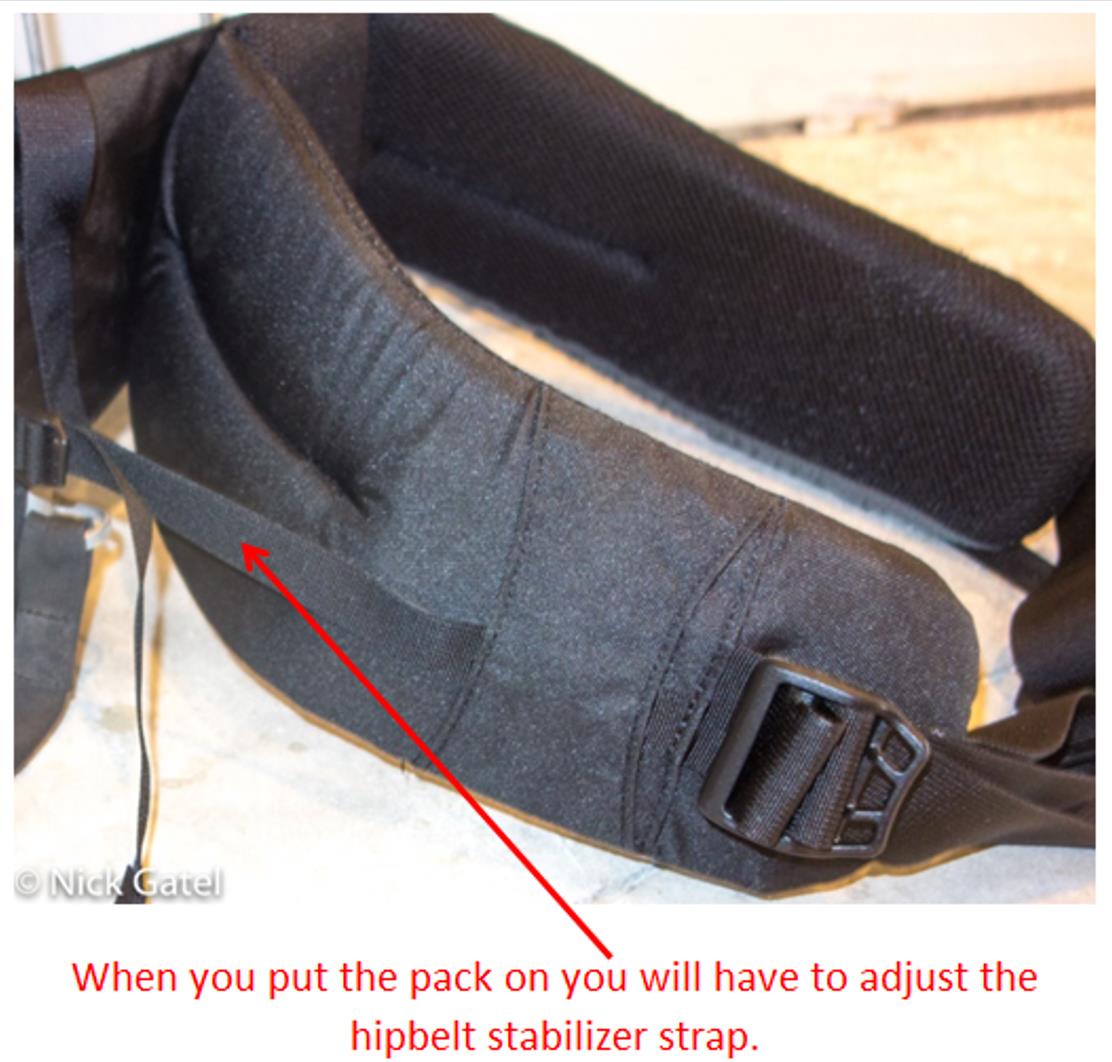
There has been a lot of interest in this post on Vintage Kelty External Frame Backpacks. Seems many folks have figured out these backpacks are fairly light and extremely durable, not to mention several companies are starting to bring new versions of external frame backpacks to market. Yes, as things often go, the old stuff works and marketing people think they have come up with something extra-ordinary, when in fact, they are just re-inventing the wheel. Although I mostly use a couple of internal frame backpacks most of the time theses day, I still use my old Kelty external frame backpacks. They just work and are fun to hike with. Often these old Kelty packs can be found pretty cheap in thrift stores and on eBay.
One problem with these old Kelty packs is the foam in the shoulder straps and hipbelts get rock-hard after several decades. Several folks have told me they would have bought a used one, but the foam was too hard.
Now there is a solution.
In fact the solution has been around for a long time! Order a replacement shoulder strap set and hipbelt for Kelty’s current Trekker 65 external frame backpack. In this post I will show you how to install them on an old-school Kelty backpack.
Below are the parts you need, which fit the Trekker 65 and were easily adapted to my old Kelty packs.

https://www.kelty.com/backpack-accessories/
The hipbelt and shoulder straps are designed to be installed as a set, as the hipbelt includes the strap to connect to the shoulder straps. However, you can install them separately if you choose.
Kelty Trekker 65
Before we take a look at the old Kelty packs, we need to check out the current Kelty Trekker 65 and understand how the shoulder straps and hipbelt attach to this “modern” external frame model.
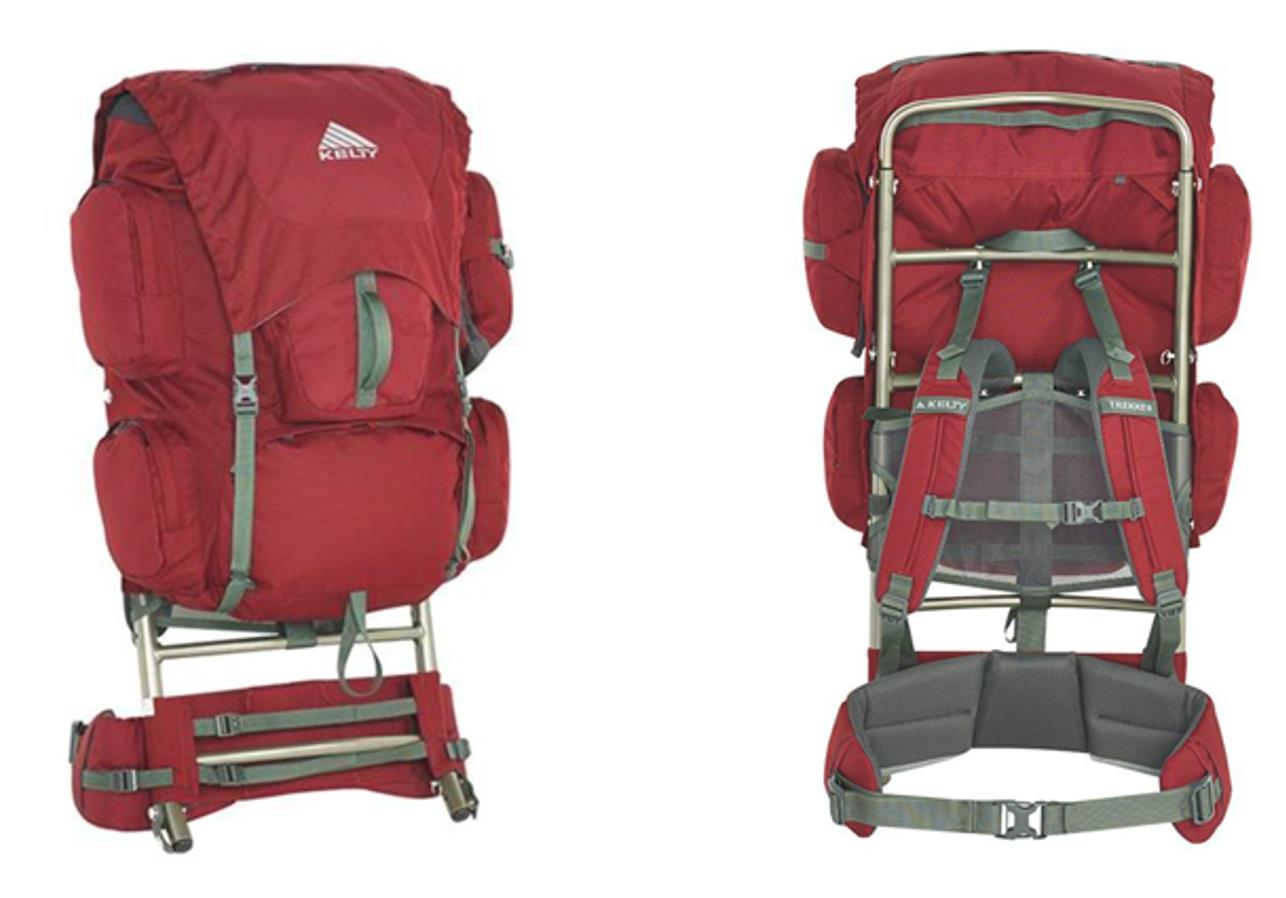

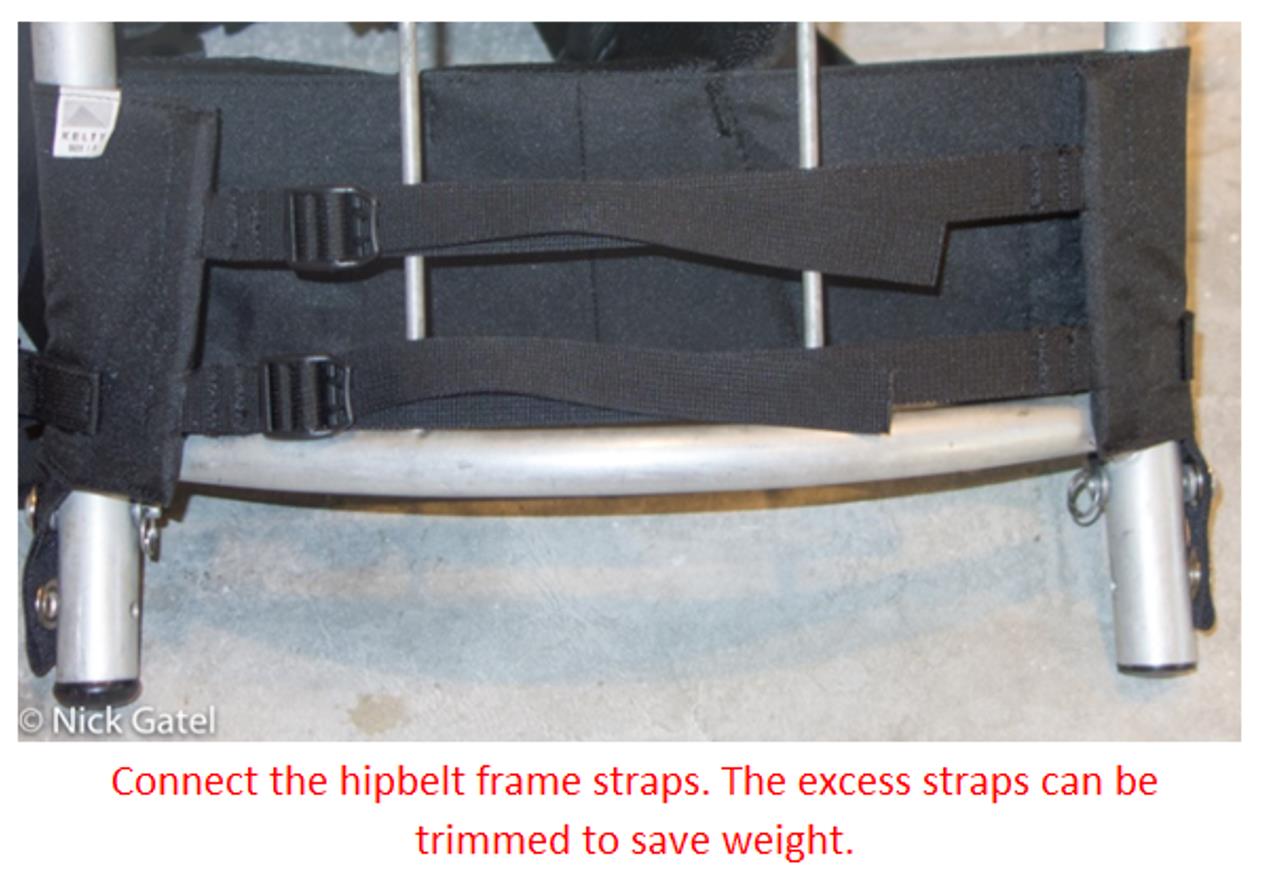
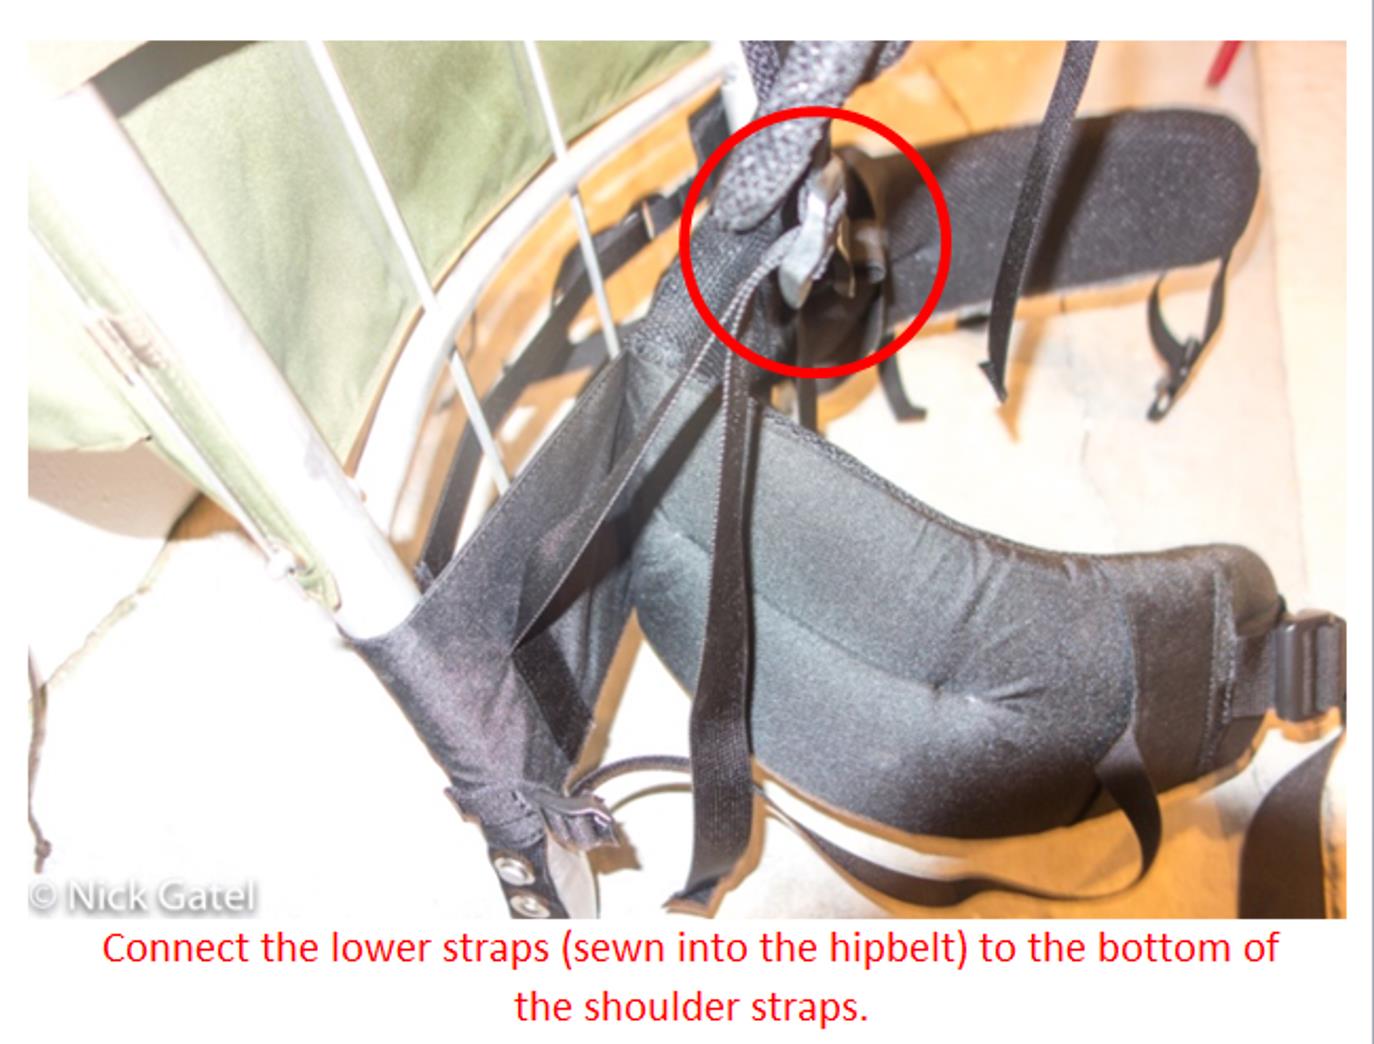
Below is a description of how the hipbelt and straps are connected to the frame.
It is important to note that the “load lifter” straps attach to the Trekker 65 at about the same location that the shoulder straps attach to an old-school Kelty backpack. Therefore the load lifers really won’t work on an older Kelty. You could attach the load lifters to the upper bar of an old-school Mountaineer frame, but it won’t function well at all. The load lifters cannot attach to the old Backpacker frame. To differentiate these two frames, click on the this link.
Trekker 65 Shoulder Strap Kit
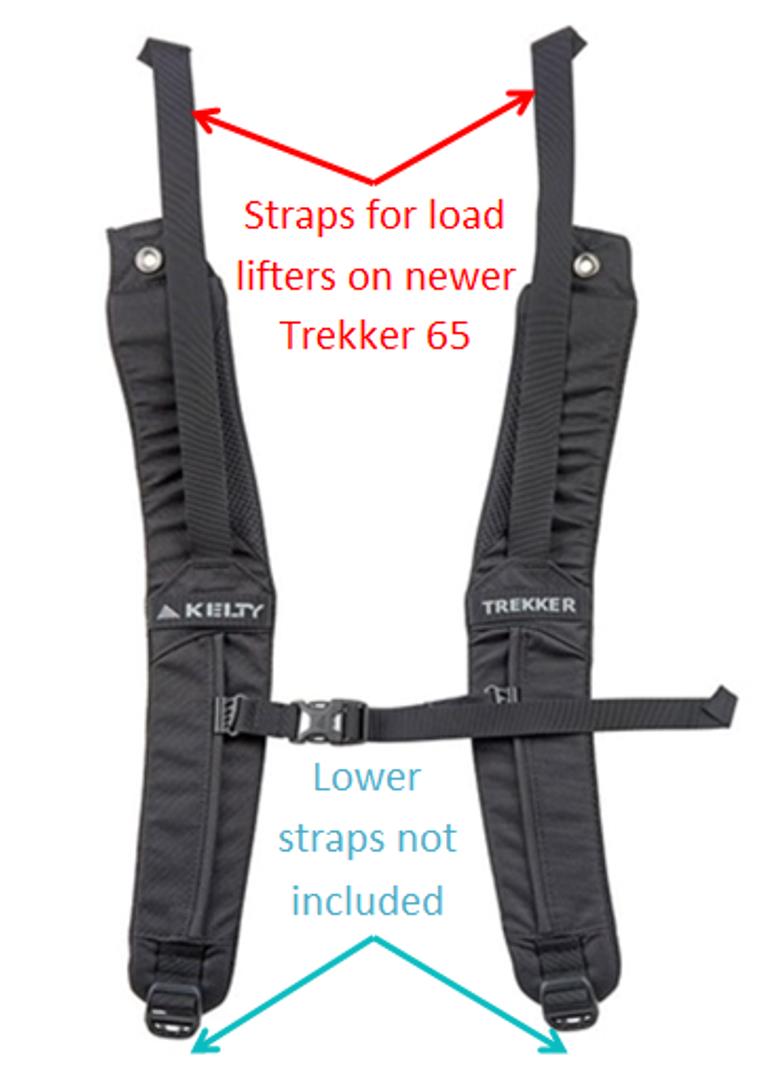
Now let’s take a look at the shoulder strap details:
As shown above, the Trekker 65 shoulder strap kit does not include lower straps to connect to the frame like the original strap. The shoulder strap will connect to the Trekker 65 hipbelt. However, you can elect to connect the shoulder strap to the original lower section of the old shoulder straps.
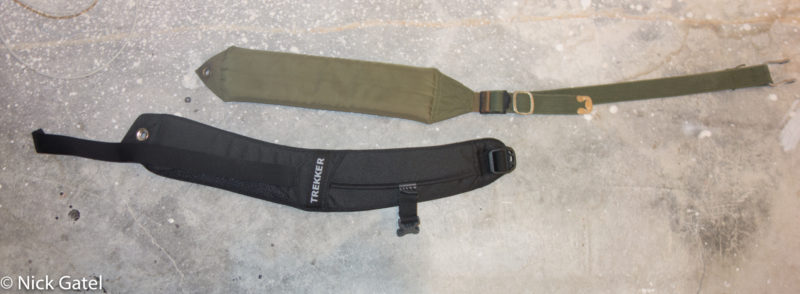
Original shoulder strap and U-bracket:
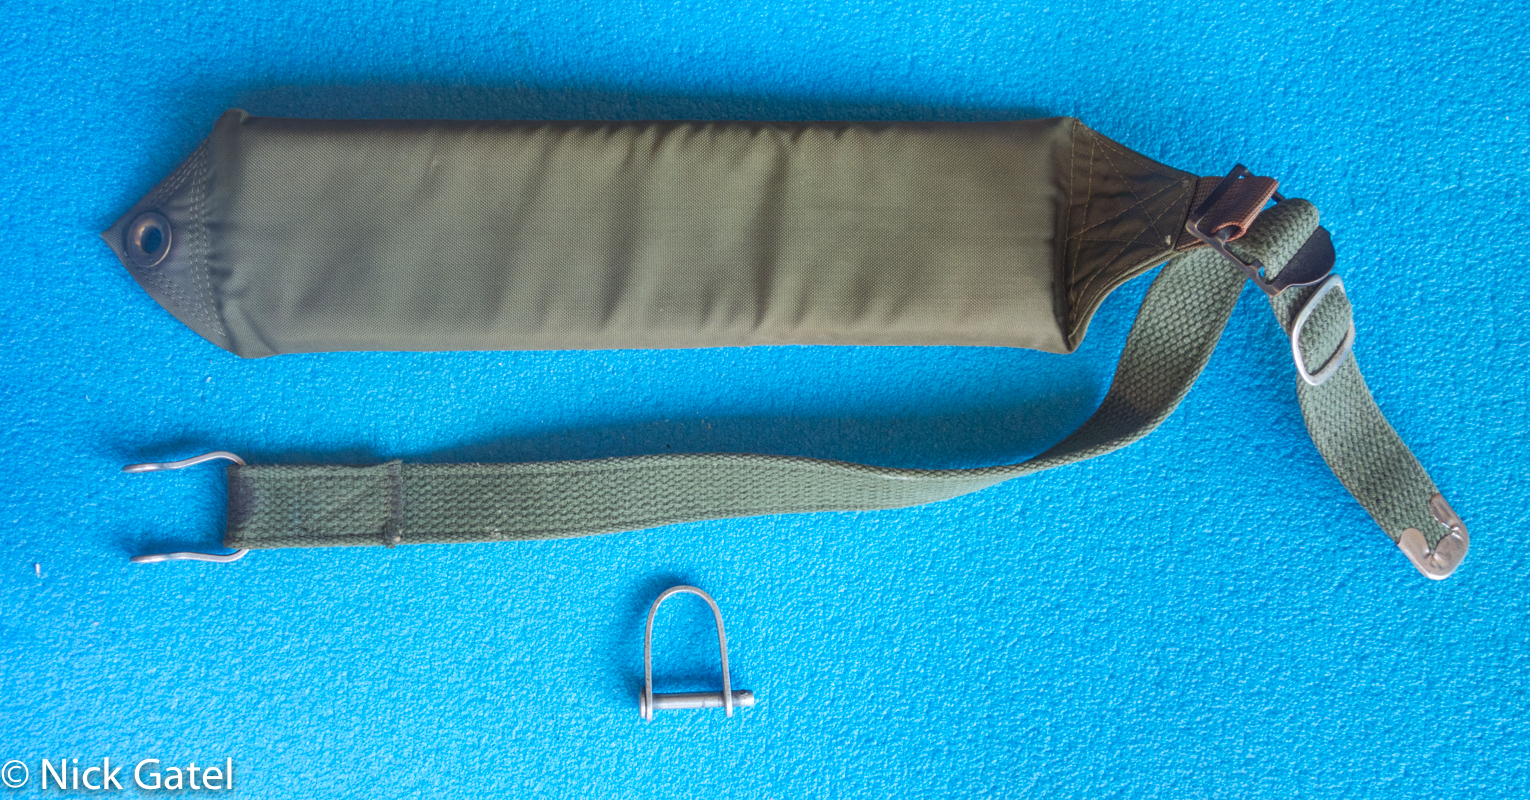
Should you decide to keep the lower part of the original strap, the metal end of the strap (see right hand end of strap in picture above) will not fit through the buckle of the new strap — you will have to cut off the end with the metal keeper.
Trekker 65 Hipbelt Kit
And the hipbelt details: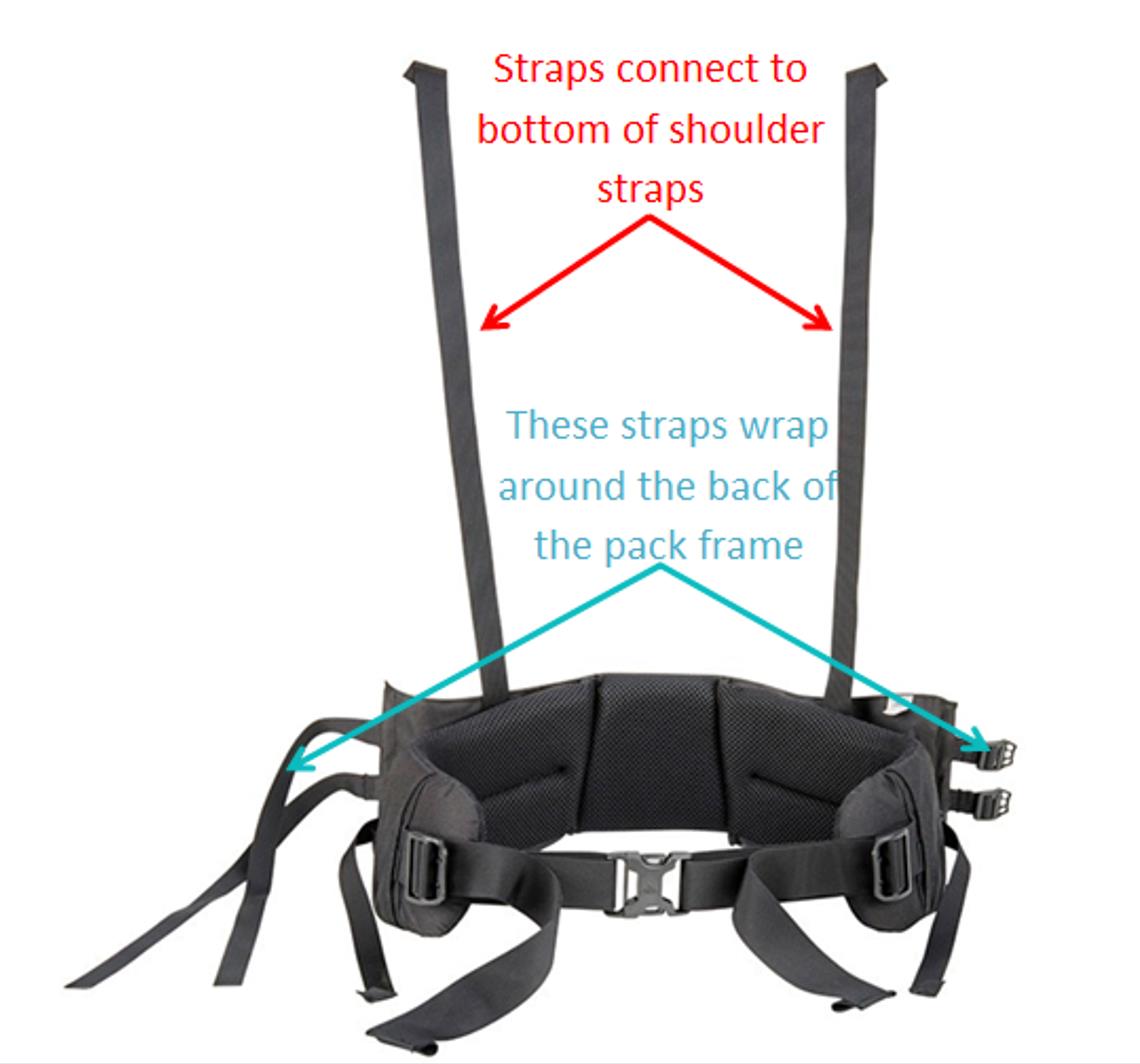
Kelty B4 Upgrade
Okay, now we are going to see how I replaced the hipbelt and shoulder straps on my 1960’s vintage Kelty B4 (model B with two optional extra side pockets) with the larger “Mountaineer Frame.” This pack had the old unpadded web belt; I discarded the original lower shoulder straps and connected the new shoulder straps to the new hipbelt, just as they are configured on the Trekker 65.

Hipbelt Replacement
Shoulder Strap Replacement
If you want to add both the new belt and shoulder straps as a unit, the above pictures show the process. However, you may want to keep reading as I will included some additional information on hipbelts that may be pertinent to your own Kelty old-school upgrades.
Kelty D4 Upgrade
There are a couple differences in this backpack and how I installed the hipbelt. I did not replace the shoulder straps because I had already replaced them a few years ago. However, this upgrade will be appropriate if you want to keep your old original shoulder straps and just install a new Trekker 65 hipbelt.
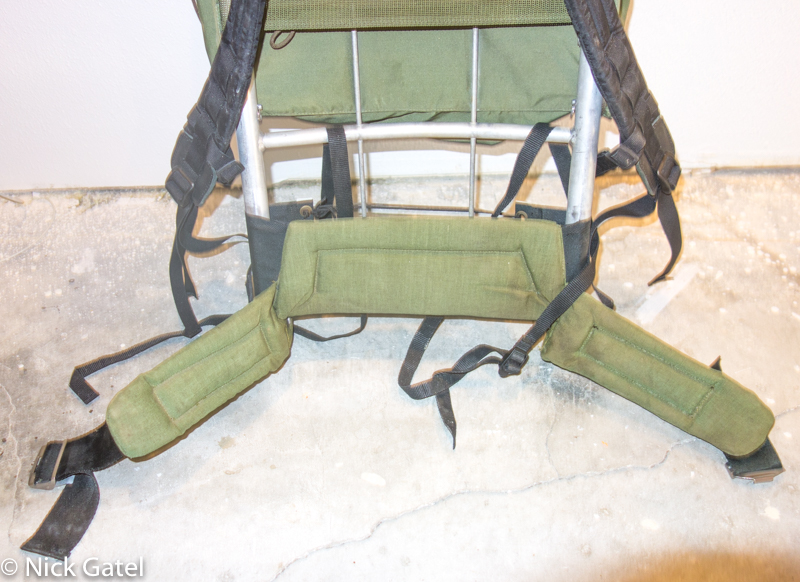
Above: this is an optional Kelty padded hipbelt I bought in 1971. Note that the lumbar pad covers the entire width of the frame. The new belt is a true wrap-around belt, which works much better.
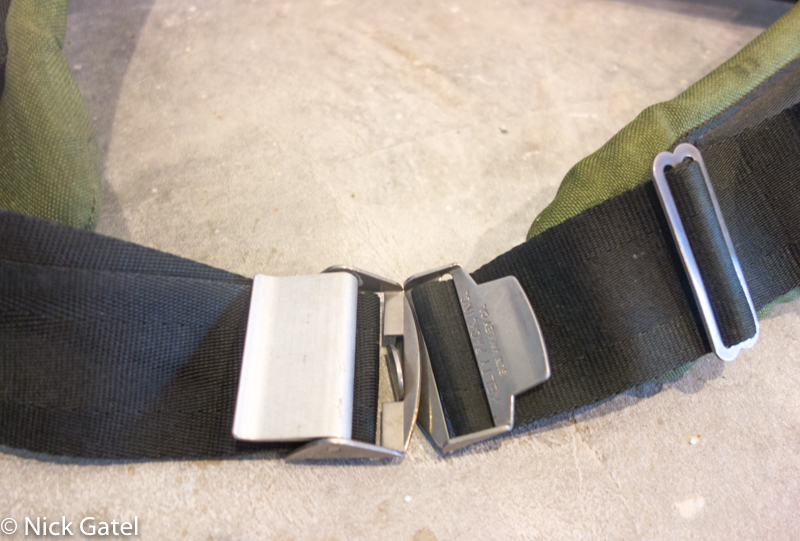
The original hipbelt came with the famous Kelty cam-lock metal buckle. I really wanted to transfer this to the new belt, but the webbing on the new belt isn’t as tall. It could be transferred but probably would work well.

The Trekker 65 hipbelt comes with dual adjustable side straps, which really work better than the original single pull strap.
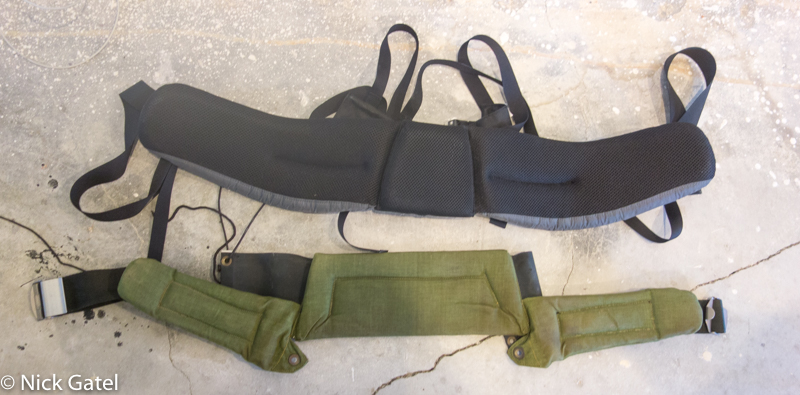
The above photo shows how small the lumbar section is compared to the old original. The new belt fits much better around the hips! It is a huge improvement.
The hipbelt is installed as shown on the Kelty B4 earlier, except the original shoulder strap and U-bracket are kept. The U-bracket connects to the frame with the same clevis pin and split ring that connects the new hipbelt to the frame. With this installation, I cut off the lower shoulder strap that was part of the hipbelt, because I didn’t change the shoulder straps on this pack.
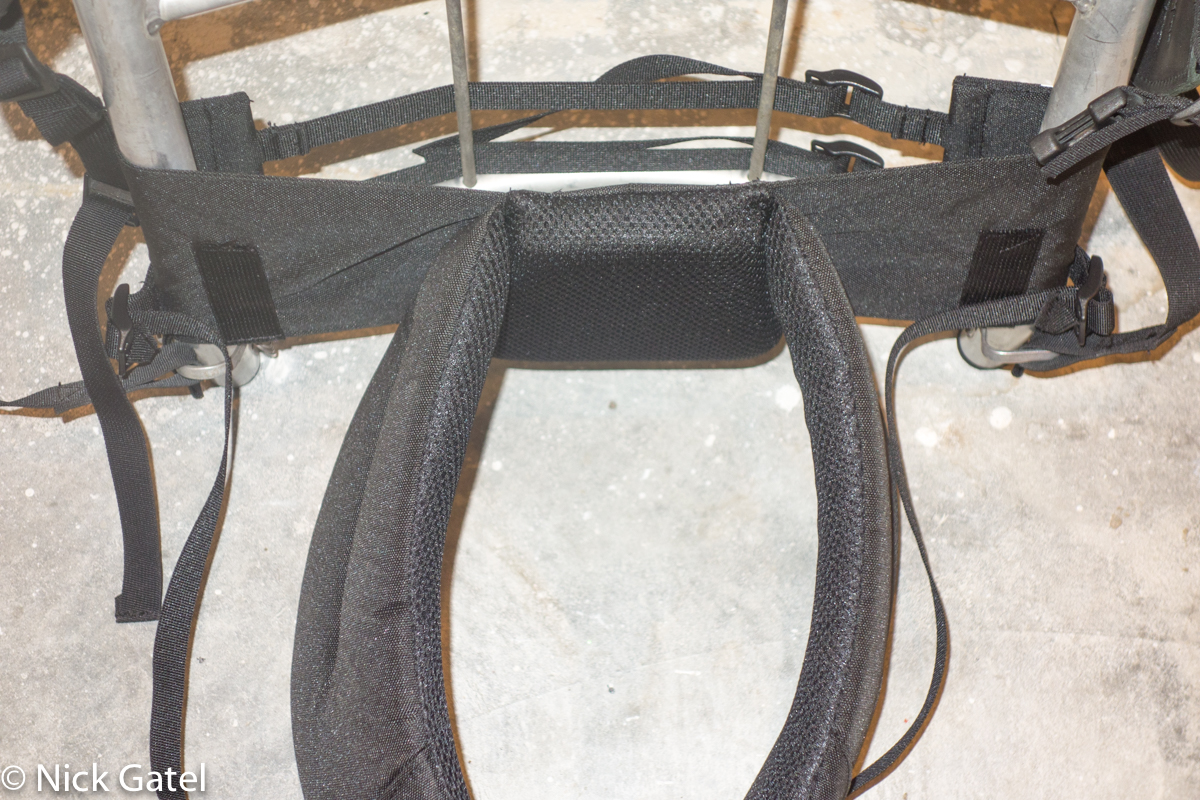
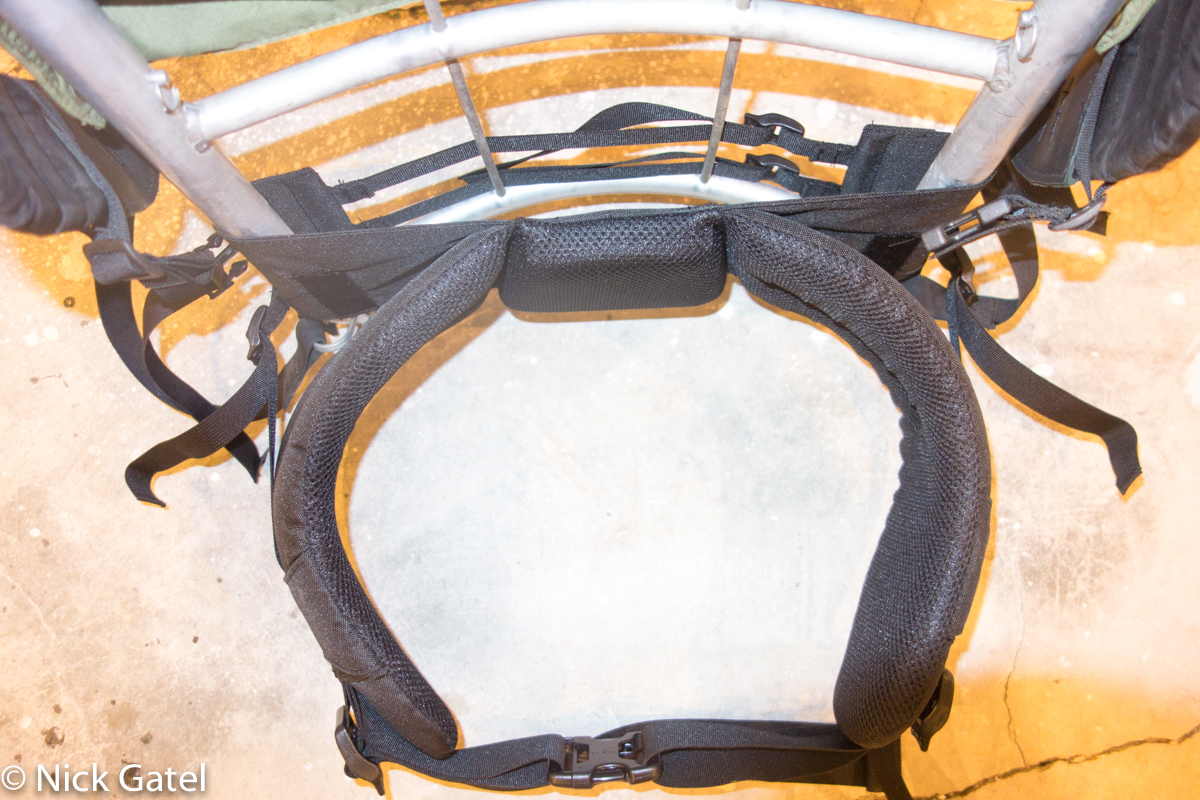
New Hipbelt Installed on Kelty D4
You can purchase the Trekker 65 hipbelt and shoulder straps directly from Kelty at
Kelty Trekker 65 Shoulder Straps
Disclosure: I bought all of these items at full retail price. PopupBackpacker.com pays the bills through marketing links, receiving small commissions from vendors, at no additional cost to the reader. This post contains said links.

