Earlier this month I shared the story of the RV fire I witnessed. This served as a reminder that fire extinguishers, propane/CO detectors and smoke alarms need periodic inspection, maintenance and end of life replacement.
Yesterday I posted an article on When and How to Replace an RV Propane/CO Detector. As promised in that post, this is a companion article on smoke alarms.
When Should You Replace an RV Smoke Alarm?
Check the Owner’s Manual of your product. Our manual states the smoke alarm should be replaced after 10 years. I checked this after the RV fire at our campground. I also added a second smoke alarm just outside our bedroom. The other smoke alarm is above the front door adjacent to the cooking area. Since both were installed at the same time, it will be easier to remember to replace both in 10 years. This, of course, is assuming that I will still be alive and using our trailer since I will be 83 years old.
First Alert BRK Smoke Alarm
Both of our last campers came with the same brand battery operated smoke alarm sold as a First Alert BRK unit. They are approved for RV use according to the manufacturer.
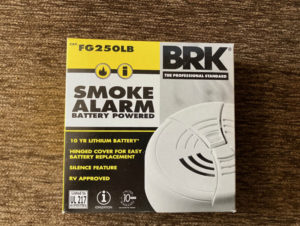
As I found out via Mr. Google, The same parent company (Resideo) owns First Alert and BRK. First Alert is their retail division, and BRK is the commercial division. I mention this because the packaging show it as a BRK product and I ordered a First alert item. Going back to my order, I see that the description is for a First Alert BRK model FG250LB smoke alarm.
How Well Does It Work?
As I have mentioned many times, we rarely cook inside out travel trailer. But I can report the alarm does work even when the smoke is so little it isn’t noticeable. To be honest, in these rare occasions the alarm is kind of a pain in the ass. But we do have an exhaust fan above the stove, which we usually forget to use and it does quickly clear the air.
When the battery gets low, the alarm begins to chirp. The chirping is very annoying, even with my severe hearing loss, giving ample motivation to replace the battery, which is quick and easy to do. We keep several 9V lithium batteries in the camper since they have a shelf life of 10 years.
Volume
The specification sheet says the alarm is 85 dB. Even with my poor hearing it is loud. As I shared, and will document here, our Propane/CO alarm is also rated at 85 dB.
The chart below and descriptions will help to understand (from Decibel Pro )
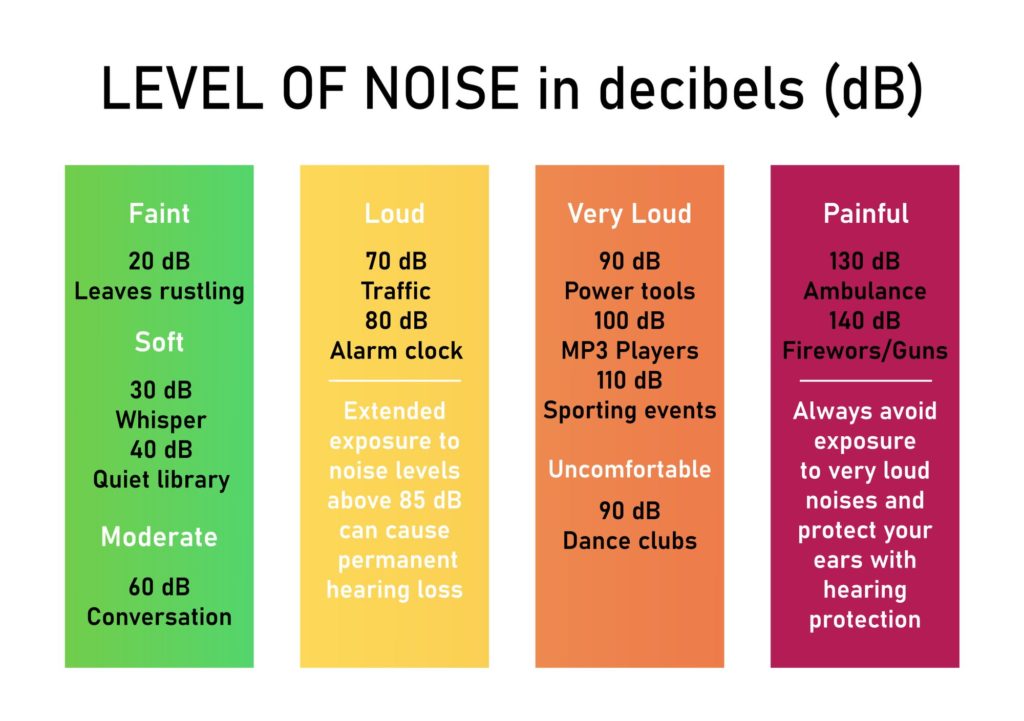
85 decibels is a noise or sound level equivalent to that of a food blender, heavy traffic while you are in the car, a noisy restaurant, or a cinema.
To better understand how loud 85 decibels is, here are some common and specific sources of sounds reaching this level:
Some common sources or examples of 85-decibel noise are:
- Noisy restaurant
- Noisy hotel lobby
- The inside of an airport
- Heavy road traffic
- Train or truck passing
Installation/Replacement
What’s Included?
It comes with instructions, a 9V lithium battery, two drywall-type wall anchors, and two screws. All I needed was a screwdriver to install it. Didn’t need the wall anchors since our camper’s ceiling is a solid material.
Steps
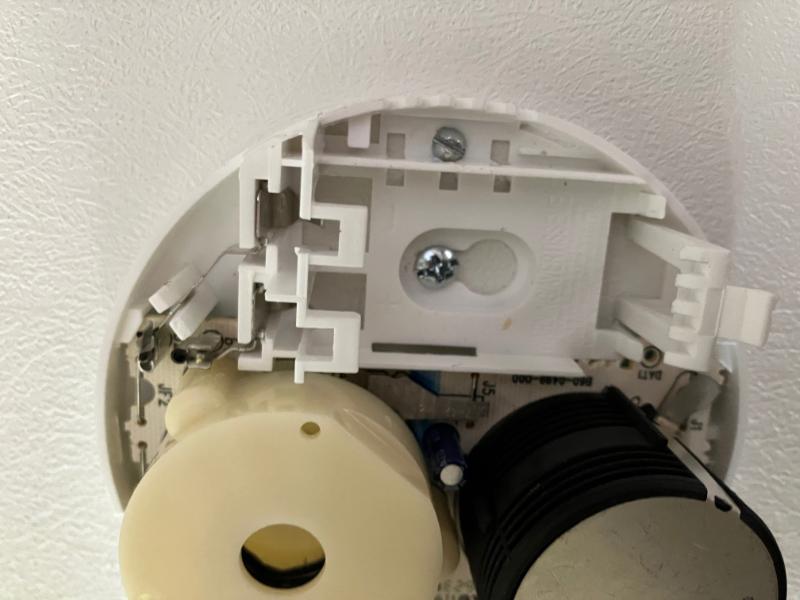
To install the cover needs to be opened and the battery removed because on of the screw holes in under the battery. The battery had a plastic pull-cover that needs to be removed.
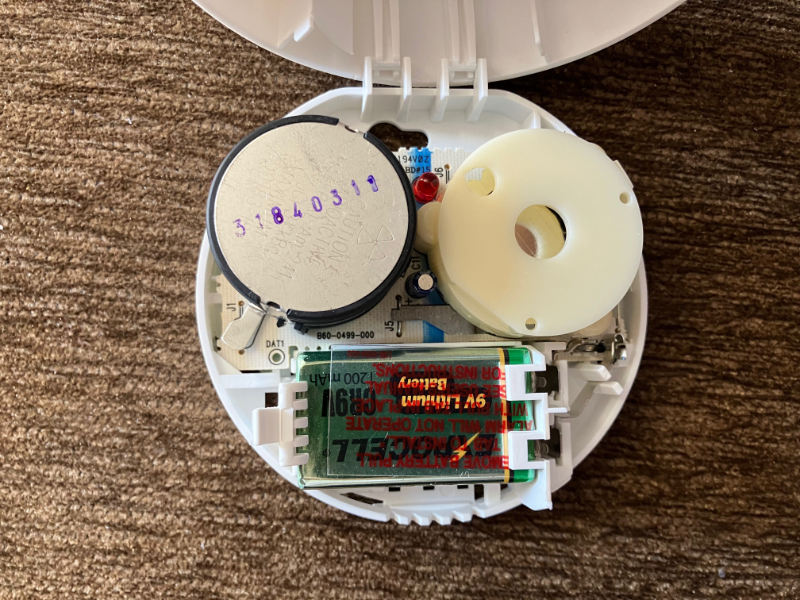
If you forget which terminals in the alarm are positive and negative, the terminals are marked on the alarm as shown below.
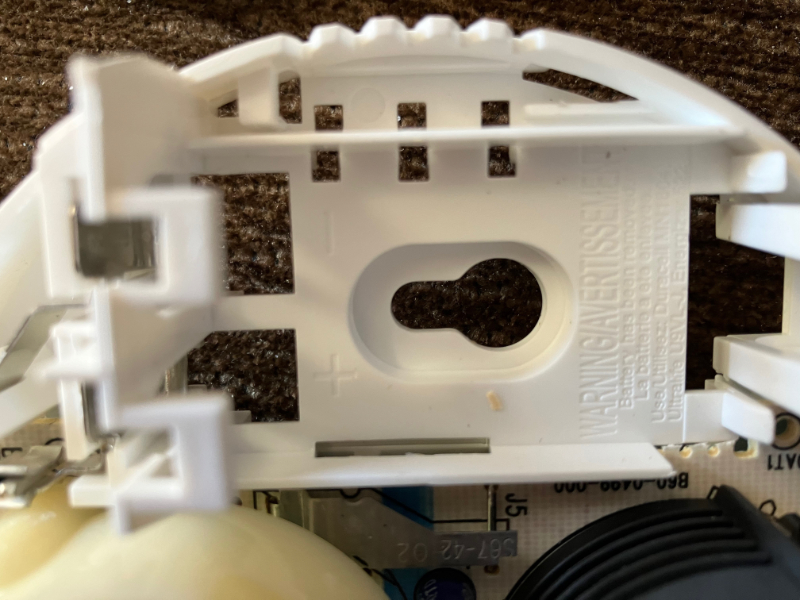
There are two mounting holes in the base of the alarm (see image above). Here is how I did it:
- Place the alarm, which the cover open, against the ceiling and mark one of the mounting hole location with a pencil or pen. Make sure the location will give easy access when the cover is opened for future battery replacements.
- With the alarm placed aside somewhere, install one of the screws into the ceiling. Do not tighten the screw all the way. Leave enough space so the mounting hole can be slipped under the installed screw.
- Place the alarm mounting hole under the screw, with the narrow part of the mounting hole under the screw. Tighten the screw.
- Insert the other screw in the other mounting hole.
- Install the battery.
- Close the cover.
- Test the unit.
Optional:
Because things vibrate in trailers while towing, it is not unusual for screws to become loose. It is possible, should the screws come loose, for the alarm to rotate and fall off the ceiling. Just in case this might happen, I placed a third screw under the battery to prevent rotation. See below:
Testing
Hold the Test Button down until the alarm sounds. It will sound three times, pause, and then sound three more times. If it doesn’t sound check that the battery is good and is installed with the proper polarity. If it still doesn’t work, replace the alarm.
The alarm should be cleaned with a vacuum cleaner periodically. No other maintenance should be done.
Test the unit before each trip. The manual says to test weekly, but we don’t. The low battery chirping works for us.
This website may be compensated for linking to other sites for sales of products. As an Amazon Associate I earn a small fee from qualifying purchases at no additional cost to the purchaser.


