
A couple weeks ago I did a wonderful little desert trip.
Something that I haven’t done in years is share a backpacking trip report gear list. This post will break that trend.
I want to share how I planned this trip, what gear I took, and why I selected each piece of equipment.
Weather and Water
Weather Forecast
The weather forecast for the lower deserts in Southern California was predicting perfect conditions for a backpacking trip. Daytime highs around 70F, with nightly lows in the high 30F range. It was time to plan a trip.
The one item I would not need on this trip was rain gear. No rain in the forecast. For over 10 years my go-to rain gear has been a zPacks Poncho/Groundsheet. One of the best purchases I have ever made in backpacking gear. Leaving it at home would save me 3.4 ounces.
Link to my zPacks Poncho/Groundsheet review below.
Water, the Limiting Factor
The length of any desert trip, in days, is usually determined by water availability, which usually means no water. A two day overnight hike is a simple affair. One can comfortably carry enough water if the conditions are mild. A trip of four of five days requires advanced planning.
The most important factor for this trip was water, or its scarcity. I would need to plan around the one reliable water source in the area I wanted to hike.
Water Caches
One solution is to drive to strategic points near the planned route and cache water jugs before the trip even starts. It works, but takes time and wastes gasoline. Properly cached and stored, a water cache is safe and secure — with one exception — that two-legged critter called homo sapien.
Not surprisingly, these creatures have been known to take someone’s water cache, a.k.a. stealing it. For this reason, it is a good practice to leave a note secured to your water explaining its importance and an approximate date you plan to pick it up. The strategy usually works, but not always.
Here’s a post about an instance of this inhumanity I wrote in 2013, Balls and Sunshine Ripped-off on the CDT!!
Over the years I have cached water a few times, but usually rely on reliable natural water sources. These sources can be difficult to locate. Reliable is the keyword. Maps showing springs are not a reliable source.
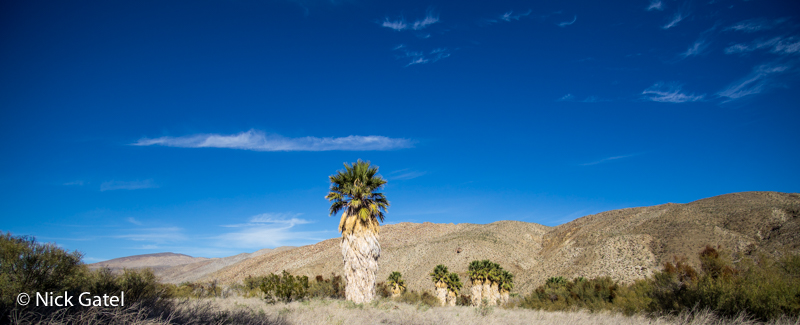
Anza Borrego Desert State Park
The largest state park in California at over 600,000 acres (935 square miles), it is the largest state park in the lower 48 states.
It lies in the Lower Colorado Desert of southeast California — meaning it gets incredibly hot in summer. Within the park, there are 12 designated Wilderness Areas comprising around 87% of all California Wilderness Areas that are administered by the State of California.
There are over 500 miles of dirt roads open to the public and over 100 miles of hiking trails.
As you can imagine, it gets a lot of use in the cooler 6 months of the year. However, there are plenty of places where one can find solitude. Backpackers can camp almost anywhere they wish (check regulation for exceptions) and no permits are required for backpacking.
However, due to the lack of water it is uncommon to see a backpacker far from a dirt road. This is a huge attraction for me.
Coyote Canyon
A popular area for 4WD enthusiasts, the mouth of this canyon is adjacent to the small town of Borrego Springs. The Canyon itself is 35 miles long. An easily accessible dirt road winds through the lower section of the canyon. The first few miles are often accessible with 2WD vehicles, but soon require high clearance 4WD vehicles. In winter, after rainstorms, it is often inaccessible to any vehicle, as the canyon’s watershed dumps water into Coyote Creek.
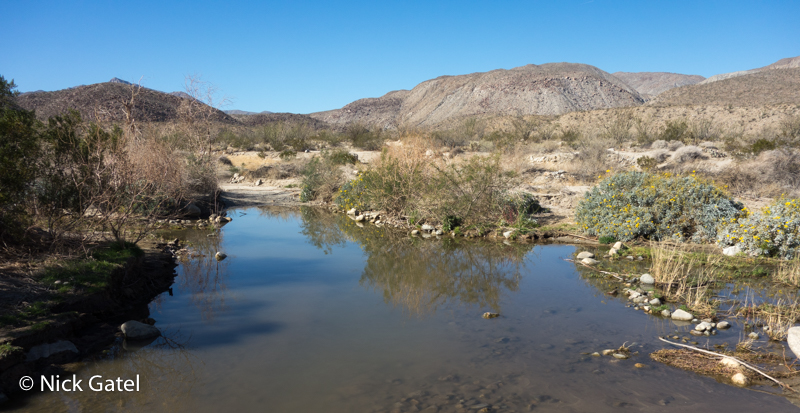
Coyote Creek
This is the only reliable perennial stream in Anza Borrego. During winter rains it can double in length. Most of the year it is around 18 miles in length and often most of the creek bed is dry.
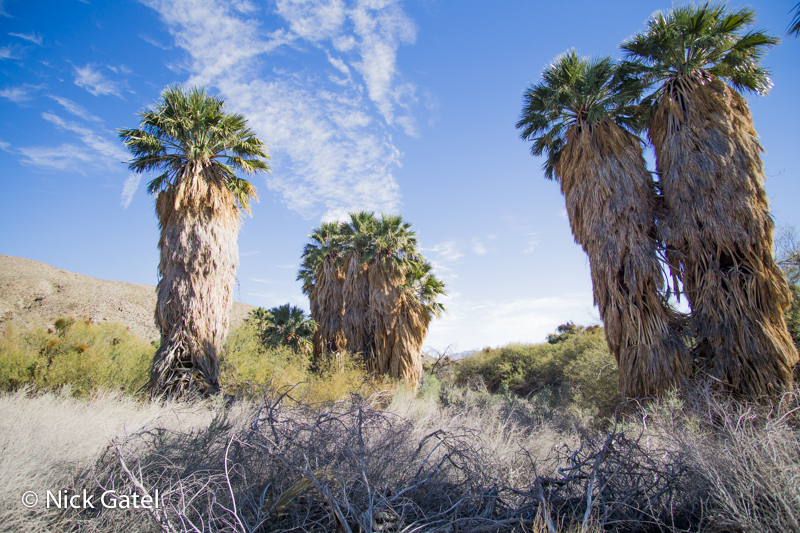
There are three spots along the creek that always have water, due to underground springs: Upper, Middle, and Lower Willows. Lower Willows is the largest, getting its water from the Santa Catarina Spring.
Coyote Creek Road
The lower section of the road crosses the stream bed three times. These crossings are aptly named: First Crossing, Second Crossing, and Third Crossing. Each crossing becoming increasingly difficult to drive through.
Third Crossing is right at the southern edge of Lower Willows.
Lower Willows the Center of the Trip
Reliable water here was the focal point point of my little adventure. I would do a modified figure eight loop. One loop would be north of Lower Willows and the other southeast of this point. Midway, after two and a half days north of Lower Willows, I would return back to Lower Willows to refill my water bottles and canteens at the spring.
Driving up Coyote Canyon, I parked my truck on the side of the road below First Crossing. It would take a little over an hour to hike to Lower Willows. From here I would hike northward on a rough boulder-strewn jeep trail through a pass between a couple of hills that separate Collins Valley from lower Coyote Canyon.
Once through the pass, Collins Valley would unfold before me. Collins Valley is contained in the northern part of Coyote Canyon. I would do a large loop around the perimeter of Collins Valley and return to Lower Willows as the midpoint of the trip.
After completing the first loop and returning to Lower Willows to fill up my water containers, the second half of the trip would involve a loop in the hills and canyons east of Coyote Canyon. This section is rugged and navigation can be challenging. The end of the loop would be a climb over a section of the Santa Rosa Mountains via Alcoholic Pass. My truck would be parked at the bottom of Alcoholic Pass.
My Water Plan
I would start with six liters (~1.5 gallons) of water in my pack. Since it would be short walk to Lower Willows from my truck, there wasn’t any need to fill up there. It was logistically easier to fill my water bottles at home at start the trip at full capacity.
Day 1 (1.5 liters)
- 0.5 liter for drinking during the day
- 1 liter for dinner and hot chocolate
Day 2 (3 liters)
- 1 liter for breakfast and coffee
- 1 liter for drinking during the day
- 1 liter for dinner and hot chocolate
Day 3, Part 1 Morning (1.5 liters)
- 1 liter for breakfast and coffee
- 0.5 liter for drinking during hike back to Lower Willows
- Refill water bottles and canteens at Lower Willows
Day 3, Part 2 Afternoon (1.5 liters)
- 0.5 liters while hiking
- 1 liter for dinner and hot chocolate
Day 4 (3 liters)
- 1 liter for breakfast and coffee
- 1 liter while hiking
- 1 liter for dinner and hot chocolate
Day 5 (1.5 liters)
- 1 liter for breakfast and coffee
- 0.5 liter for hike to the truck
Adjustments to the Water Plan
As it turned out, I was able to finish the hike early, getting back to my truck at the end of the fourth day.
So a 5 day hike ended up only being 4 days.
I need to point out that I have lived in one of the hottest deserts in the US for 45 years. Over the decades I have become acclimated to the desert and require less water than most people. Before setting out on a trip like this, one needs to know how much water their body needs. Everyone is different. Disregard what “experts” say, and err on the side of bringing too much water.
Higher temperatures and more strenuous hiking (think big long elevation gains) will require even more water.
The Hike
I didn’t take many pictures. Picture taking is a time consuming pain in the ass. I usually take a few pictures to share with my wife and kids.
Anza Borrego is famous for its wildflower blooms, which usually occur towards the end of March and early April. This is dependent on how much rain falls in the two or three months prior and the weather at the time of the bloom. Most years are so-so. Some years are fabulous. I was hiking in late January, and there would be very few wildflowers, as expected.
The difficulty with the fabulous years are the number of people driving to the area, most of whom only want to snap a few selfies for their social media endeavors. Hence, the biggest threat to wild places is the Internet, in my opinion. Of course one can simply backpack in these areas to spots where few people wander, as I shared a few years ago in this post, Anza Borrego Super Bloom 2017.
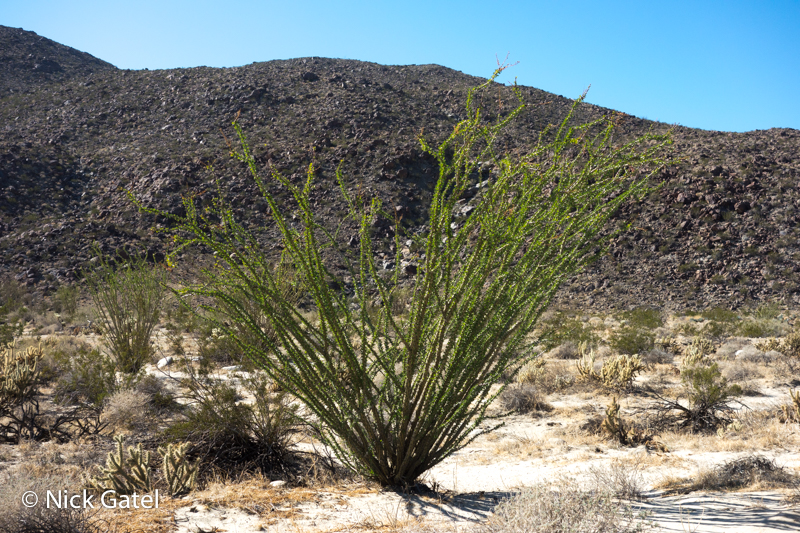
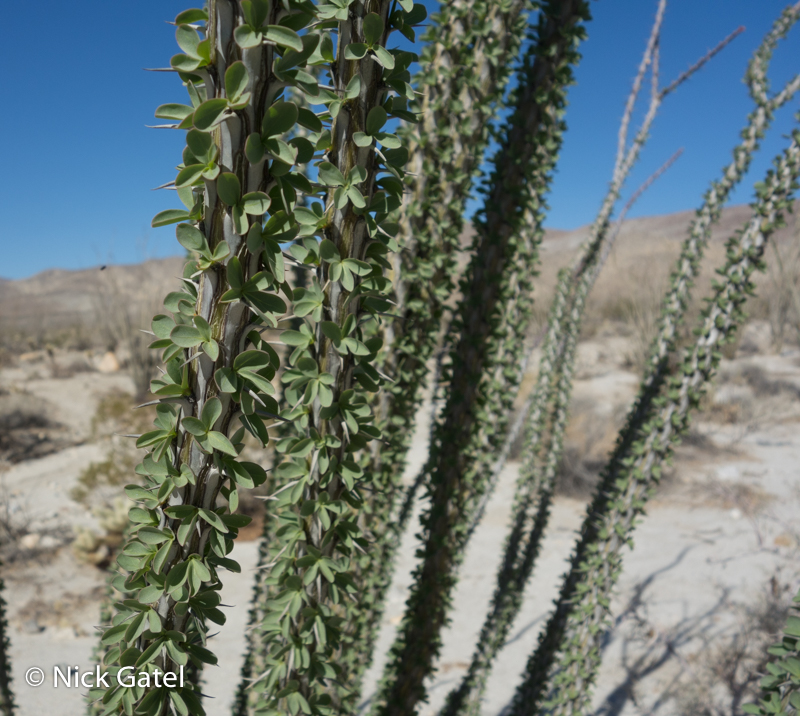
We won’t know how the spring bloom will be this year yet. However, we had some nice rains in late December and early January. And the ocotillos are starting to sprout green leaves as a result.
Most trails in the area are multi-use allowing horses, mountain bikes, and people. With this kind of traffic the trails get rather sloppy with a lot of loose sand. I mostly avoid these trails. I also try to avoid dirt roads.
The trail through Lower Willows has been closed for a couple years, which did force me to hike the rough “by-pass” jeep trail to get into Collins Valley. By-passing the Lower Willow Trail was actually not a bad thing. This time of year it is a mud-slough to hike through.
This brings up an important point: always check the rules and regulations of the places you want to hike in. They often change, and more and more, there are seasonal or temporary restrictions in place. Agencies enforce the concept that you are responsible for knowing the rules — even though it is hard to get an agency to answer the phone, reply to emails, or even find new regulations that are posted on poorly designed websites.
One permanent rule in Anza Borrego State Park is no one is allowed north of Lower Willows from June 1 — September 31. This is in place to make access to watering holes by big horn sheep easier.
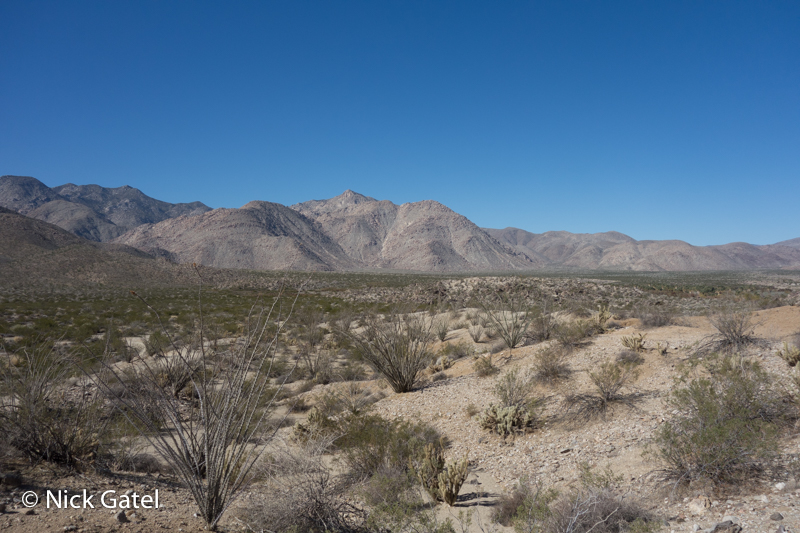
As you can see, cross county travel opportunities are plentiful, and it is rare to see another person in the area once you move away from the existing dirt roads and trails. I did hike some sections of trails and did not see a single person over the course of four days.
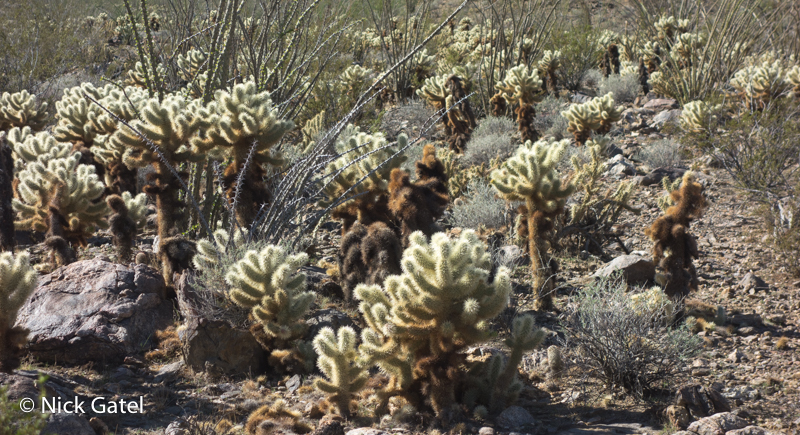
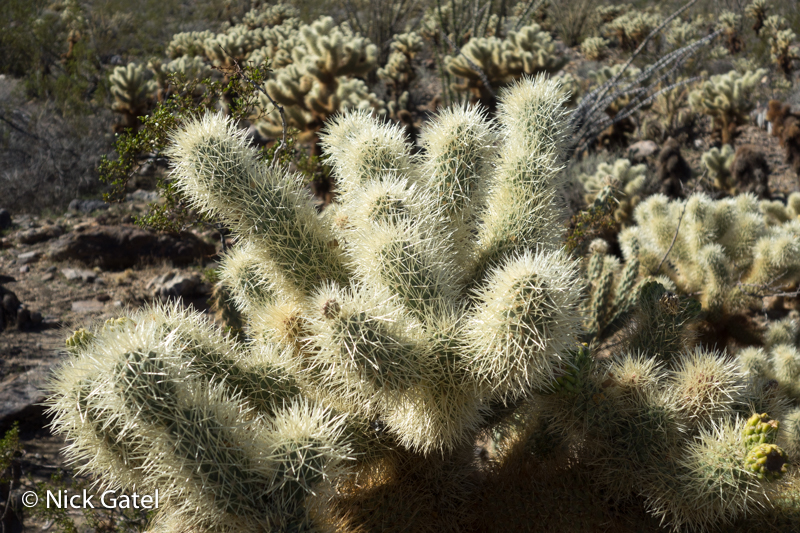
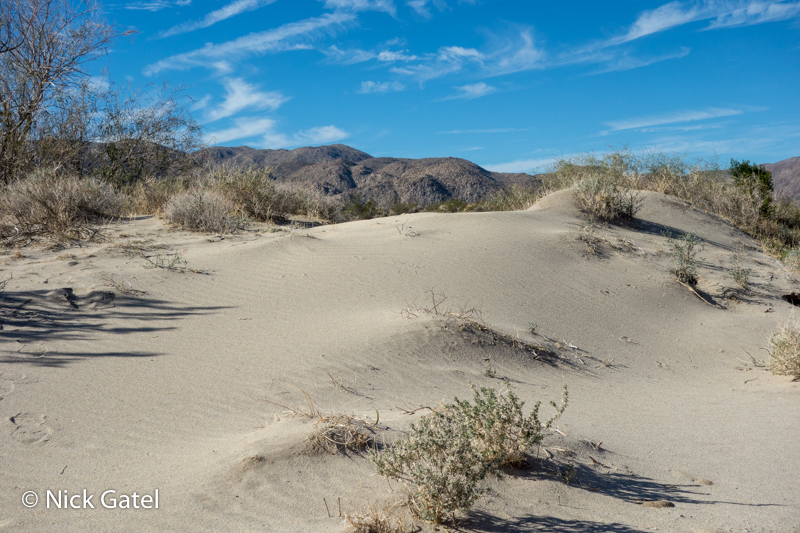
As a few pictures above show, cross country travel can get difficult at times with thick brush and cacti.
Gear
Items Worn and Carried
For those to regularly follow my blog, the items below are almost a uniform for me. I wear them on most trips.
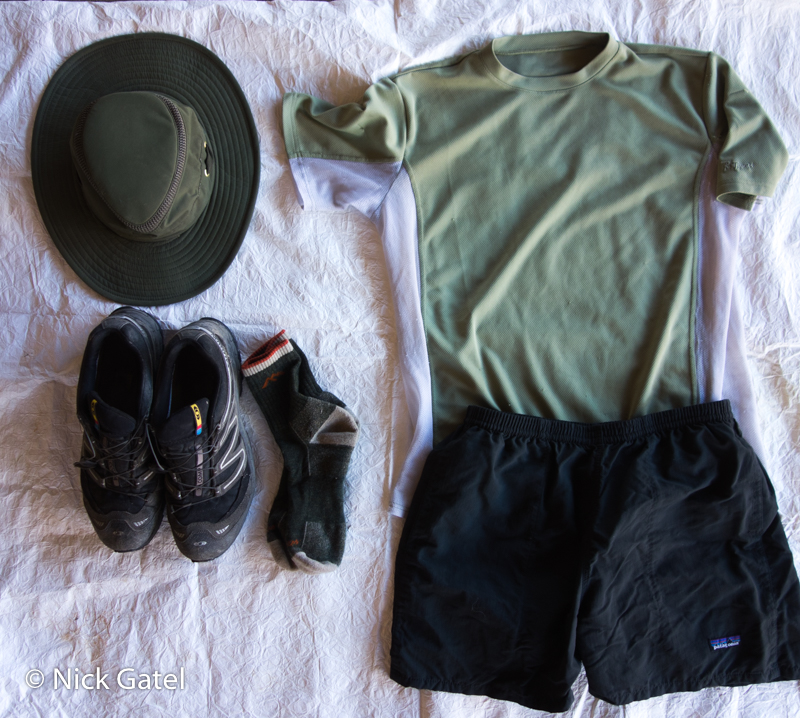
Tilley LTM6 Airflo Hat (3.84 oz)
This is the hat I wear on most trips. I have two of them. One olive-green and the other a khaki color. In this post, I took a “deep dive” into the LTM6 features and benefits.
Salomon XA Pro 4D Comp Gore-Tex Shoes (1 pair, 13.40 oz)
Wait a minute!!
Regular readers know I abhor water-proof breathable gear. I have ranted and raved about this many, many times.
And I still stand behind those rants.
In the post below, about my winter footwear, I mentioned I sometimes used Gore-Tex shoes on snow trips. On these kinds of trips, where I don’t really anticipate much wet snow or water they work well for me. I don’t need waterproof shoes, and I don’t need breathable shoes when temperatures do not get above freezing.
In the link below, I trace the history of waterproof breathable gear and conclude that products like Gore-Tex are not waterproof, nor breathable over the long haul.
The Search for the Holy Grail: Waterproof Breathable Rain Gear
Lastly, in this post, I agreed with Andrew Skurka that Gore-Tex and similar products are mostly hype.
So what the hell am I doing wearing Gore-Tex shoes?
Since they really don’t breath, they don’t allow fine dust to get into your shoes!!
In the temps I was hiking in, I didn’t need breathable shoes.
Now here is something to consider — a lot of people swear by gaiters to keep fine sand and dust out of your shoes. I have found, over the years, they don’t do a great job — because most of the dirt and dust that gets into your shoes get there via the breathable mesh material of the shoes.
I was expecting to walk through a considerable amount of loose sand, and the Gore-Tex shoes solved the dirt problem. After 4 full days of hiking without changing my socks, or even taking them off at night, my feet looked pretty darn clean!
Vermont Darn Tough Wool Socks (2.50 oz for the pair)
I’ve been wearing these for several years now. As the name indicates — they are darn tough! I should write a review.
RailRiders Eco-Speed T-Shirt (4.59 oz)
Supporting my theory that companies will discontinue great products and replace them with no-so-good items, this shirt was discontinued many years ago. As is my habit, when I find a product (usually clothes and footwear) I really like, I purchase several before the company discontinues the product. I bought a few of these shirts a long time ago.
The material has an open weave that breathes incredibly well, and the material is somewhat thick. At first glance it would appear the material is too bulky and won’t cool well. The opposite is true. The shirt is very efficient at wicking moisture away from the skin and keeping me comfortable over a range of temperatures and humidity. There are panels on each side, from the arm pit down to the bottom of the shirt, constructed of an open-mesh material to enhance air flow.
It is mind boggling that a company would discontinue such a perfect garment for outdoor activities.
For over 10 years it has been my primary shirt for most trips.
Patagonia Baggies Shorts with 5” Inseam (5.40 oz)
A couple years ago I wrote a 35 year review of the Patagonia Baggie Shorts.
What else can one say about a piece of gear that has been a staple of their gear closet for decades. Of course, I’ve gone through a few of these, but they last longer than any other pair of shorts I’ve ever owned.
They are tough and breath well. It probably helps that I always cut out the nylon liner when I buy a new pair.
Here’s another thing. The pockets are huge and keep things nice and secure, which leads to an observation . . .
Over the years I have noticed folks who create gear lists relegate a bunch of stuff to being “carried” versus being transported inside their pack.
Why?
Is it better to carry a bunch of stuff in your pockets?
Often these gear lists are just below some magical cut-off point for the the gear carried in the pack. Perhaps 5 or 10 lb. Removing the carried stuff from pants pockets and back into the pack’s weight on a spreadsheet will push this base weight over some arbitrary weight threshold. Silly.
I also separate items on my gear list into what I will carry outside the pack, because my gear list is really a checklist to ensure I do not forget anything. This post explains how I use gear lists to Excel at Backpacking.
Back to the Baggies Shorts and the pockets. Nothing has ever fallen out of my pockets.
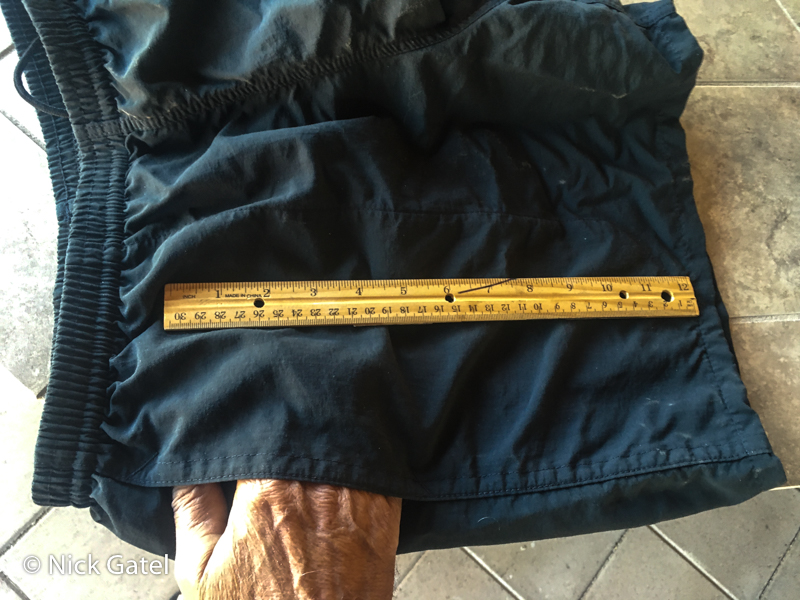
As you can see (above) the pockets are over 12 inches deep and about 7 inches are below the opening for your hand.
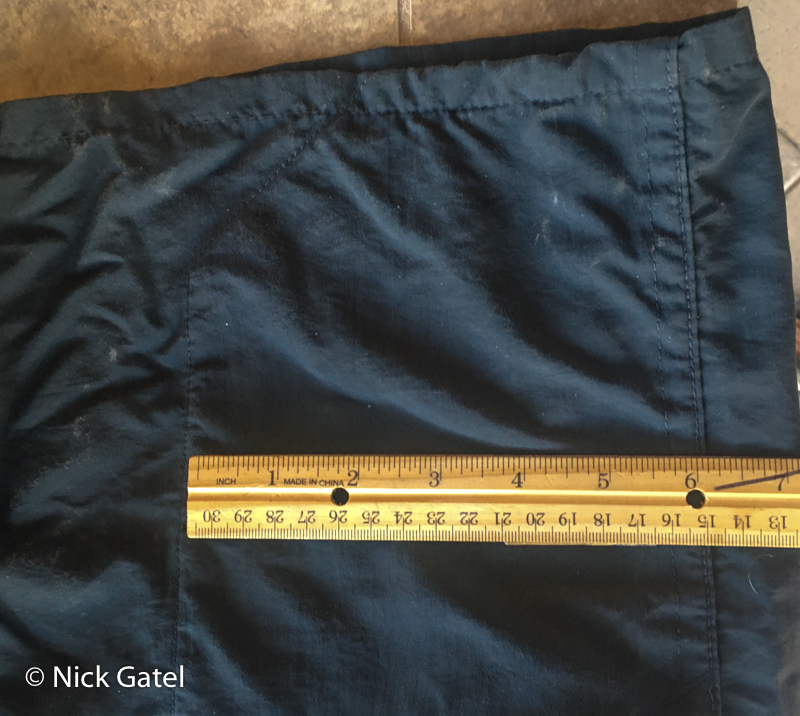
The pockets are 6 inches wide, excepting a small 45 degree angle at the very bottom.
For the past 10 years I’ve carried a Sony RX100 camera in one pocket. At times I will also carry a tube of chapstick. The pockets easily swallow a folded map and my rather large Cammenga Lensatic Compass. I only carry the map and compass in my pocket when navigating difficult terrain. The rest of the time is resides in my pack, and is notated on my gear list as being in the pack.
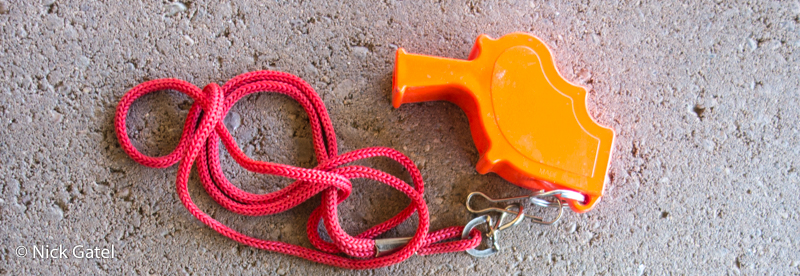
Other Items Carried Outside the Pack
Tracks Hiking Staff
Fox brand emergency whistle and a Photon Micro-Light II
Sometimes I’ll carry a tube of Chap Stick in a pocket, but most of the time it is in my backpack and calculated as part of my base weight.
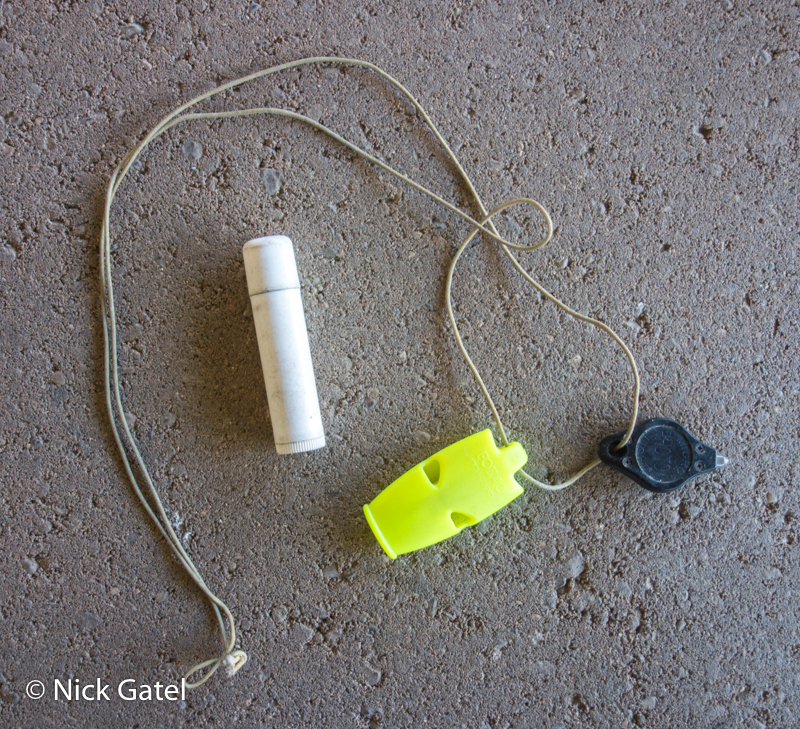
That’s it. Everything else goes inside the pack.
Extra Clothing
Additional clothing inside the pack is dead weight until you need it, then it is like gold. Valuable.
Deciding on what extra clothing to bring is a balancing act between expected conditions and minimizing weight as much as possible. It is best to utilize a layer strategy where two or more items can function as one thicker and heavier piece of clothing. I took a deep dive into this a couple years ago — Understanding Layers Using Patagonia Clothing as a Guide.
A picture of the extra clothing I carried on this trip (below). As mentioned earlier, I was expecting daytime highs around 70F and nightly lows in the high 30F range. Of course weather forecasters can be wrong. Additionally periods of gusty wind was forecasted, which can lower the effective temperature.
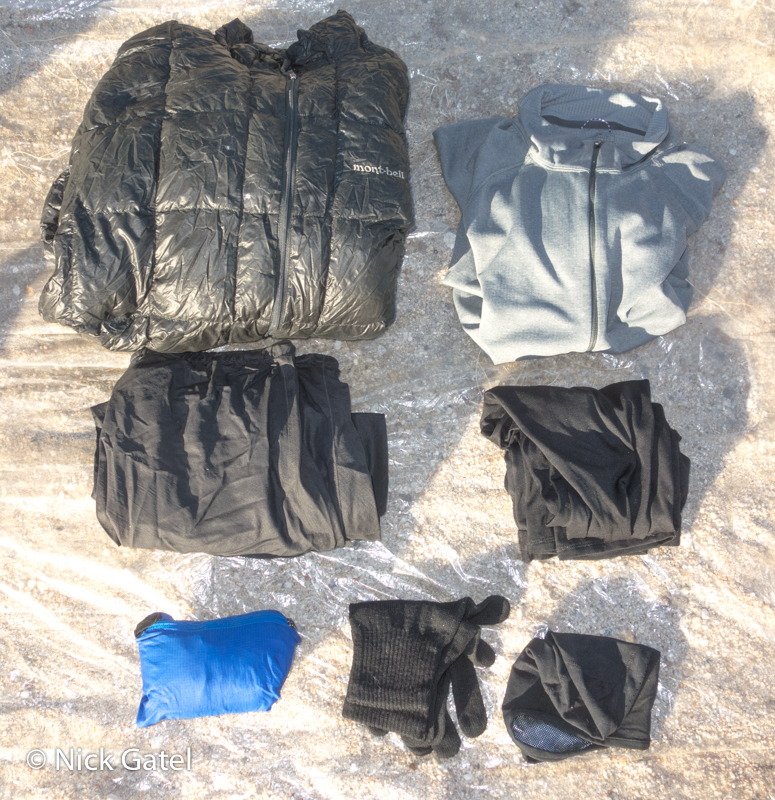
Top Row (L to R): Montbell Extremely Light Down Jacket (6.21 oz) and Patagonia Capilene Mid-weight long sleeve shirt (8.50 oz).
Middle Row (L to R): Montbell Dynamo Wind Pants (2.79 oz) and Patagonia Capilene 1 base layer bottoms (4.97 oz).
Bottom Row (L to R): Patagonia Windshirt stuffed into its top pocket (4.23 oz), SmartWool Merino Wool Glove Liners (0.74 oz), Columbia Omni-Heat Backcountry Ride Beanie (0.71 oz).
At night I wore the Patagonia Mid-weight baselayer shirt and the Capilene 1 bottoms to bed, mostly to help keep my sleeping bag clean. I also wore the Columbia Beanie to bed because my sleeping bag does not have a hood.
Using different layers, the clothes provided many layering combinations and flexibility.
Backpack
Back in 2020, at the height of the COVID pandemic and government lockdowns, Dan McHale crafted a 3rd customized backpack for me.
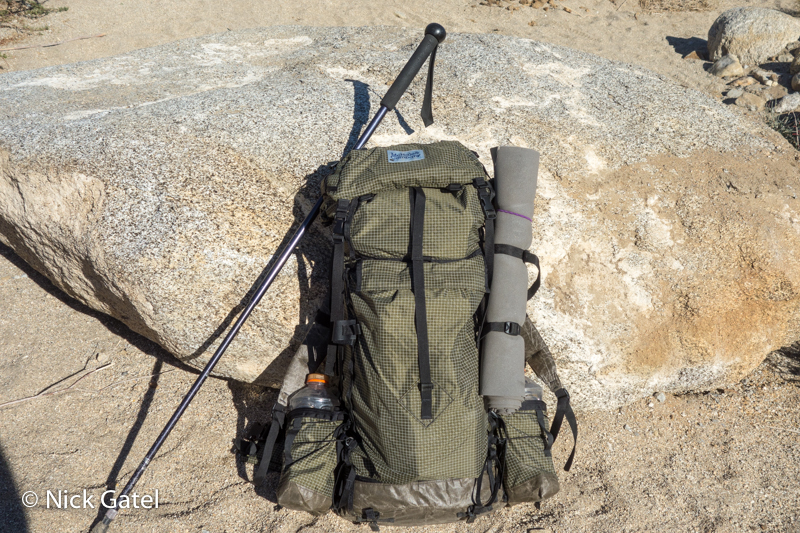
It is a Little Big Pack 34 (LBP34). the 34 stands for 34” circumference. This is the smallest Little Big Pack model Dan makes. It fits nicely between my Bump32 and LBP36. I am finding it is the perfect size for three season trips of 4 to 5 days — even when I need to carry up to 2 gallons of water, which weighs almost 17 lb for just the water!
I suppose I ought to do a review of this pack and compare it to my other McHale backpacks. In the meantime, if you would like an in depth review of the other two packs, a long term review follows.
McHale Backpacks — Long Term Review (Bump 32 and Little Big Pack 36)
I did not order hip belt pockets or a shoulder strap pocket with this pack. For one thing, I have those options on my other two McHale packs and can transfer them to my new pack. I rarely use them on the other packs as it is.
When I walk, I don’t want to deal with equipment or even think about equipment. With a well designed and proper fitting pack one will soon forget they are carrying a pack, unless your pack is just too heavy for your body to carry comfortable. During the day I am not using much equipment. If I want to take a picture, I grab the compact camera that is in one of the pockets of my shorts, capture the image, and put it back.
Some times I want to use my binoculars. I carry it around my neck via its strap. Most of the time it resides in my pack. If I need to navigate with map and compass, the pockets of my Patagonia Baggies Shorts are large enough to carry them without any discomfort or distraction.
I do like a top lid on my packs to keep smaller items close at hand and easily accessible, which also helps me keep gear organized at my night camps.
What follows is a detailed overview of all the gear I carried in my pack, other than the clothing discussed earlier.
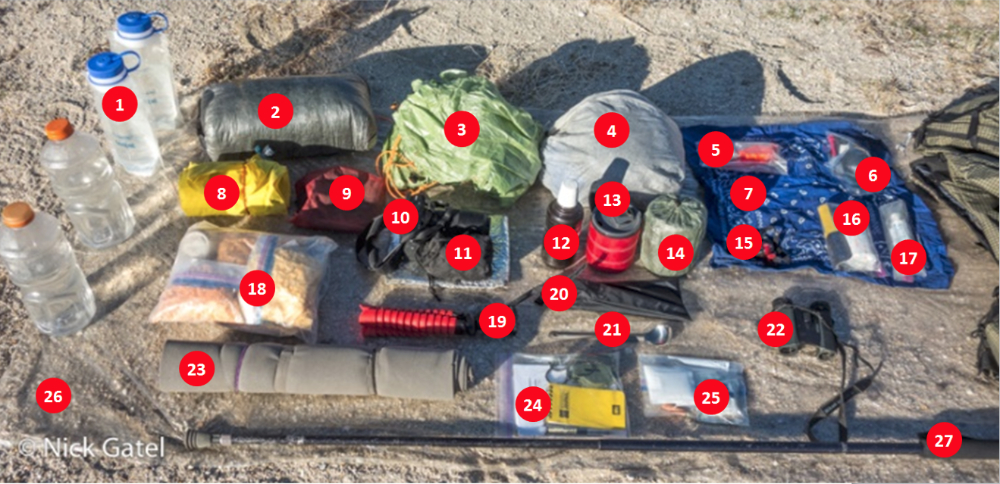
- 64 oz Gatorade Bottles (2 each), 32oz Nalgene Cantene (2 each)
All three of my McHale backpacks have external water bottle pockets designed to fit a 64 ounce Gatorade bottle. Each bottle weighs 2.89 oz.
Several years ago I switched from using Platypus soft water bottles to the wide-mouth Nalgene Cantene (2.13 oz). These make it much easier to collect water. When empty they can be rolled up to save space. I carry these inside my pack even when full of water.
- zPacks 20F Sleeping Bag (18.17 oz) in a Cuben Fiber Roll Top Dry Bag (0.74 oz)
I’ve owned this bag for over 10 years. Similar to a quilt, but with a full zipper to close it, I use it instead of a quilt when I expect a lot of wind. Although rated at 20F, for me it provides about the same warmth as my 32F rated Nunatak Quilt. I keep it in a waterproof bag, just incase the water bottles I sometimes carry in the pack might leak.
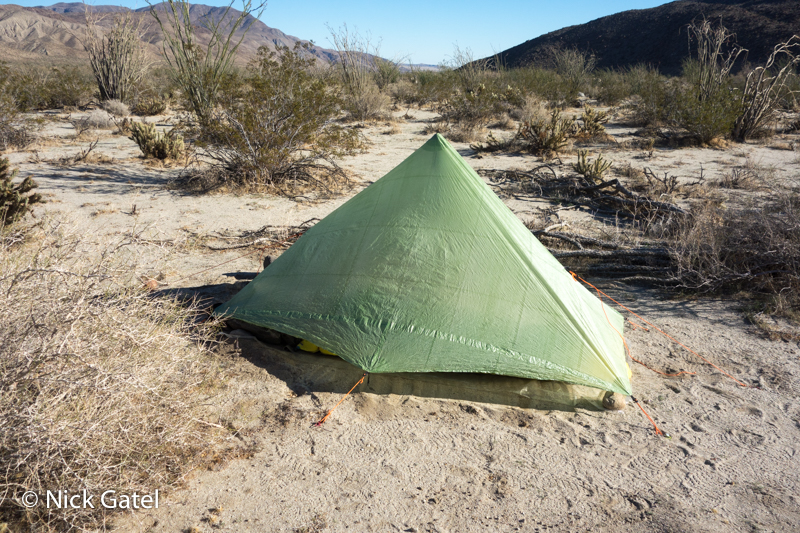
- Six Moon Designs Deschutes CF Pyramid Shelter (9.98 oz with LineLoc 3 tensioners and 3mm guylines)
This has been my go-to shelter for 7 years now. If I’m alive in three years I’ll do a 10 year review. For now you can check out the comprehensive write-up I did in 2015.
You may notice there is no stuff sack in the picture for this shelter. I quit using the sack after a couple of trips because it was a bulky package. (SilNylon and coated Polyester tents pack into a much smaller package). Also many people have reported that repeated stuffing of Dyneema Composite Fabrics (formally know as Cuben Fiber) results in damage to the material. These composite materials are known for little resistance to abrasion, in spite of their outstanding strength.
Being my go-to shelter, doesn’t mean it is a “best” shelter. Shelters should be selected for the expected conditions, and I have several shelters for different kinds of trips. For most 3 season trips the Deschutes works perfectly for me.
- Extra Clothing in Cuben Stuff Sack (28.41 oz)
This has already been discussed.
- Storm Emergency Whistle and Water Purification Tablets in a ZipLoc Bag (1.10 oz)
This whistle is a duplicate. Earlier I shared a picture of my small Fox emergency whistle along with a Photon II Micro-Lite. The Storm whistle is big and bulky and I don’t like to carry it on a lanyard. Good news is I have never needed to use either whistle.
- Camera Lens Cleaning Kit & Spare Camera Batteries (5.57 oz)
These items were only needed to support my large Sony A6000 camera kit. Battery life is poor and changing lenses increase the chance of getting dust onto the camera sensor or the back of the lens. I have never carried this kind of stuff before.
My Sony RX100 battery lasts for months and the lens is permanently attached to it.
- Bandana (1.02)
What else can I say? The uses for a bandana are almost as limitless as one’s imagination.
- Therm-a-Rest NeoAir XLite Sleeping Pad (11.99 oz)
My one concession to getting older, along with an air pillow. I have been extremely happy with Therm-a-Rest products. It must be kept in mind that punctures can occur on the trail, so it is a good idea to bring a repair kit. There is also the potential for air mats to develop unrepairable leaks or structural separation of materials.
As I found out by personal experience, Therm-a-Rest stands behind their products. A couple years ago Therm-a-Rest replaced one of my air mats for free.
- Exped Air Pillow (1.79 oz)
I used to hate this pillow until I fashioned a method to keep it attached to the air mattress.
- Sony A6000 Mirrorless Camera with Rokinon 12mm F2 Ultra Wide Angle Lens (21.48 oz)
- Sony 55-210mm Kit Lens with soft case (12.71 oz)
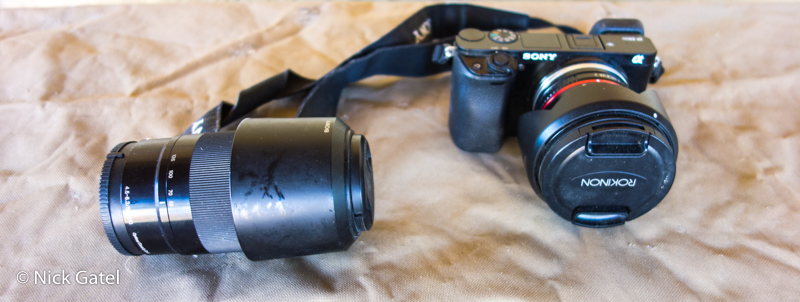
These two items and related accessories were a mistake for this trip. Nothing wrong with either, but they are heavy items and I’m not really into serious photography while backpacking — taking pictures is generally a pain in the ass — instead, a point and shoot camera, like my Sony RX100 better fits my mindset when backpacking. This was the first (and probably last) time I’ve brought this camera kit backpacking.
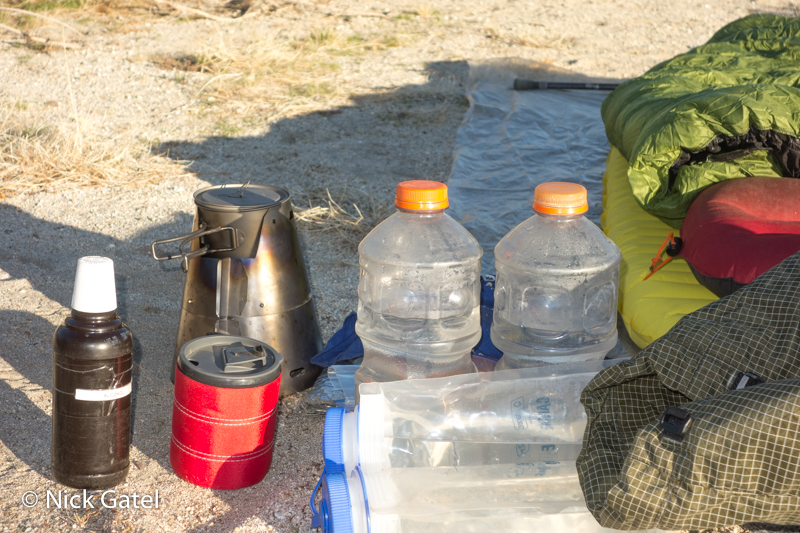
- Denatured Alcohol in 500 ml (16.9 oz capacity) Bottle
- GSI Backpacker’s Mug (3.49 oz)
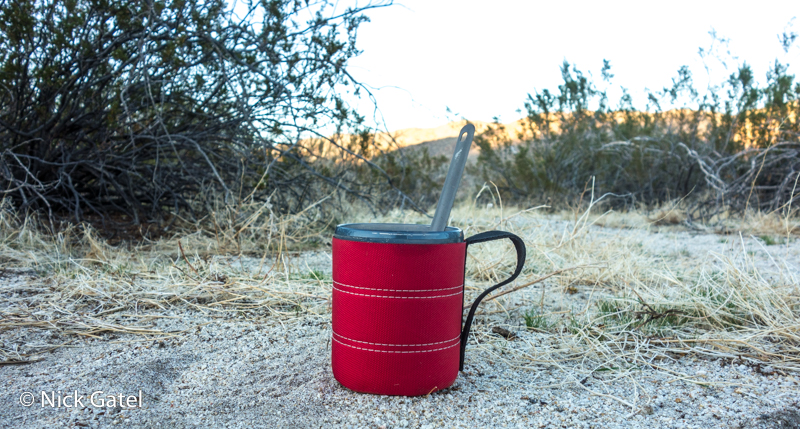
Bought this a couple years ago and wrote about a decades long search for a decent drinking cup.
I have taken it on every trip so far since I got it, and feel no need to investigate any other drinking cup solution. I keeps a 16 oz cup of coffee hot for at least 30 minutes, which is all I want a drinking cup to do.
- Trail Designs Caldera Cone Ti-Tri Fissure Stove Kit and Pot in Cuben Sack (6.20 oz)
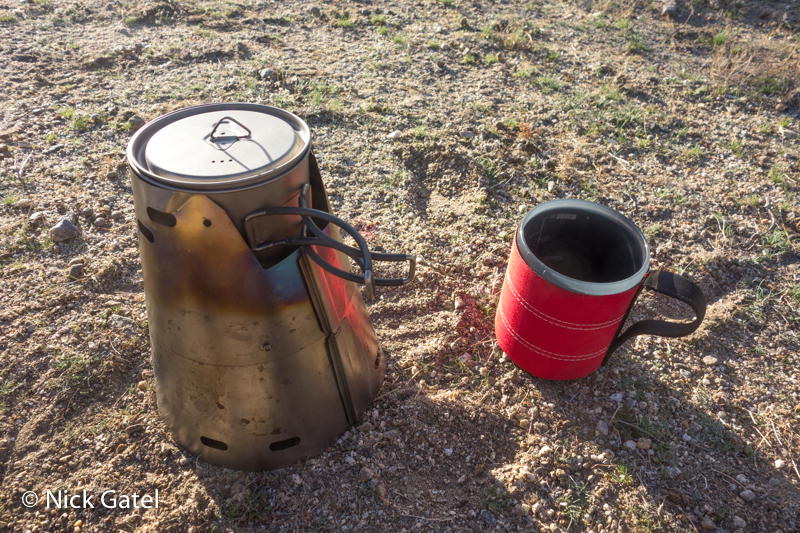
I’ve been using Trail Designs Caldera Cone Stoves since 2008. They finally really got it right with this iteration. Since 2016 it has been my go-to stove for most 3 season trips. I wrote quite a tome on stoves and specifically this stove system back in 2016.
Trail Designs Fissure Ti-Tri Stove System & Other Stove Thoughts
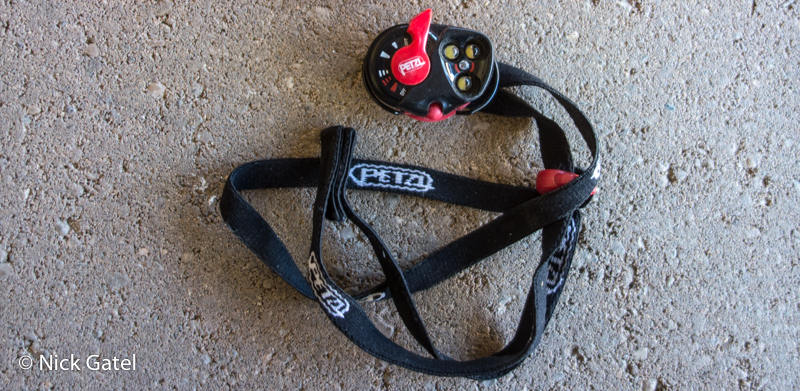
- Petzl e+Light Headlamp (0.95 oz)
I should probably write a proper gear review on this too. After 14 years it is still going strong and comes on most my trips. Really not enough light if you want to hike at night, but perfect for chores around the campsite. Runs on a couple CR2032 batteries. I can’t remember the last time I changed the batteries prior to this trip. It was a long time ago. The first night of this trip, I found the light very dim, indicating low battery voltage level. So I changed the batteries with two spares that had been in my pack for years.
- Titanium Trowel and Toilet Paper (2.25 oz)

I keep my mini-dropper bottle of Dr. Bronner’s unscented concentrated soap in my “toilet kit” ZipLoc.
- Personal Kit (3.53 oz)

My Classic Swiss Army Knife (0.78 oz) lives in this ZipLoc so it is easy to find and more difficult to lose. I rarely use it, but when I need it is such a useful tool. Attached to the knife is a second Photon Micro-Lite (0.25 oz). The kit also includes and backup Bic Mini Lighter (0.39 oz) and a mini-dropper bottle of DEET (0.49 oz).
A small tube of toothpaste and a child’s toothbrush (1.13 oz combined).
Because my hair has grown to shoulder length, I have started to carry a comb (0.18 oz) to keep it from getting all tangled. I could cut my hair, which would reduce my body weight and not carry a comb, but Joyce hates my long hair — so I’ll continue to let it grow 🙂
My doctor has prescribed a couple medications and some vitamins. I carry each type of pill in a separate EZYDose Pill Pouch. It is easier and lighter for me to use this method than buying some sort of pill organizer. I also carry a few Advils in a pouch. As I wrote a while back, the EZYDose Pill Pouches can be used for a plethora of organizing options.
- Food, Coffee, Instant Hot Chocolate (2lb, 1oz)
For this planned trip of 5 days, I brought 4 days of food. No breakfast on Day 1, because I drove to the trailhead that morning. No dinner on the last day because I would arrive at my truck and drive home for dinner. Thus, only 4 breakfast and only 4 dinner meals were required.
Many backpacking pundits recommend 1.25 – 1.50 lb of food per day. I only took 9.25 oz per day, almost half of what these experts say is needed. Keep in mind that instant and freeze dried foods have the water removed. Adding water back into the food increases the weight of every meal! At least that is my theory and I don’t get hungry on trips of under a week. Things do change when on does multi-week or multi-month trips. Experience is the only good guide.
To reduce bulk and simplify cooking, I repackage each meal into a ZipLock bag, which also becomes the cooking/eating container. Read this post on Freezer Bag Cooking.
I have gone back to simple ZipLoc Freezer bags because they work well, cost less money that the Zip N Steam version, and are easier to find in stores.
I’m not interested in actually cooking on a backpacking trip, heck I am not interested in cooking at home. Food isn’t a big deal to me — food is just replenishing what I have burned up during the day’s hike. For others, cooking (especially dinner) is an important part of their trip. Nothing wrong with that.
You may notice I did not bring any snacks or lunch items. This is fairly typical for me. On a group trip I may bring additional snacks, which is more to engage in the social setting when the group stops for a break. If I am doing a really strenuous hike that includes large elevation gains, I’ll bring a little extra food to eat during the day.
The amount of food I take on backpacking trips may sound too Spartan. At home I only eat one meal a day. Sometimes I eat some mixed nuts during the day. Fact is, most first-world people eat too much, which is why the majority of Americans are overweight or obese.
I find it interesting that Hippocrates, of Hippocratic Oath Fame, wrote over 2,000 years ago that three meals a day was gluttony and a sedentary lifestyle was worse.
2lb, 1 oz of food over 4 days included:
(8) packets of instant oatmeal
(4) Mountain House Freeze-dried dinners
(8) packets instant hot chocolate
(1) Nalgene bottle with instant coffee
For decades, on backpacking trips, my breakfast has consisted to two packets of instant oat meal and a couple cups of coffee. I never get bored with this breakfast fare.
- Compact Camera Tripod (9.46 oz)
Another mistake for this trip. With a full size mirrorless camera, a sturdy tripod is often needed, especially when taking pictures at night. But I only used it a couple times to test it out. I just am not into photography on backpacking trips.
- Tent Stakes in Heavy Duty Nylon Bag (4.41 oz)
(5 ea) Easton 9” 7075 Aluminum Tent Stake
(5 ea) MSR 7.5” Ground Hog Stakes
I only set up my shelter one night to combat some wind.
- Toaks Titanium Long Handle Spoon (0.71 oz)
Read my post on polishing titanium spoons to keep food from sticking to the surface,
- Nikon Trailblazer 8X25 Waterproof Binoculars (10.93 oz)
A couple years ago I wrote about the joys of carrying binoculars on backpacking trips.
Soon after publishing it, I rearranged my binocular inventory. I now keep the Nikon Travelite II in my truck, the Nikon Aculon T5 and Monarch 5 in our travel trailer. I really like the Aculon, but it might not be robust enough for full time backpacking use.
I then bought a pair of Nikon TrailBlazer binoculars dedicated to my backpacking kit. The body is covered with some sort of rubberized protective coating, the unit is waterproof and fog proof.
- 1/8” X 20” X 72” Foam Pad
The only purpose this serves is to protect my air mattress from thorns and other hard to see things that can puncture an air mat.
For years I have been tempting fate with such a thin layer (1/8 inch thick) of protection. A 1/4 inch thick pad would be more appropriate. However for over 10 years the thinner pad has worked, is lighter and less bulky than thicker pads.
On this trip, Fate (or physics) struck. A small thorn caused a leak. An itty bitty hole, which I could not find because there was no water available to submerge the pad and find the leak. It wasn’t a disaster. Just a little inconvenience requiring me to inflate the pad every 3 or 4 hours.
Going forward, I’ll be carrying a 1/4” thick pad instead.
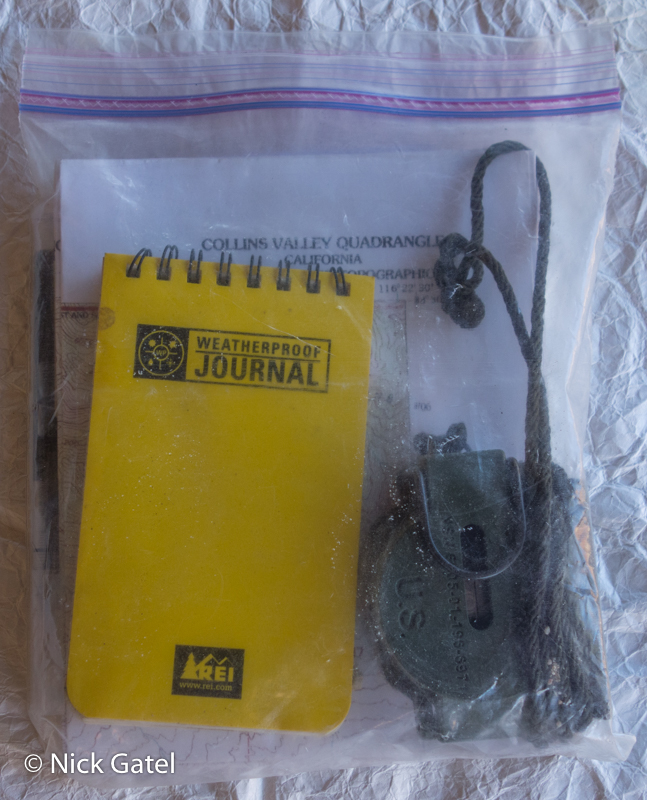
- Navigation Kit (9.35 oz)
-
- Cammenga Lensatic Compass
- Waterproof Notepad
- Ultralight Roller Ball Pen
- Campfire Permit
- Large USGS Topographical Map
- Smaller Large Scale Maps
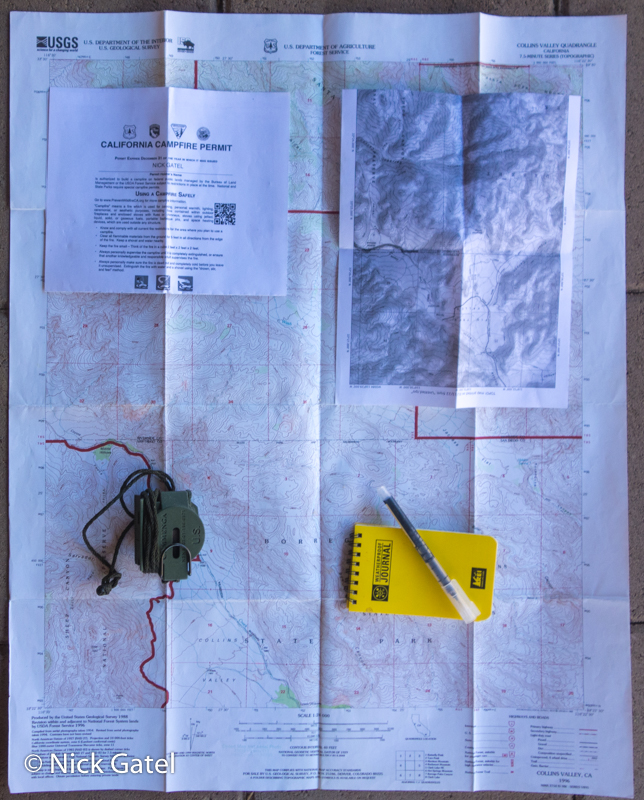
I needed one full size USGS 7.5 Minute Topographic Map to navigate several canyons in the area of the second half of the trip.
For the rest of the trip, larger scale maps were fine. I printed these maps using a long discontinued product, National Geographic’s Topo! software.
In California it is a law that any campfire or use of a portable stove requires the user to have a California Campfire Permit in their possession. These are free. Just go to a website, view a short video and take a test. If you pass the test, you can print your permit. Permits expire on December 31st of every year.
https://www.readyforwildfire.org/permits/campfire-permit/
By the way, I did print a map on the back of the campfire permit to save weight 🙂
- First Aid & Emergency Kit (1.87 oz)
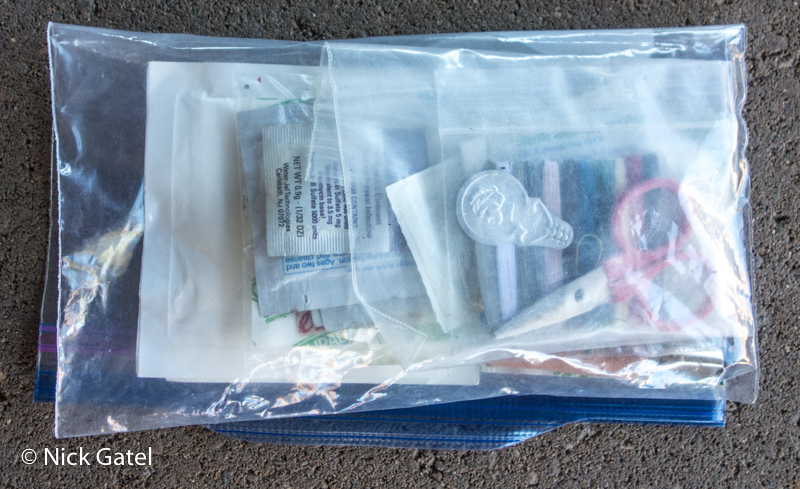
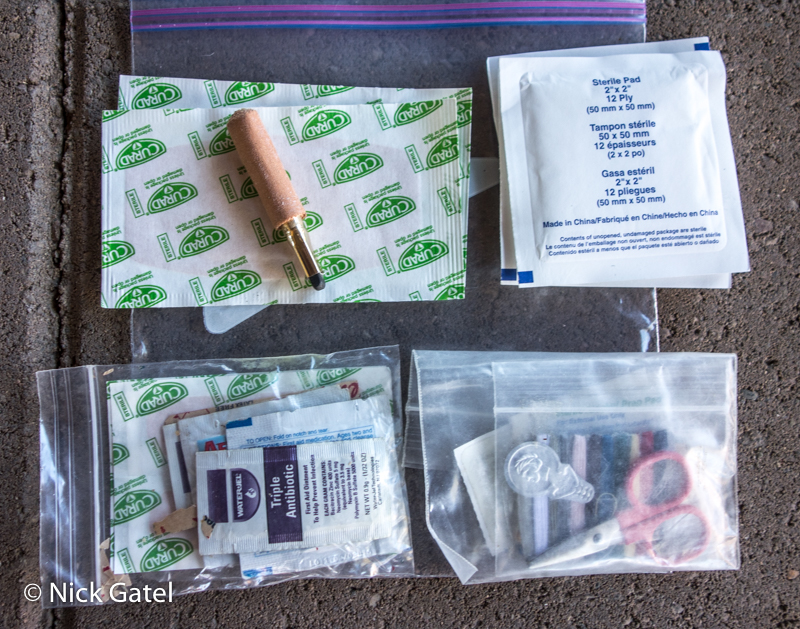
Basic stuff for minor scrapes and scratches. Also some sewing things and a couple air mattress patches. It resides in a small zippered section in my pack’s top lid along with my truck key, driver license, some cash, and a couple credit cards. All of this is out of the way and secure in the little zippered compartment.
- Polycro Ground Sheet (1.66 oz)
This just helps keeps things clean. If the ground is wet it also helps keep stuff dry.
- Tracks Hiking Staff & Tent Pole (15.73 oz)
Gear List Summary
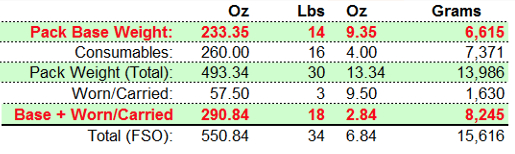
The “base” weight of my backpack, which does not include consumables (food, water or fuel), was 14 lb 9.35 oz.
If I would have left all that camera gear at home, the weight would have been around 11.5 lb. I could have tinkered with the gear, left some things at home, a got down below 10 lb, which is just an arbitrary threshold to make the weight look ultralight. The backpacking pundits even have classifications — if your base weight is under 10 lb, you are officially an ultralight backpacker — with all the privileges and recognition accompanying your heroism, so you can tell the world via you FaceBook or Instagram account.
I brought what I need (except camera gear) —
so it weighs what it weighs.
Note that the consumables at just over 16 lb weigh more than my gear. Total weight of the pack is just under 31 lb. At a youthful 71 years of age, I still find that 35 lb or less for the total pack weight is still easily manageable for me.
Here is the full gear list.
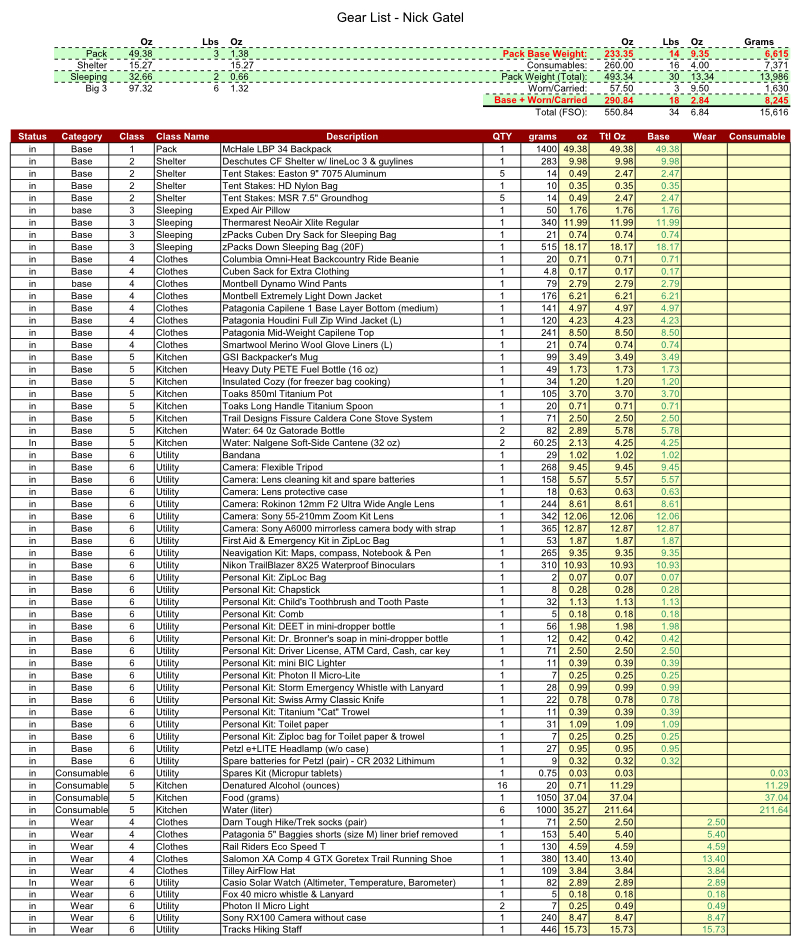
Link to a PDF of the Gear List
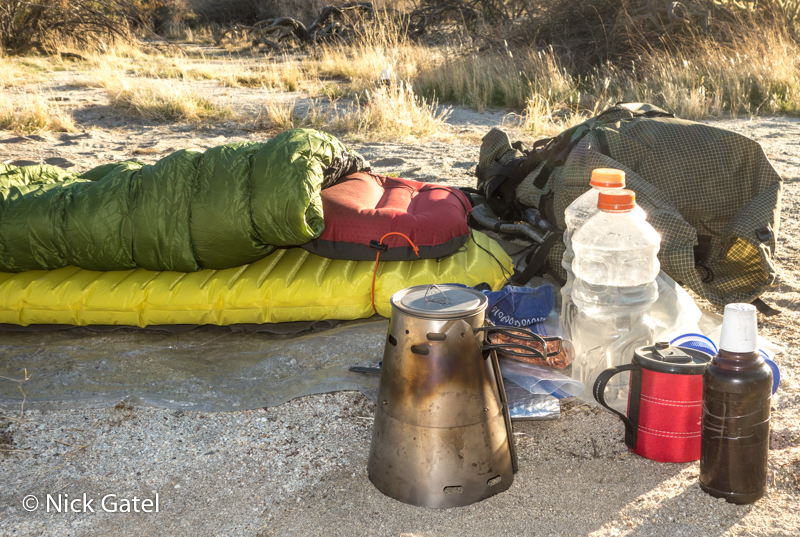
Gear in Action
As mentioned earlier, I hate to fool around with gear and equipment. The key for me is organization.
A backpack is just like an auto mechanic’s toolbox. Tools are kept in the box until needed. The best professional mechanics, who are usually paid by how much work they complete, clean and put their tools back into their toolbox after each job. These tools are kept in the same exact place in the toolbox, making it quick and easy to locate any needed tool at any time.
This is how I keep my gear organized in my backpack. Sometimes I will alter the location of my gear. If no rain is expected, my shelter is kept at the bottom of my pack. If I will need my shelter at night, I pack it higher up in my pack for quicker access. All of this just takes time and experience to learn how to optimize gear storage in the pack.
A common practice is to pack gear into a backpack in the order you will need each item, with an eye to keeping the weight balanced.
Organization
The last thing I will need each day is my sleeping and shelter stuff. In the morning they go into the pack first, in the order I will need them, when I take them out at the end of the day. Normally my shelter is at the very bottom of the pack, unless I plan on using it at night. On the day I planned to set up my shelter at night, things were organized in my pack in this order starting with everything at the the top.
-
-
- Soft-sided Nalgene Cantenes
- Camera Gear
- Extra Clothing
- Food
- Stove and Drinking Cup
- Polycro Ground Sheet
- Shelter
- Air Mattress & Pillow
- Sleeping Bag
-
These were the steps:
-
-
- Remove water containers, and put aside
- Remove camera gear
- Remove extra clothing and put on Houdini Wind Shirt, put clothing bag aside
- Remove Polycro groundsheet and place a few rocks around the perimeter to keep it in place — I was expecting wind, not rain — had rain been in the forecast I would have laid down the groundsheet after the shelter was set up
- Remove tent stakes from front Kangaroo Pocket of Pack
- Remove shelter and set it up; stake out the guylines; insert hiking staff to hold it up; tension guylines
- Remove rolled up foam pad that is strapped to the outside of the pack and place on the Polycro groundsheet.
- Sit down on pad; inflate air mattress and pillow, attach pillow to air mattress
- Remove sleeping bag from pack, fluff it up and place on foam pad
- Anything I will not need during the night goes back inside the pack
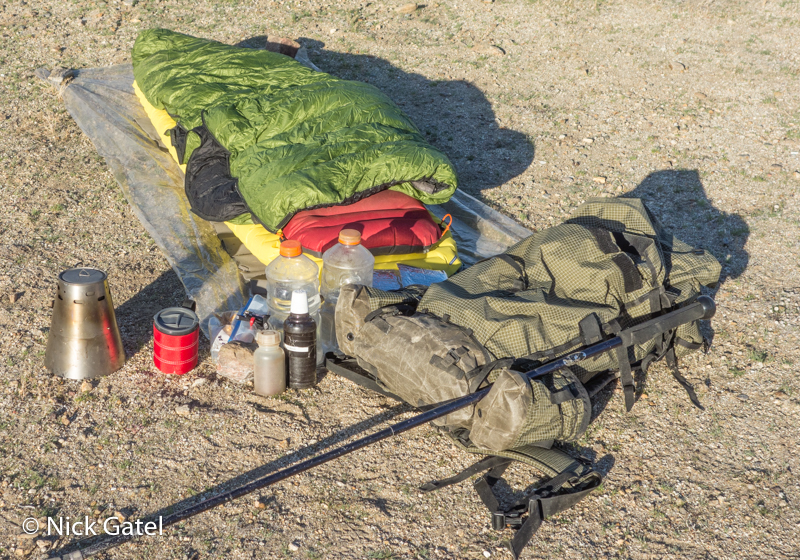
-
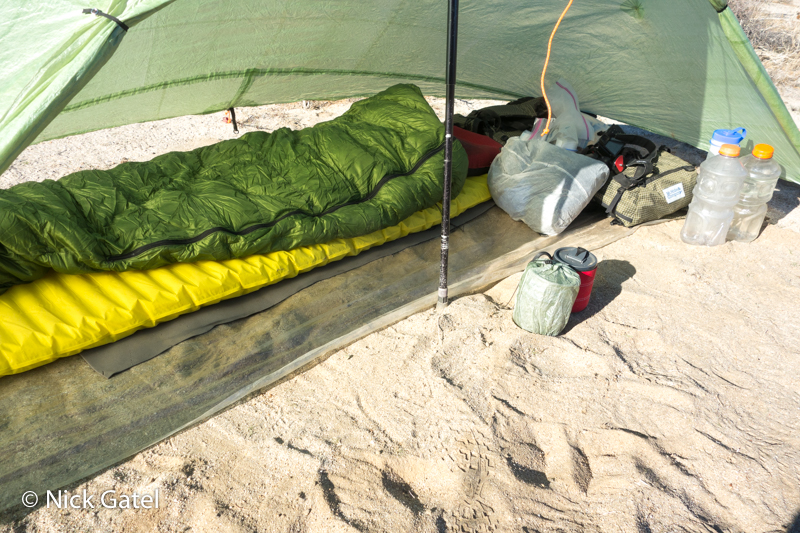
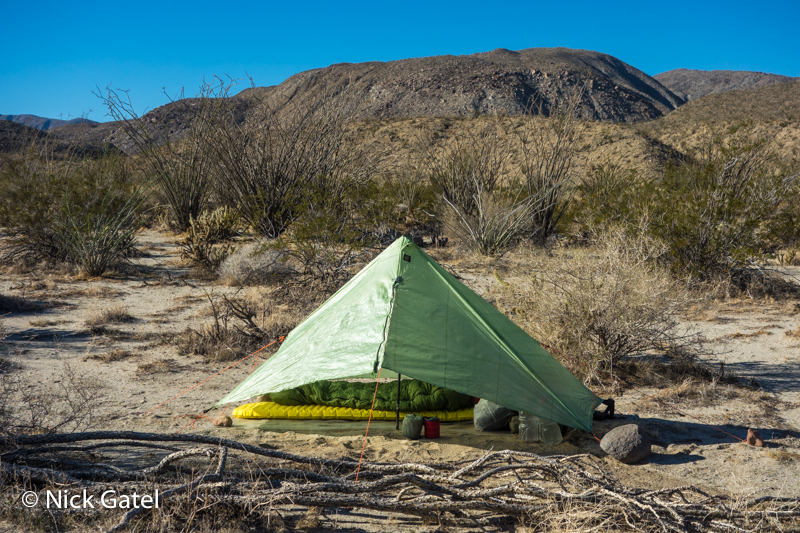
At this point everything I won’t need during the night is inside my pack. The large white sack in the above picture is my extra clothing. Just behind that is my food bag.
Now, I’ll sit down and select the food for dinner and put the rest of the food into my pack. The clothes sack will stay out until it gets colder.
While sitting I get other things out from the top lid of the back and from the Kangaroo pocket I will need for dinner and the rest of the night. Headlamp, personal hygiene items, spoon, cozy for freezer bag dinner, etc.
Once I have eaten dinner, any trash goes into a ZipLock, which is then put into my backpack. All the cooking gear will stay out overnight. This way, in the morning I can conveniently cook breakfast without get out of my sleeping bag.
Next, I’ll put on any spare clothing I will need and put the rest back into the pack. If I won’t need something during the night, it is inside the pack, except for my cooking kit.
The same methodology is employed when I do not use a shelter, which is most of the time.
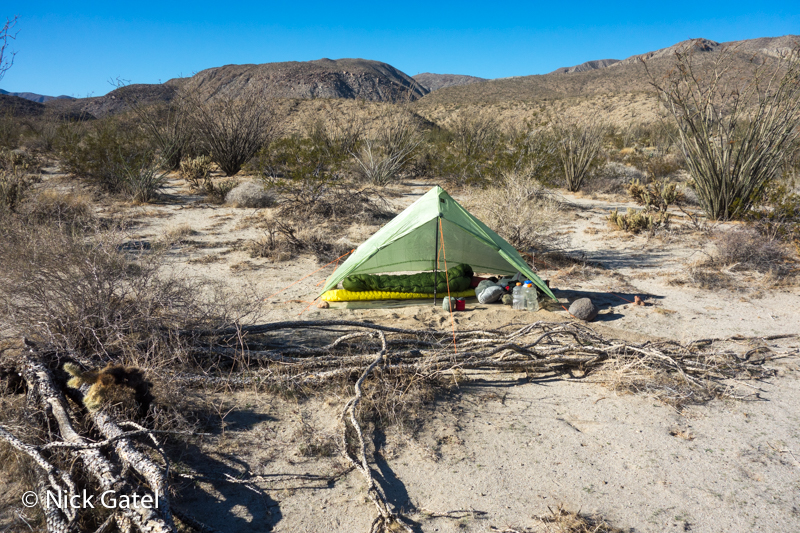
Night 1 Campsite

Night 2 Campsite
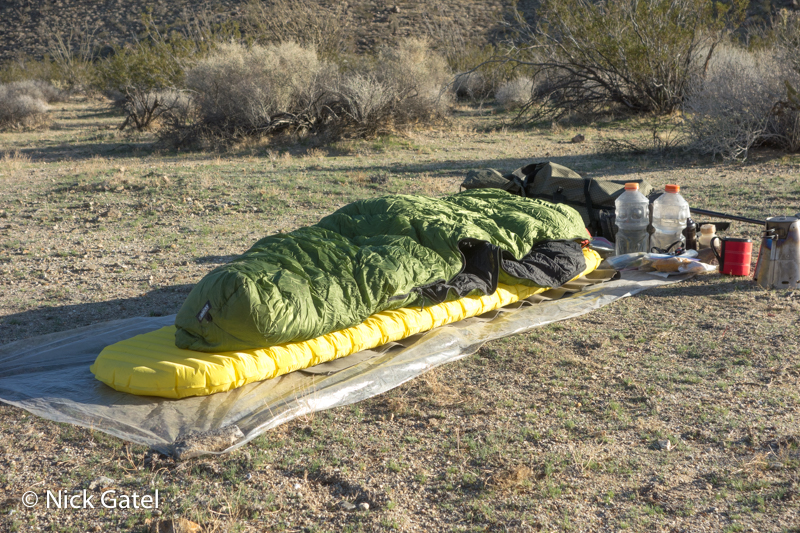
Finding a Suitable Campsite
It is a misconception that deserts are wide open places. More often than not, it isn’t easy to find a good site.
Even though my shelter has a very small foot print, it probably took me 15 minutes to find a nice level spot large enough to set up.
What to do at Night?
Winter nights are long and I don’t bring reading material or music. I usually hike alone.
How do I keep myself occupied?
If I arrive at my campsite early enough, I take little walks to explore things of interest out.
I spend a lot of time at dusk watching the sun set. It is a worthwhile advocation.
Once it is dark, and I am sleeping without a shelter, I can spend hours laying on my back observing the night sky with my binoculars. On this trip the Pleiades (Seven Sisters Star Cluster) was outstanding and I spent a lot of time observing it along with the constellation Orion. Usually I get tired after a while and fall asleep.
Life is good.