
The stabilizers on our trailer have been irritating me for almost 5 years. They’re too short and they’re welded to the frame. Typical replacement requires:
- Welding new ones means grinding off the old ones and welding the replacements. And I’m not an accomplished welder.
- Bolting on new ones still means grinding off the old ones, drilling holes in the frame, and then bolting the replacements to the frame.
Or is there another option that is easier? Yes, there is.
Modern Problems
Things that irritate us should be resolved as soon as possible, assuming you can resolve them. Some things are best ignored. For example, the wind hitting your tent or the patter of rain drops on your camper’s roof. These things are natural and one should learn how to embrace them, as they are natural noises. If you need to artificially block these kinds of natural noises, you might need to see a mental health specialist.
But unnatural irritations can cause neurosis, which is a mental disorder. Such noises as a dripping water faucet or a squeaky door often cause discord between people, leading to shitty parenting and ultimately dysfunctional children. Then of course, one must consider that these kinds of noises lead to mechanical failures resulting in unnecessary expense for repairs.
Unfortunately many people can’t diagnose and/or repair a leaky faucet or squeaky door and become deranged. Others are just too lazy and unknowingly live in a state of stress, anxiety, or depression. Fortunately these shortcomings can be resolved with Google or YouTube. First recognize the unnatural noise, then do a search on how to fix or resolve the issue.
My irritation with our trailer’s stabilizers was not a common occurrence. If we camped on a fairly level site, they worked just fine. However too often we ended up with these kinds of situations…
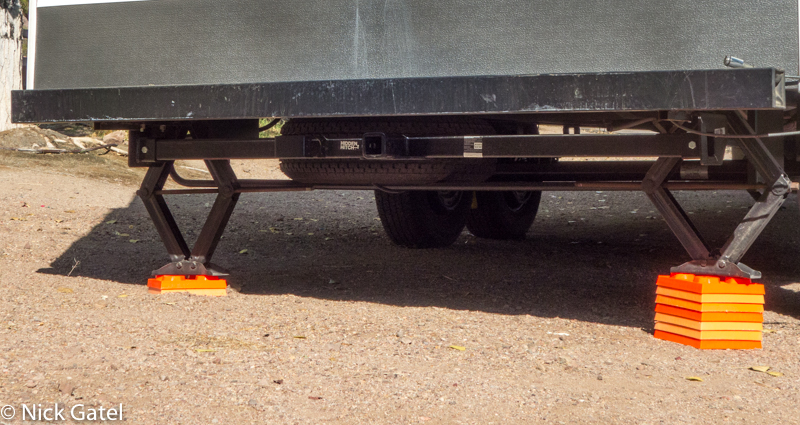
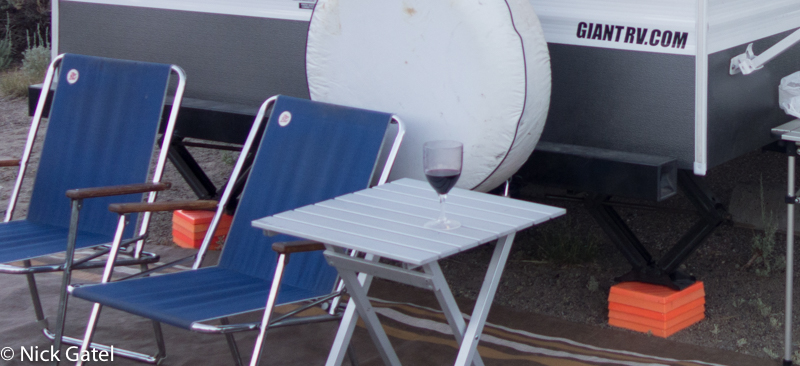
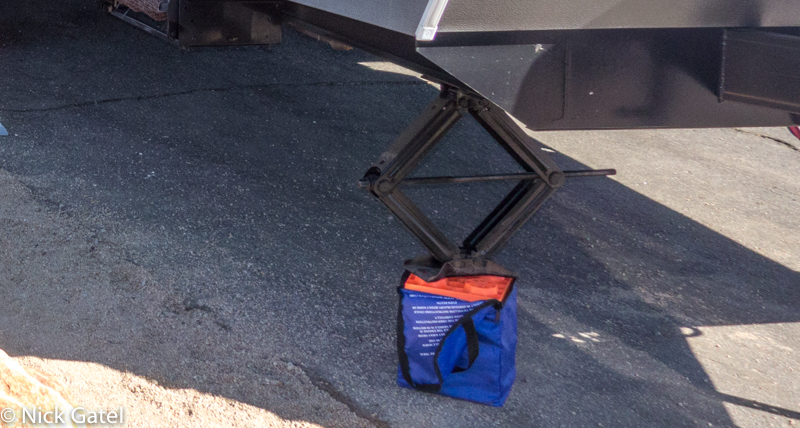
The problem is the trailer manufacturer got cheap and installed 24 inch stabilizers. Given that our trailer is higher than most (the spring is mounted on top of the axle), they should have installed 30 inch or even 36 inch stabilizers. Being that our trailer is higher than most, it makes it easier to towi on rolling dirt roads, easier to drain our waste tanks, and easier to get under the trailer for repairs or modifications. I prefer a higher trailer. But the shorter stabilizers were an irritation. You see, if our chosen camp site had an incline, then either the front or rear stabilizers were too short and blocks were needed to set things up. If I had to extend the stabilizer all the way, then they didn’t stabilize as well as using blocks as in the pictures above. But putting anything on blocks indicates a shortcoming and often blocks can slip or slide creating new problems — sometimes even death.
The irritation was always short-lived — during set up and take down I would be reminded that they were too small. I kept making mental notes to replace them, but by the time I would get home those notes were always somehow misplaced. So on our last trip, I made an entry in my iPhone’s reminder app to replace the stabilizers.
30″ or 36″ ?
The end of the original stabilizer was flush with the side of the trailer; that is it didn’t stick our beyond the wall. Obviously, at least to me, a longer stabilizer means it would also be longer in the raised position, and on my trailer it would stick out beyond the wall. I calculated that a 30″ stabilizer would stick out 3 inches, and 36″ stabilizer 6 inches. Three would be acceptable, as my awning and one of the steps extend the same distance. The 6 inch extension of the 36″ stabilizers would be unacceptable, but could be overcome my mounting then diagonally on the frame — complicating the installation, of course.
Would I be Able to Use the Original Brackets?
If I could, it would a very simple installation.
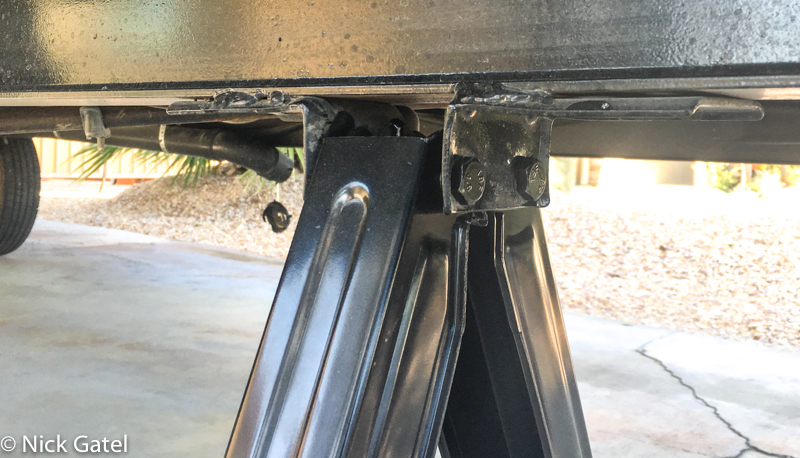
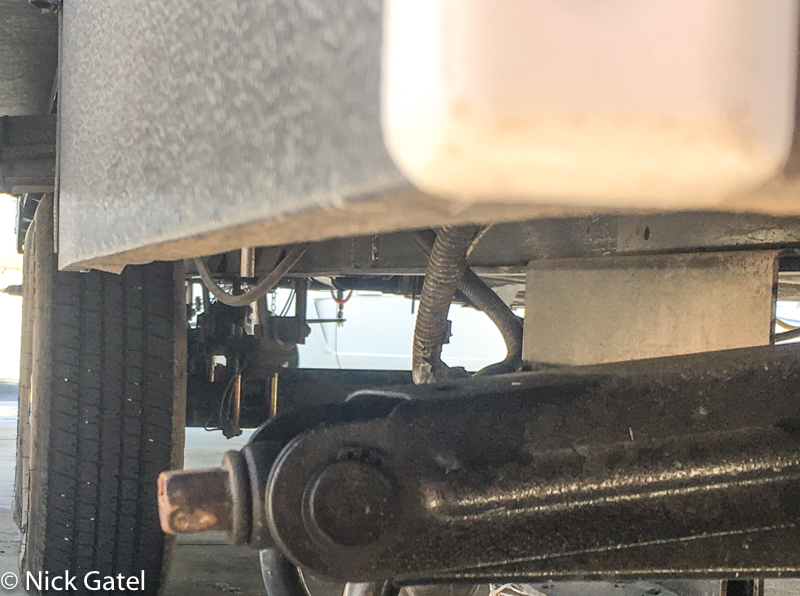
As you can see, the brackets are welded to the frame and there are just two bolts holding the stabilizer to the bracket. So the questions to ask are:
- Do most stabilizers have the same width to fit between the brackets?
- Are the bolt holes low enough to allow the stabilizer to extend and retract?
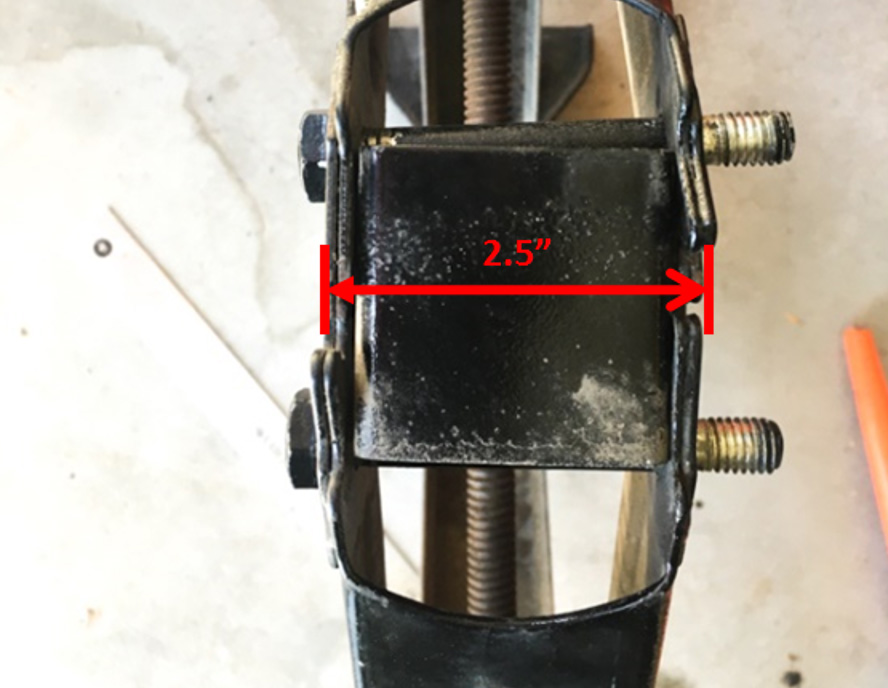
This was the most difficult part. Only one manufacturer had detailed measurements, and that brand wasn’t available on Amazon. I was looking for stabilizer that were 2.5″ across at the top.
But most of the scissor type stabilizers looked almost identical. And of course they’re all made in China. My experience with this kind of product is that one or two companies make the product and supply all different companies that sell them with a different label or box. There weren’t many options for 30″ stabilizers on Amazon, but plenty of 24″ units were available.
Why Amazon?
It is really, really easy to return items purchased from Amazon, especially if you are a Prime member and get free shipping. I’ve only done this twice, once when the wrong product was shipped and once when some shoes didn’t fit. If you want to return something, Amazon provides a link to print a shipping label, then you can take it to your local shipping place (like Mailbox Etc.) and they’ll ship it free. Of you can call UPS to pick it up (assuming the label is for UPS. Each time I’ve done it UPS was the shipper.
This website may be compensated for linking to other sites for sales of products. As an Amazon Associate I earn a small fee from qualifying purchases at no additional cost to the purchaser.
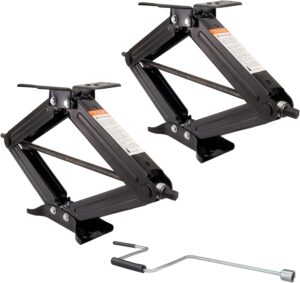
RecPro RV Stabilizer Jacks (5,000lbs, 30 inches)
![]()
Installation
They new stabilizer fit perfectly! 10 minutes and all four were replaced. I won’t give you step-by-step instructions because it is so simple. But here are a couple tips.
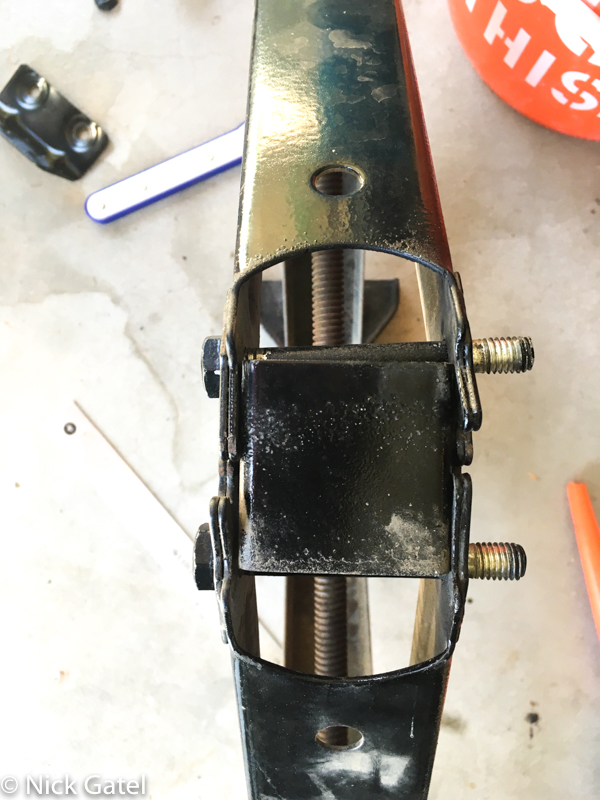
The top of the stabilizer has a plate that holds the sides to the top. The stabilizer must be inserted inside the bracket and the bolts inserted from the outside, making sure the bolts go through the holes in the top place. You can extend the stabilizer before hand so the foot rests on the ground to make installation easier. Also, DO NOT tighten the bolts too tight. The top must be able to swivel and the screw drive is turned. The bolts come with “self locking” nuts and will not work loose. Also, you need to note that there are metal gears (actually the metal of the sides is cut to create a gear) and you need to make sure the gears are aligned properly — not difficult for the average or below average person to visualize.
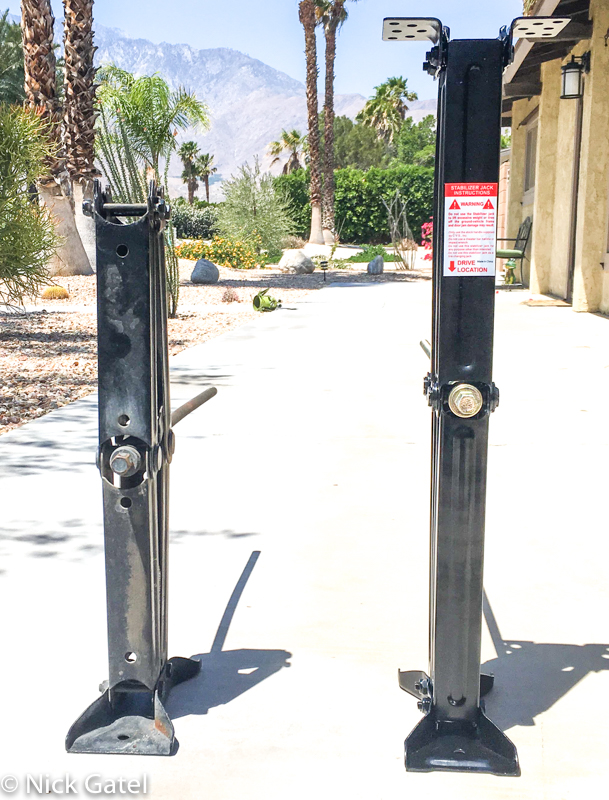
The new stabilizer is on the right, obviously.

Our driveway has a steep incline, much steeper than most campsites. These are going to work out well.