Few things in a home remodel can make as dramatic and durable transformation like tile can.
For the first time DIYer, tile work may seem rather daunting. With planning and understanding, the first time DIYer can lay tile, resulting in a professional look and long lasting surface.
I had never laid tile before we did our house remodel, so I am a first time DIYer.
Planning
First and foremost, patience and planning will be your best friend. You can’t rush. Wanting to finish a small tile job in a weekend might be your worst enemy. Tile work is a learned skill. Yes, the YouTube video of the professional tile setter getting the job in two days is achievable, but not necessarily reasonable for the person tackling this kind of a job for the first time. A planned weekend completion timeframe might realistically be a three-weekend job. You have to be prepared for this reality and be ready to accept this simple fact.
Sketch Your Work First
The true sign of an amateur job is small slivers of tile at one edge of a floor or wall. Measure the space first and make a drawing with each tile so there is a fairly wide tile at each end. You may use more tiles this way, but tile isn’t that expensive to use an extra 10% to do the job correctly.
By starting with drawings you can experiment with different patterns.
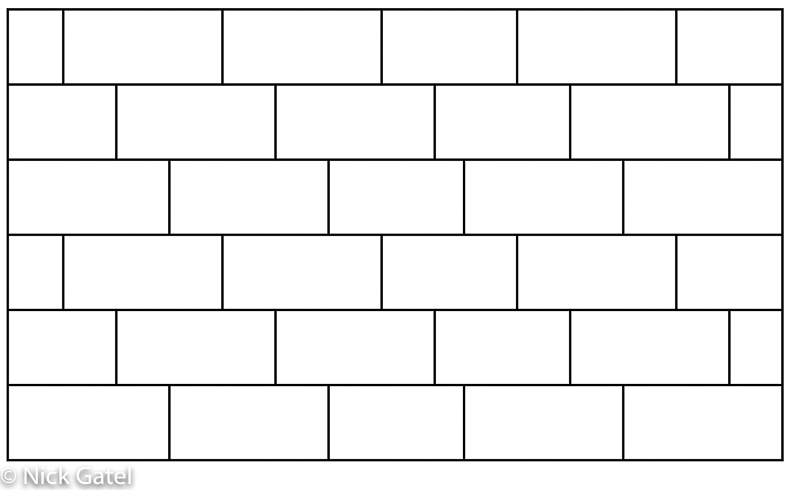
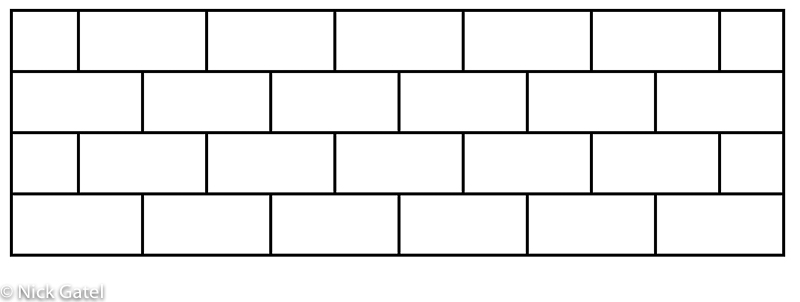

Here is the look you want at the end of each row (no small slivers of tile):


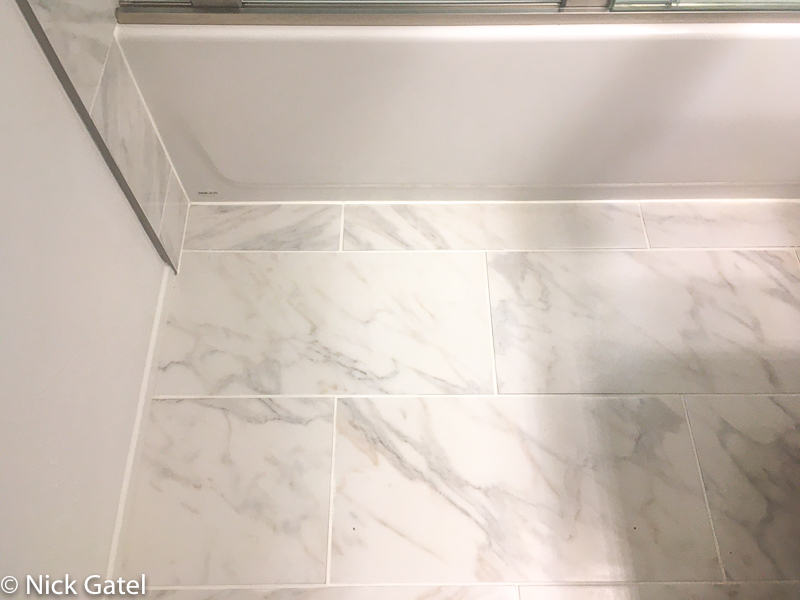
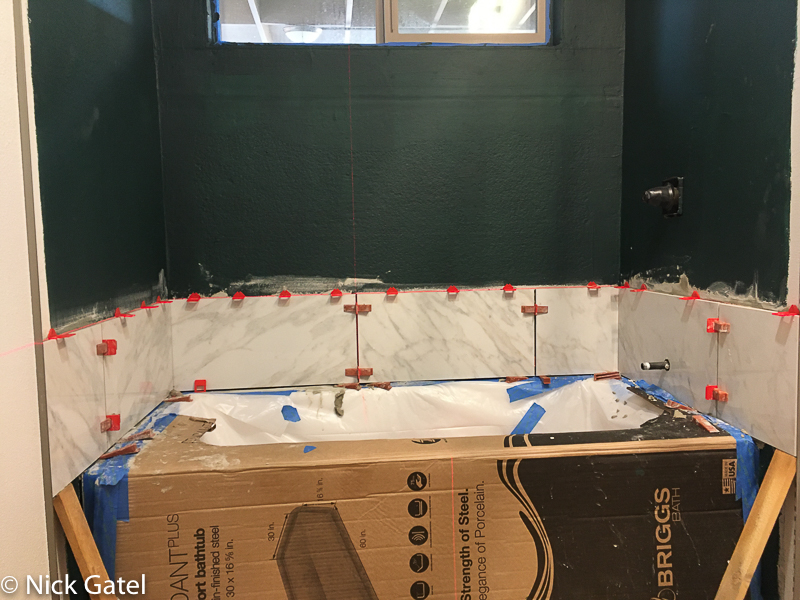
The pictures below show the four corners and the tile pattern termination at all four walls in our guest bathroom.


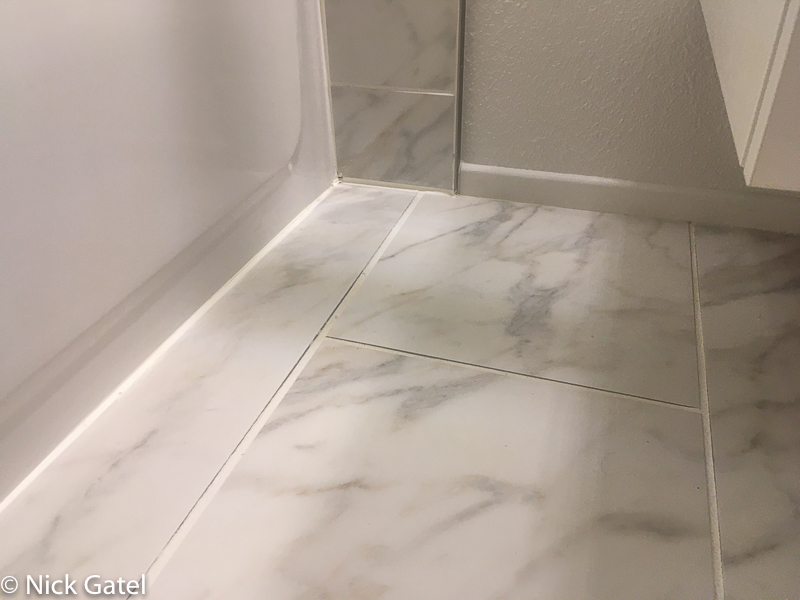
Cutting tile in odd shapes isn’t easy and often an angle grinder with a diamond blade is the best tool, however it takes care and is easy to break the tile. Because of this, part of my layout planning included placing the tiles so there would be a minimum of tile cuts. In the picture below, you can see it worked out so I would only have to cut one tile instead of two or even four.

Tile Sizes
You need to pay close attention to tile sizes by checking the actual size. The floor tiles we used were exactly 12 inches X 24 inches. Our wall tiles were listed as, 12” X 24” (common), but the actual dimensions were 11.75 inches X 23.75 inches.
When making your drawings you also need to consider the gap between each tile that will be filled with grout. Also, there should be about 3/8” gap next to the wall, and the length of each tile should next to the wall may vary if the room isn’t exactly square, which is common.
Ordering Materials
Spend time to determine all the materials you will need in addition to the tile. Tile and mortar are heavy and most people don’t have a large enough vehicle, or a vehicle with enough load carrying capacity to transport everything. Most tile outlets will deliver everything for a set price. Our Home Depot and Lowes will deliver any order, not matter how large or how heavy, for $75.
Here is the order list I put together for the all the materials to tile our kitchen, laundry room, guest and master bath.
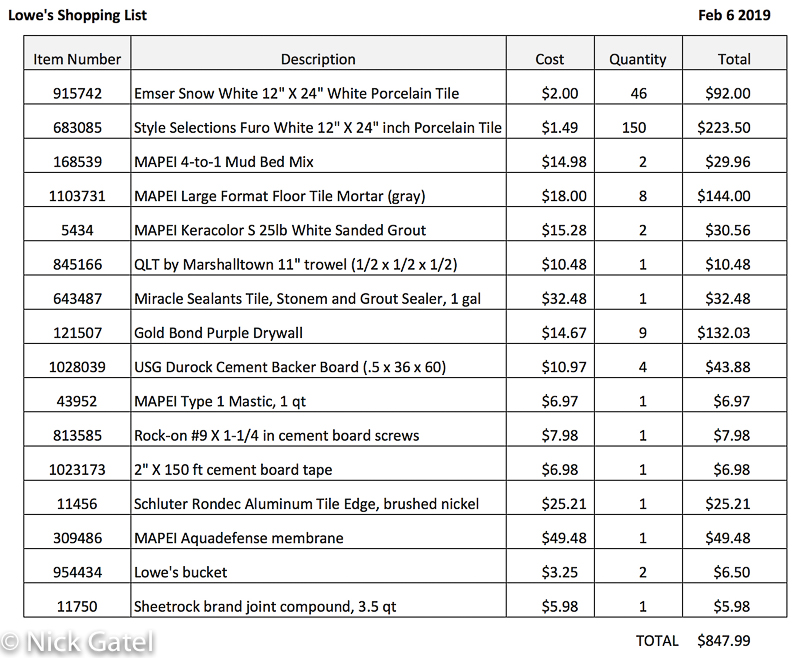
By using the Item Numbers on Lowes website, the ordering process was quick and accurate.
As you can see, the total cost to tile four rooms, using more expensive porcelain tile vs. ceramic tile was under $850 before tax and delivery charges. This also included a trowel for the large format tile size. In addition to this, you will need a quality tile saw and mortar mixing tools. By doing the work ourselves, we saved several thousand dollars compared to the quotes we received.
This website may be compensated for linking to other sites for sales of products. As an Amazon Associate I earn a small fee from qualifying purchases at no additional cost to the purchaser.
https://www.amazon.com/DEWALT-D24000S-Heavy-Duty-10-inch-060-Inch/dp/B01M5C9BVZ/ref=sr_1_2?crid=1ZLN8PZF2ZSB3&keywords=B01M5C9BVZ&qid=1704677101&sprefix=b01m5c9bvz%2Caps%2C174&sr=8-2&th=1
One thing that happened is we decided to use a little different pattern of tile for the guest bathroom after we had finished the other three rooms. This cost us an extra couple hundred dollars, but we ended up with a bit of extra tile in case we ever have to remove tile for repairs or if one tile breaks. Tile patterns have to be matched by batch and patterns tend to be discontinued yearly. This is something to keep in mind.
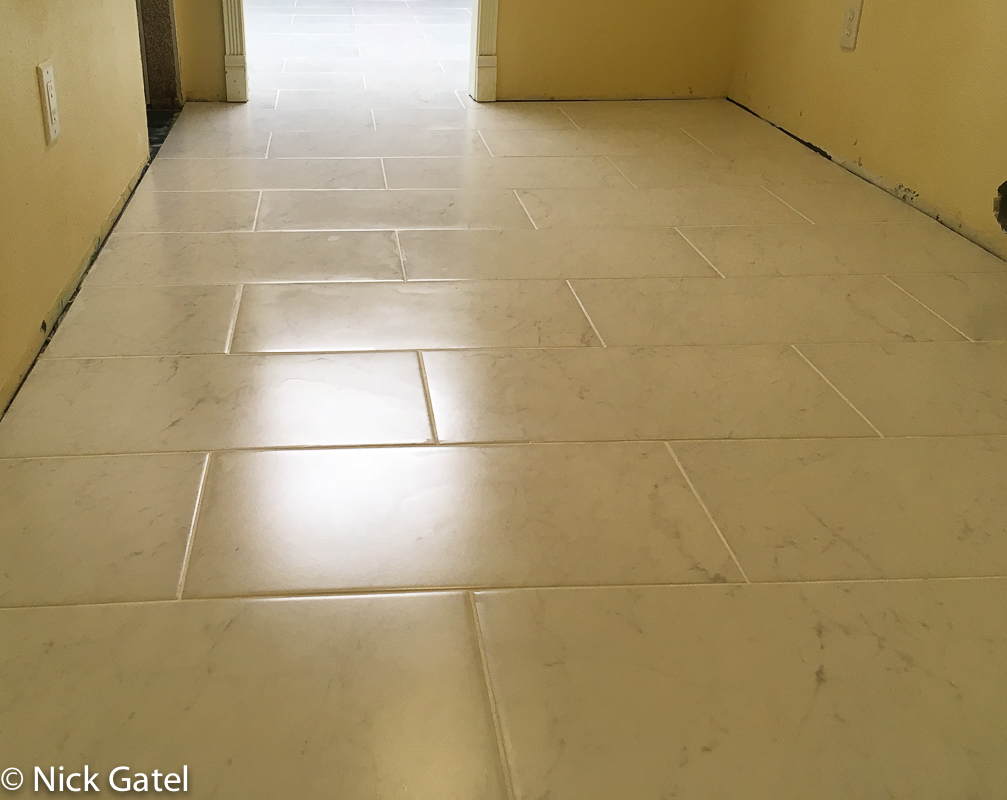
Today large format tiles such as 12 inches X 24 inches, 24 inches X 24 inches, or even larger are popular. Any tile with a side 17 inches or longer is consider a “large format” tile, and requires a special “large format” mortar.
Surface Preparation
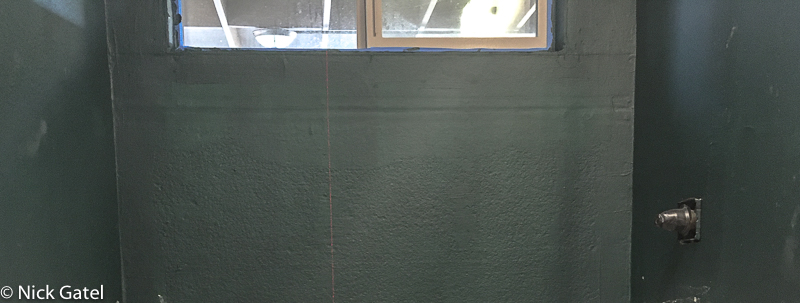
All surfaces (floor and walls) must be flat and even, and clean. Wall tiles in rooms with moist environment or around showers and bathtubs, need a waterproof or water resistant substrate. In our bathrooms we used cement board attached to the wall studs around the shower and bathtub, and water resistant drywall in areas not subject to actual water.
Also with large format tile, it is a good practice to place a waterproof membrane under the tile. A membrane helps the tile to “float” above the substrate, reducing the change of tile cracking and also complete waterproofs the substrate under the tile.
Floor Preparation
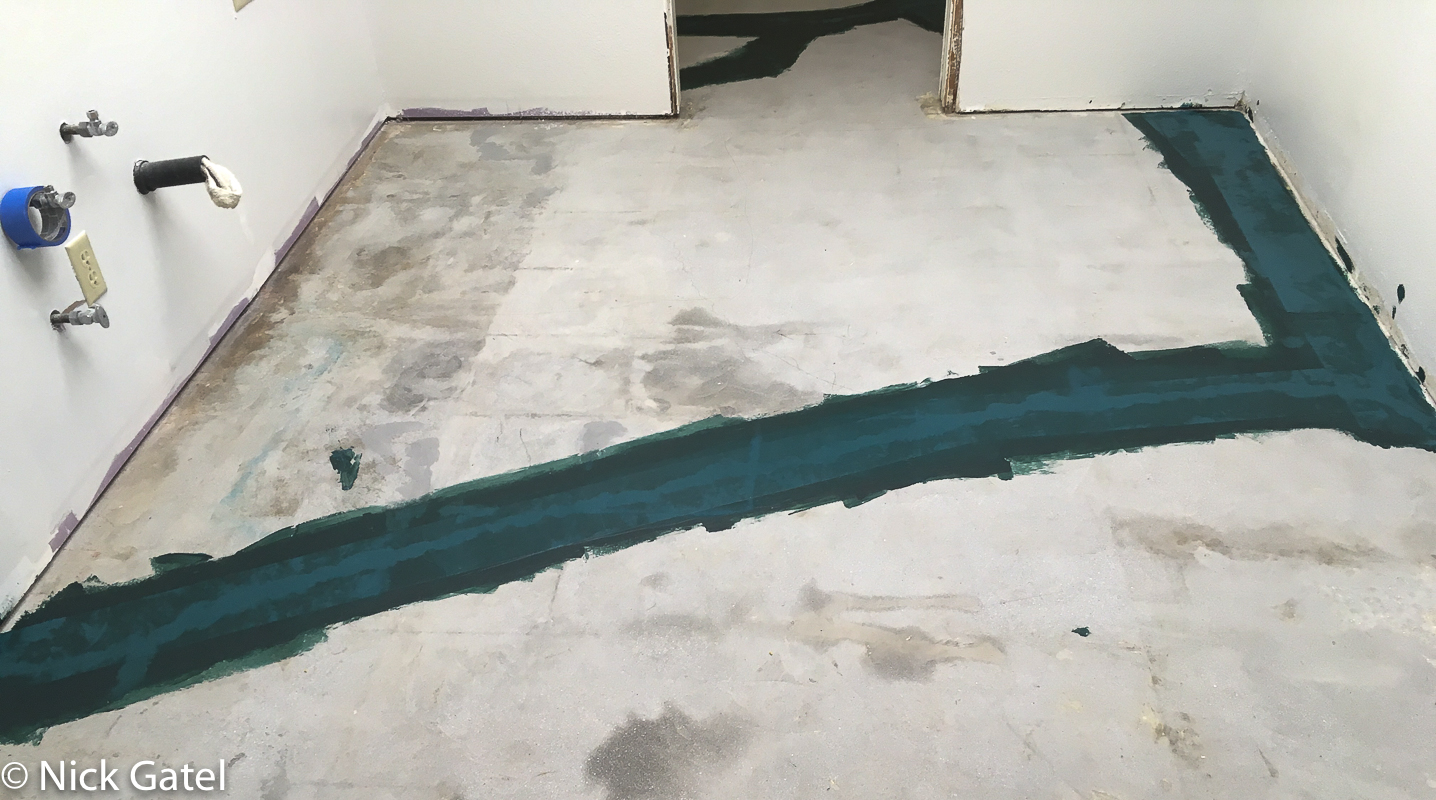
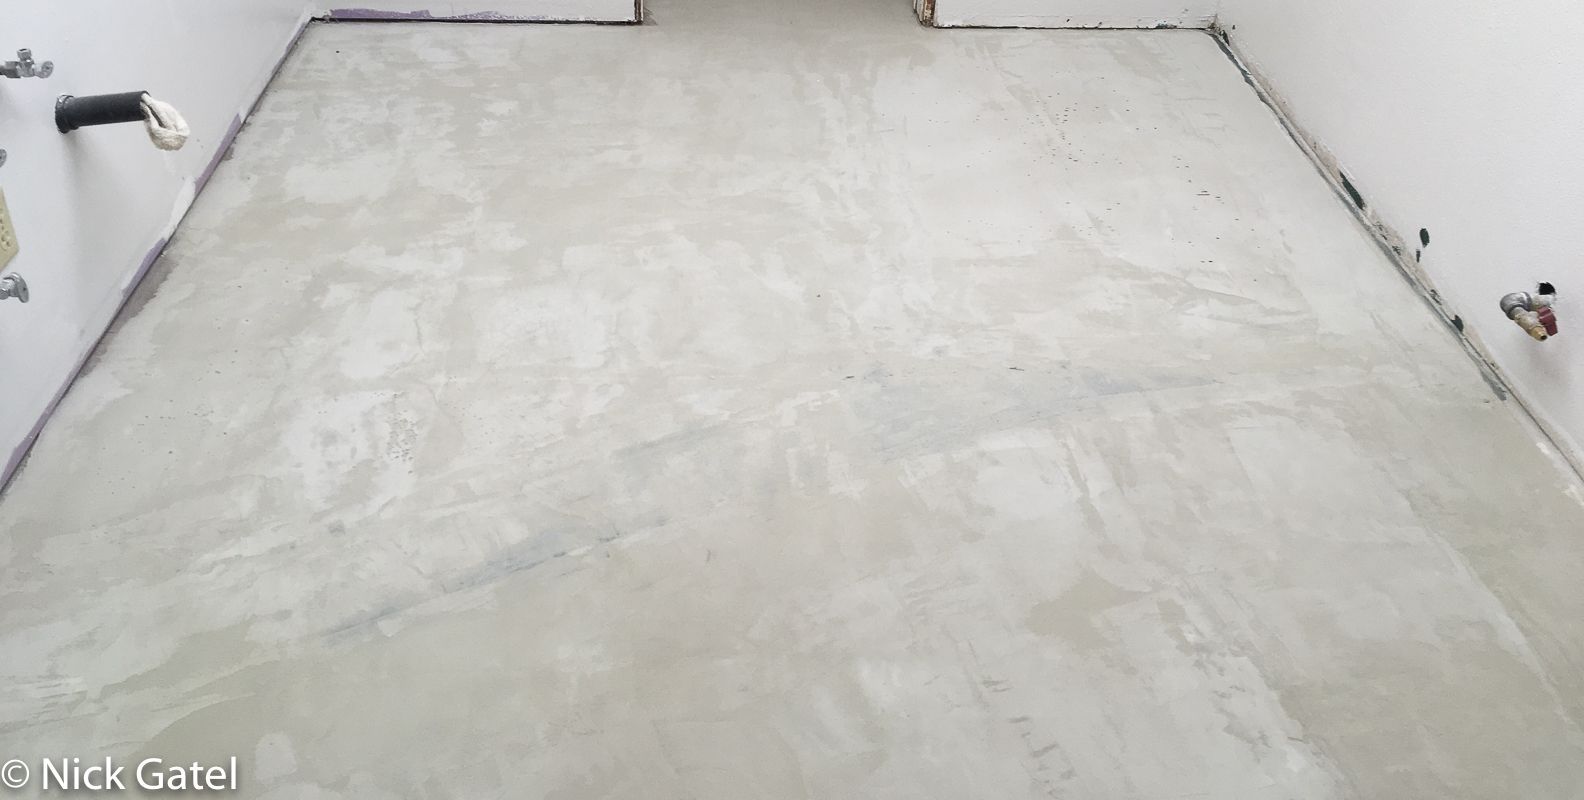
We have a cement slab floor. So our steps were to fill and isolate cracks, fill low spots in the floor, and grind the high spots, before we applied the membrane over the floor. We opted to use a rubberized membrane that is applied with a roller, just like paint. The two most popular brands are RedGard and AquaDefense. Both are similar. RedGard is a red color, AquaDefense green. We applied two coats after the floor was prepared.
Cleaning the Cement
The first issue we had to tackle was the leftover adhesive from the original linoleum floor covering in the rooms we tiled. No chemical could remove it, including mineral spirits, acetone, or specialize adhesive remover. Finally I found a solution. A cement-grinding wheel attached to an angle grinder. However it created so much cement dust that was not only dangerous to our health, but made a huge mess. I found an attachment for the angle grinder that could be connected to a shop vacuum. This tool was a godsend!

A note of caution — the cement grinding wheel can remove a lot of cement quickly, so just let it float on the cement applying no hand pressure and keep it moving.
https://www.amazon.com/DEWALT-DWE4011-Small-Grinder-One-Touch/dp/B009ELXH1K/ref=sr_1_1?crid=30Z4NABZ4WLUH&keywords=B009ELXH1K&qid=1704677384&s=lawn-garden&sprefix=b009elxh1k%2Clawngarden%2C302&sr=1-1&th=1
https://www.amazon.com/dp/B003XXE0RA/ref=hcx_acf_dp_cacc_1_yours
https://www.amazon.com/QuickT-GDS701K-Universal-Surface-Grinding/dp/B07YQ99DXN/ref=sr_1_5?keywords=DEWALT+Angle+Grinder+Dust+Shroud%2C+5-Inch&qid=1704677672&sr=8-5
Cracks in cement must be cleaned, filled with appropriate cement filler (read the instructions), sanded smooth after curing, and then covered with a wide fiberglass tape material, then finally covered with a rubberized membrane, such as RedGard or AquaDefense.
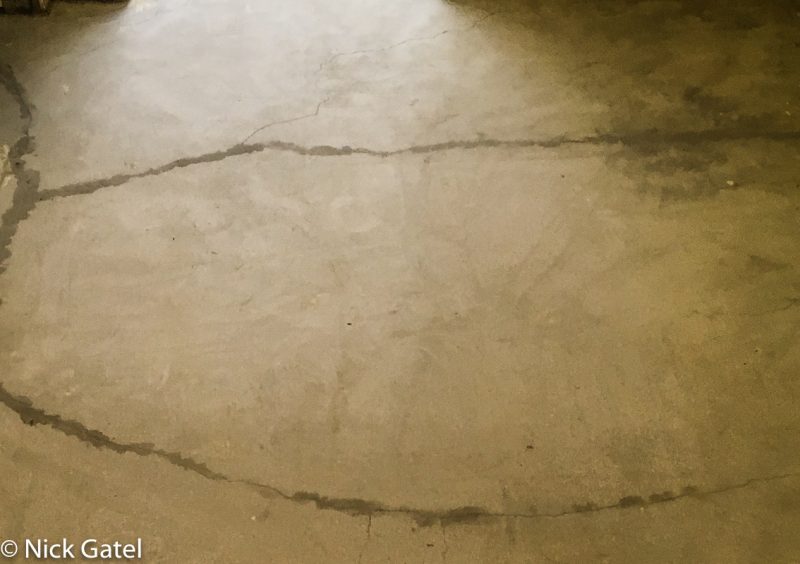
At this point, the kitchen floor (which was the worse floor of all), had some low spots. Also, the floor had a ½ inch slope from one end to the other. To actually level the floor would have been a truly major project. So I opted to make the floor completely flat without any dips or high spots (these were ground down). With a perfectly flat floor, I would be able to simply shim the kitchen cabinets to make them perfectly level, and the slope of the floor is completely invisible to see visually.
To accomplish this, I poured a thin coat of thin-set mortar, using an 8 foot wide straight edge to keep it level from side to side.
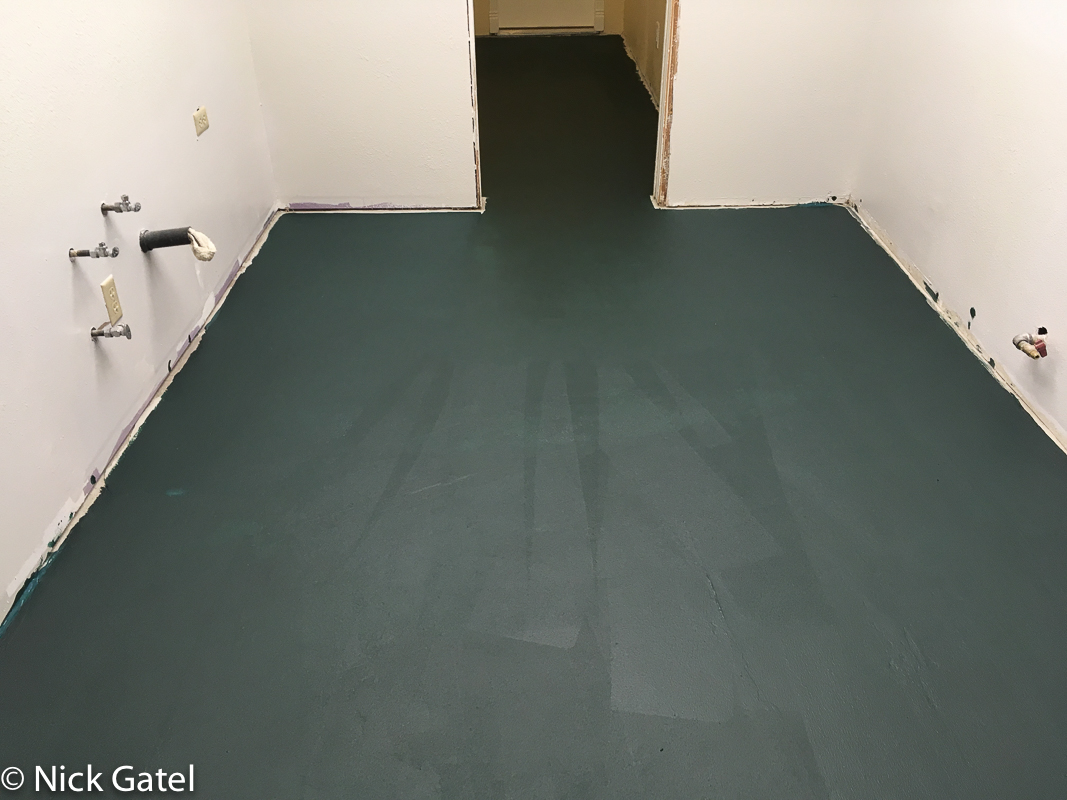 Two coats of AquaDefense.
Wall Preparation
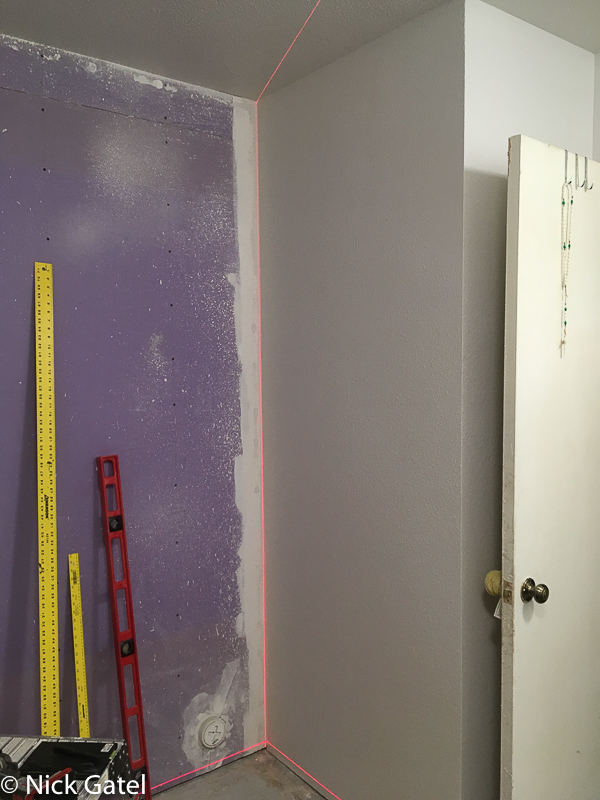
Cement board is attached with special screws. Then all joints and screw holes are covered with a thin coat of mortar. The joints are filled with mortar, covered with fiberglass tape, which is then covered with another coat of mortar, then all is smoothed with a trowel so the entire surface is smooth and flat.
 Installing the cement board and using a laser level to check the corners and walls are true.
https://www.amazon.com/Bosch-Self-Leveling-Cross-Line-GLL-55/dp/B01KM3PY8W/ref=sr_1_2?crid=28LH6P90HQ2S6&keywords=B01KM3PY8W&qid=1704677846&sprefix=b01km3py8w%2Caps%2C156&sr=8-2

Laying Tile
After this section, I’ll provide links to a couple YouTube channels that show how it is done correctly. But some things to remember:
Layout
It is best to tile the walls first. This way you aren’t making a mess on top of new floor tile.
I found it best to do a dry run on the first row of walls to make sure the measurement drawings were accurate. Do not cut all the end piece tiles ahead of time. Cut each one after you have laid the row of tile, as the length of each end tile can vary a little.
For the floor, first, find the exact center of the room, and then using a chalk line, strike a line indicating the center of the room with lines running lengthwise and widthwise. Now place all the tiles, using spacers to make sure your measurements are good. Don’t cut any tiles. You may have to adjust the lines to make everything fit properly. Do not step on any tiles when they are laying on the bare floor, because they can crack.
To lay the tile on the floor, you will want to start at the center and tile each quarter of the room working from the center out to each wall.
Tile Levelers
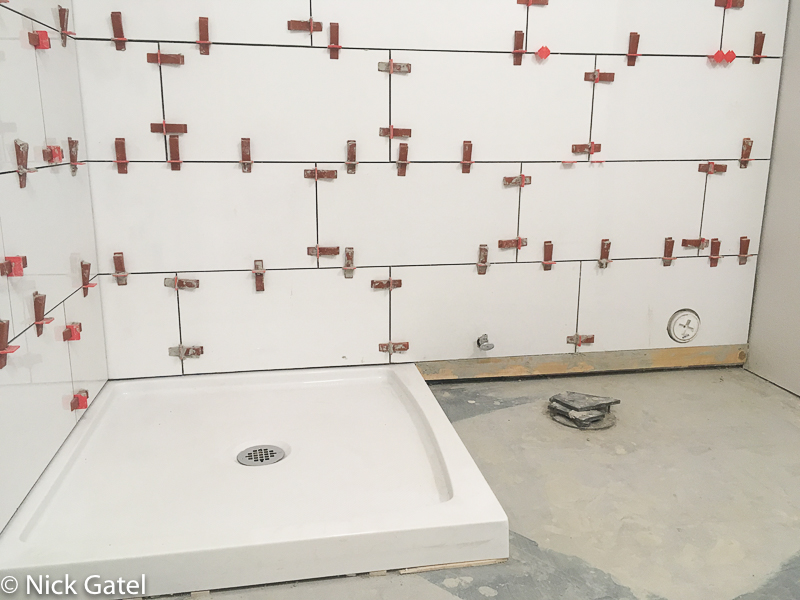
A handy system, especially for large format tile, is to use a leveling system; such as the Raimondi Leveling System to ensure each tile edge is perfectly aligned to the adjacent tiles.

These systems are not a substitute for an uneven floor. In the picture below, you can see the leveling system spacers that remain after I used the included tool to make each tile level with adjacent tiles.
Below is a link to view a video of the Raimondi system while laying tile.
Useful Links
This website may be compensated for linking to other sites or for sales of products. As an Amazon Associate I earn a small fee from qualifying purchases at no additional cost to the purchaser.