Planning a Simple Small Solar System

This post will detail how to calculate a small solar system including how to determine what battery and solar panels will be optimum.
I am following up on the two previous solar system posts:
It isn’t a theoretical exercise, but looks all the steps I followed for my small remote power system for my telescope rigs.
This system is smaller than what most people might want for a camper. Although it could work for a van setup. The methodology is important and is applicable for any RV Solar System planning.
1. Calculate (Measure!) Electric Use
I covered this in my 20 Year TriMetric Battery Monitor Review.
This system is designed to power both of my telescope kits. Every thing runs on 12 Volts or 5 Volt USB. At home I operate both almost overnight to take images with my cameras. When camping I usually only take one of the kits but sometimes both kits.
How Not To Estimate Power Needs
Some people just look up the specifications for all the equipment they want to run. These specifications are the maximum amps a device can consume and for most devices are not even close to actual consumption.
If I were to do this with each of my kits I would come up with a number close to 10 amps — way, way more than what really happens.
Components In Each Kit
- Motor driven telescope mount (2 motors in each mount)
- BeeLink GK-55 Mini Computer
- GL.iNet GL-MT1300 (Beryl) VPN Wireless Little Travel Router (for remote connection with my laptop or iPad)
- Astronomical guide camera
- Astronomical imaging camera
- Electronic automatic focuser
- Telescope (does not consumer power)
- Guiding scope (does not consumer power)
Measured Power Consumption
Over the past two years I have performed many power consumption test on both kits. I run my telescope kits from Astronomical Dusk until Astronomical Dawn (all night). Plus I don’t shut the system down until I get up, which might be five hours after Astronomical Dawn.
The BeeLink mini computer controls everything automatically. After the imaging session is done the computer parks the scope and the motors stop. All the other equipment is in stand-by mode except the computer and the router.
Night after night the total power usage is right around 22AH (amp-hours).
If you are paying attention to this, you may comment,
“Nick this doesn’t sound right. The summer nights are much shorter than the winter nights. The equipment will be running much longer in winter.”
You would be correct.
This is because my imaging cameras have internal coolers inside. I set the coolers to keep the camera sensor at a constant 32° F (0°C). In summer the cooler uses more power than it would during colder winter nights. It is a coincidence that the nightly consumption is about the same every night.
2. Determine Needed Power Storage Requirements
Each kit consumers 22AH (or 264 Watts) calculated for a 12 volt battery. To run both kits at the same time, I need 44AH capacity.
I would also like to have the storage capacity to run both kits for two nights without recharging. This is just a cushion in case the weather is too bad to recharge. However this isn’t very probable.
I need a battery with 88AH capacity. But will rarely use more than 44AH between charging. The 88AH goal can be met with a 100AH (a common size) deep cycle battery. It must be kept in mind that a battery’s capacity decreases over time, depending how many times it has been recharged and how much the battery has been discharged.
Conventional Batteries
The two most common conventional batteries are lead-acid and absorbed glass-mat (AGM). There are a couple important points to review about them.
First is the capacity/voltage relationship as the battery discharges. Take a look at the chart below.
When the battery reaches 12.06 volts, 50% of its capacity will have been used. Some of my devices do not work well at voltages under 12 volts.
The other point to consider is repeated discharges greater than 50% will cause the battery to lose its rated capacity quicker.
So a 100AH conventional battery should be fine for daily consumption of 44AH. Too many 88AH discharge cycles would significantly decrease capacity. If I was regularly using 88AH between charges, a 200AH battery would be the proper choice. For a portable system, a 200AH conventional battery would be too heavy and large to comfortable move around often.
LiFePo4 Lithium Battery
Now let’s take a look at the State of Charge Table for a LiFePo4 battery.

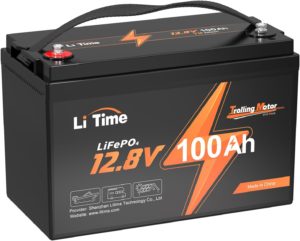
Conventional batteries have a “nominal” voltage of 12 volts. The nominal voltage for a LiFePo4 battery is 12.8 volts. These batteries will deliver 12 volts when 91% of the battery’s capacity has been used. Additionally, even if a LiFePo4 is completely discharged.
LiFePo4 batteries have significantly longer life (discharge cycles) compared to conventional lead-acid or AGM batteries. Just a few years ago LiFePo4 batteries were incredibly expensive, but are now fairly competitive compared to convention ones.
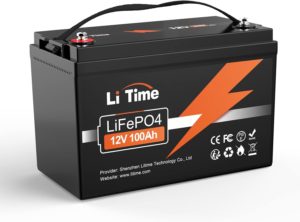
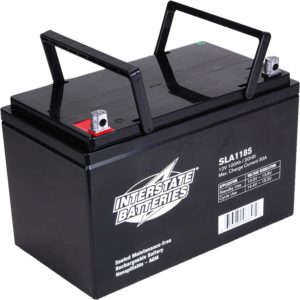
Below are two batteries for sale on Amazon. In order:
(Note: This website may be compensated for linking to other sites for sales of products. As an Amazon Associate I earn a small fee from qualifying purchases at no additional cost to the purchaser.)
At the time of this post (11/25/2023) the costs in order were:
Lastly, let’s compare the stated weight of each battery:
- LiTime 100AH LiFePo4 = 24.25 lb.
- Interstate 100AH Conventional AGM = 65.05 lb.
After much research and study I purchased the LiTime 100AH LiFePo4 battery for my remote astronomy power system.
Special Note About LiFePo4 Batteries
We’ve all read the horror stories about Lithium batteries exploding or self-igniting. These are Lithium-ion batteries, not LiFePo4. LiFePo4 batteries have a little lower energy density, which is pretty much non-combustible. In addition to being safer than other lithium chemistries, LiFePO4 batteries have several advantages, especially for larger capacity applications like RV solar systems.
I already mentioned the higher nominal voltage of 12.8 V versus 12.0 V for their competitors. LiFePo4 batteries can be fully discharged without damage. Another advantage is they perform better in cold weather below freezing. Whereas a lead-acid battery can lose 20% – 30% if its capacity the colder it gets. In the same conditions LiFePo4 will lose 5% – 10% depending on how cold it gets.
LiFePo4 Battery Management System (BMS)
LiFePo4 batteries have a Battery Management System (BMS) is an electronic device that manages the lithium iron phosphate battery packs inside the battery case. It can monitor individual cell voltages, temperatures, and the overall pack status. The BMS protects the batteries by preventing overcharge, over-discharge and short circuits. It also balances the cells and controls charging and discharging.
Don’t Charge a LiFePo4 Battery in temperatures below 32°F (0°C)!
Charging LiFePo4 batteries at temperatures below freezing will damage them. Some more expensive LiFePo4 batteries come with a low temperature cut-off that will not allow charging when the temperature drops below 32° F. If a battery manufacturer includes a low temperature cut-off they will specifically state so.
The specifications for each battery will include the charging information such as this from LiTime Batteries:
- Charge Temperature:0℃ to 50℃ / 32℉ to 122℉
- Discharge Temperature:-20℃ to 60℃ / -4℉ to 140℉
- Storage Temperature:-10℃ to 50℃ / 14℉ to 122℉
- Low-Temperature Protection:N/A
- Low-Temperature Charging Protection Auto Recovery:N/A
But some manufactures do not state whether or not the battery has low temperature protection. Buyers must exercise caution when shopping for a LiFePo4 battery. Cheaper brands use often use an inferior BMS for their batteries.
Earlier I posted a link to a LiTme 100AH LiFePo4 battery, which does not have a low temperature cutoff. LiTime does sell a 100AH LiFePo4 with low temperature cutoff and it costs about $60 more.
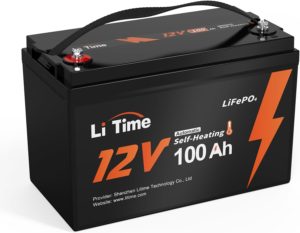
A better solution for some will be a self-heating battery. These batteries will raise the internal temperature high enough to be safely charged. Of course at a premium price. This LiTime 100AH self-heating LiFePo4 battery sells for around $100 more than their standard battery without a low temperature cutoff.
You probably noticed I am using LiTime products for comparisons. LiTime sells quality products at very competitive prices.
We rarely operate at temperatures below freezing. If the expected temperature falls below freezing, I simply disconnect the solar array from the battery bank. In our travel trailer I use circuit breakers, which makes it quick and easy.

With larger system, such as our camper, the solar controller needs to be connected to the battery when disconnecting or connecting the solar array and the circuit breakers make this simple.
3. What Size Solar System?
I use my telescopes year round. The days are shorter in winter and the sun is lower in the sky, thus providing fewer hours of solar power to harvest each day. So we need to size our solar array for the months of the least amount of sunlight.
Peak Sun Hours
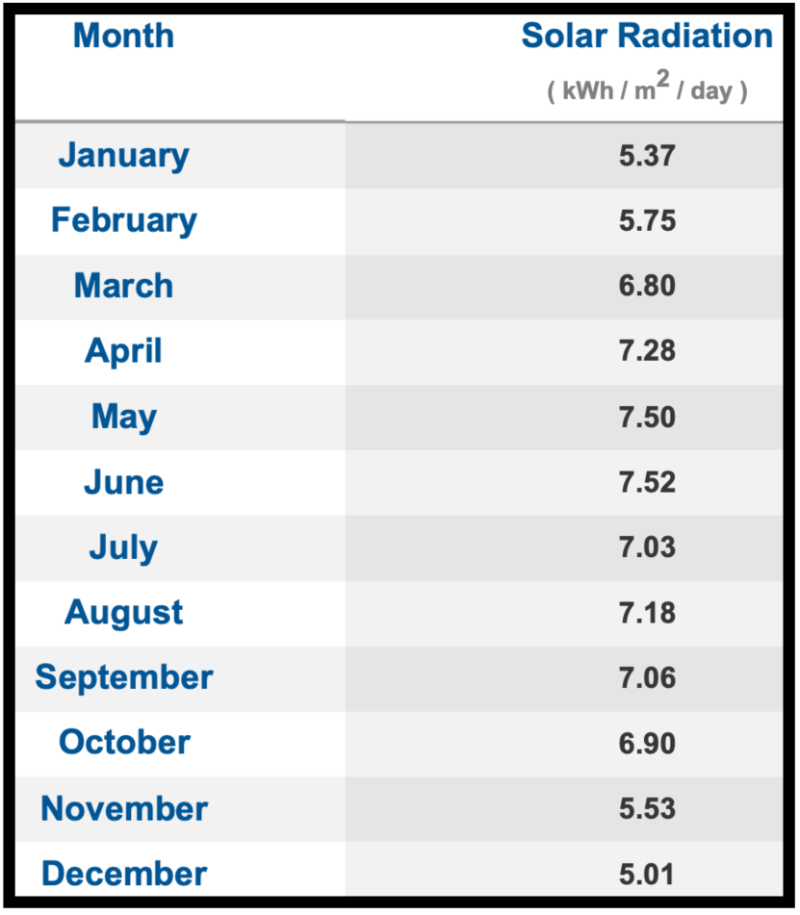
Peak sun hours is way to determine how much energy can be harvested during different times of the year. Below is a monthly chart of the Sun’s angle for my location:
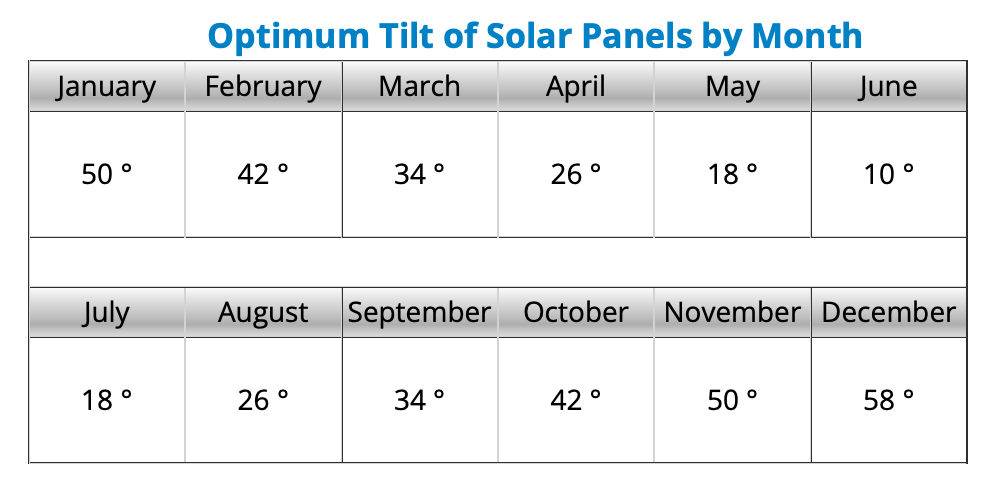
For our location, recommended panel angles:

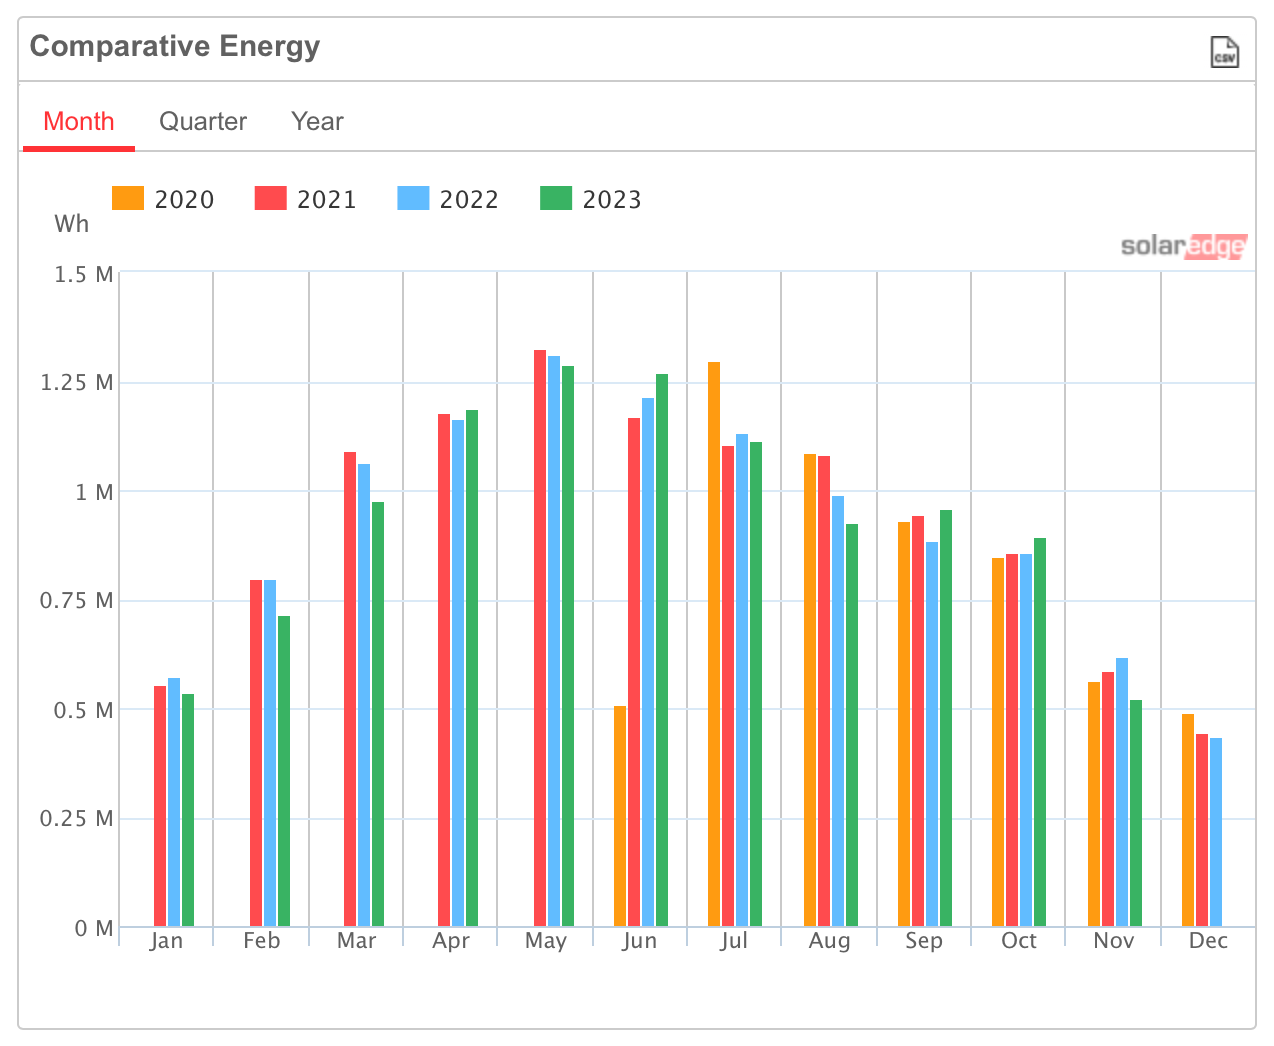
Fixed angle (non-tillable) solar panels do create compromise. Our house has a 6.2 kWh solar array with a fixed angle. Below is the monthly solar production. This is actual production, which is also impacted by weather and clouds, along with the Sun’s location in they sky. We typically have some monsoon cloud cover in the July through September. July of 2020 was unusually sunny every single day.
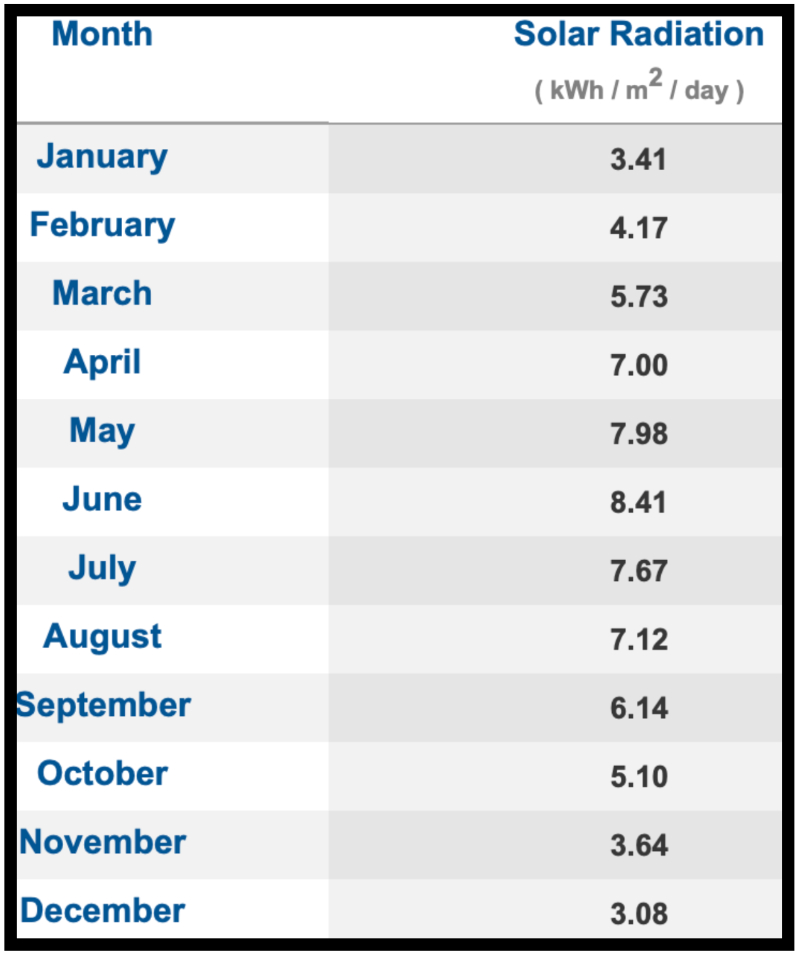
Peak Annual Sun Hours By Month For Palm Springs
Our travel trailer has permanently mounted panels on the roof and they are horizontal (0° angle). Below is the monthly hours of Peak Sun with horizontal panels. For our travel trailer, I would want to use the December number to calculate how much solar I need.
FLAT PANELS (Horizontal)
TILT PANELS (30° Tilt)
Some people build a tilting frame system so they can climb up on the roof to tilt the panels. In this example I picked a 30° fixed tilt. If one is inclined, with a bit of work a fame could be built that allows adjustable tilt angles for the optimum angle each month. With tilted panels, in addition for the need to climb up on the roof to adjust the panels, the RV would have to be parked with the panel array facing south, which often can’t be done in campgrounds where the orientation of the campsite is fixed.
This is the link to the Peak Sun Hours Calculator from the National Renewable Energy Laboratory (NREL) I used for the examples above. I like it because it shows each month of the year.
Renogy 100W Suitcase Solar Panel Kit
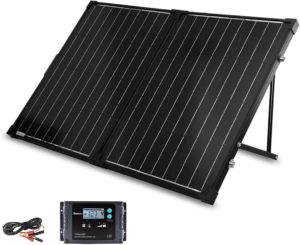
I bought a Renogy 100W suitcase solar panel kit with a PWM solar charge controller. It consists of two 50 watt panels hinged together with a carry handle. Construction of the panels (monocrystalline) is robust and it comes included with a padded carrying case for transport. It should be durable.
Since I will be using these portable panels for my astronomy kit, I can adjust the tilt angle. Calculating for the least amount of Peak Sun Hours (December), a 58° tilt angle, and assumed the panels would be facing directly south the entire day. I could harvest a little more energy if I move the panels to follow the Sun’s movement across the sky. This calculation will give me the amount of power I can harvest in the “worst” month of the year. I will be able to better in all of the other eleven months of the year.
Calculations
My last post Solar Charge Controllers: PWM vs. MPPT goes into great detail on calculations.
To calculate how large a panel I need for my system, I am going to use the 5.66 hours of peak sunlight, which is for the month with the least amount of Peak Sun Hours where I live. I also will also use the specifications for the Renogy 100W suitcase solar panel with a 20A PWM solar controller.
The Optimum Operating Current (Imp) is 4.94 amps. We will multiply this by 5.66 peak hours.
4.94 amps X 5.66 hours = 26.96 Amp-Hours
Plenty to recharge the 100AH battery after a single night using just one of my astronomy telescope kits. Not even close to recharging if both telescope kits are used during the night, which will usually consume 44AH of power.
So I really need a 200W system. I could add another Renogy 100W suitcase solar panel to double the amount harvesting, bringing my total harvest to 55.92AH.
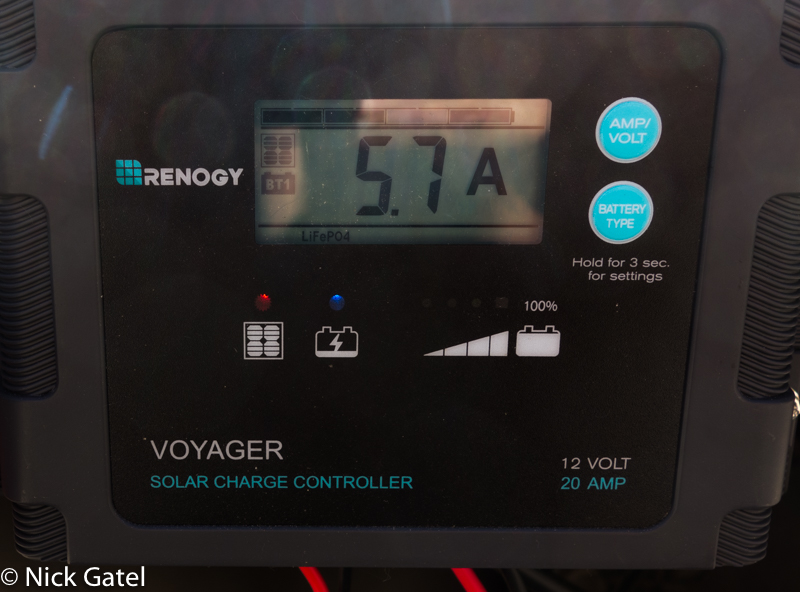
I haven’t spent time to monitor the actual performance of the Renogy 100W panel over time. But with the panel tilted at 58° it does produce 5.7 amps of power at times (which I confirmed with my TriMetric Battery Monitor).
This isn’t surprising as I have seen often seen this with my other solar systems over the years, where the solar will occasionally peak for a while.
For sizing your own solar system, use the Optimum Operating Current (Imp) specification for your calculations.
SHOULD I BUY A SECOND SOLAR PANEL?
For me the answer is no.
I normally charge this battery with 120V AC power supply in my garage. Our house has solar and each year the utility company owes me money, so it is “free” electricity.
This solar panel is for camping trips where I normally just use one of my telescope rigs. Should I take both rigs camping, I can use the travel trailer’s solar system to recharge this battery.
WHAT I DON’T LIKE ABOUT THE SOLAR PANEL KIT
The solar controller is attached to the back of the panels with a folding hinge. Very convenient for packing up and transport. But a solar controller should be as close as possible to the battery, not the panels. For this small of a system it won’t matter much.
The kit comes with a battery charge cable with two clamps. Clamps aren’t secure and are really temporary.
I bought a pair of 5 foot 12AWG solar extension cables and replaced the terminals at one end with Anderson Power Pole connectors for a secure connection to the battery.
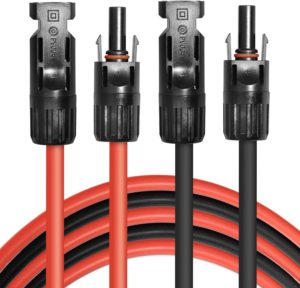
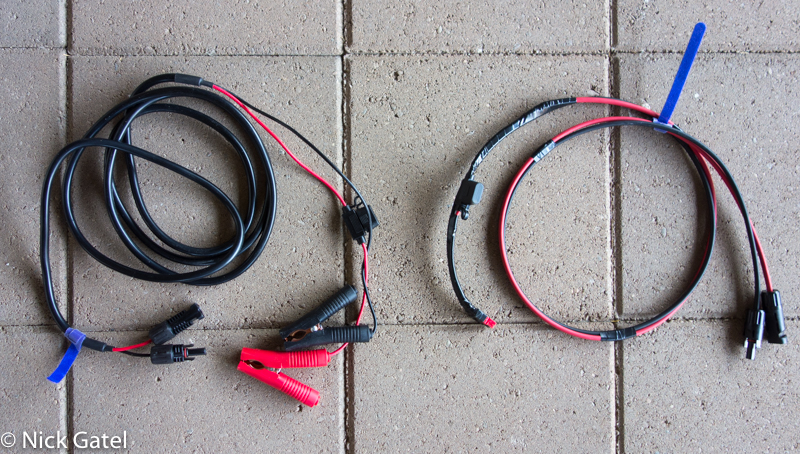
The Renogy suitcase solar kit came with a charge cable (above left) with rather thin wires and clamps. I made a more secure and shorter cable (above right) with Anderson Power Pole connectors and an inline 15A ATC type fuse.
This concludes the conversation on how to size a small solar system. Soon I will be publishing an article on designing a larger RV solar system, which is more complicated.
To see how I used the battery and suitcase solar panel to built a complete power distribution system, read this story, New Telescope Remote Power System.