
I can’t count the number of times on the internet (especially forums) I have seen the comment that a MPPT solar controller is far superior to a PWM controller. Often times, if someone is seeking advice about their first RV solar system, someone will pop up and state they need MPPT without having any information about the other components that will be part of the system.
The bottom line is that MPPT is not superior to PWM solar charger. For specific systems one type can be better than the other.
Let’s find out more about the MPPT vs PWM debate. If you are thinking about installing a RV solar system or expanding your current system which solar controller you choose is very, very important.
In this post I will share some of the technical aspects of solars systems and, perhaps unfortunately for those who dislike numbers, some simple math. Remember, numbers are really your friend.
I am not an expert of any kind. On the other hand, I have many, many years of experience with DC voltage systems along with small off-grid solar arrays. Sometimes practical experience trumps theory.
What Is A Solar Charge Controller?
A solar controller is placed between the solar panel array and the battery bank. It controls how much power is delivered to the battery bank to ensure the bank isn’t over charged or under charged.
It also helps protect the system’s circuitry and wiring.
What Are PWM And MPPT?
PWM
PWM is an acronym for Pulse Width Modulation. A PWM controller simply passes the current from the solar array to the battery, based on the battery’s nominal voltage. It does this by turning the current on and off (very quickly). When the battery needs to be charged, the controller harvests all the charge current from the solar array sends it to the battery.
PWM controllers quickly open and close as needed to regulate the current coming from the solar array and into the battery. PWMs decrease the output voltage down to match the battery voltage.
These controllers can’t modulate the voltage, they just pass the current charge to the battery.
Let’s say you have a solar panel rated at a max power voltage of 22 volts and a charge current of 7.9 amps. The PWM controller will send the full current of 7.9 amps to the battery at the battery’s nominal voltage, which is usually 12 volts for a lead-acid battery bank on an RV.
If you have a Lithium (LiFePo4) with a nominal voltage of 12.8 volts, it will still send 7.9 amps to the battery too.
MPPT
MPPT stands for Maximum Power Point Tracking.
A MPPT controller is much more sophisticated and will regulate the charge current into the battery like a PWM controller.
In addition, the MPPT will also convert the voltage coming out of the solar array to match what the battery bank needs. This additional function can dramatically improve efficiency in some cases.
To understand the potential efficiency improvement we need to visit some numbers.
By The Numbers
Standard Test Conditions (STC)
Solar panel manufacturers test (and design) based on standardized testing conditions. These are not the real-world conditions we experience when out camping in our RVs, but it does provide an accurate way to compare different solar panels and to help us design our own RV solar system.
There are several specifications that are part of the STC, which is usually found on a label on the back of the solar panel and most manufacturers include the data in their documentation, which nowadays is most often found online. For our discussions we will be concerned with three measurements.
- Rated Power, Watts (Pmax) (measured as Watts)
- Voltage at Load (Vpm) (measured in Volts)
- Current at Load (Ipm) (measured in Amps)
Our camper has two 140 Watt solar panels wired in parallel. The specifications for each panel is:
- Watts (Pmax) = 140 Watts
- Voltage at Load (Vpm) = 17.7 Volts
- Current at Load (Ipm) = 7.91 Amps
The specifications for the entire solar array is:
- Watts (Pmax) = 280 Watts
- Voltage at Load (Vpm) = 17.7 Volts
- Current at Load (Ipm) = 15.82 Amps
In the above specifications I have marked the increases in bold. Parallel connections increase the amperage and watts, but the voltage remain the same. So two panels in parallel double the amperage and the watts.
In summer when the sun is at its highest we do get over 15 amps from this array into our battery bank.
As a side note, solar panels can be wired in series and in series/parallel. For our discussion, I am keeping things as simple as possible. For those who need series and or series/parallel, you are probably smarter than me and might need to read all of this.
Watt’s Law
Now for the big question — how many amps and watts will our PWM Solar Charge Controller system produce in summer?
We can use Watt’s Law:
Power = Voltage X Current
or
Watts = Voltage X Amps
Watts = Battery Nominal Voltage X Amps
For our camper with its 12.8 Volt Lithium battery the math shows:
Watts = 12.8 Volts X 15.82 Amps
Watts = 202.5
Also keep in mind that Watts are just a measure of power at the point in time it is taken, as are Amps. When we measure how much energy has been added to the battery bank, we use Watt Hours or Amp Hours. Watt Hours is how much energy can be produced in an hour, same goes for Amp Hours.
For example, if a solar system produced a steady 200 Watts for 5 hours, the total would be 1,000 Watt Hours (5 hours X 200 Watts). A similar calculation for Amp Hours for a steady 20 Amps for 5 hours would be (5 hours X 20 Amps) that comes our to 100 Amp Hours.
What could be produced if we had a MPPT Solar Charge Controller?
Here we would calculate things differently than with a PWM controller. Because the MPPT controller can modulate current and voltage, it can potentially deliver more power. The formula we want is the Charge Current (Amps) sent to the battery bank. Under ideal conditions the MPPT will sent the full amount of Rated Watts (Pmax) to the battery bank.
We will still use Watt’s Law, but we are searching for Amps. Using the formula
Watts = Voltage X Amps
we find that Amps is calculated by dividing Watts by Volts
Amps = Watts ÷ Volts
Instead of using the battery bank’s nominal voltage, we need to use the MPPT’s charge set point voltage, which on our system would be 14.6 volts. So, to complete the formula we would get:
Amps = 280 Watts ÷ 14.6 Volts
Amps = 19.2
Now lets us calculate the difference between what the PWM controller sent to the battery compared to the MPPT controller, as a percentage.
The MPPT would produce about 3.4 more amps than the PWM controller. To find the increase we need to take the increased amps from the MPPT compared to the amps produced by the PWM controller. We want the increase between controllers stated as a percentage:
Percent Increase = 3.4 Amps ÷ 15.8 Amps (PWM Amps)
Percent Increase (using the MPPT) = 21.5 %
We need to exercise caution with these numbers. MPPTs work really well in cold weather. In warm weather, especially the kind of weather we camp in, the efficiency won’t be as great. In general, with smaller systems like we see on most RVs and assuming the solar panel voltage is matched to the controller a PWM will be an excellent choice.
When an RV solar array gets up to about 600 Watts, then the owner should seriously consider a MPPT controller — again assuming the solar panel voltage is matched to the controller — and this (voltage) has changed quite a bit since we bought our Kyocera 140W panels back in 2014.
It used to be that solar panels marketed for RV use and advertised as 12 Volt panels had a Voltage at Load (Vpm) specification of between 17 and 18 volts. This was almost universal. That has changed considerably. Lets take a look at some very popular “12 Volt” solar panels made by Renogy.
Popular Renogy Solar Panel STC Specifications
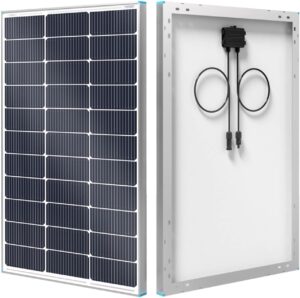
100W panel (36 cells)— Vpm = 20.4 V; Imp = 4.91 A
175W panel (64 Cells)— Vpm = 18.1 V; Imp = 9.67 A
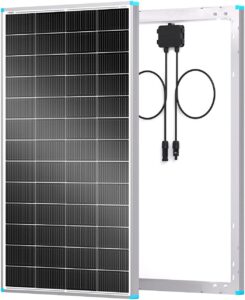
200W panel (68 cells) — Vpm = 19.2 V; Imp = 10.42 A
200W panel (40 cells) — Vpm = 22.6 V; Imp = 8.85 A
Note: Renogy sells two versions of their 200w Monocrystalline panels and both have the same model number (RSP200D). The 68 cell model has a 10 year workmanship warranty and the 40 panel only 5 years workmanship. Both have a 25 year power output warranty. Also, the 40 cell model has a much higher open circuit rating (27 volts) and would probably be an issue with many PWM solar controllers. But we’ll include it in a table to see how a higher voltage solar panel produces fewer amps with a PWM controller.

This website may be compensated for linking to other sites for sales of products. As an Amazon Associate I earn a small fee from qualifying purchases at no additional cost to the purchaser.
The Table below illustrates how higher Vpm reduces the charge current a PWM will deliver to a battery bank. The table looks at 100 Watt panels with different Voltage at Load (Vpm) specifications. This is because at 100 Watts is equal to the Volts times the Amps.

Let’s do another number exercise. Suppose we want to build a solar array of at least 600 Watts for our RV.
Using the popular Renogy solar panels we could use:
- (six) 100 Watt panels in parallel = 600 Watts
- (four) 175 Watt panels in parallel = 700 Watts
- (three) 200 Watt (68 cell) panels in parallel = 600 Watts
PWM Solar Charge Controller Example
Now let’s calculate how many Amps a PWM Charge Controller could deliver under optimum conditions to our 12.8 Volt Lithium battery bank.
- (six) 100 Watt panels in parallel = 6 X 4.91A = 29.46A
- (four) 175 Watt panels in parallel = 4 X 9.67A = 38.68A
- (three) 200 Watt (68 cell) panels in parallel = 3 X 10.42A = 31.26A
MPPT Solar Charge Controller Example
Next we’ll perform calculations for what a MPPT Charge Controller could deliver under optimum conditions to our 12.8 Lithium battery bank.
- (six) 100 Watt panels in parallel = 600 Watts = 41.1A
- (four) 175 Watt panels in parallel = 700 Watts = 47.9A
- (three) 200 Watt (68 cell) panels in parallel = 600 Watts = 41.1A
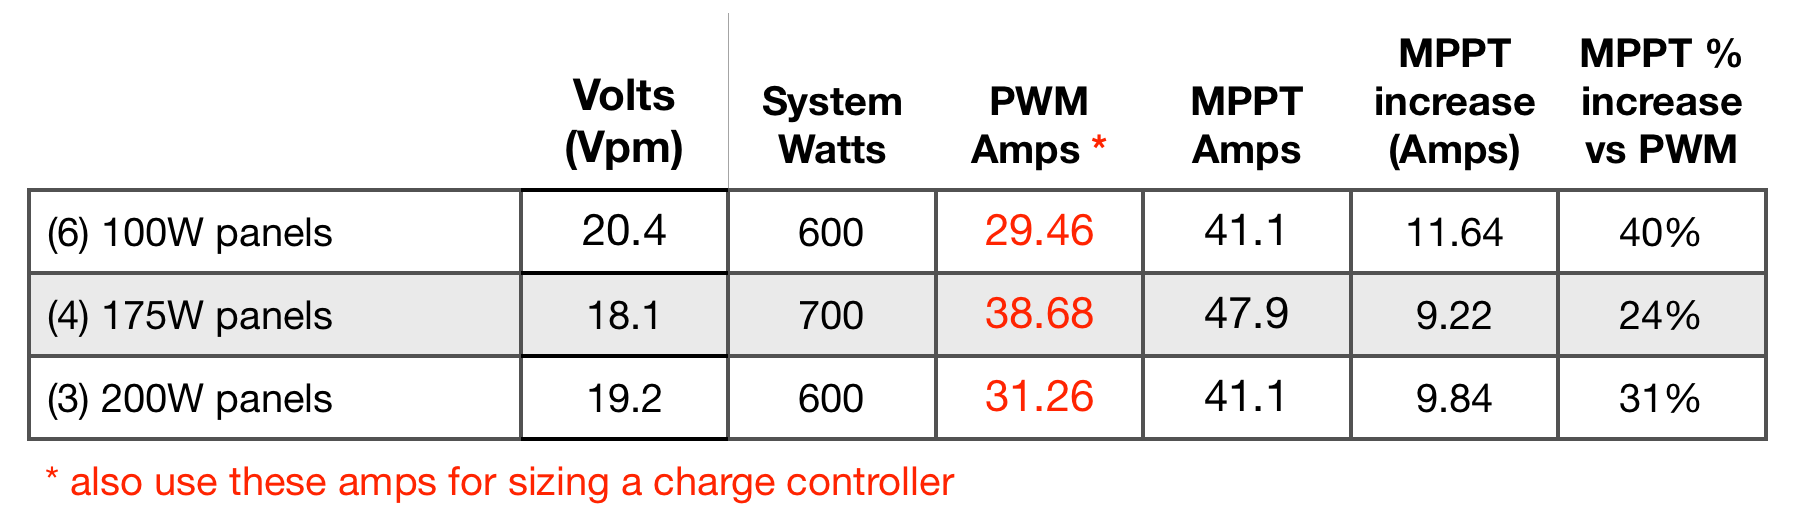
Finally all the data entered into a table for review:
Solar Panel Costs (Checked on the Renogy Website on Black Friday)
- 100 Watt panel (600 Watts total) @ $89.99 X 6 = $539.94 Cost per Watt = $0.90
- 175 Watt panel (700 Watts total) @ $189.99 X 4 = $759.96 Cost per Watt = $1.09
- 200 Watt panel (600 Watts total) @ $209.99 X 3 = $629.97 Cost per Watt = $1.05
These costs don’t include extra money for mounting brackets, fuses, wire connectors, etc. The 200W panels will require the least amount of installation time and extra materials because there are only 3 panels versus six 100W panels or four 175W panels.
All three systems will require a 45 Amp charge controller. Either a PWM or MPPT will work.
Pros and Cons of MPPT and PWM Controllers
Technology Differences
This table from Morningside Corporation does a great job explaining the differences in technology.

MPPT controllers are much more complicated to build and thus cost significantly more money. Additionally, PWM controllers usually last longer because of this.
Keep in mind that a quality controller will last decades, so the dollar cost average over the years may be less than a cheap unit that might fail sooner.
RV Considerations
For those who own a motor home or trailer, they know that things constantly rattle, vibrate, come loose, and even fall apart. My inclination is to buy sturdy and durable components whenever possible — quality products — and quality products often cost significantly more.
Don’t Buy Anything Yet!
As I mentioned in my 20 year review of the TriMetric Battery Monitor, a solar system needs to be sized according to the daily electrical consumption and other factors. A battery monitor is the first step — electrical consumption needs to be documented first.
This post you are reading right now will be part of a series of articles and I will soon be sharing an article on How to Size a Solar System.
Solar Charge Controller Prices
There are so many cheap brands on the market these days.
Morningstar controllers have been popular for over 35 years, having sold millions and millions of units over the decades. Victron seems to have a good reputation too. Renogy sells a popular line of consumer controllers.
I have no experience with Victron.
I do own a small folding 100W Renogy solar panel suitcase for my telescope with a Renogy Voyager 20A PWM solar controller that came with the unit. It charges just fine. However you have to select the battery type every time it is hooked up. It can’t remember the last setting. Also the LiFePo4 charge point is fixed at 14.4 volts. I would like to change it to 14.6 volts, but can’t. These are the kinds of things to consider when buying a solar charge controller.
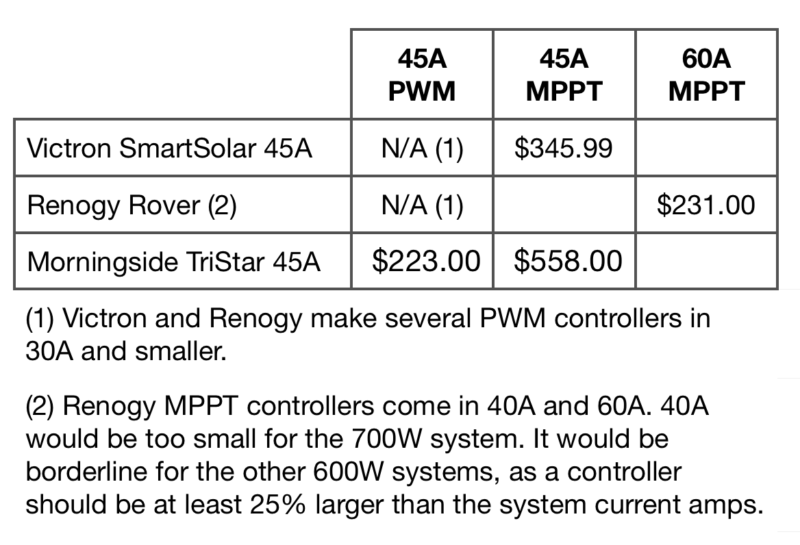
Given all of this, I’ll stick with the Morningside TriStar family of controllers. My experience has been stellar. Keeping that in mind, here is a quick comparison table. Remember this is just a matrix of popular solar controllers. I am not recommending the Renogy or Victron controllers; on the other hand I am not dismissing them as inferior either. They are just convenient for comparison. Just consider the methodology in the examples.
Other Comparisons
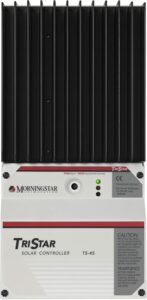
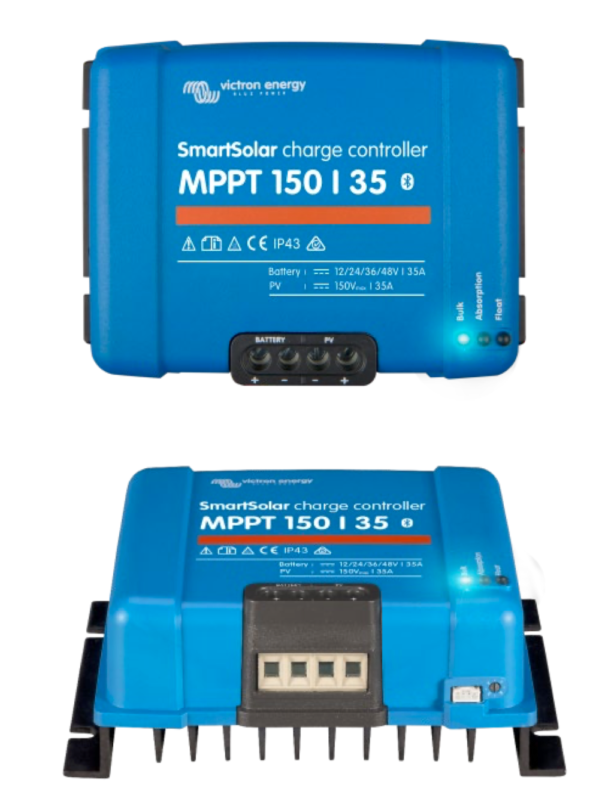
Morningstar TriStar 45A PWM
- Height: 26.0cm/10.3 in
- Width: 12.7cm/5.0 in
- Depth: 7.1cm/2.8 in
- Weight: 1.6kg/3.5lb
Construction is all metal other than the circuit board components.
Made in Taiwan.
Check out the heat sink at the top of the unit in the picture below!

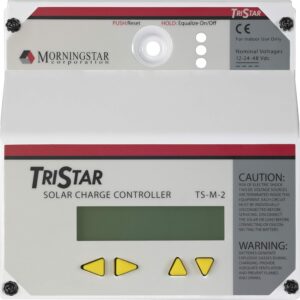
The TriStar controllers have 8 DIP switches for basic setup. A lot of customization can be done via software. However this requires a RS-232 adapter to a Windows computer running the free software from Morningside. I documented this towards the end of my LiFePo4 battery installation post.
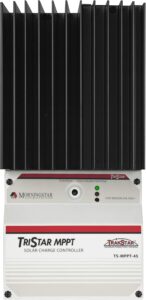
Morningstar TriStar 45A MPPT
This thing is even more massive that the PWM version.
- Height: 29.1 cm/11.4 in
- Width: 13.0 cm/5.1 in
- Depth: 14.2 cm/5.6 in
- Weight: 4.2 kg / 9.2 lbs
Construction is also all metal other than the circuit board components.
Made in Taiwan.
Below is a TriStar 45A MPPT (left) and a TriStar 45A PWM mounted inside our travel trailer. Each solar controller is connected to a separate solar array, and both controllers are connected to a single 300AH LiFePo4 Lithium battery. In other words, both controllers charge the same single battery.

Morningstar states (and it works) that two controllers can be connected to a single battery bank. The controllers have to be the same amperage and all the settings must be identical.
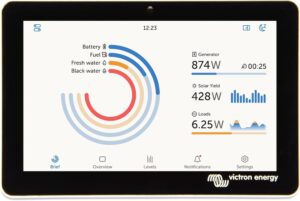
Meters are an optional purchase. One style meter is mounted directly to the solar controller. Also remote meters can be purchased.
Using two of the Morningstar remote meters, the picture below the MPPT (far left) is sending 19.1 amps to the battery and the PWM controller (far right meter) is sending an additional 8.2 amps for a total of 27.3 amps.
But the battery monitor (center) is reporting a total of 24.8 amps, which is 2.5 amps less. This is easy to explain. If you look at the inverter display at the bottom right, it shows the inverter is on and supplying 123.6 volts AC to all the outlets in the trailer. The inverter itself usually consumes 2.5 amps of DC power. So our meters are exactly correct!
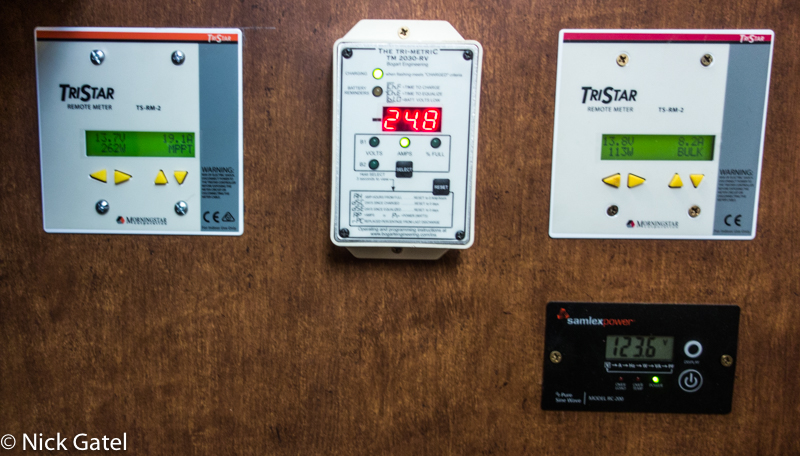
By the way, these measurements were taken on a November afternoon when the sun was low in the sky and we would expect the energy harvesting to be 50 or 60 percent less than what could be harvested during peak hours in summer.
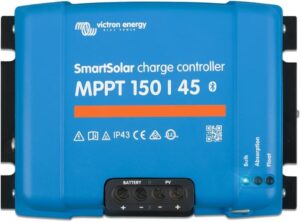
Victron SmartSolar 45A MPPT
From what I have read, the 30A and 45A SmartSolar MPPT are the same dimensions and weight.
- Height: 13.0 cm/5.1 in
- Width: 18.6 cm/7.3 in
- Depth: 7.0 cm/2.75 in
- Weight: 1.25 kg / 2.75 lbs
Compared to the TriStars, the heat sink isn’t very impressive.
Optional displays and a bluetooth adapter can be purchased for the Victron.
I couldn’t find out where these controllers are made. I saw a few general statements that Victron products are designed in the Netherlands with production in the Far East, India, Malaysia and Sweden.
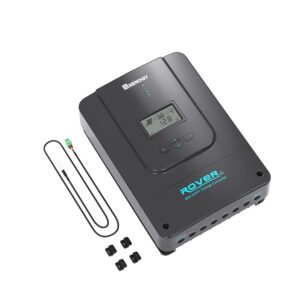
Renogy Rover 60A MPPT
Renogy is an American company located in California. From my research, most of their products are made in Thailand.
From a Renogy brochure, the 30A and 45A SmartSolar MPPT are the same dimensions and weigh the same.

It is a nice looking unit. Looks like there might be a lot of plastic though. I have never seen one in person.

Next Steps
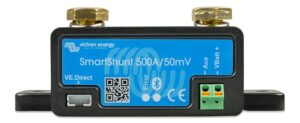
Recapping all the information presented, an accurate shunt-based battery monitor should be used to determine the daily energy consumption. Once this is done, a strategy can be developed for how much capacity is needed to be stored in the battery bank. For RVs we will also want a certain amount of reserve to power all our needs if the sun doesn’t shine for several days.
We have looked at the different types of solar charge controllers and the methods to predict how much energy each kind can produce.
Lastly we will need to understand how many peak hours of sun are available in our location for each month of the year. It is a lot less in winter than in summer.
My next post (in a few days) will walk through all the steps needed to make the calculations to size a proper solar array. Stay tuned!