If I haven’t bored you yet, this is the next post on our house remodel.
Of all the rooms I completely tore down to the wall studs during our house remodel, this was the easiest. Probably because my skills improved as I progressed room-by-room, it was more intuitive to anticipate problems, and there was only one big obstacle in this room.
I won’t get into as much detail here as in the previous two demolition posts for our master bath demolition and our kitchen demolition, as I don’t want to be too repetitive. I will delve into a bit of detail on some things I haven’t discussed before. This will also be the last post on demolition activities.
The Starting Line
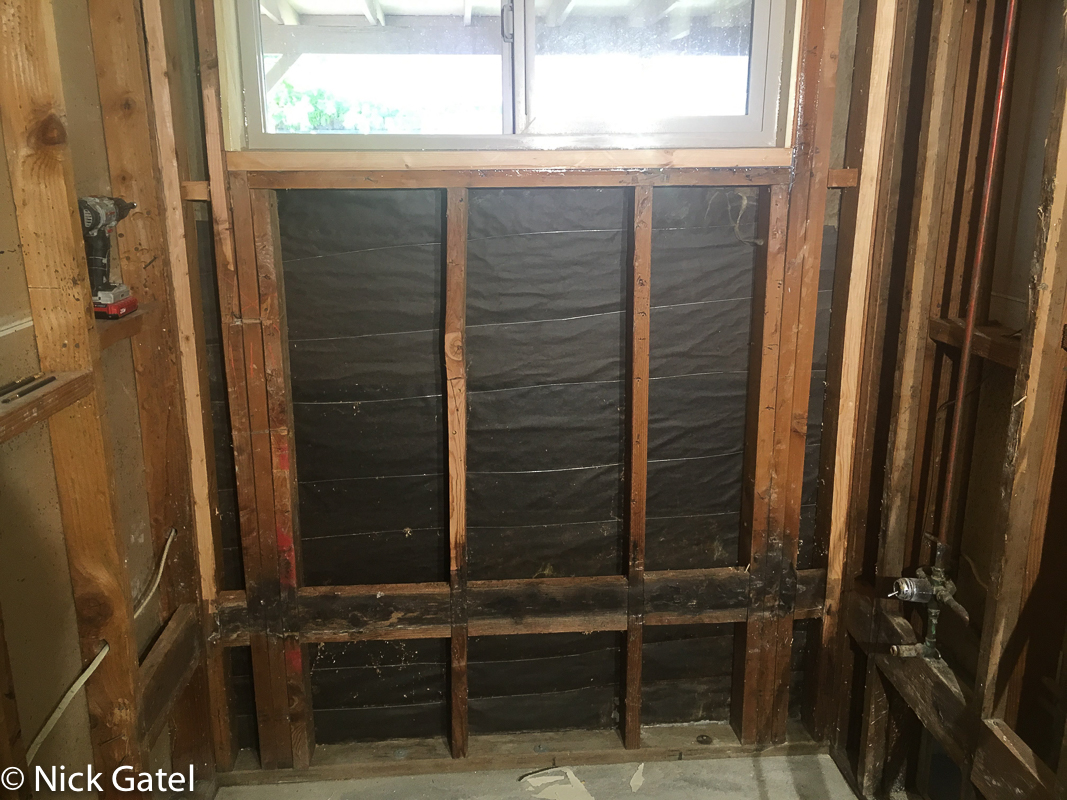
This is what we started with . . .


Drywall, Tile, and Tub Removal
As I did in most rooms, the first task was to remove the drywall that covered the walls. This would allow me to move some of the electrical outlets and to install a new shower control valve to the water supply lines.
Once all the drywall was removed, I removed the old ceramic tile and bed mortar surrounding the bathtub.
Bathtub
We decide to replace the old tub since is had a couple spots where rust was coming through the enamel. Luckily it was an enameled covered steel tub and not made from cast iron. Joyce and I would not be strong enough to lift it out. We replaced it with a similar enameled covered tub.
Tub removal should be simple in most cases, and a Google search will show you how. What is important when removing an alcove tube like ours, is to remove all wall coverings and to remove the stud blocks on one side, then the tub can be tilted up and removed.
I was able to remove the tub by myself. Joyce helped me to set the new tub in place, because I wanted to be careful and avoid chipping or damaging the enamel coating.

Ceiling
As was the case with our laundry room, the ceiling has sustained minor damage due to a roof leak, and I could no longer secure it to the rafters with new drywall screws, so I opted to just install new drywall on top of the old ceiling, using longer than standard drywall screws.
Shower Valve
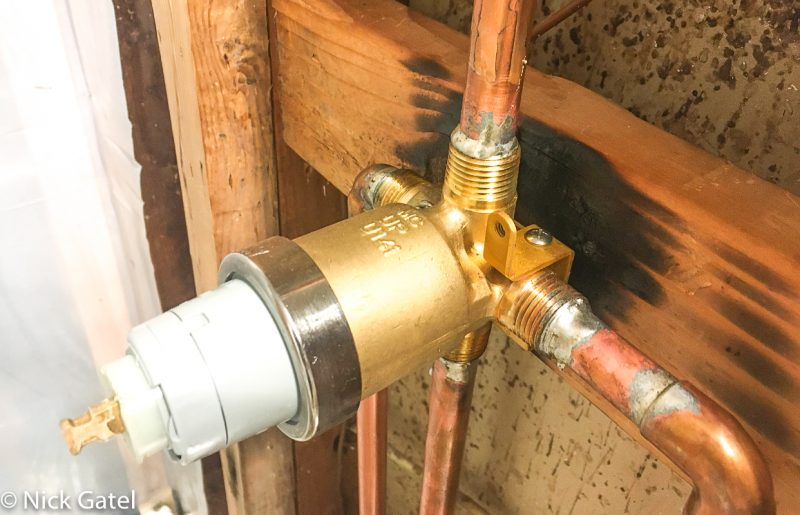
Like our master bathroom, the shower valve was over 40 years old and some of the replacement parts are no longer available. So we bought a Delta kit with a replaceable cartridge.
With these replacements, the old valve is replaced with a new one. The new valve can be connected to the water supply lines and can accommodate iron, copper, or PEX piping. Two things are important: 1) center the valve over the tube or shower and 2) set it at the correct depth so it does stick out too far or is too recessed when the final wall covering or tile is installed.
I opted to use copper, since the house came with all copper lines. Connecting to copper is the cheapest way, PEX is the most expensive as it requires special tools. Many people buy PEX adapters to connect to copper or iron pipe.
The thing with copper is it takes a little practice, but isn’t difficult if all the required steps are followed. Connecting copper fittings is called sweating or soldering. To successful solder copper a few steps have to be followed:
- Shut of the water supply and let all pipes dry out until there is now moisture left.
- Clean all fittings with a wire brush or sand paper.
- Use quality flux and the correct type of solder.
- Use plenty of flux in the joints where the solder will connect the fittings.
- Heat the connections until they get hot enough to “suck in” the solder.
Once the flux is hot enough, just touching the joint with a length of solder will quickly pulling the solder evenly into the joint covering the entire inner circumference of the joint. After allowing the solder to cool, turn on the water supply and check for leaks. Below are some pictures of my joints. Most professional plumbers would give their nod of approval to my work, even though I am a rank amateur. I had never soldered copper pipes before I started our remodeling project.
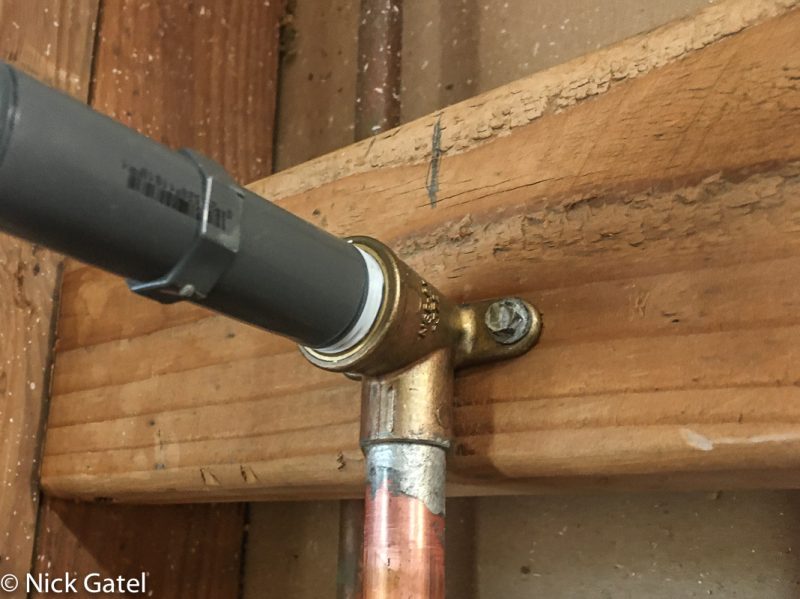

In the two pictures above, I used galvanized hex head screws to secure the copper fittings. The ones I removed had been held in place with a single bent nail.
Working in the Bathtub Alcove Area Before Installing the Tub
Once a new tub is set in place, the tub surround (tile or other wall coverings) is then installed. There were several things that needed to be completed before installing the new tub. They could have been done afterwards, but the tub would just be in the way.
- Frame and waterproof the window above the tub.
- Solder in new shower valve.
- Install new drywall on the rest of the walls and ceiling.
- Install insulation and vapor barriers in exterior walls.
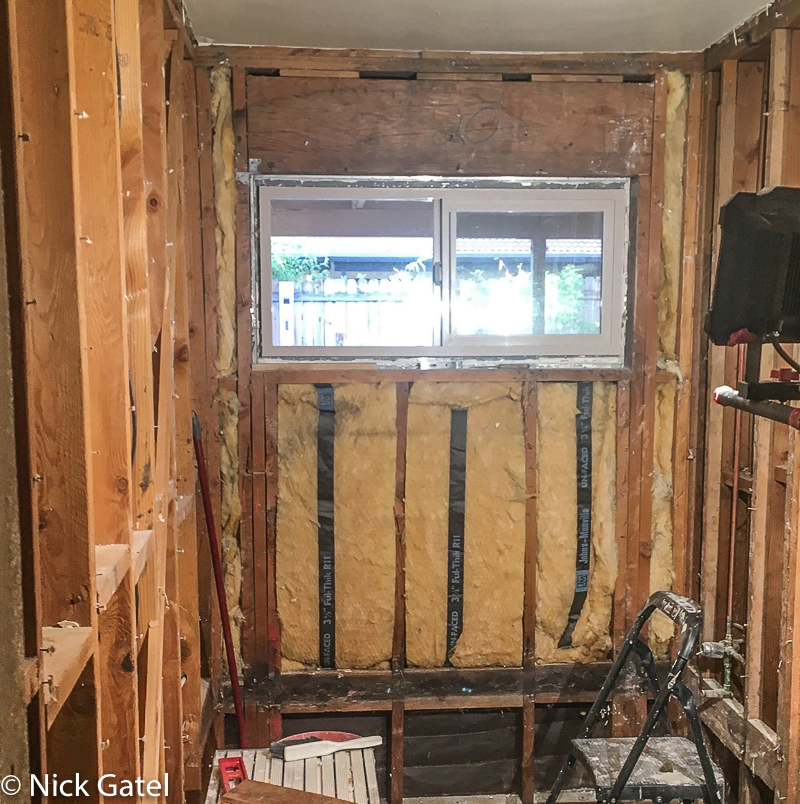
Window Prep
The original tub was surrounded by ceramic tile. The windowsill was drywall, which was really, really dumb. Over the years, despite my best efforts of caulking and using waterproof paint, water has seeped in to the frame, but with little damage.
Retrofit Window
I had replaced the original window with a double-paned retrofit unit back in 2016 when we did our major energy upgrade. To install a retrofit window, the stationary and sliding window panels are removed (easy to do) and the original window frame is left in place. The new window is sized to snuggly fit into the opening left by the original window frame – thus the new window is smaller. Once the new retrofit window is installed then trim is used to conceal the old frame. This method works well, but the result is a large frame around the window (see the kitchen window below).

My plan was to fill in the areas around the window to decrease the wide window frame, which would then be covered with wall tile when the project was completed.
Below you can see the new pieces of wood surrounding the window. The windowsill is slanted slightly towards the front so water will drain away from the window properly when taking a shower. It’s hard to see, but I have applied several coats of silicone to all the joints. Next I would cover all of this will a rubberized weatherproof membrane, then thin-set mortar, and finally the tile and grout.

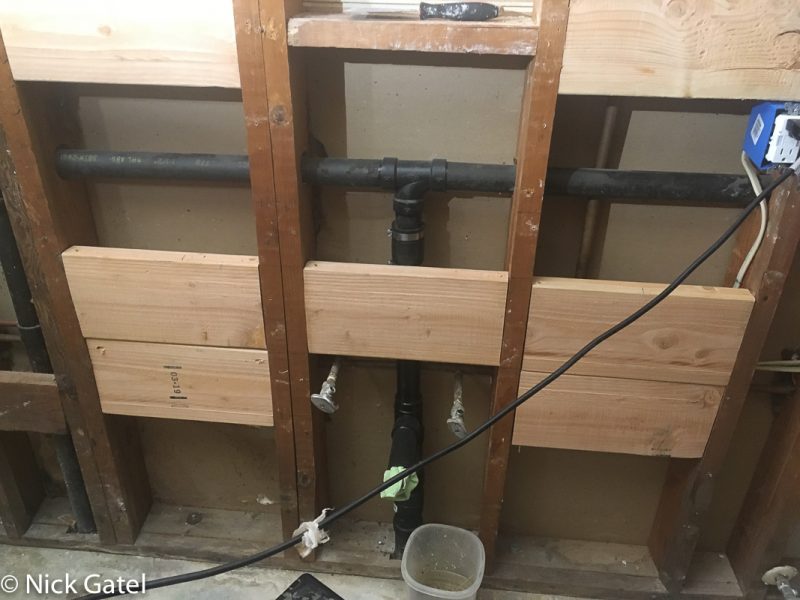
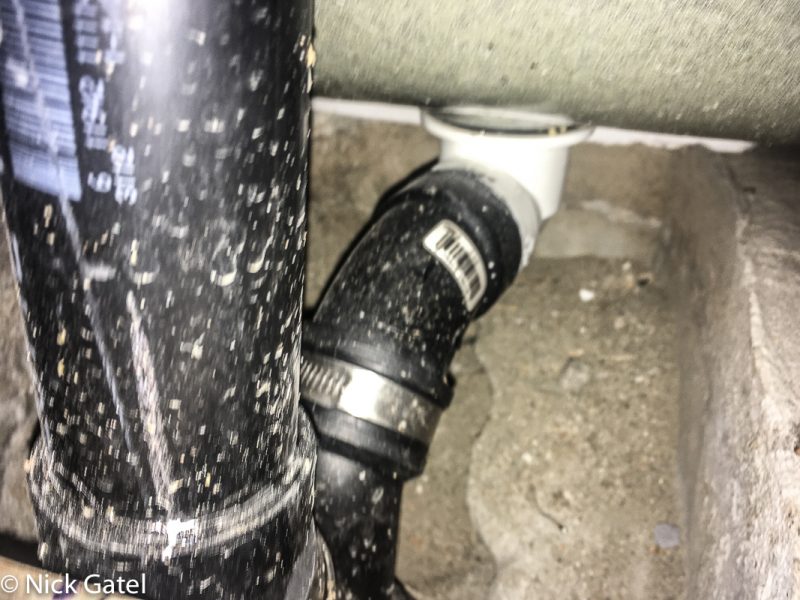
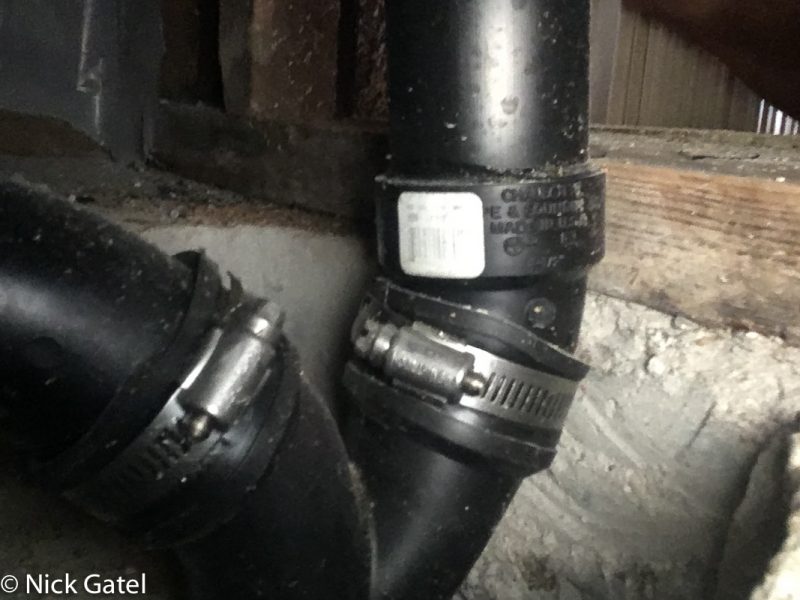
Bathtub Drain
This was the only problematic part of the job. The original pipe that connected to the sewer line was jammed against the cement slab opening. When I removed the tube, the bathtub drain was just set into the sewer pipe, like you would put a washing machine drain hose into the sewer pipe. So the bathtub drain wasn’t sealed. I could see where a little water had overflown into the dirt hole in the slab over the years. I would have to chisel away part of the cement slab to connect the drain to the sewer line.
In the picture below you can see the hole in the slab to accommodate the bathtub drain. The green rag is in the sew pipe to keep debris out. The rest of the junk in there is debris from removing the wall material and shaving some of the studs in preparation for the wall tile.

Even though I chiseled out the cement all the way back to the wall bottom plate, the angle of the sewer pipe made it impossible to install standard pipes and fittings. My options were to 1) jackhammer out a large section of cement to the right of the existing hole or 2) use flexible fittings with hose clamps. I opted for #2.
The picture below (found on the Internet and commented by me) shows the difficulty I encountered. Because of the location of everything, the top of the black sewer pipe needs to be just below the level of the cement slap. Since the white slip-joint nut is wider than the black sewer pipe below it, there is no room for a slip joint. So I had to use rubber drain connectors that did the job and allows the water to drain as it should.
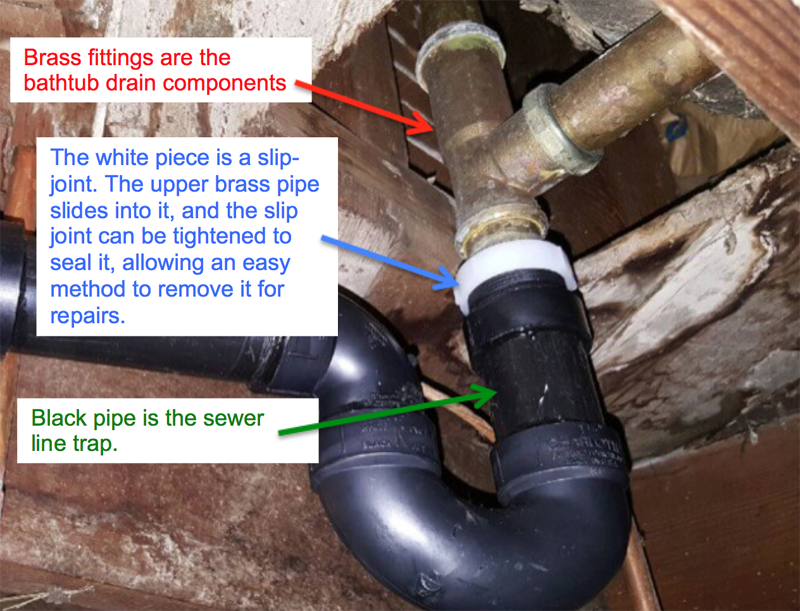
There is an access panel in the wall, so I do have fairly easy access should a leak develop. So far not a single drip of water has leaked. Below are some pictures of the bathtub drain.
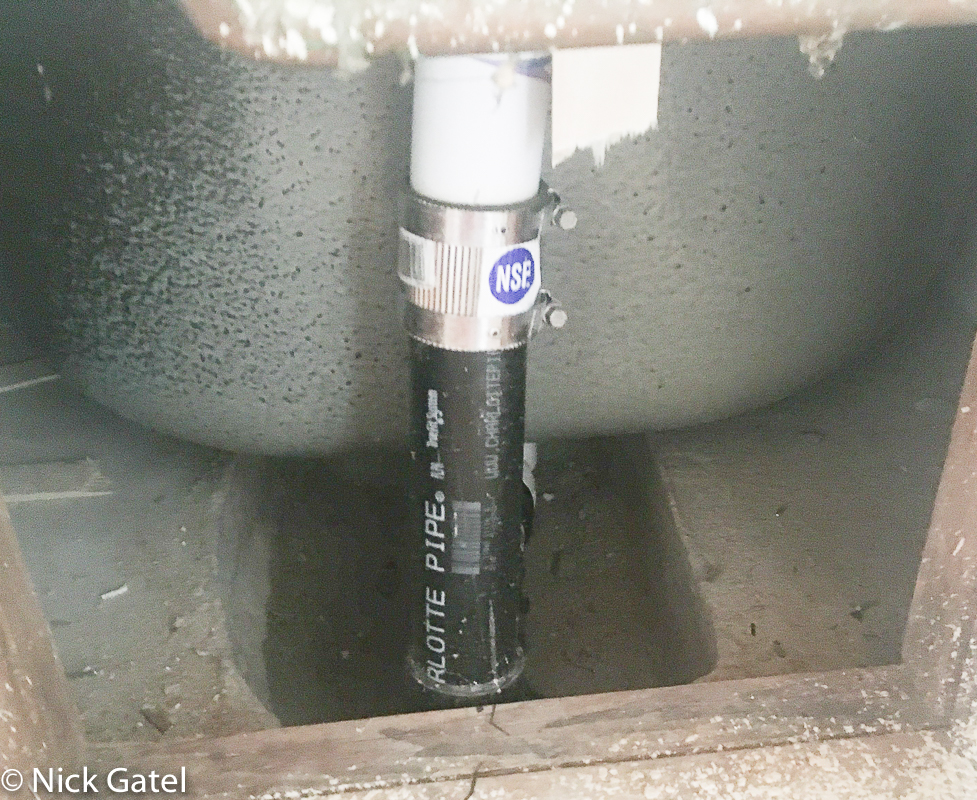
There is an access panel in our dining niche in case repairs are needed, which makes it easy to see the drain after it was installed. I had to use a metal covered rubber hub connector, as I did in the kitchen, because there wasn’t enough room to install a standard slip-joint.

Leak Testing
Once the drain was connected, I filled the tub with water, checked for leaks, and then attached the tub to the blocking between the wall studs. Note the drywall has been installed in the rest of the bathroom; insulation and the vapor barrier are in place in the back wall.

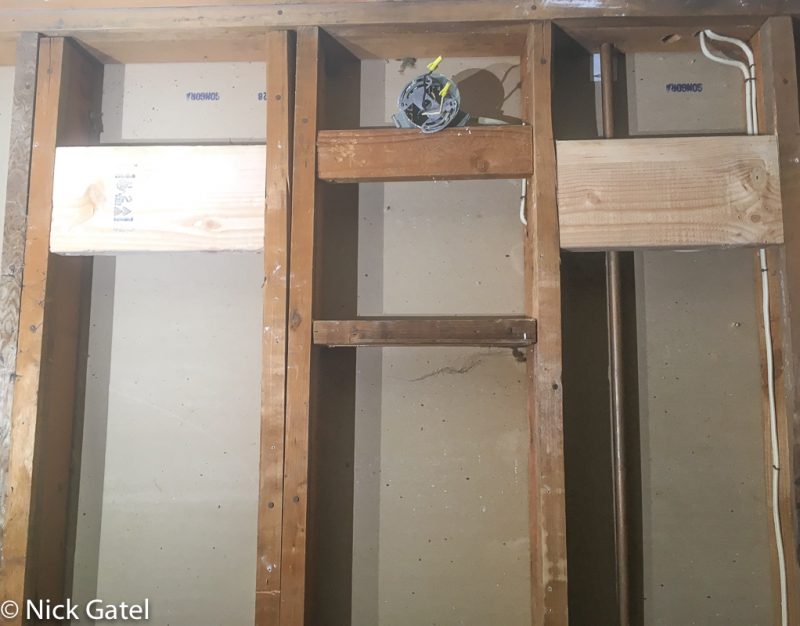
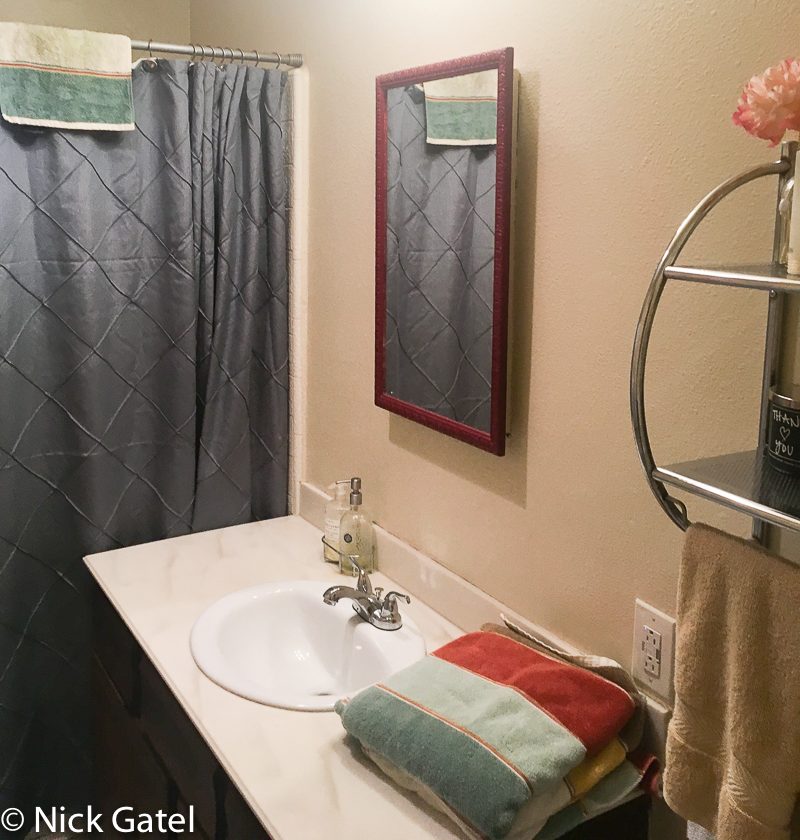
Cabinet Blocking
We installed a Ikea wall mounted vanity and a Ikea wall mirror, so as I had done in the master bath and kitchen, cabinet blocks were installed between the wall studs.