Again, I’m continuing the House Remodel series. What else can I do since backpacking and camping in California are pretty much closed to me. I have patience. The last post in the series was about our master bath demolition, which went well over all. The same cannot be said about the kitchen.
Of all the work I had planned, the kitchen was supposed to be the easiest.
In my post on planning for the demolition, I mentioned that,
A simple galley kitchen, there wasn’t a lot that could be done without some really, really major construction. So we would end up upgrading the cabinets, countertops, and flooring.
As it turned out, we found a plethora of problems after we removed the old kitchen cabinets.
The Old Kitchen
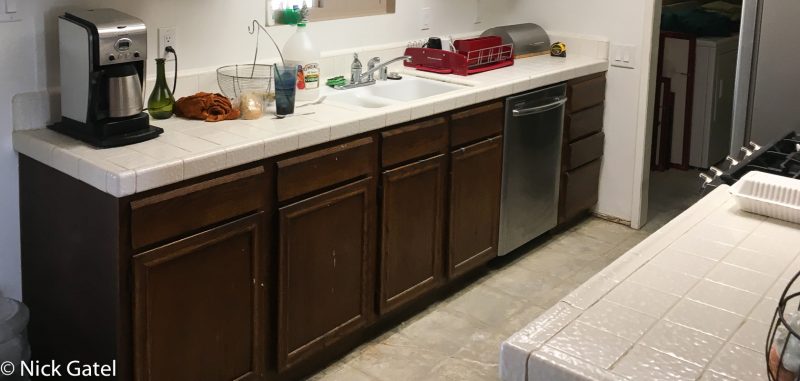
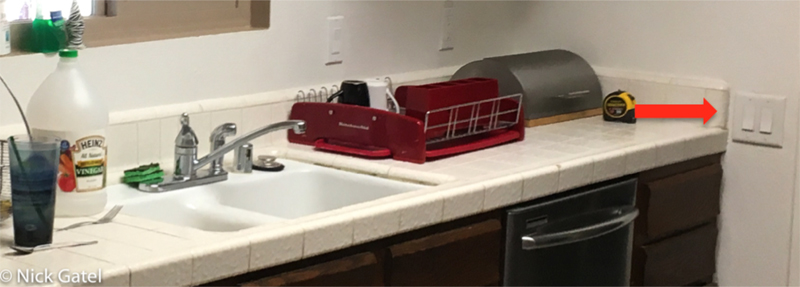
Note the red arrow pointing to the wall switches. The new countertop was probably going to be a little deeper and the wall switch would interfere. I would need to raise this wall switch.

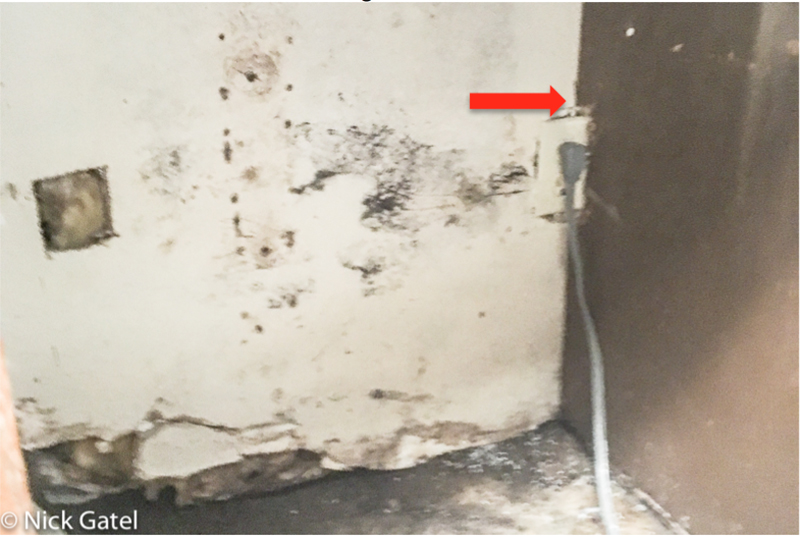
Water Damage Behind the Cabinets
As I started removing cabinets on the sink side of our galley kitchen, I immediately noticed mold. Another issue, which is hard to see, one of the cabinets had been notched out to make space for the electrical plug for the dishwasher (see the red arrow below). My calculations showed the new cabinets would probably have a side that would partially cover this electrical outlet. I would have to move it before installing new cabinets.
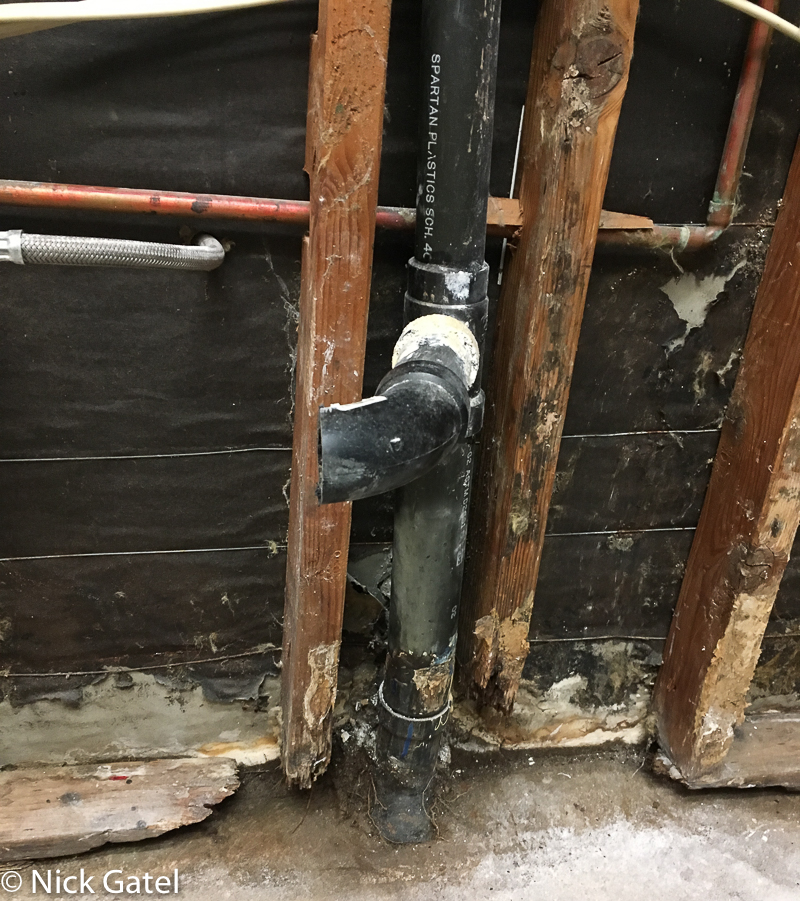
As I removed each cabinet, the water damage was worse. After removing all the cabinets, and then all the drywall, I found this:

Above:
- The blue arrow shows the drain connection from the sewer is pointing slightly down. It should be slightly above level, so the drain water flows downward.
- The red arrow shows where the pipe was leaking. It is hard to see in the picture, but the pipe was cut with a saw blade, during construction when the wall was being raised and the plumbing was in the way someone was cutting the framing and cut into the pipe.
- The green arrows shows where the wood decayed into oblivion over 40 years due to a slight drain leak, which never was enough to flood anything or become visible on the floor.
Here’s another picture of the drain (below). With a pipe like this, one cannot just cut out a section and replace the bad part, because neither the top nor bottom of the pipe can be moved without extensive work. Also the rotted studs and damaged (and missing) wall bottom plate will need to be repaired.
Repairs Completed
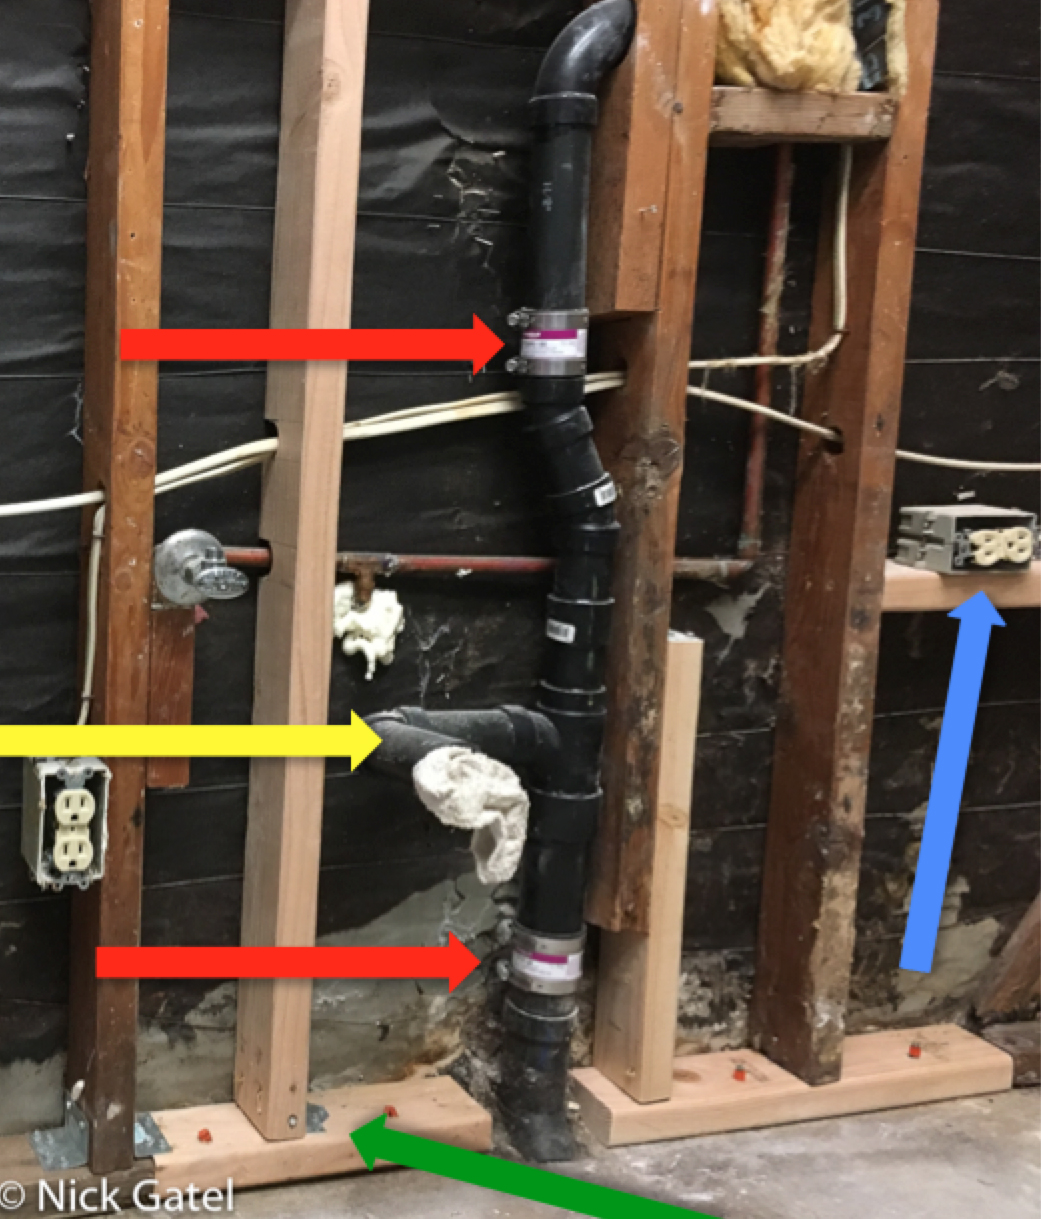
- The yellow arrow shows the drain from the sink trap is slightly sloped down.
- The red arrows show the flexible rubber couplings I used to connect the new plumbing section to the existing sewer plumbing.
- Green indicates new studs and bottom plates.
- The blue arrow shows the relocated electrical outlet for the dishwasher.
The fitting below is what I used to connect the new section at the top and bottom. The entire piece has to be placed on a pipe above or below where the two will be joined, then the whole assembly is put into position between the existing upper and lower pipes. Once the new section is in place, the fitting is pushed over the joint. The hose clamps are then tightened.
Repair Solutions
Neoprene Shielded Coupling

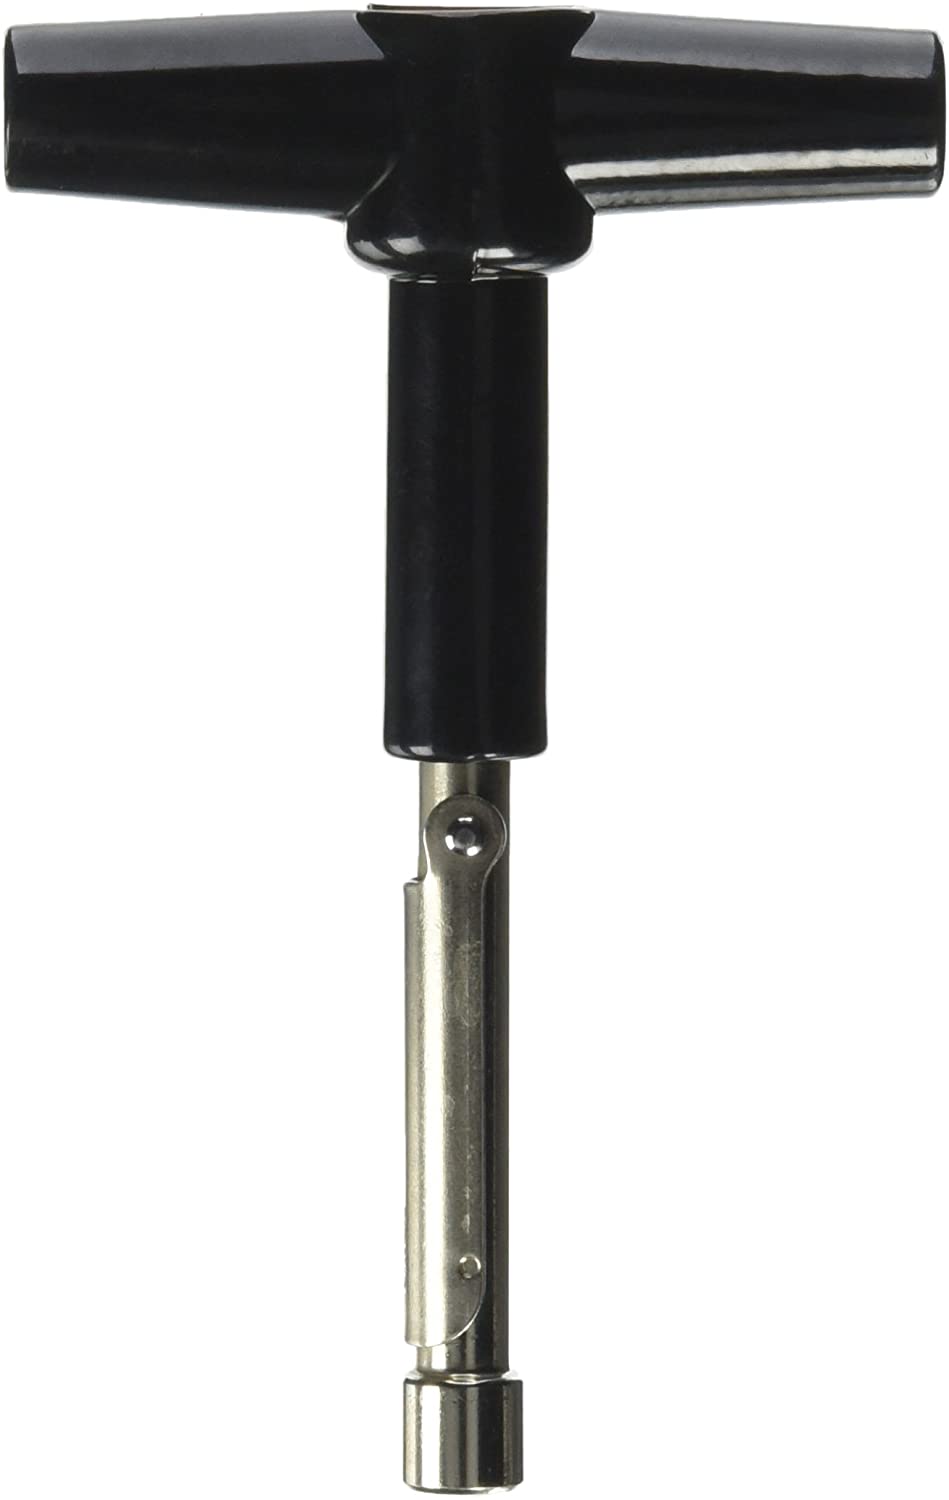
Torque Wrench for Hose Clamps
After the coupler is installed, the wall is closed with drywall or some other material. Once covered the clamps cannot be tightened, loosened, or adjusted without opening up the wall. It is pretty easy to get the couplers aligned. But how tight should the clamps be?
60 inch-pounds of torque.
Most people don’t have a torque wrench to properly install the clamps. Clamps, like the one below, are easy to use. Once the torque is met, the wrench can no longer tighten the clamp. It really is a must-have kind of tool.
Other Water Damage
No pictures, but part of the laundry room (adjacent to the kitchen) ceiling was damaged due to a leak in the roof. Given that heat rises and it gets so hot in the attic, due to our hot and dry desert climate, no mold was present. But the gypsum in the ceiling drywall was compromised, allowing the ceiling to sag. Installing new drywall screws would not hold the drywall in place, as the gypsum would just crumble, plus the old popcorn style ceiling finish was a mess. Instead of removing the ceiling drywall, and having all the insulation fall into the room, I just installed new drywall over the old, using longer drywall screws than are normally used. Worked great and took a lot less time than replacement. I also removed all the drywall covering the walls in the laundry room, making it easy to finish everything.
New Water Lines Needed
When we built our patio, I installed a kitchen sink cabinet outdoors, directly opposite the indoor kitchen sink, so I could easily connect water and sewer.

What I didn’t do was solder in new pieces of copper pipe for the outside sink water supply. Instead I just ran water hoses through the wall, knowing I would need to do it right when we remodeled the kitchen.
The blue arrows (below) show the temporary water hoses I ran to the outside sink.
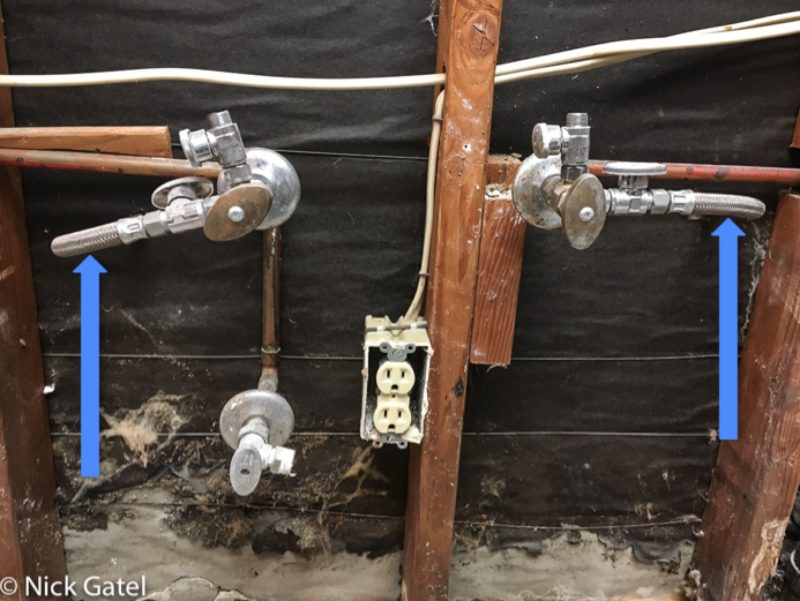
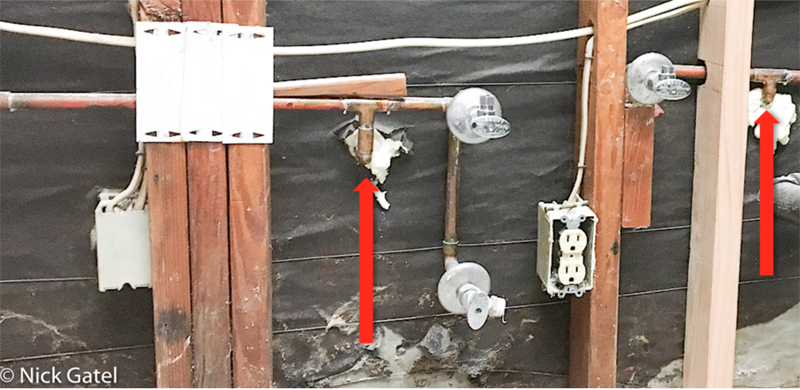
The red arrows above show where the new copper tubing was installed and goes through the wall to the outside sink. The white coloring around these pipes is foam insulation.
This picture (below) is the outside water supply connection to the new copper pipes installed above.

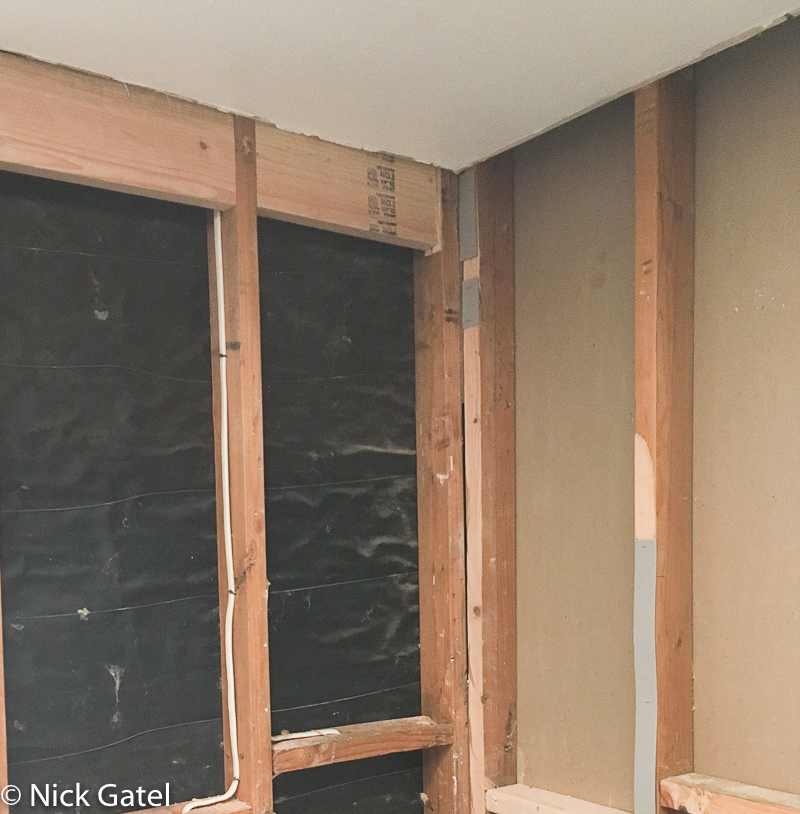
Wall Studs
Just like the master bathroom, there were some issues with the studs, especially in the corner below. Instead of a 90° angle, it was more like 100° angle. The rear corner was about ½ inch shorter that the front edge of the counter. The original installation compensated by trimming the counter and extra tile mortar to make the corner look square. I had to plane the inner corner (red arrow) and shim the outside edge of the wall (green arrow), so the corner would be square would be square. A square corner was important because we would be installing a solid granite counter top. The wall switch would be later raised about 4 inches, because it would interfere with the new granite counter top.

Cabinet Blocks
As explained in the master bathroom demolition, cabinet blocks make it so easy to install cabinets, not needing to locate studs, which are supposed to be 16 inches on center, but often are not. In the picture below, the cabinet blocks are at the left top of the picture below, in case you didn’t read the master bathroom post.
Lighting
Our house came with this old fashion florescent ceiling light, a commonly found item in the ’70s and ’80s.

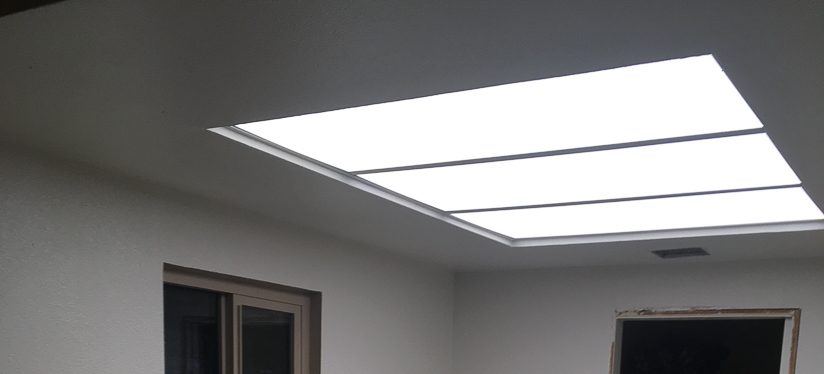
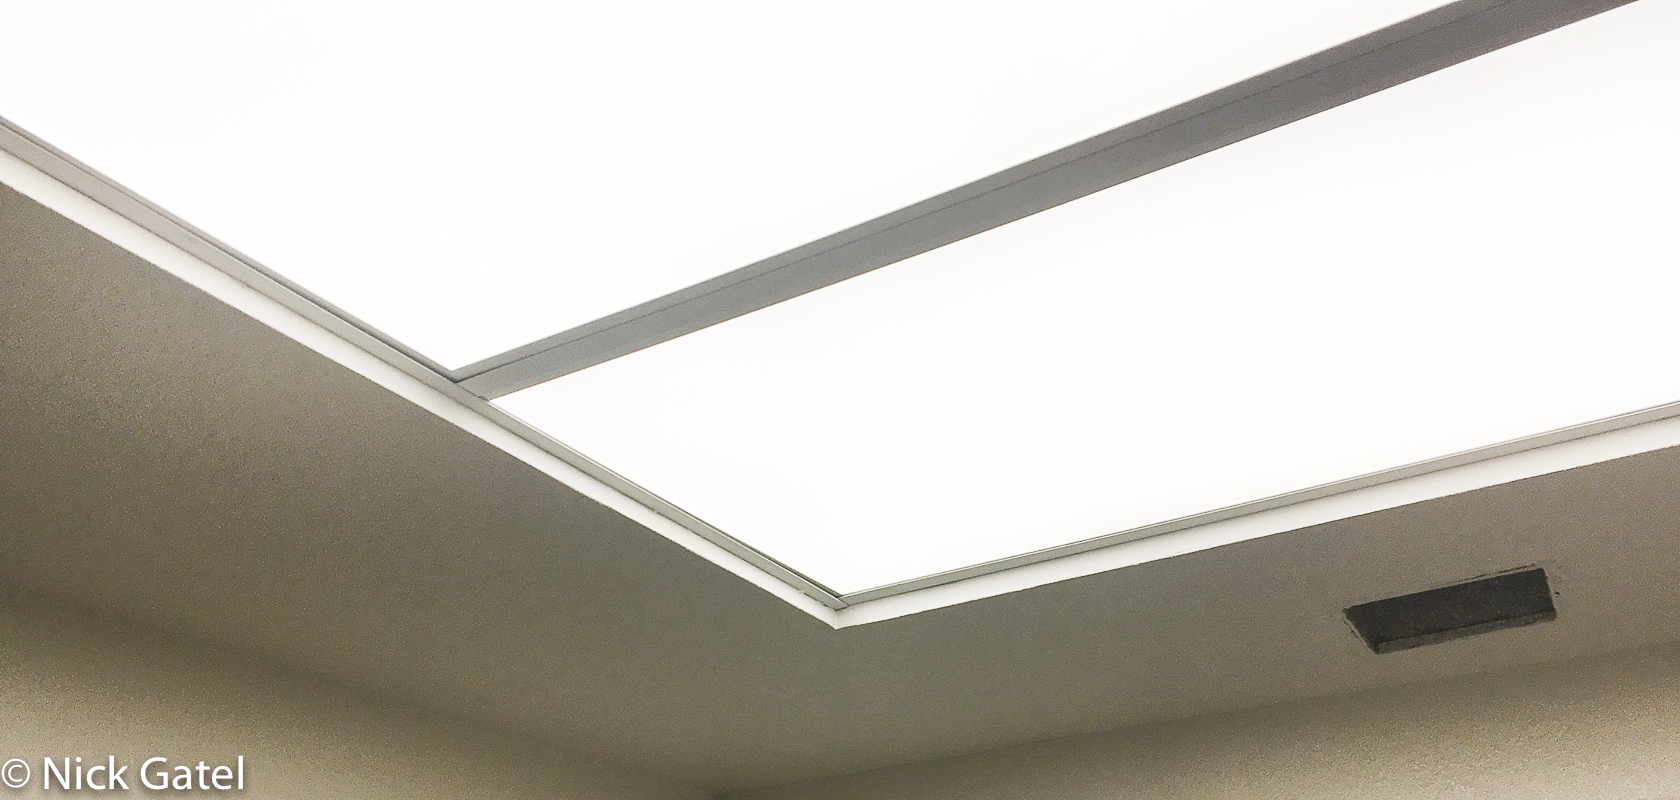
As mentioned in the demolition planning post, it was difficult to come up with a solution that really made us happy. But then I found these Troffer light inserts.

They’re supposed to drop right in the metal channels of a standard florescent installation, but I found our framing was 1/2” too short from standard sizing. So after a lot of trimming and cussing, I finally was able to install them.
Unlike fluorescent tubes that you can see behind the lenses, these are a solid light, use less electricity than the old system and my lumens went from 3200 to over 14,000 (1458 x 3).

Now we have lots and lots of nice light. Effective lighting was more important to us than aesthetics. Instead of the see-through plastic lenses of the old fixtures, we have nice flat solid smooth soft and bright lights. The light is much brighter than the pictures below show, because I had to edit the picture to get the fixtures to show properly.
The next post in this series with be the: Guest Bathroom Demolition Phase